What’s the Project? If you’re learning to sew and need a little help with how to sew a zigzag stitch, this lesson will give you all the help you need to understand the basics.
Hopefully, you have mastered how to sew a straight line and now you are ready to move on to the zigzag stitch. This is another basic fundamental of sewing and the second lesson in these online sewing classes. Zigzag is a fun stitch to do, simple to learn and handy in a lot of scenarios.
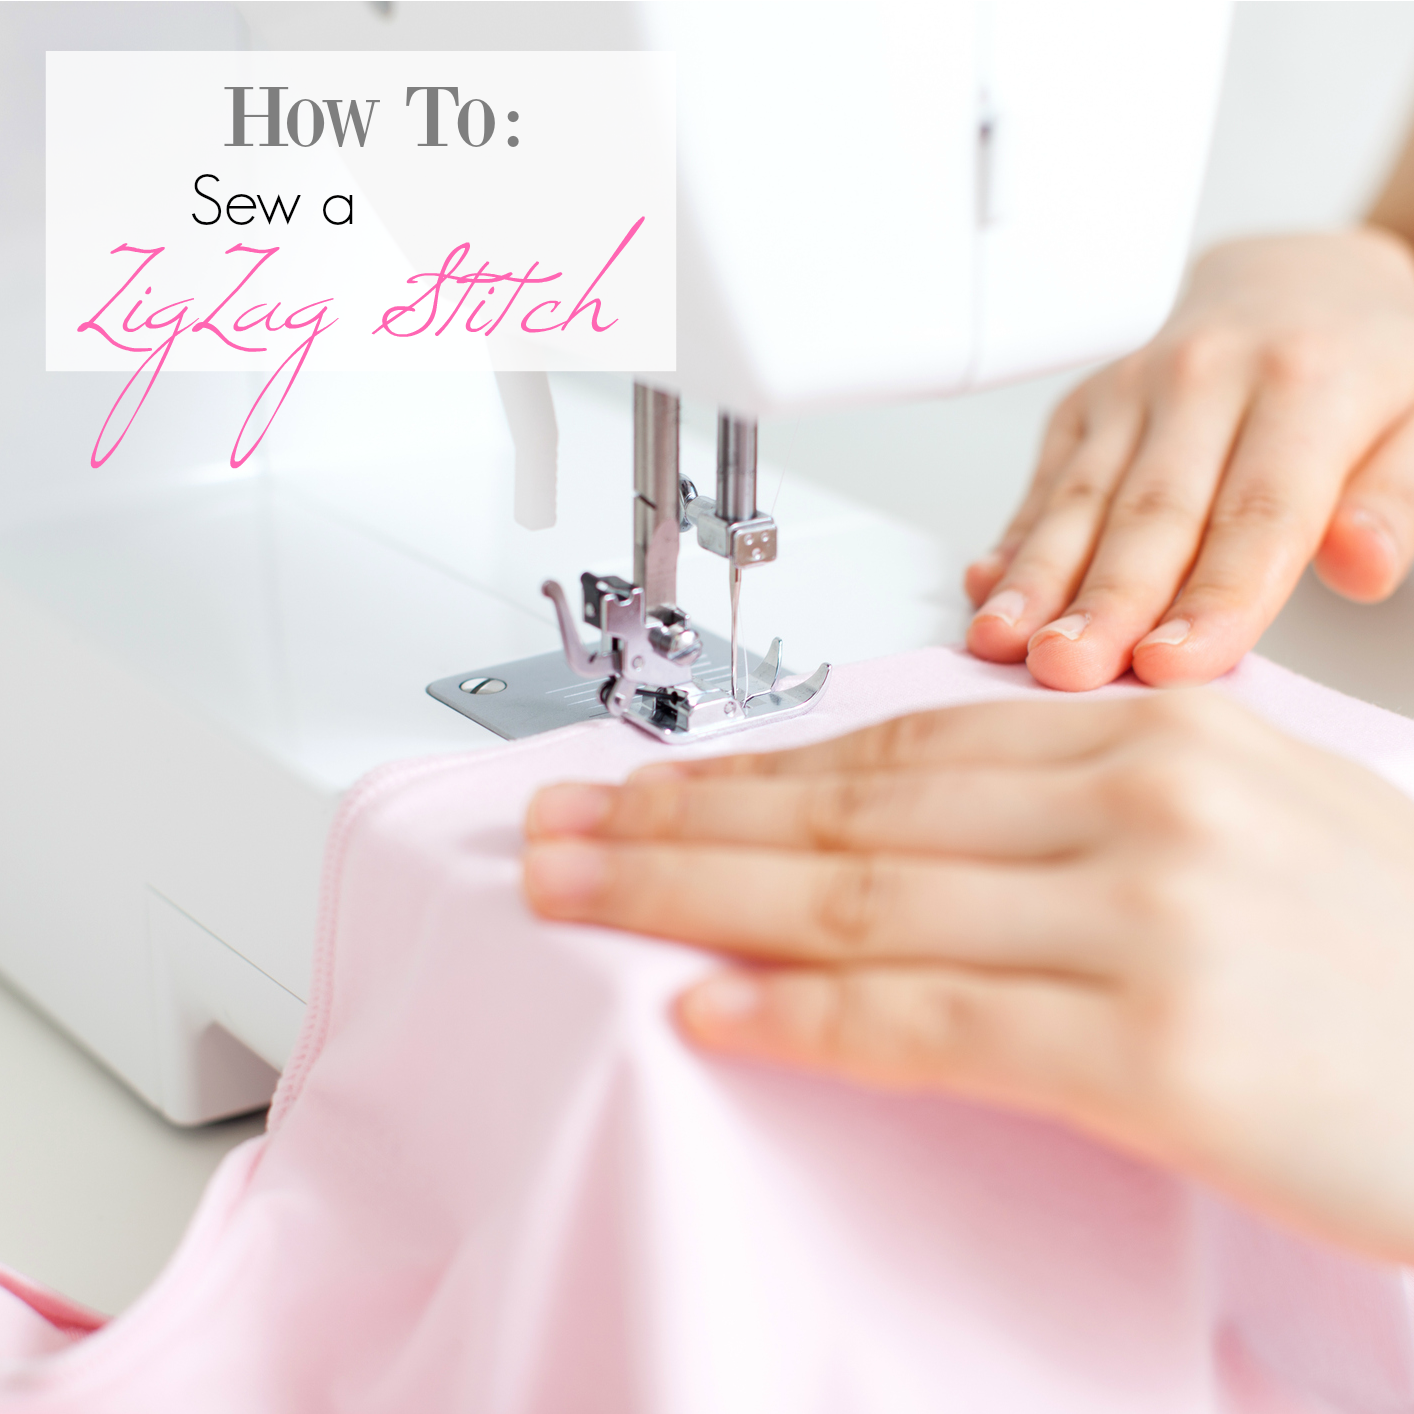
How to Sew A ZigZag Stitch:
First of all, let’s talk about what a zigzag stitch is and why you would use it. A zigzag stitch is just that-a stitch that zigzags. It looks like this:

Why Use a Zigzag Stitch:
Pretty basic right? But why would you use a zigzag? There are a couple of reasons:
1. A zigzag is a more sturdy stitch, so if you need something held extra tight, a zigzag is the stitch to use. That’s what I use when attaching the hood on my hooded towels because I know it will hold nice and tight.
2. A zigzag can be used to prevent fraying. If you are sewing clothing or something that you want to have be really nice and you don’t want any raw edges to fray, you can zigzag them first. (That is if you don’t have a serger.)
3. Zigzags are used in applique and buttonholes. We are going to learn about those more in Lesson 7.
Adjusting Your Zigzag:
So, let’s get started sewing.
To sew a zigzag stitch you are going to start out just the same as you did with your straight stitch from Lesson #1. Thread your bobbin and your machine. Somewhere on your machine is going to be a way to change from a straight stitch to a zigzag. Up above you can see a picture of how mine does it (mine is computerized). It may be a picture of a zigzag or it may be a number or letter that indicates what stitch you are doing. Check your manual for help on this. (See also the Meet Your Machine post.)
Set your machine to zigzag. The basic zigzag stitch is going to be of average length and average width:
But you will be able to change the stitch width and the stitch length as needed. Here are some examples:
On this one, I have adjusted the WIDTH of the stitch to be larger. See how the zigzag is very big and wide?

But on this one I adjusted the LENGTH of the stitch-making the stitches long and farther apart:

Here they are closer together, meaning I adjusted the LENGTH again and in this case, I also adjusted the WIDTH and made it a little smaller:

And on this one I adjusted the LENGTH almost as low as it could go:

When you have a really tight zigzag where the stitches are right up next to each other, that’s called a Satin Stitch.
Are you getting a sense of how you can adjust your stitches? Find where you do this on your machine and play around with it a little.
Now, typically when using a zigzag you can just keep your stitch width and length at a nice average setting. But it’s good to know how to change it as needed.
Sew a Zigzag:
To sew a zigzag, LOWER your presser foot and your needle into the fabric. Make sure your machine is set on zigzag and sew an inch forward. Just like with the straight stitch, now push the reverse button and sew an inch backwards (back-stitching) and then go forward again. You have now knotted your thread and can continue sewing. Again, you can still use the edge of the presser foot or the seam guides to help you sew straightly.

One more thing to note. You’ll notice that sometimes that zigzag will make the fabric kind of gather in a tunnel underneath it. This can happen on lightweight fabric. There is a way around this. On your machine, the setting next to zigzag will look like a zigzag but dotted. This will do a zigzag but with three stitches per zig to help prevent the tunnel effect.
And that’s it. Not too hard is it?
YOUR ASSIGNMENT:
Now we need to practice and sew something new! Here’s how your assignment works:
- Pick a project-I will give you several options here, you are also welcome to choose something of your own, just be careful to make sure that it is in your ability range. Sew it up this week before you move on to Lesson #3-Turning and Top Stitching.
Project Option:

Or choose your own! Any clothing item that you zigzag the edges to prevent fraying can work! Or anything you can find to use a zigzag on!
Good luck!


Rudrika says
This is a great tutorial for learning how to sew a zigzag stitch! I followed
Courtney says
I tried the zig zag once, but the needle broke because the presser foot didn’t move and the needle came right down onto the side of the foot! Am i missing something? Do i need a special foot for zig zag? Tia!
Amber says
No you shouldn’t! Your machine should easily do a zigzag? Did you ever get it to work?
Courtney says
Actually, I figured out that when i got my machine a couple years ago, I put a special foot on it for piecing quilts and forgot that it wasn’t the regular foot when I tried to do the zigzag!
JPG Art says
Thank you for a great explanation. I was looking online for a similar idea and really appreciate your tips
Jessica S says
I have been sewing for a few years but I was self-taught and I NEVER knew about the Satin Stitch and the use of a zig-zag! I’m excited to see the difference in the hold of the zig-zag vs the straight stitch, which has been a complete flop for most of my fabrics! Thank you!
Mrs L says
I’m sewing a dress or two or three, this week. I don’t have a serger so I use the zig zag stitch to finish off my seam.
Judy pabst says
Amber, I am having trouble with the felt I’m using for the tongue on my puppy hooded towel. The fabric keeps getting pulled down into the bobbin case AND the needle then gets stuck and won’t move. So then the fabric shreds. I feel like it would be better to sew it before cutting it out so I can hold onto it as it moves along. A few years ago, I made the frog towel and I remember having the same problem. Is there a setting change I should make? Or what? Thanks so much.
Amber says
I am not really sure! I haven’t had that problem. I guess another solution would be to use something other than felt to make the tongue?
Melissa says
absolutely love these tutorials! They are so easy to use and understand! Thank you so much. 🙂
Meryl says
Thanks for the easy to follow instructions, it’s much easier when it’s in plain English!
I am going to teach my 8yr old grand daughter to sew and think she will easily be able to understand your instructions.
To the people that are having trouble with needles breaking on the thickness, use a small hammer to bang it down, also useful for jeans hems!
Colleen says
Can you tell me what model Janome sewing machine you have? I’m learning so much, Thanks!
Amber says
Mine is a Memory Craft I think 9500
Lin says
THANK YOU for the zigzag tutorial. I am not new to sewing but have been away for a long time. Now I remember that I ALWAYS had trouble with the little tunnel the zigzag creates on thin materials, and sure enough, this solved it for me! I have a brand new machine (because my 34 year old Kenmore could no longer be repaired!) and that old one didn’t even HAVE that multi stitch zigzag. Now I know what it is for! Cheers, Lin
Edna says
Hi Amber! Thanks for your much needed tutorial! I have never sewn in my life and decided to make a car seat cover! I taught myself through YouTube and blogs like yours!!! Amazing and so helpful! I have run into a problem that I’m not sure how to figure out…..I’m trying to do a cute decorative top stitch….a zig zag in between straight stitch…and my zig zag looks really good except every once in awhile it wouldn’t pull it tight so instead of a sharp hill (point) it’s more rounded…curved…if I could take a picture of it I would show you cuz I’m not sure if I’m making any sense haha! Do you know why that is? Thanks so much for your help!!
Amber says
It’s probably your tension. Or try a new needle. That can help.
Deanna says
Hey there! I love your tutorials and this blog! I am VERY new to sewing but am enjoying learning. Today I was using a zig zag stitch on the edge of my fabric to prevent fraying. However when I turned the fabric right side out after sewing, the thread seemed a little loose. Now I noticed you said that you could do the zig zag stitch “first” when using it to prevent fraying. Should I do another stitch over it to make it tight? Thanks so much!
Amber says
Yep, I would just run a straight stitch along it too in that case in order to keep it secure.
Renee says
SO EXCITED! I made one for my daughter and for my son, and they love them, and they actually turned out! Thanks so much Amber!!
sandra says
My towel is made…but I might have to rip it apart and try again with another towel that is thinner…I broke a needle! I want to make these for my boys for Valentine’s day, they are so cute!
Amber says
Ya, the towels can be tricky and hard on needles.
Lorie M says
I also found the zigzag stitch to be a challenging one. I took many breaks when completing this project, but did get it finished and think it turned out quite well. I plan to try some of the animal hooded towels soon. Thank you Amber!
Amber says
Good for taking breaks. Sewing can be very frustrating but also very fulfilling.
Leslie says
The zig zag stitch is great, and the practice this week really helped! The hooded towel turned out ok, but it was challenging. I will try to make it again, though, because it is a super cute gift idea!
Joni says
Thanks so much for the tutorials! :). I haven’t sewn since high school (…a l-o-n-g time ago 😉 LOL! ). My hubby got me a Janome for Christmas, and with your help I feel so much more comfortable learning to sew again. Thanks for the Uber-Cute hooded towel tutorial too … You rock! 🙂
Amber says
Thanks for joining me. I use a Janome too. 🙂
Camille says
Love the hooded towel! Can’t wait to finish mine…zigzagging away!
Jessi says
Love the lessons! My nieces will be getting lots of stuff from me thanks to you!
Karis says
Ugh… I don’t think I ever want to try sewing towels again… Maybe with a different needle. I made two, since I have twins. They look cute (and the kiddos think they’re awesome), but they were challenging 🙂
Amber says
But you DID it!
becca says
I am so excited to finally be able to do this tutorial this weekend! My sister has always made hooded towels as baby gifts, so each of my girls have one…but a few extras would be nice (and some with BIG towels for summer swimming would be fantastic!), so I can’t wait to get sewing this week! Thanks for the tut on zigzag stitch, too, I haven’t had the chance to use it yet, and look forward to it!
Amber says
Yes, hooded towel with a beach towel would be great!
Ashley says
Thank you for the clear tutorial!! Very easy to follow along 🙂
Colleen says
It went great! I made a basic hooded towel, and now I think I’m going to utilize my trusty seam ripper and pull the hood apart to turn it into a dinosaur. I’m also going to make a penguin towel for my daughter. And I’m thinking that a set of these will probably be a fun Christmas gift for my parents next year–they have eight grandkids and these towels would be super fun ones for them to use when they visit!
Elaine says
An hour and a half later and viola! Two hooded towels for my pair of goddaughters… can’t wait to see them modeling their gifts! 🙂
Carla says
Thank you for all your hard work putting these lessons together!
Shannon says
I currently have a compact sewing machine but I want to buy something that can handle larger projects. Do you have any recommendations on a good starter machine that wouldn’t leave me too confused but could easily handle any one of the projects on your site?
Amber says
I have so many people asking this…I am going to put together a post with machine options. How soon do you need my recommendation? 🙂
Aimee says
Use this stitch often as I have a basic machine. Great idea to use on hooded towel. Thanks!
MaryB says
Project went okay. Not my favorite, though! LOL
Linda says
I practiced my zig zag stitches. I like the zig zag best of all so far. Can’t wait to make my hooded towel. I’m making it for my 15 month old grandson. (he’s too little not to appreciate it…lol)
Jami Cobb says
Yay! I did it! It’s a little small for my 7 year old, so going to switch a few things up and try another one. This is perfect for my 4 year old nephew tho!
Megan says
I practiced my zig zag stitches on pajamas for my 6 year old. I haven’t made the towel yet, but I will give it a try soon. I love using zigzag stitches to “serge” clothes.
Sandra says
I love the hooded towels! I think I will make them for my boys for part of their Valentines presents.
Patty says
this looks super fun, can’t wait to get started
Deanna says
Thanks for the zig zag tips and the link to Suzy’s Sitcom!
Sharon Joyner says
Thanks so much for this tutorial on the zig zag stitch. I do not use it often but now that I know a little more it seems to be the perfect stitch for some things. Thanks again..
Sarah says
Loving your series!! Thank you so much!!
Becky says
I am loving these posts! I learned how to sew when I was younger and am recently picking it up again. These lessons have been super helpful!
Amber says
Thank you. I’ve had a dumb day and it’s nice to hear things like that right now. 🙂
Kim Thomas says
Thank you for the lesson. Take care. 🙂
Kim H says
So this week’s lesson went just ok. Overall, the towel is done in one piece and unless you inspect it carefully, it looks fine, but I did have a few problems. First I had trouble getting the towel moving. At the beginning of all my stitches, the needle would just zigzag in the same place and not feed the towel forward. I had to keep lifting the presser foot, move the towel just a smidgen, and try again to get it going. Once it got going, it would be ok. I broke a needle, but replacing it with a heavy duty one went easily. I had a problem with the hood piece slipping forward as I was sewing it to the bath towel so it’s not quite centered. And all my corners aren’t quite “square”, the hood wouldn’t quite lay straight to attach to the towel corner to corner, so I had to curve it upward as I sewed. So when it’s laying down flat, the hood kind of leans forward/upward to compensate, instead of laying flat too. But I’m learning and hopefully many more will follow with better results. Thanks so much for these tutorials, I learn so much!
Amber says
The towels can be a little tricky because of the thickness but once you get used to moving that thick fabric through your machine they are a breeze. Just takes practice.
Sarah white says
I’ve had mu sewing machine for an entire year and have been intimidated by it. Now I have twin babies, boy & girl, and am determined to learn to use it. Love your blog.
Dominique says
Thank you for teaching us what the dotted zigzag stitch does! I always wondered but was too intimidated to try it for fear I would ruin something! Thank you for build up my confidence in sewing too!
Cristina Ferrer Lopez says
Since this is for practicing the zig zag stitch I’ll be recycling some towels I was going to cut up into rags for cleaning. It’ll be mismatched in colors but practice is practice. 🙂
Jennifer says
One hot pink hooded towel coming up!
Amber says
My favorite color!
Allsion Spencer says
I bought the same thing . . . hot pink! 🙂
Since we didn’t add a face, and my towel is solid, I’m braintstorming what I can “do” to it! ha Wish I knew how or what I need to monogram! Or I may just wait until we learn to applique and try that.
Megan says
You should make it into a pig!! Heheh, that would be so cute!! 🙂
Valerie says
Loving these lessons!!!
Monica @ Creative Gator says
Loving your tutorials. I would love to win some patterns. They are so cute!
Jennifer K says
Love the quick zig zag tutorial! I’m never sure what I’m going to end up with so this all helps understand how it all works.
Jen says
Thanks for the tutorial. And the patterns at the shop are adorable!
Jennah S says
Plan on making the dragon hooded towel this week for a baby shower gift.. Thanks for having this series.. I come from a family that is truly gifted in sewing, I of course am lacking this gene, so I appreciate your ability to make sewing less intimidating!
julie says
This if fun to try and learn to sew. Thanks for the lessons!!!
Aubrey says
I love all the zig zag stitches! The only trouble I had was it getting to thick during the knotting process. Still need some work on that!
Kat Germaine says
I love this series: I can’t wait to make a hooded towel, my grand kids love them 🙂
ANNA FINLAYSON says
My kids LOVE hooded towels!!! I’m hoping I can actually do this!! *gulp*
Erica says
Thanks for the tip about the “dotted zigzag”. I have been wondering for a while what that was for! Looking forward to next week!
Amber says
The truth is… I didn’t know it was until last week either. 🙂
Melissa Reynolds says
Thank you for these posts!! I have learned something from both so far. I am a beginner sewer(teaching myself as I go). I found the explanation of the Satin Stitch especially helpful! The only times I have changed the settings on my machine have been to do gathers lol! Is this the stitch we will be using when you go over the applique technique?
Amber says
Yes, Satin Stitch is what you use to applique.
Megan says
I LOVE this tutorial! I can’t wait to do it! Thanks again!
Trasity says
I found a tutorial to add a ruffle to pant legs and it uses a zig-zag stitch to make the ruffles, so that’s the project I used to practice this stitch. Turned out pretty well. I’m surprised at how non-intimidating this stuff is once you just get in and do it. Lesson #2 is a success!
Christy S. Lube says
Heh… I may have to revisit parts of this series when I can afford a new machine, I s’pose… lol. I think I might attempt the hooded towel with a double row of straight stitches or something, they are so cute!
Amber says
Definitely! You don’t HAVE to zigzag. You can do it with straight.
Harlee Jaye says
It can be done as well with a straight stitch. We sewed with the early Singer machines that only had a zig-zag attachment that I rarely used. Just practice first on scrap towel thickness and don’t make your stitches too small or too tight.
Nicci says
I’m having so much fun with this series. Thanks for helping me use my new machine. I can’t wait to make the hooded towel!
Niki says
When instructions call for satin stitch, is that like a really tight zig zag? Love the tutorials in the series!!
Amber says
Yes, I think I will add that to my tutorial.
Jeanette says
A hooded towel was one of my first projects when I started sewing again and I think your method may be even better. Excited to try again because a little toddler wrapped up in a hood must be one of the cutest things!
Lindsey says
Why have I been so intimidated of the zigzag stitch!! Thank you 🙂
Uta says
Thank you for this great workshop.
Hugs, Uta
Makenzie says
These are so cute! The only issue I had when I made mine today was getting the machine to cooperate on the thick parts? I broke a needle! Is there a way around this that I haven’t learned yet?
Megan says
I hate that! I broke my moms needle once and it was frustrating! Usually what I do on the thick parts is go really slow or do it by hand. Hope that helps!
Amber says
They do sell heavy duty needles for sewing through thick stuff too.