This is it! Time to teach the kids and teens to sew! Who’s excited!?! I’m excited!

And I’m a little nervous. Are you a little nervous?
I’ll tell you why I am nervous. I am not, NOT, a professional seamstress. I have NO experience teaching anyone to sew. I am just a girl who happens to have sewn a lot in the past 10 years or so and decided to blog about it.
So I hope that I can teach these lessons well enough for the kiddies.
Here’s the Thing:
We have kids of all ages participating with their grandmas and moms and friends. We’ve got young 5 and 6 year olds all the way up to teenagers. So our ability levels will vary a lot.
- Moms and Grandmas and teachers, this is where I need your help. You know your child and what they can handle. Some of these lessons may be beyond their ability. That’s ok. You be the gauge for what they can handle and go only that far. If ruffles are too much, help them out, demonstrate for them, skip that lesson, do whatever you need to to make it work for YOUR child. Take it slow, have fun, make it work however you need to.
- It was brought to my attention that some little boys will be doing the series. Yay! Don’t worry, our projects are all friendly for boys with the exception of ruffles. Maybe just skip that week?
OK?
Before You Start:
- Read the Sewing Pledge with your new little sewer. Emphasize that sewing can be hard, it takes practice and can become frustrating. When we get frustrated we take a break (and I recommend chocolate) and come back to it later. We don’t give up!
- Check out the Sewing Dictionary. Maybe go over some of the terms with your miniature sewer. Refer back to it as needed.
- Meet Your Machine with your child. Get familiar with it, show them how to thread it if they are old enough.
Ready? Now these lessons won’t be much different from the original Learn to Sew Series lessons. But we’ll go through them again with the kiddies.
Lesson #1: How to Sew a Straight Stitch and a ZigZag Stitch-

How to Sew a Straight Line:
Get a piece of fabric ready to practice with-just a scrap of something will do. It’s going to be easiest if you fold it so that you are sewing through 2 layers of fabric while you practice.
First, thread your machine (including the bobbin of course). Make sure you have your machine set to sew at an average stitch length (your manual will probably tell you what that is).
Now, take your piece of fabric and place it under the presser foot. For starters I want you to line your fabric up so that the right edge of your fabric matches up with the right edge of your presser foot as you look at it like I have done in this picture below and lower the presser foot so that it is holding your fabric in place.

Before you start to sew use your hand wheel (or button if you have a computerized machine) to lower the needle so that it is all the way down into your fabric: (always do this when you begin to sew)

Now, slowly press your foot pedal down to begin to sew. Stitch for 1 inch:

Then push the reverse button or lever to back stitch for 1 inch (sew backwards over what you just sewed):

After you have back stitched over that 1 inch, proceed with a forward stitch again. You have just created a knot so that your stitches won’t come loose.
Continue to sew forward. As you do, try to keep the edge of the fabric lined up with the edge of your presser foot. This will help you maintain a straight line. Also try to keep a nice steady pace.
Once you reach the end of your fabric, knot it again. (Sew to the end, back stitch for about 1 inch then sew forward again.)
Raise your presser foot and gently remove your fabric. Snip the threads that are attached to your fabric. Guess what? You just sewed your first straight line!
But wait-there’s more to learn.
What if you are sewing a straight line and you come to a 90% angle corner (like if you are sewing a rectangle or square) that you need to turn to continue sewing (because you will in this week’s project)? What do you do?
Sew almost all the way to the corner, but leave yourself about 1/4″-1/2″ of space between your needle and the very edge of the fabric. Making sure to lower your needle all the way into the fabric (this is very important), lift your presser foot. Your fabric will stay in place because the needle is holding it, but you can now pivot it so that it is positioned to keep sewing, now in the new direction. Lower your presser foot and continue to sew. (See in the image how I have sewed down the fabric and I am now turning to sew a new direction. My needle is down in the fabric but my presser foot is lifted so that I can turn my fabric while not losing my place):

A couple more things if you feel like your child is ready for this.
Sometimes you will be asked to baste. A baste is a long stitch that is much looser than a typical stitch. When you baste you do not knot at the beginning and the end. This is because you will probably be picking the baste stitch out (if it is just there to hold your fabric in place for the time being) or you will be using it to gather (which we will learn about in a few weeks). Here’s a baste:

A hem is when you fold under the fabric twice and sew it in place to create a nice finished edge (like at the bottom of your pants). To hem you will first fold the fabric under about 1/2″ and press (iron) it into place. Then fold it the same amount again, press it again and then do a straight stitch along it:
Here’s a hem being sewed:

And here it is finished:

Here’s an important thing to know when sewing a hem or at other times. If you are sewing a small area, like a pant leg, guess what? You can take off part of your machine to make it easier. See, now I can sew that complete loop so easily. Give it a try-that part of your machine will come right off and then go back on when you need it back on:

Now, I told you to use the presser foot edge and match it up with your fabric edge to sew a straight line. This is what I do at least 90% of the time when I am sewing, because it creates such an easy guide. But occasionally you will be asked to sew a certain seam allowance. When that happens you need to use your seam guides to guide you instead of the presser foot. In that case you will line up the edge of your fabric with the seam guide you need and try to keep it steady with that line as you sew:

OK, that’s it. That’s lesson #1-How to Sew a Straight Line. Practice, practice, practice. You will sew millions of straight lines in your sewing life. And you’ll get better as you go. DON’T get frustrated if it’s not perfect. It’s OK!
How to Sew a ZigZag Stitch:
First of all let’s talk about what a zigzag stitch is and why you would use it. A zigzag stitch is just that-a stitch that zigzags. It looks like this:

Pretty basic right? But why would you use a zigzag? There are a couple of reasons:
1. A zigzag is a more sturdy stitch, so if you need something held extra tight, a zigzag is the stitch to use. That’s what I use when attaching the hood on my hooded towels because I know it will hold nice and tight.
2. A zigzag can be used to prevent fraying. If you are sewing clothing or something that you want to have be really nice and you don’t want any raw edges to fray, you can zigzag them first. (That is if you don’t have a serger.)
3. Zigzags are used in applique and button holes.
So, let’s get started sewing with your child. Just walk through this and show them a little bit about this and let them try it out a little.
To sew a zigzag stitch you are going to start out just the same as you did with your straight stitch. Thread your bobbin and your machine. Somewhere on your machine is going to be a way to change from a straight stitch to a zigzag. Up above you can see a picture of how mine does it (mine is computerized). It may be a picture of a zigzag or it may be a number or letter that indicates what stitch you are doing. Check your manual for help on this. (See also the Meet Your Machine post.)
Set your machine to zigzag. The basic zigzag stitch is going to be of average length and average width:
But you will be able to change the stitch width and the stitch length as needed. Here are some examples:
On this one I have adjusted the WIDTH of the stitch to be larger. See how the zigzag is very big and wide?

But on this one I adjusted the LENGTH of the stitch-making the stitches long and farther apart:

Here they are closer together, meaning I adjusted the LENGTH again and in this case I also adjusted the WIDTH and made it a little smaller:
And on this one I adjusted the LENGTH almost as low as it could go:

When you have a really tight zigzag where the stitches are right up next to each other, that’s called a Satin Stitch.
Are you getting a sense of how you can adjust your stitches? Find where you do this on your machine and play around with it a little.
Now, typically when using a zigzag you can just keep your stitch width and length at a nice average setting. But it’s good to know how to change it as needed.
To sew a zigzag, LOWER your presser foot and your needle into the fabric. Make sure your machine is set on zigzag and sew an inch forward. Just like with the straight stitch, now push the reverse button and sew an inch backwards (back-stitching) and then go forward again. You have now knotted your thread and can continue sewing. Again, you can still use the edge of the presser foot or the seam guides to help you sew straightly.

One more thing to note. You’ll notice that sometimes that zigzag will make the fabric kind of gather in a tunnel underneath it. This can happen on lightweight fabric. There is a way around this. On your machine, the setting next to zigzag will look like a zigzag but dotted. This will do a zigzag but with three stitches per zig to help prevent the tunnel effect.
And that’s it. Not too hard is it? Do you have questions?
And, one last thing-don’t forget this guy-your seam ripper. When you make a mistake, the seam ripper will fix it. Trust me, I have been sewing for years and I use my seam ripper all the time. That’s the beauty of sewing. If you make a mistake, you can fix it.

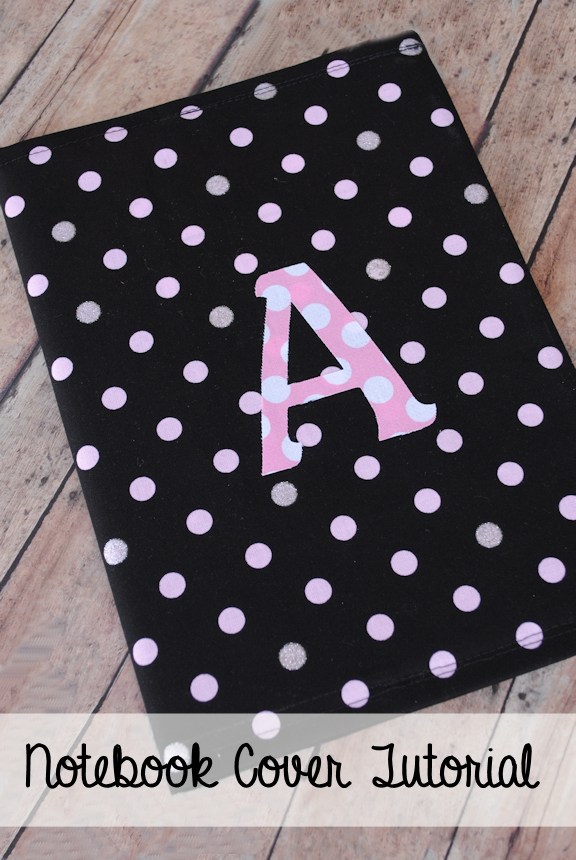
Your Assignment (This Week’s Project):
This week we are making a notebook cover. It’s just straight lines and doesn’t take too long so hopefully it won’t be too much of a challenge for the kids. Help them as much or as little as needed. And HAVE FUN! (Note that this project doesn’t use the zigzag stitch so just practice that on a scrap of fabric.)


Chloe says
I’m exited to start sewing with my daughter.
Sarah says
The notebook cover that is linked above looks like it’s just fabric glued to a composition notebook. Is there one that actually utilized the sewing machine?
Amber says
Yikes! I think I got rid of that one when I was cleaning up the site. There is this one: https://crazylittleprojects.com/go-organizer-tutorial/ but it’s a little harder.
Ellen says
Thanks Amber. I’m anew teacher and I get to teach sewing. At first my students were older teens but I’m looking for some supr simple things, these are great. Thank you.!
Amber says
Glad to be helpful!
Gina says
The notebook cover is cute, but why include it in a sewing class when it doesn’t involve any sewing?
Amber says
Sorry, there used to be a notebook cover that you sewed but I removed it. I recommend sticking to the original lessons for project ideas: https://crazylittleprojects.com/learn-to-sew-online-sewing-classes/
Kathy says
Hello! I’m looking for the notebook cover sewing pattern. When I go to the link for the first week’s project in the blog, it takes me to notebook covers that are glued, and not stitched. Could you please direct me to the sewed version of the notebook covers? Thank you so much. This tutorial looks great!
Amber says
I think I deleted that tutorial. Whoops! Sorry!!!
kristie says
Hi im new to sewing and having a hard time doing a zig zag stitch. I have no one that knows how. I get a couple zig zags in then all of sudden it just starts to do a straight line. Any suggestions?
Amber says
My guess is that you’ve got a setting off on your machine? Maybe check the manual?
Nikki Gillette says
I have been sewing since I was in middle school, and my daughter just asked me to teach her how. She completed her first project (a hand-pieced quilt top – talk about jumping in with both feet!) and is now hooked. What a great tutorial and easy lessons. I’ve bookmarked this page and will be sure to share with her. Thanks so much!
Amber says
Love to hear that!!!!
Kaitlyn says
I am 13 and just getting into sewing and I was wondering what you would think is a good beginner sewing machine. One that is reasonably priced and easy to handle. I’ve never sewed before and your posts have really gotten me interested in the idea. My friend sews and has so much fun.Thank you for your help!!
Amber says
Brother machines are pretty good and are affordable. I love Kenmore the best or Janome though. If you can find one of those I definitely recommend it!
Kate says
My 6 year old son gets out of school next week and we’ll be sewing along with you. He loves to sew and has made his own pillowcase with assistance from me. Your clear instructions will help me teach him. I know he will love your projects!
Cristina says
Following along again because I love your tutorials.
Faith says
Thanks for all the tutorials – they are a great help!
Tina Covey says
My daughter and I are beginner sewers and we are going to try your tutorials.
Kristi W. says
Wub and I are enjoying the lessons. She’s getting ready to start Kindergarten in August and has expressed interest in the sewing machine for years now. This series has given me the courage to sit her down and work with her. We made a doll blanket and we’ve chosen the fabric for the Notebook cover. Strangely I don’t have an appropriate notebook so we’ll have to pick one up tomorrow. Thanks for sharing this. We put some picture of her doll blanket on the blog.
http://futurejackorchloe.blogspot.com/2013/06/sew-little.html
Colleen says
A just sewed some straight lines and did great! Off to the first project!! 🙂
crystal moyer says
project is going well my sons not as much into it as i hoped but my daughter is really excited i just feel shes to young to fully understand it all but ill keep workign with them on it
AD says
I can’t wait to teach my daughter to sew!
Laurie P. says
Great series for those youngsters ready to start their sewing journey. I hope to someday have a small person to share the wonderful world of fabric and sewing with. Thanks for the giveaway!
Carolyn says
My little ones are too little to fully enjoy the sewing machine (2 and 1), but my oldest does like to sit on my lap while I sew. I can’t wait ’til she’s big enough to try these projects!
Leonie Dewick says
I so hope I can get my grand daughter into sewing.
Hannah says
My three daughters just finished their notebook covers. My office looked like a sweatshop with all the ironing, pinning and sewing going on today! We can’t wait for the next lesson and project! Thank you for doing this series. It’s been excellent quality time with my girls!
Amber says
Great!! Did it go well?
Hannah says
Yes! They are pretty thrilled that can use something that they were able to make themselves. We are notebook lovers too, so this project was perfect for us. My girls are 9, 9 & 6 and I was surprised how much they can do on their own. They already asked me what we are going to sew today!
Reena says
We are making a bible cover for my daughter. Nice lesson. I couldn’t understand why the flap was stitched separately? Can it be taken together?
Stacy says
This will be the first project my daughter and I will learn to do together. She’s 15 and your projects are so fun that she’s interested in learning. Thank you for the step by step directions! This will be summer fun for us! *excited mom*
Jessica says
My Niece wants to learn to sew for her dolls, this is perfect 🙂
Michelle says
The bestie and I are prentending to be kids again and doing this together!!
Amber says
LOVE it!
Christine J says
I Love this series and will be pinning to go over with my daughters! Thanks for sharing!
Kristy says
Excellent post Amber!!!
BRENDA SUTTON says
This is great for children. Hopefully, it will instill a life long enjoyment of sewing. Thanks for the giveaway.
Gwynne says
What a great way to start the lesson process off. I evened learned about removing the front part of my machine so as to sew cuffs and things like that..thanks
Nikolette B says
Although this is geared for kids, I am going to use this for me. I just turned 30 and recently bought my first sewing machine and can’t wait to learn how to use it. Thank you!
Amber says
Perfect! Glad you are joining us.
J. Burks says
I can’t wait to get started on this. It looks like a very good way to introduce my kids to sewing. Thank you!
Sandy says
Getting back to sewing at 40. I appreciate your hints to remind me how to sew the right way.
Heidi @ Mom's Crafty Space says
My big boys and I will be trying it at the little guy’s naptime! Thanks for such great photos and clear instructions!
Jennifer Smith says
Can’t wait to work on this with my daughter!
kara burns. says
I am so excited to start sewing with my daughter!!!
Angie says
My daughter is so excited to learn to sew. Thank you for sharing these cute projects and lessons.
Laura Muzinic says
My son is almost 6 and has expressed some interest in sewing. I think I’ll let him try this weekend! My daughter is almost 3 and wants to try too, but I think she’ll have to wait a couple more years. LOL.
Kristina Calkins says
That looks great.
Ashley R says
Kristina! Are you doing this with your kids? Reagan and I are. When we get back into town we should do one together! 🙂
MISTY SPITZER says
I am a sewer and my 11 year old son wants to learn. We will be doing this together, we are out of town but I will update when we get home! 😀
Joan Johnson says
I’m happy to see these are projects, for the most part, that can be for boys or girls. My grandson is 7 and is ready to learn! Thanks for offering this.