What’s the Project? You’ve got a new sewing machine & now you need to know what to do-even as basic as how to sew a straight line. These sewing classes will teach you.
So you’ve got a sewing machine. Maybe it’s brand new, maybe you’ve been staring at it for a long time….but either way, you’re wanting to learn to use it, but it can be overwhelming. These sewing classes are going to walk you through the whole process. It’s free and it’s from your own home, at your own pace. We will start as basic as how to sew a straight line and then go from there.
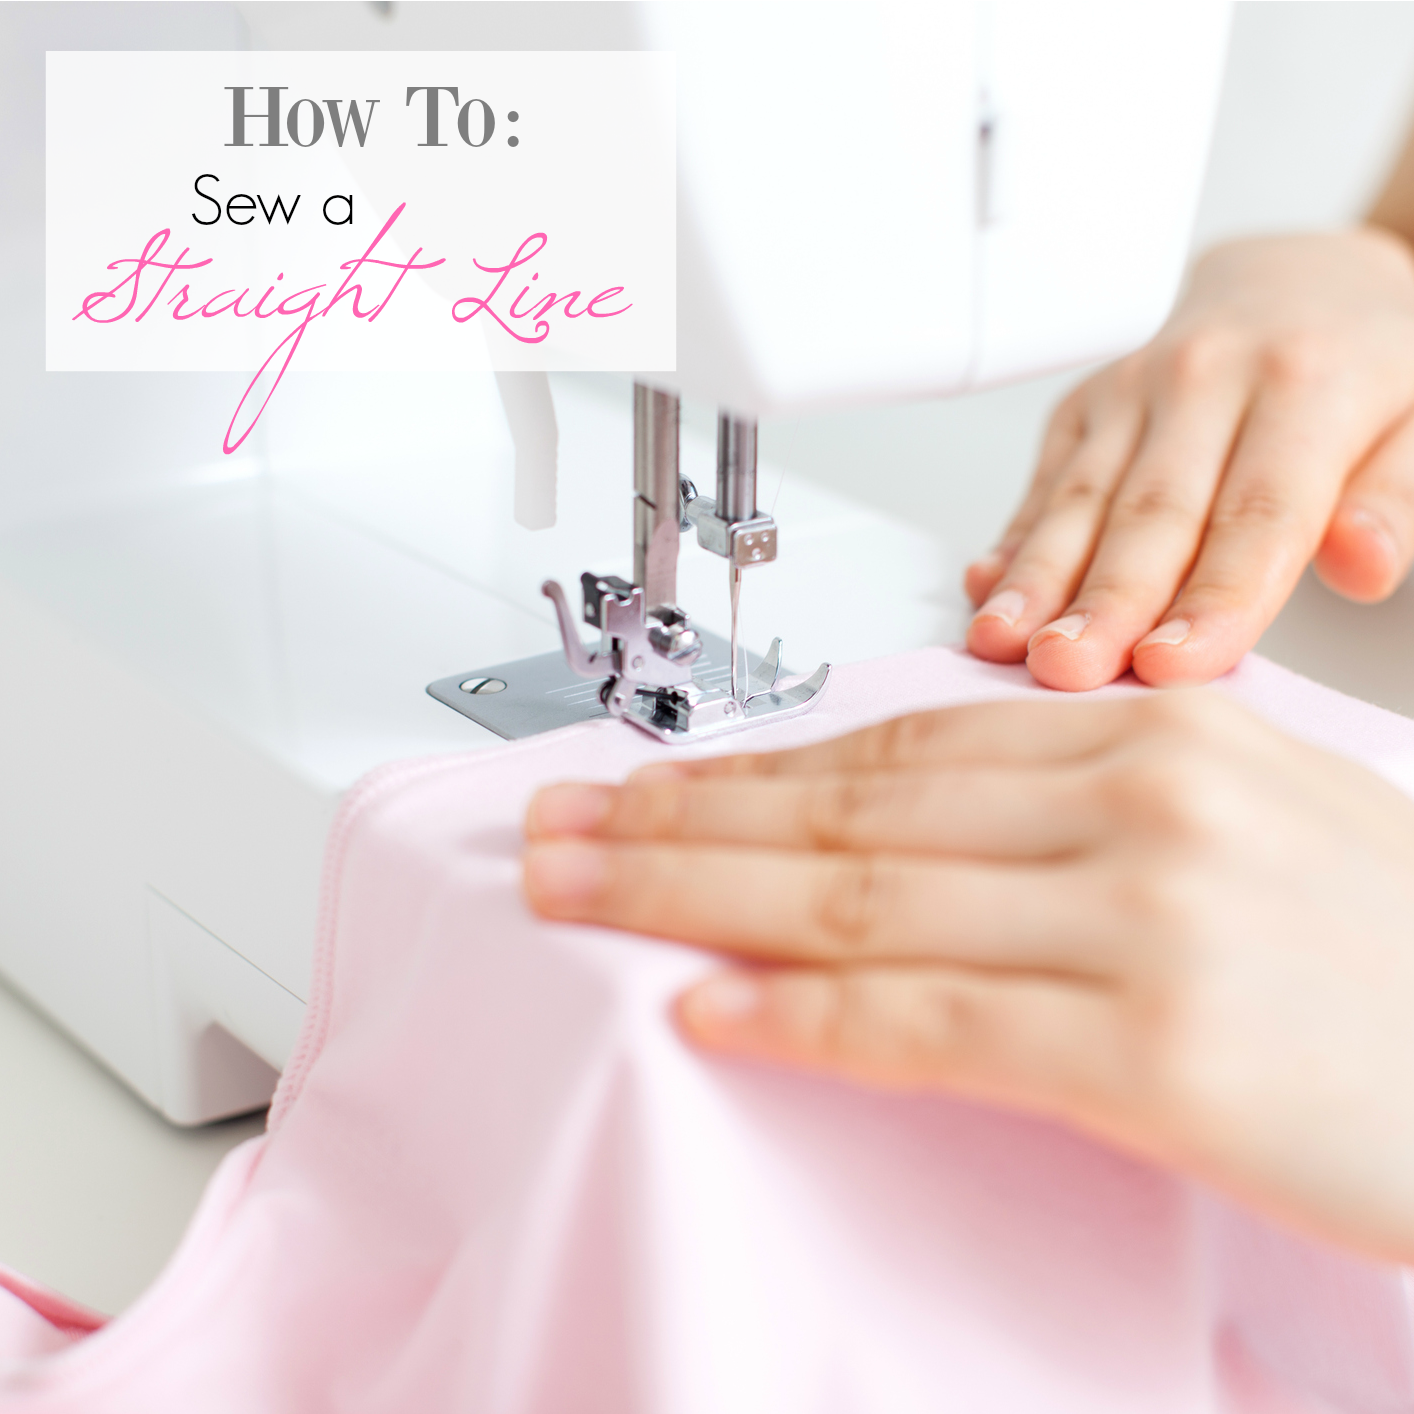
This first lesson will teach you how to sew a straight line. Following lessons will cover things like zig-zag stitches, how to sew a zipper, topstitching and more.
Before you get started, make sure you’ve checked out all of the pre-lessons and you’re all set for these sewing classes.
How to Sew a Straight Line:
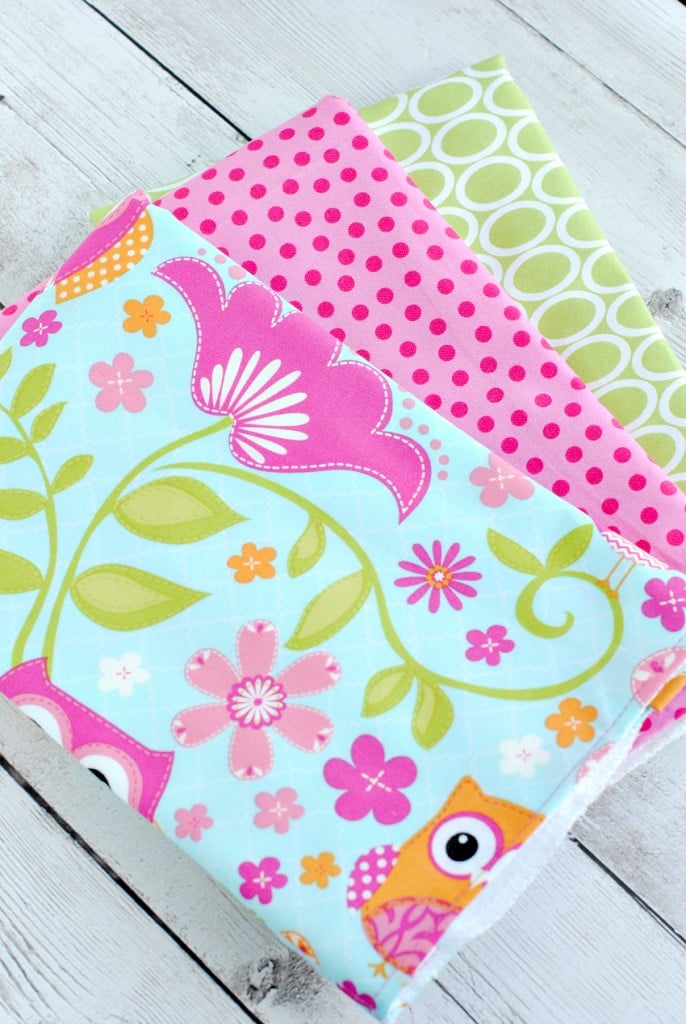
Get a piece of fabric ready to practice with. Just a scrap of something will do. Preferably just a basic cotton-not anything knit or stretchy. It’s going to be easiest if you fold it so that you are sewing through 2 layers of fabric while you practice.
First, thread your machine (including the bobbin of course). Make sure you have your machine set to sew at an average stitch length (your manual will probably tell you what that is). You can take some time to play around with this-testing shorter stitches and longer stitches.
Adjust Stitch Length:
You’re going to want to make sure you are sewing at the desired stitch length.
How to Sew a Straight Line:
Here’s a video of the process:
Or here’s a written set of instructions.
Now, take your piece of fabric and place it under the presser foot. For starters I want you to line your fabric up so that the right edge of your fabric matches up with the right edge of your presser foot as you look at it like I have done in this picture below. Lower the presser foot so that it is holding your fabric in place.

Before you start to sew, use your hand wheel (or up/down button if you have a computerized machine) to lower the needle so that it is all the way down into your fabric: (always do this when you begin to sew)

Now, slowly press your foot pedal down to begin to sew. Stitch forward for 1 inch:

Then push the reverse button or lever to back stitch for 1 inch (sew backward over what you just sewed):

After you have back stitched over that 1 inch, proceed with a forward stitch again. You have just created a knot so that your stitches won’t come loose. You will do this whenever you sew unless otherwise specified.
Continue to sew forward. As you do, try to keep the edge of the fabric lined up with the edge of your presser foot. This will help you maintain a straight line. (See images above.) Also, try to keep a nice steady pace. You can also put a piece of tape on your fabric to use as a guide to practice getting a straight line.
Once you reach the end of your fabric, knot it again. (Sew to the end, back stitch for about 1 inch, then sew forward again.)
Raise your presser foot and gently remove your fabric. Snip the threads that are attached to your fabric. Guess what? You just sewed your first straight line!
But wait! There’s more to learn.
Sewing Around a Corner:
What if you are sewing a straight line and you come to a corner (like if you are sewing a rectangle or square) that you need to turn to continue sewing. What do you do?
Here’s another quick video of how to do this:
Again, here’s the written out version.
Sew almost all the way to the corner, but leave yourself about 1/4″-1/2″ of space between your needle and the very edge of the fabric. Making sure to lower your needle all the way into the fabric (this is very important), then lift your presser foot. Your fabric will stay in place because the needle is holding it, but you can now pivot it so that it is positioned to keep sewing, now in the new direction. Lower your presser foot and continue to sew. (See in the image how I have sewed down the fabric and I am now turning to sew a new direction. My needle is down in the fabric but my presser foot is lifted so that I can turn my fabric while not losing my place):

A couple more things. Sometimes you will be asked to baste. A baste is a long stitch that is much looser than a typical stitch. When you baste you do not knot at the beginning and the end. This is because you will probably be picking the baste stitch out (if it is just there to hold your fabric in place for the time being) or you will be using it to gather (which we will learn about in a few weeks).
Here’s a How To Video:

How to Sew a Hem:
A hem is when you fold under the fabric twice and sew it in place to create a nice finished edge (like at the bottom of your pants). To hem you will first fold the fabric under about 1/2″ and press (iron) it into place. Then fold it the same amount again, press it again and then do a straight stitch along it.
Here’s a video of how to do it:
Here’s a hem being sewed:

And here it is finished:

Here’s an important thing to know when sewing a hem or at other times. If you are sewing a small area, like a pant leg, guess what? You can take off part of your machine to make it easier. See how I can sew that complete loop so easily because the fabric fits all the way around? Give it a try-that part of your machine will come right off and then go back on when you need it back on:

Seam Guides:
Here’s some written instructions:
Now, I told you to use the presser foot edge and match it up with your fabric edge to sew a straight line. This is what I do at least 90% of the time when I am sewing, because it creates such an easy guide. But often you will be asked to sew a certain seam allowance. When that happens you need to use your seam guides to guide you instead of the presser foot. In that case, you will line up the edge of your fabric with the seam guide you need and try to keep it steady with that line as you sew:

OK, that’s it. That’s lesson #1-How to Sew a Straight Line. Practice, practice, practice. You will sew millions of straight lines in your sewing life. And you’ll get better as you go. DON’T get frustrated if it’s not perfect. It’s OK!
And, one last thing-don’t forget this guy-your seam ripper. When you make a mistake, the seam ripper will fix it. Trust me, I have been sewing for years and I use my seam ripper all the time. That’s the beauty of sewing. If you make a mistake, you can fix it.
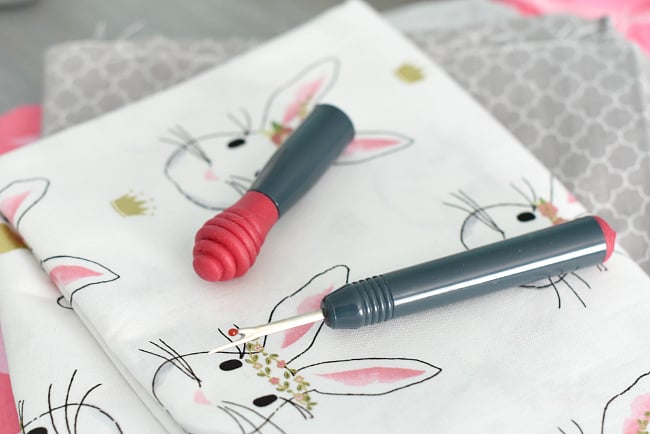
(Here’s my favorite seam ripper to get. (affiliate link)
Your Assignment:
Now we need to practice and sew something new! Here’s how your assignment works:
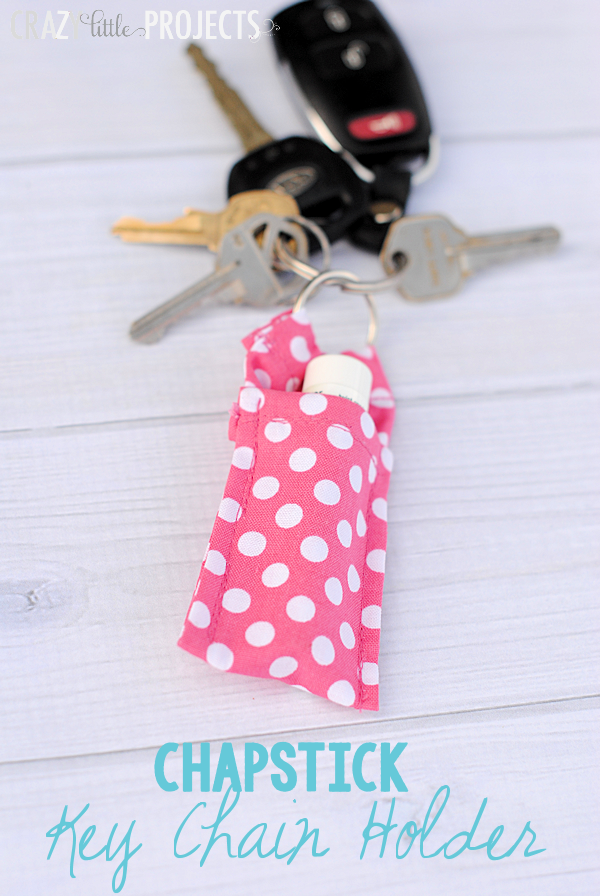
- Pick a project-I will give you several options here, you are also welcome to choose something of your own, just be careful to make sure that it is in your ability range. Sew it up this week and practice your new skills before you move on to the next lesson.
Lesson #2: How to Sew a Zigzag Stitch
Project Suggestions:
Hope you feel confident that you know how to sew a straight line now!
Pin It:


Naomi says
Thank you so much for this. With covid around my father wanted some cotton scarfs/DIY masks to carry with himself. We were talking and I said some material with a hem or stitch to stop fraying is all he needed and I’d do it if I had a machine. Well he bought me a machine and got some fabric. I remembered bits and pieces from seeing others sew but this post helped me fill out my knowledge and grow comfortable with using my machine and sewing straight stitches.
Kim says
Hi Amber. So glad I found your blog. I’m ready to get back into sewing. I’ve dusted off my machine, all I need is to find the missing power cord. Lol. I’m going to be taking your learn to sew series, get all my basic skills again and I’m very excited about it. Thank you for doing this!
Amber says
Wonderful! Best of luck finding the power cord!
Shelley says
I am not able to get the link to watch the sewing lessons. You have wonderful pictures of each step but would love to see the videos. Not sure if it is my computer. Thanks Shelley
Snowhawk says
This was just what I was looking for. My girlfriend (an experienced quilter) is trying to teach me to quilt and I have the hardest time trying to sew a straight 3/8 inch line… straight.
My machine hqs guides and I tey to stay on them but I find my seam as crooked as a drunk fly walking along the material. I guess I just need to tqke scraps and practice, practce, practice. Someday I may a actually get that line straight.
I am very much looking forward to subsequent lessons. Thank you!
Amber says
Keep at it! You’ll get it!
Mia says
Thank you so much for this wonderful guide, it’s everything a beginner needs! I’m new to sewing and I just learned how to use a machine reading this series. Thank you 🙂
Jordon says
Thank you. Very helpful.
Machine Embroidery says
thnx for sharing..keep up the Good work.
ZABDIEL says
Thanks Amber. I’m a beginner and this tutorial really helped me. This is the best site i have come across
Zabdiel says
I’m a beginner. I love this tutorial, it’s very easy to understand.and helpful.
Donna Huber says
Hi. I am a Family and Consumer Sciences teacher with a degree in fashion design. Nice job with this tutorial. I have to disagree with your back stitching. It should only be 1-2 stitches, not an inch because you too thick of a seam end — think about it, you’ve stitched in the same spot three times! It gives more cause for error if you aren’t exactly on the same line.
Susan says
Someone asked about sewing over pins. If you’re going to do it, you have to be REALLY careful. I’ve broken more than one sewing machine needle hitting a pin as I sew.
Better to remove them as you get to them.
I have recently started quilting and straight seams are more important than now…to match seams and points. I can’t seem (no pun intended) to CUT the fabric straight (rotary cutter or not) and often I find my fabric “curves” to one side as I sew.
Seam allowances and distances between seams are my issue.
My seam ripper and I have developed a love/hate relationship. :/
Susan R says
Hello Amber,
I think this is gonna be my example reference from now on, when beginners approach me for an easy beginners sewing project I will be sending them this link for sure. Nothing can get easier than this.
Regards,
Susan
Julie C says
I have been reading several online articles since morning how to sew a straight line and this one got it nailed absolutely. The photos did help me a lot.
Ritika Sharma says
This blog recalled me of old days of craft classes when i first started learning how to stitch.
Debbie Bowman says
I am new to sewing my best friend and kindred spirit sister sews like a dream so I am going to learn to sew so that she and I can spend time together making memories. She is my inspiration. Lesson 1 complete. With a little guidance from her. I LOVE this series.
Amber says
Oh that sounds awesome!
Mrs L says
I’ve learned to sew, so I made a mini tote using your pattern and I altered it adding an outer pocket with piping and also a flap with piping as well.
Veronica Marks says
These step by step instructions are amazingly clear and specific, especially with the pictures of the machine. I’ve been looking for something like this to help me teach my niece how to sew. She’s never used a sewing machine before, but I think she would really like it. I remember one of my first projects was an apron that I made in junior high. I think we’ll work on one together for her as well, but we have to get her stitches straight first!
polly says
Amber, Can you help me troubleshoot?I’ve been sewing basics since jr high but don’t know what’s wrong with my machine right now.when I manually lower the needle to pull up the bobbin thread it sounds like the needle is hitting the bobbin or case. I’ve removed and re inserted the bobbin and case several times and it looks like its correct.
Any ideas?
Polly
Rhea says
Hi Amber,
I’ve been meaning to get to know my sewing machine better for ages and can’t wait to start your classes.
Polly – I had that problem before (although Im just a novice so ignore if this doesn’t work, but thought I could share while you wait for a more experienced advice!): in my case it turned out that the needle was set to the right or left of its default position. check if your stitch type is set to straight stitch (just for picking up the bobbin thread), and if your machine has a separate needle left, needle right, needle centre control, try adjusting that before gently turning the handwheel again to see if the needle will go down.
(If the needle hit off the casing a few times it can blunt the needle which can cause problems for sewing later, so turn the wheel gently and if its not sewing quite right afterwards consider changing to a fresh needle.)
Hope you get going again soon!
Amber says
Might need a trip to the shop. I think I had that happen before too and had to get someone to fix it.
Daniel says
Amazing! Can’t wait to try this out! Gonna be making some pencil cases <3
Sherry says
Hi Amber, I have been sewing for close to 50 years now but, I found your class to be enlightening for not just beginners but us long time sewers also. I ‘am following your class but decided to do your bench cushion instead of the burp cloths, which I have made several in the past they are so cute for new parents! I enjoy your news letter & posts helps me keep up with what children and younger people enjoy. thank you for sharing your talents.
Amber says
Thank you!! 🙂
Shannon says
We are so excited to get started! My daughter chose the key fobs as her project, so we’ve ordered our supplies. 🙂
Christianna says
Question : when i do the reverse stitch, my thread gets knotted up and stuck. Please explain this?
Great tutorial
Amber says
Make sure that you aren’t going clear to the edge of the fabric when doing this. Mine sometimes has problems when I do that.
Ashley says
love how simplified you have made this, but my first hurtle is CUTING the fabric straight, my problem is I can’t cut straight so I have a hard time sewing straight. I am left handed but have cut paper my whole life right handed but I even bought a left handed scissors and still cant cut straight and it feels awkawrd because i am so used to cutting with my right, even though its not straight…
Amber says
I know, getting a straight line can be hard. Try a rotary cutter maybe.
Joey says
I cannot thank you enough for this tutorial! I’ve owned my sewing machine for 17 years and never used it because I just really don’t know how… Now, I’m going to be a
Glam-Ma in July and I’m desperate to learn how to make straight lines and ruffles for my Dakota-Mae, thank you so much!!
Amber says
Welcome!! 🙂
Abbey says
I know this post is a little older but I’m hoping for a response.. As I was reading your post I realized while making a quilt (just picking an easy pattern and trying to teach myself)
I never “knotted” the seams of the different blocks… I just sewed to the edge of each block and then snipped the thread… So is my quilt basically going to fall apart once I sew all the blocks together? >_<
Amber says
Well, you would have sewed over them going the other direction while you were sewing rows together right? So that should help lock things in. It will probably be ok.
Rachael Rabbit says
Hi Amber – I often use the walking foot for sewing straight lines – it keeps the layers from slipping – especially when using any sort of stretchy/soft/furry/fabric with a sheen sort of material. I don’t know if this idea would help anyone.
Amber says
I agree! A walking foot can be VERY handy!
SarahHamblettUJ says
hi
your website and article is really helpful, thankyou
Chrys says
Thank you!! So excited to find this site. I’ve wanted to learn to sew for years, so this year, I finally broke down and let my students buy me a machine (using the Visa gift card from the class.). I found a machine I liked and the best price was on Amazon, so I had to wait a day for it to arrive. Luckily, when Amazon split my order, the machine was the first to arrive. It would have been tough to be surrounded with fabric scissors, bobbins, and other assorted sewing stuff, and be unable to really play with it! I was off to Target today, and have completed 5 burp cloths. I’m hoping my cousin can still use them for her baby; otherwise they’ll get stored in the linen closet and will be gifted at the next baby shower that comes up. I do have one question about turning fabric. How do you know when to stop and turn? I was eye-balling it, trying to line up with the presser foot on my turn, but I didn’t quite match up with my beginning stitches on a couple of the cloths. Is there something that I’m not thinking of?
Amber says
Oh that’s a good question! I think you kind of just get an eye for it eventually, but let’s say you are sewing a 1/2 inch seam, then you are going to want to stop and turn the corner 1/2″ before the edge of the fabric so that when you turn you are all lined up to keep going with a 1/2″ seam. Does that make sense?
Tiffany says
I just finished this! My first sewing project ever! I def learned some lessons lol, especially sewing the ric rac on. Now I just need to have this baby and test it out 🙂
robyn says
hi, just need some knot advice. It seems when i do reverse stitch and then go forward again, the stitching on the other side loops up…what am i doing wrong?
Amber says
I’m not sure. That’s not normal. Does it do it every time? Have you rethreaded both the thread and the bobbin?
Kayleigh says
Thank you soooo much!! I needed this. I’ve always wanted to learn & just got myself a machine! You’re a life saver!
Jenn says
Thanks so much for these tutorials!!! I just found them on Pinterest, and decided to follow along!! I’ve been doing some straight line projects, and I tried your diaper and wipes case! It turned out gift worthy!!! One pucker and a few runs with the stitch ripper but now I’m torn as to whether to use it myself or give it as a gift!! Hopefully I’ll be able to catch up with the rest of the projects!!! Thanks!!!!!! 🙂
Linsey says
OK, apparently I am sewing machine illiterate. I’ve loaded everything according to the directions. Both the bobbin thread and the top thread pull easily when I pull extra thread through, then when I start to sew it all binds up and tangles. I seriously have a pile of thread that I’ve removed from this stinkin’ machine sitting next to me. It does fine until I either reverse stitch or if I try to sew a hem. What’s the deal!?!?! I know I’m doing something wrong but I don’t know what 🙁
PS. Mary Jane, my DD and I did manage to make a small pillow for her American Girl doll. 🙂 all straight lines.
Amber says
Sounds like maybe your tension is off? Do you know anyone that could have a look at your machine for you?
Renee says
I have the same issue if I don’t have enough thread on the bobbin. I have to keep it pretty full or it tangles that same way.
Amber says
Weird!
Amber says
Hmmm, sounds like something might be wrong with your machine, not you. I wonder if you could take it to a local sewing machine repair shop and have them take a look at it.
sandra says
Thank you for the lesson! I just completed the burp cloths and they are adorable.,,,on to lesson #2
Linsey says
you should post a picture of them! I’d LOVE to see!!
Mary Jane says
Do you have any other projects that we can make using the straight stitch, other than the burp cloths? It would be nice to have some different choices.
Heather says
A little behind, but so excited! I haven’t sewn anything since middle school home ec. but I bought a machine and just made 3 burp cloths (perfect since I have a newborn)! Thanks for the lessons.
Renee says
Thanks Amber… my burp rags look suitable, well, to be barfed on. So I guess they are successful, then. Here’s to hoping I improve as we go. 🙂
Kim Thomas says
Thank you for the lesson. Take care. 🙂
Mackenzie says
Thanks for finally helping me understand how to machine baste stitch something. I do wish however that there was a way to see a printer friendly version of this blog post so that I can print it out each week and make a “Learning to Sew” Manual/Bible!
Christina says
Woohoo! First sewing project ever, and I think they turned out great. Thanks so much! This was exactly what I needed to break my brand new sewing machine out of the box. Success!
Bonnie Nyquist says
Great tutorial,very useful little items too, Make several ahead for gifts! Cannot think of a better first project.
Elaine says
(Almost) straight lines? Check! Thank goodness for matching thread and patterned fabric! 🙂
Meghan says
Thanks so much! Great easy to follow directions.
Laci says
Instead of doing burp clothes I have been working on two pillowcases. I didn’t have the supplies for the burp clothes and I live 1.5 hours away from craft stores, and 45 minutes away from the worst walmart ever. Thanks for the tutorial. I am so glad I get to participate.
Charlene@A Pinch of Joy says
Fabulous tutorial and you did an excellent job of including all the basics. It’s so easy to forget how hard it was to master those things 🙂 Pinned! Thanks so much for linking on Busy Monday!
Pam Zimmerman says
Thanks so much. I made my first one and will do lots more. Pam
Megan says
This was a great first project! I finally got it completed yesterday and I blogged about it today if you want to come see my results: http://craftymeggy.wordpress.com/2013/01/12/sewing-saturday-2/
Thanks for the tutorial!
Amber says
Good work! 🙂
Becca A says
Thanks so much for this tutorial and series. I started sewing last year, with some major help from my mom. I’ve made a few cute things, but just got my own machine. I am about to go make my burp cloths right now–they are actually going to be doll burpies/blankets for my three girls. They are very excited to have them!
Karis says
Finally finished! I made 10, since I didn’t know what else to do with the diapers 🙂 My stitches still aren’t perfect, but I’m getting there! Overall, it was a great refresher for me. I never got any further than sewing straight lines for the past 20 years, so the next few lessons will be awesome! Now if only I could do these projects without using my iron… 😛
Rachael says
Going great! Fun project and great for practice!
Kathy Antley says
All Finished! I made five of the burp cloths for my little one. I found my biggest problem is knowing how to slow down! when I slowed down the stitches were much more controllable. Their not only very practical but very cute! Im so thankful for these lessons and am excited to try the next projects!
Leslie says
I made three burp clothes for a cousin, who recently gave birth to a beautiful little girl! I used a cute flannel fabric, in pink & green with butterflies. What a simple yet practical gift for any new mother! Thanks for the lesson, and the tutorial!
Jenn K says
I’m loving all of the posting of projects on the FB page!
ANNA FINLAYSON says
Did it! I wasn’t sure I was doing it right because it seemed almost…. *gasp* … easy!! Thanks for the first lesson!! Looking forward to more!!
Ashley says
Finally made my burp cloth last night… I definitely wouldn’t gift it lol. I messed up several times (first time sewer–i expected it!), but couldn’t figure out how to use a seam ripper efficiently (do you have to rip out EACH stitch?). I’m proud that I did it, but I need more practice! 🙂
Amber says
Rip out a stitch here and a stitch there and then just tug at it a little and it will all come apart.
Natasha says
So excited to start this week! I’m hoping to understand my new sewing machine a lot better after the 7 projects. Thanks for putting this together!
ktrn says
This is really great, I’ll sure follow your lessons! Thanks for them 🙂
Kate says
Thank you for the tutorial! I’m finally getting to start the burp cloths tonight, as soon as the baby goes to sleep. It’s been fun seeing the finished cloths on the Facebook group.
Amber S says
Thank you for this! *fingers crossed*
Gypsie says
Thank you so much for this. I had no idea what a baste was! And I’m getting better at sewing!
Amber says
Yay!
emily says
Had a blast making these! Right now I have 6 lovely ladies that are expecting so these along with your diaper wipe bag are going to make cute gifts! Thank you!!
Amber says
Yay! I think I have like 18 friends expecting. I need to make some more!
Makenzie says
I made 6 so far! I’m so excited to be sewing again. I didn’t have space for a sewing machine in our old small duplex. We just moved and I have a whole craft room to myself. I am loving it!
Marjory says
Great tutorial for beginning sewers! Cute project too!
Sharon Joyner says
Thanks for the tutorial…I will not be making burp cloths but hand towels instead and you are so right it is harder than people think to make a continual straight line but it worked out wonderfully….thanks so much.
Melissa says
Thanks for the awesome tips!
Linda says
Made three burb cloths tonight. Did a pretty good job. Learned a few things like make sure you iron everything first because it does make a difference. My lines were straight when I used the presser foot as the edge guide.
Kim H says
I just finished (it was a 3 day process – washing and ironing fabric on Monday, cutting and pinning hem Tuesday, and finally ironing, pinning and sewing today) and it went much better than I expected. Nary a hiccup and only had to seam rip once when for some reason my top thread got all bungled up on the bottom (do you know why that happens? Do I have it set up wrong?). But I noticed every once in a while a thread of the diaper itself got snagged as I was sewing and pulled and puckered the diaper. Sometimes I could pull it back, sometimes I couldn’t. Any advice?
Amber says
Be careful that your threads aren’t getting tangled on or caught on the presser foot at all while you are sewing because that could pull them and cause puckers. Tension could be off?
Liz says
If your problem of threads getting all weird is at the beginning of your stitching, a way to fix it is to hold your threads as you start sewing that should help – but if its all funky in the middle you might need to take your machine in for checkup from the sewing machine doctor or google tension issues. Sewing machines work best with yearly maintenance 🙂 Good luck!
Darcy says
So excited to start, I learned my lesson though to read ahead of time — tonight was set aside as sewing night and my diapers aren’t prewashed! 🙁
Sharon says
No burp clothes for me! I’ve done them before for baby showers, and thankfully- mine are old enough to not need them!
Sherry says
Just finished my first burp cloth, not perfect but I think it looks great for my first sewing project!
Megan says
If you’re looking for cloth diapers don’t buy them at Target. They’re $17 where I live in Idaho for a 10 pack or 5 pack for $12.99!! You can buy a 10 pack at Walmart for $13.50. Just thought I’d share that.
Lauren I-S says
Getting started now. Baby burps cloths I will master you 😉
Valerie says
I am so happy I found this series. I have recently started sewing and wnt to expand my skills.
Dixie says
Hi there 🙂
So I’m completely new to sewing! I have wanted to learn for a really long time but nobody I know knows how to sew (including my mother).. So when I came across this on Pinterest I was so excited, and for the first time ever I now own a Sewing machine. I can’t wait for the next 6 weeks and thank you for helping beginners like myself!! 🙂
Rachel says
Can’t wait to begin!
katie says
great job
Trasity says
I’m super excited to be doing these lessons the next few weeks! I just got a brand new sewing machine and have always wanted to learn. So, I was very enthusiastic about the first lesson starting! My husband was too, haha!
I completed two burp cloths last night while my husband did his p90x. He was very impressed and kept stopping his workout to watch me lol. He would ask, “what’s that lever do?” Or, “what are you doing with that knob?” It was hilarious but he is so supportive and excited for me to be learning. I turned out two pretty good looking burp cloths I will be giving away to expectant friends. Thanks again for this opportunity! Can’t wait for lesson 2!!
Amber says
That’s great! Way to impress the hubby. 🙂
Linda says
That’s so exciting that your husband was so interested. 🙂
T. Alloway says
Beginning sewer, SO EXCITED.. THANKS!! 😉
Wendy Reichle says
Wow. I have been sewing for years. And my girls are and have been learning just a little over time. But, as they get into their teen years, their patience with me and my “over-explaining” everything, has made those lessons nonexistent. Enter high school and the sewing class. They don’t need my sewing experience at all. 🙁 But they still have a lot to learn, starting from the basics. Your post is as thorough or more so than I have been, but I can’t wait to show them the tutes in this series, as it will be much easier for them to learn from you at their pace than me. Pictures and print are way better than mom repeating. 🙂 Thank you so much for this! Oh, and I came over from Straddling The Gap!
Amber says
Awesome! I hope they will do it. Thanks for joining me. 🙂
Alyson says
My sisters baby shower is coming up and will now have something handmade to give my new nephew! Thank you!
Cindy @straddlingthegap.com says
BTW – Did I see you sew over that pin in the first three pictures!?!
Amber says
If they were the pins going in sideways, yes. 🙂 I was trying to show that if you put them in that way you can sew over them.
Chris says
I saw this too and wondered..lol So sewing over the pin wont hurt the needle?
Amber says
I think you aren’t supposed to do it. I do it anyway. 🙂
Cindy @straddlingthegap.com says
This is a great tutorial – excellent pictures! I’m excited about our project for this week because I have a friend having a baby next month – perfect and easy gift!
karla says
I found you on pinterest and I’m soooo glad I did! I bought a new sewing machine and started a fabric stash and this was a great project for me thank you especially since I’m going to be an aunt again in a few months :]
Alicia says
I was looking at making some burp cloths for my nephew, now I have an excuse.
Monica @ Creative Gator says
I am still a very new sewer, having tried a few simple projects in the last year. My straight lines are terrible. Thanks for the tips. So excited to test them out.
Shelley D. says
Straight line – check…..not doing so bad.
Burp cloth – not done yet……still working on it.
AnnaMarie says
I can’t wait to get started!!! 🙂
Amber Bright says
Yay this was great thank you! I can’t wait to start on the burp cloth!
Lorie says
I made 1 burp cloth tonight…it went well (if I do say so myself). My lines aren’t perfectly straight but this is only the 4th thing I’ve ever made so I’m feeling pretty proud of myself. I plan on doing another on tomorrow. Thank you so much for creating this series Amber! I am from a mall town and there are not many options for someone learning to sew so this is fantastic!
Alana says
I LOVE that we’re starting with the very basics!! I’m so excited to move “ahead”, but know that this great foundation will help all of us to be able to do bigger projects correctly! Thanks!
Allison P says
I really enjoyed making the burp cloth! Looking forward to the rest of the series.
Dana says
Great post!!! I made some burp cloths today and instead of putting a strip down the middle I did a rectangle at the bottom! They look super cute!!! 🙂 and so will my newly adopted niece! 🙂
Dana says
The last line should say…I love them and so will my newly adopted niece! My fingers got ahead of my brain!
stormyyskyy says
Great idea for burp cloths. I usually use terry cloth & flannel and zig-zag around the outside. They make great washcloths that way, too.
Janet says
I just had a baby 4 months ago. This is perfect two birds in shot. Learning and making something for my baby!!! I couldn’t ask for more. Have a Bless week.
Jessi says
I’m so excited to get started! Someone I work with just had a baby boy, so he’ll be getting these as gifts!
Crystal says
I will give this a shot. I have no clue what I’m doing but here goes.
Amber says
You can do it!!! 🙂
Nikki says
I couldn’t figure out what they ment by knot… Thanks for finally clearing that up (: great lesson. Do we have to use cloth diapers for the burp cloth? Would a hand towel work? I am not close to a target. And I ready to start tonight! (: thanks for the great lesson
Amber says
Ya, a hand towel could work nicely!
Angie says
So excited to start!!! Have all my stuff and am ready to go go go!!!
Trinecia says
Great post! Seems so easy to follow. Look forward to getting started.
Jess says
Yay! So excited to start sewing!
casey says
awesome tutorial! can’t wait to get started. my sister taught me to use painters tape on the machine if you need to make a seam allowance, so it is easier to see.
Desiree Tatro says
Cant wait to do this. I have already been sewing and I have completed some big projects even being a beginner. I have been planning to make some burp cloths and this is the week to do it. I’m using terry cloth instead. I purchased a remnant from JoAnns.
Laurie says
Yeah for this great series and giveaway, perfect for my DIL with her new sewing machine. Thanks.
Suzanne S. says
These will be perfect for the baby shower I need a gift for next week!!!!!
ashley says
Great first post Amber! 🙂 I already learned something new! I’ve never known official sewing terms so this is great! Thank you! 🙂
Cara says
I’m not actually going to make this project…I have some sewing skills already, and I don’t have any reason to sew burp cloths! Thanks for the lesson, though!
Amber says
Sure-all the projects are optional. 🙂
Cristina says
What? A lesson and a giveaway? How awesome! Thanks Amber!
Jennifer Womack says
Thank you for your sewing classes! Great Lesson!
charissa says
so excited i stumbled upon your blog. this is exactly what i was looking for as a beginner sewer.
Anna says
What a great post. I wish my machine had those seam allowance guides. Mine just has lines but no numbers or anything. I’m thinking about making myself a small ruler I can tape on as sewing correct seam allowances have always been difficult for me to do.
I love how you talk about back-stitching too. I have only just started doing this instead of literally tying my threads together and it makes such a difference. Thanks!
Amber says
Oh wow! That must have been a bit of a headache tying the threads. Glad I could teach you an easier way. 🙂
Chelsey says
I think I found this class at the perfect time! I have been practicing all weekend!
Val says
Love this post, even as a beginning sewer I was able to learn something new. I’ve taken a beginner’s class before, but was never told to place my needle down into the fabric in order to turn. I was so disappointed with my “straight lines” that turned because they always looked cooky. Thanks for the awesome tip!
Crystal says
Seam ripper in hand and SUPER Excited!! Thank you!!
Crystal says
Seam ripper in hand and SUPER Excited!!
Jana says
How fun! I don’t know anyone with a baby, so I made a little blanket for a plush animal instead. It worked out fine. The lines aren’t quite straight, but that’s okay, I’ll get there! Hope this counts instead!
Amber says
That’s perfect. All of my projects are just optional ways to practice the skills. You can do any project you want each week.
Uta says
Thank you for this lesson.
Hugs, Uta
Shaunterria Owens says
I never knew how to make a knot on the sewing machine *lol* No wonder all my stitching came loose! Thank you for starting with the bare basics, I need them.
–shaunterria
ca11i0pe.blogspot.com
Amber says
Glad to help. 🙂
Mari says
Thank you for the advise! And I can always use more burp cloths 🙂
Audrey Scarante says
Awesome. Thank you!
Kenya says
Just a question on seem allowance guide. My machine has the seem allowance markings but does not have the length listed just the lines. Where do I start to measure to know which line is 1/4 or 1/2….? Thanks for the first lesson.
Amber says
If you use the presser foot edge you’ll be doing 1/2 inch.
Jess says
I got this! Thanks so much for posting these direction! 🙂
Lindsey says
Thank you so much for doing this series!! I practiced sewing straight lines this morning and am looking forward to starting on the burp cloths, hopefully, this afternoon. Your directions are so easy to understand.
Kellie says
Great first lesson! You did a good job…
Now to try a burp cloth 🙂
Allison Blaszak says
I sewed my first straight line!!! Thank you for making it easy for me to understand… I’ve never done that before!! I even took a picture of my scrap practices and sent it to my mother!!! I think I’m going to practice some more and then try these burp cloths… 🙂
Amber says
Love it! Was your mom proud? 🙂
Allison Blaszak says
She
Allison Blaszak says
She was hysterical laughing at me. Lol. But I think so…. its nice to make your mom proud even at 35! Lol
Linda says
Oh Allison, I’m 44 almost 45 and the other day when I was “practicing” I got a piece of scrap and just sewed a few lines to get the hang of the machine and the levers and showed my husband. You would have thought I was Martha Stewart I was so excited…lol So I completely understand. : )
DinT says
Thanks you for the great lessons. Your blog is wonderful and inspiring me to get my sewing machine going again.
fiona hadland says
Great post, love the burp clothes thank you for running such a great series x
Suzy Myers says
Great job, Amber! Now I just have to find some cute fabric to make those burp cloths!
suzy
Donna says
I can do this! Thank you!
lindsey says
So excited to start practicing! So easy to understand! Thc!
Heather says
Excited for the challenge & tutorials!
Lakin says
Great instructions easy to understand! Can’t wait to complete the project!
Georgette says
Can’t wait to give it a try. Your instructions look so easy to follow
Cassandra Henson says
Great lesson! I can’t wait to get started.
Stephanie P. says
Great first project! Can’t wait to try out these burp clothes! Perfect timing since I have a baby shower to attend soon! 🙂
Aubrey says
So excited class has begun! Can’t wait to practice when I get home from work!
Nicci says
I love how you make this simple enough to understand, and you don’t take for granted that we know little things that total beginners wouldn’t know. Just a couple of days ago, my sister was talking about hemming pants, and I said, “I don’t know how you can sew the fabric around like that without getting it tangled.” She thought I was kidding, and I didn’t have the heat to tell her I wasn’t–and here you explained it for me! Thanks!
Linda says
Can’t wait to get home from work tonight and give the lesson a try. I figure if I practice each day by the end of the week I should be an “expert” lol or at least a beginner…lol
Jana says
I don’t know anyone with a baby, so I made a little blanket for a plush animal instead. It went pretty well. The lines are not quite straight, but that’s okay. I will improve! Hope that counts instead!
Looking forward to trying out new techniques! I love colourful fabrics and would love to be able to make more things from them!
Amber says
Perfect!
Christa G. says
Great post! So easy to understand!
cindy r says
Great first project for a beginner!
Michelle Spiess says
Thank you for your sewing classes! Very excited to learn! 🙂
Samantha says
Great lesson! Can’t wait to make a few burp clothes!
Meredith @ Wait Til Your Father Gets Home says
Fabulous post! I absolutely love to make burp cloths :o) I’m actually hoping to get a few made today during nap time!!