What’s the Project? Learn how to make a hooded towel quickly and easily. This basic hooded towel tutorial will teach you to make a large towel that moms and kids will love.
Is there anything better than a baby who has just been bathed? Baby heads smell so good! Or how about a cute toddler all washed and smelling amazing wrapped in a cozy hooded towel? I miss the days of little ones all washed and clean and snuggly. But I love to give these as baby gifts because they are wonderful to have around when you’ve got little ones.
Making one of these basic towels is easy. And you’re going to love having one of these for your kids. They are so big and last for years and years. My kids have used them up to about 8 years old. I’ll show you in this post how to make a hooded towel and then if you want you can move beyond and make fun animal hooded towels too.
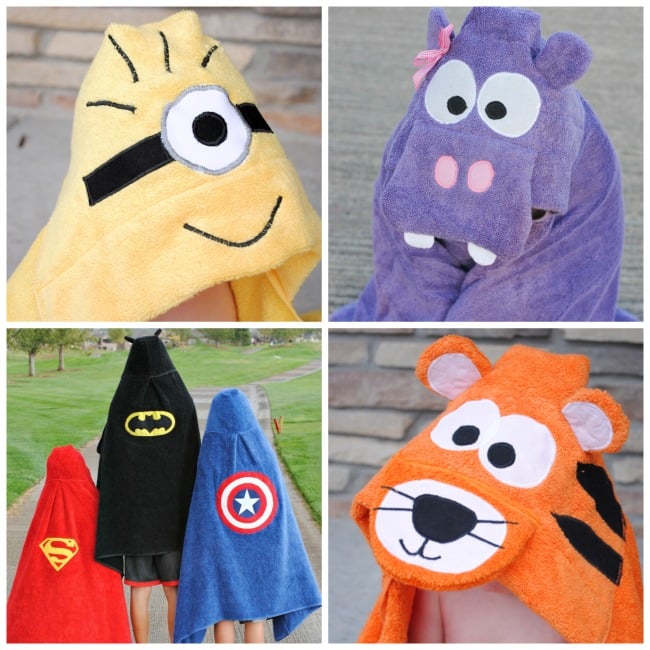
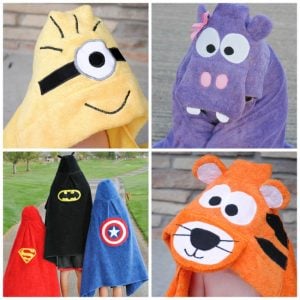
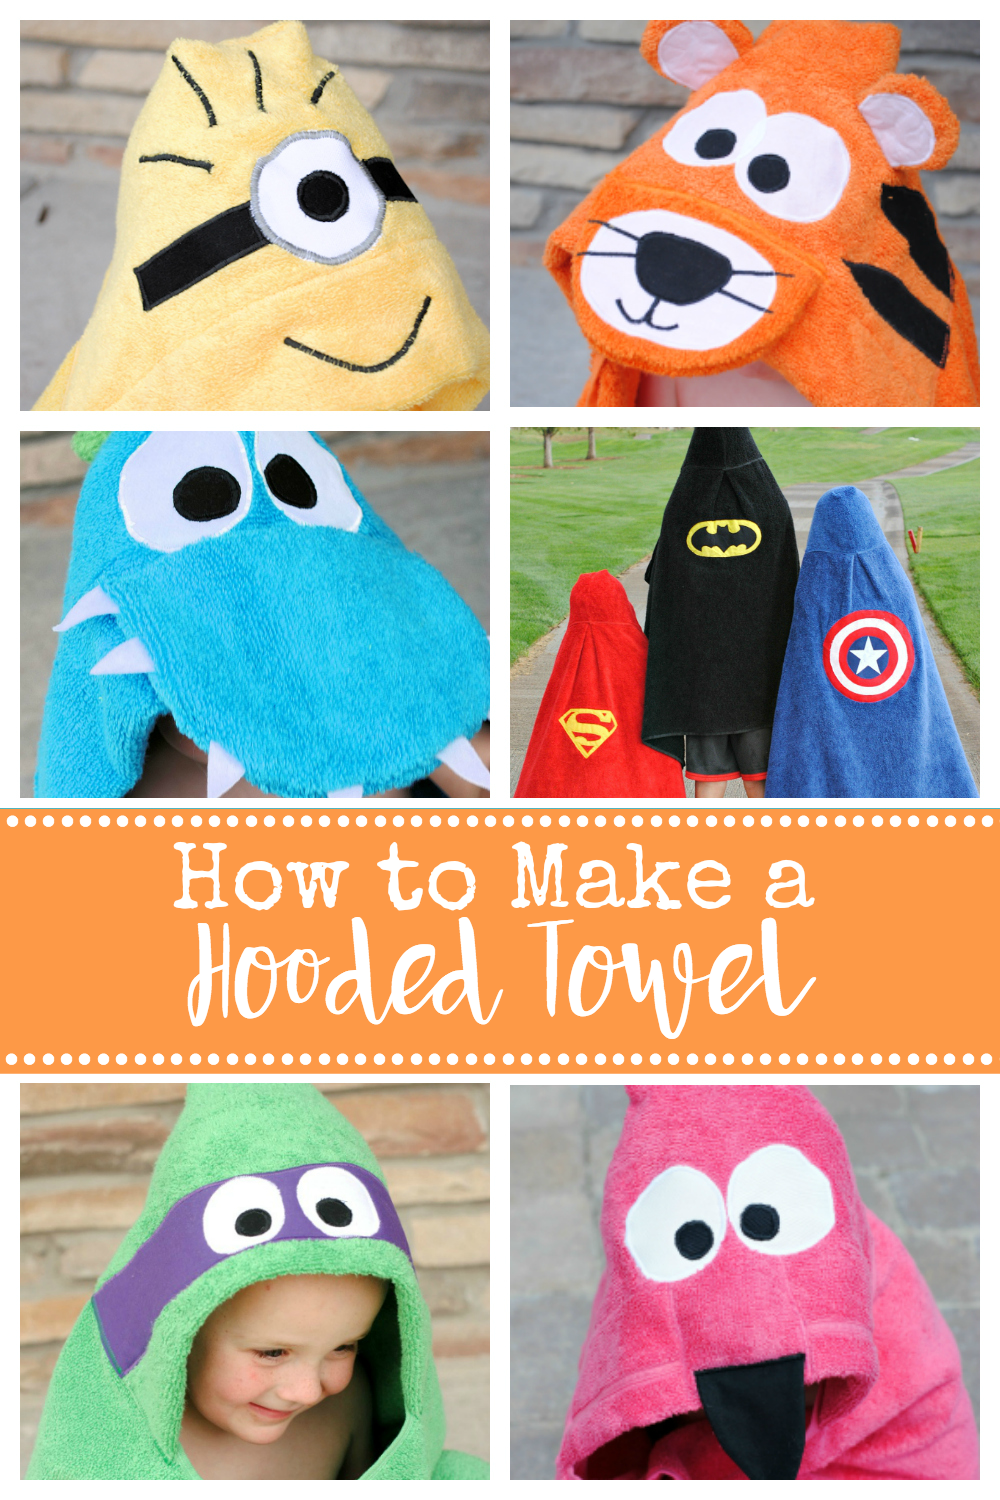
Here’s a peek at what you can make as you learn to master the art of these cute things!
Browse all of the hooded towel patterns here.
Hooded Towel Pattern:
How to Make a Hooded Towel
Supplies
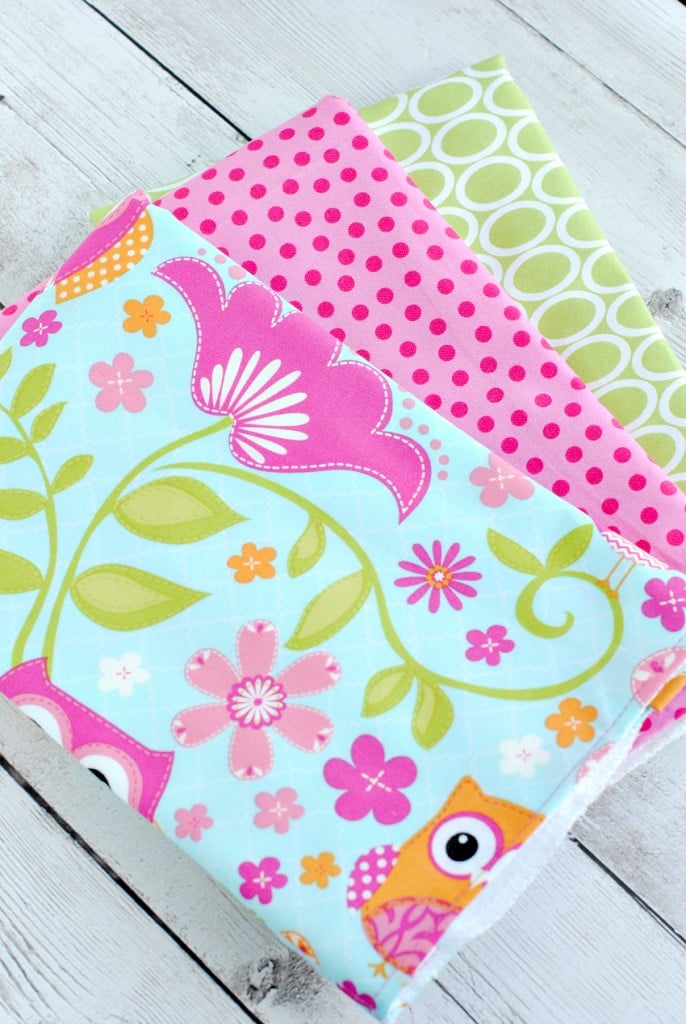
- 1 bath towel (just about any towel will do. I usually get them at Target or you can search online for your color of choice.)
- 1/2 hand towel (coordinating with the towel)
- 1 heavy duty sewing machine needle optional, but it can really help. My machine will sew through this just fine, but be warned, your machine might struggle sewing through several layers of towel. If you break a needle you might want to try getting a heavy duty needle.
Instructions
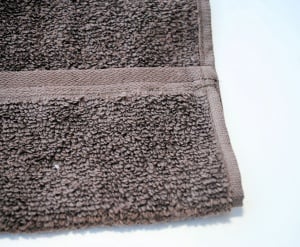
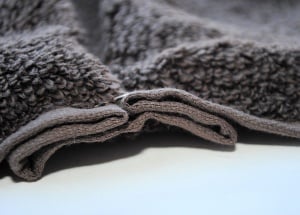
- Start out by cutting your hand towel in half across the short size so that it ends up short and fat. Then, with the finished edge fold it under about 4 inches or so:

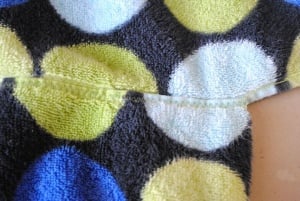
- And sew that in place:

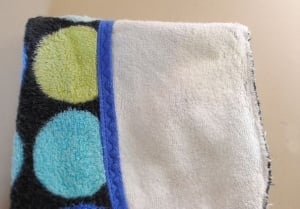
- You can decide which side you want to have on the outside of your hood and which you want inside. If you are doing an animal face you need the underside to be the face. So NOT the part you see above. Flip that over and use the other side. If you are just doing a basic hooded towel, just choose which side you like best. If you are doing an animal towel, you will do the face now. Otherwise, proceed to the next step.
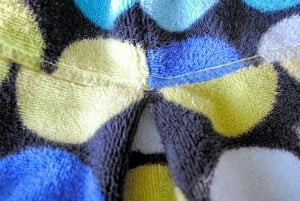
- Now, fold the hand towel in half so that right sides are together (meaning your outside part is inside for now). See the image below. The polka dots are the right side of the fabric so I have to fold them together so that they are touching and are on the inside. You are going to do a zigzag stitch up the raw edge to form the hood: (so in this picture you are sewing on the right side).

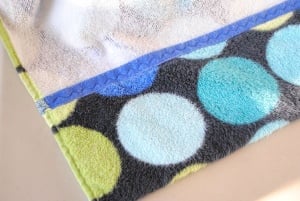
- That’s it. Your hood is done.Now, on the bath towel, on each of the 2 sides fold the edge under about 4 inches and sew it in place: (this has a decorative stitch-you can use that or just a straight stitch).

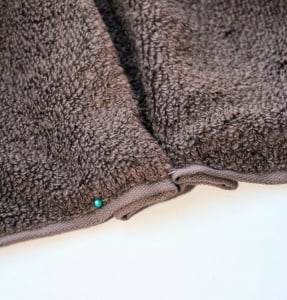
- Now, find the center of your towel on the long side. You are now going to form a little pleat that looks like this. To do that you are just folding about 1 inch in from each side and pinning it in place:

- Zigzag that pleat into place.

- Now you need to attach your hood to your towel. Center the hood so that the seam of the back of the hood matches up with the center of the pleat you just made. Pin the rest of the hood in place along the top of the towel and then zigzag it in place:
- It should look like this when you are done:

And that’s it. You’ve got yourself something the kids will love and it makes such a great gift too! Be sure to check out all of the variations here.

I hope that you’ve been successful making this. And I hope you have fun making many more! They really are a favorite of mine!
You Might Also Like:

Pin It:


Janice Schenck says
Hello! I love the animal hooded towels and would like to make the tiger. I am extremely confused about the hand towel. I noticed in another comment you had replied that the hand towels you were using are 15 1/2 inches wide and then when you cut it, it is 13 inches. Does that mean that your hand town is 15 1/2 inches wide by 26 inches long? The pictures almost make it look like the whole hand towel is used instead of half. I want to get this part right and using the whole hand towel seems too large. Please explain. 🙂
Amber says
Yes, what you said is accurate. It’s just half.
Casey says
How can I change getting your wonderful emails to my new email address (from the email address I will be deleting)?
Amber says
Sorry I just saw this. Did you get it figured out?
Marti says
Have made 3 if these for one of my daughter’s older three, now have two more to make since she’ll be having twins!
She loves them and asked for them for her shower gift.
I also add their name on the side, since I have a sewing machine that will do it.
Thanks for sharing your talent with us by sharing this pattern.
Amber says
Twins! How fun! Glad you like the pattern!
Eva says
This is such a great gift idea, I keep coming back to this tutorial each time there is a kid’s birthday in our circle of friends.
Aimme says
Is there is a trick to getting the material to fit in the sewing machine better???Keep sharing your good work.
Amber says
My presser foot will raise up a little bit manually so I can slide it under. Will yours do that?
Amy says
Thank you for your site. I love your ideas. I’ve made at least a dozen of these towels, the monster being my favorite. The duck makes a sweet baby gift. I find the thinner (cheaper) tiwels work best and my machine handles the bulk really well. made the snowmann BINGO game for my daughters preschool, although modified with just 9 pictures on a page (I used the larger calling cards and 9 fit on the original template perfectly). You have clever and fun projects. Thanks!
Carmen says
Thank you I have been able to make and gift them . All the babies are receiving their own.
Jessica says
I don’t understand the pictures. The step by step is confusing to me. Where is the brown towel coming into play? Is it sewn into the polka dot towel?
Amber says
No, I just happened to take pictures two different times. Just pretend they are the same towel.
Linda Nicoli says
I spotted your Olaf towel on Pinterest and thought it would be perfect for my Frozen obsessed granddaughter who is turning 3. Loved all of your towel ideas and also the fact that you have 4 boys! My four are now 43-37 and have blessed me with 8 grandchildren – including 5 girls! Be sure to teach your boys to sew – their wives will be thrilled!
Amber says
Several of my brothers sew. 🙂
Abrooks says
Super confused about cutting the hand towel in half…which way in half? Long way or short way. You really should specify.
Amber says
As indicated, the short way so that it ends up short and fat.
Kathy says
Hi – I’m confused about which part of the sides to fold under and sew. I just pinned both the long sides under 4 inches and was about to sew them, but thought I should check first. Should I be sewing the top and bottom of my towel, or the long sides?
Amber says
For the towel part-not the hood right? You are just sewing in the short sides on either end of the towel and actually, it’s totally optional.
Kelly says
I have a good friend that made a hooded towel for our first little. We LOVE it! I would like to make some more! I like the look of it not having a pointy hood. In a lot of your other lessons (superhero towel) the towel does not have a point. However, in this basic tutorial that you reference for all the other lessons does. Are you able to give instructions to show how you made it without the point?
Thanks!
Amber says
I usually just cut the point off when I am doing characters, but you can certainly do it on any of them! Just check this tutorial for instructions on that: http://crazylittleprojects.com/2014/04/puppy-dog-hooded-towel-pattern.html
Sherry McCall says
I sew and have for 37 years and I feel like a total idiot the hood part is confusing to me I want to make the dog for my grandson and wondered if you have video tutorials that I can watch I learn much better watching then reading. BTW your work is so beautiful.
Amanda says
I got confused when you were deciding which side of the hand towel to use depending on whether you were making an animal or not. Could you explain that again? I’m not sure what sides you are referring to. Thanks!!
Amber says
Not sure what you mean. Oh-maybe just that the towel I bought for that picture was not double sided, so I had to be careful to use the right side. Normally you should be fine either way.
AJ says
Made a monster towel for my grandson’s 1st birthday. Hope he likes it!
Amber says
Bet he will love it!
Cathy says
I just made my first towel, it turned out so cute! I’ll be making more, this was so easy! Thanks for a well-written, easy to understand tutorial!
Brandi says
These towels are super cute! I am in the middle of making a lil monster for my four year old and so far I’m doing pretty good. I am especially thankful to have a pretty nice Janome machine that was gifted to me even though I had absolutely no sewing experience! Anyways thank you so much for these great tutorials. Oh and is there a way to make a bigger one for a teenager?
Amber says
I haven’t really figured out how to make a really big one yet expect maybe using a beach towel?
Lynia says
Hi Amber,
Thanks for your gorgeous designs. I have a question about the towels themselves, most towels in the shops seem to have various borders(stripes), where the pile of the toweling varies. Have you come across this? Do you particularly choose towels without these borders? Thanks in advance for your help.
Amber says
I get mine at Target and they don’t have designs on the end. I think you could still use towels with designs though.
christie says
What are the measurements of your hand towel? I made the dragon hooded towel but my hood seems small.
Amber says
Mine are about 15 1/2 inches wide and then when you cut it, it is 13 inches long.
amanda adrian says
I just got back into sewing, again. I just couldn’t find the time of day. I am very excited to give this hooded towel a try, for my nephew for a Christmas gift!!!! Thank You for the ideas tutorials!!!!!
Sarah says
Has anyone made the hood by cutting a full sized towel up into the same size as a hand towel? It was more cost effective to buy full sized towels. I plan on cutting it and serging the edges, but Im not an experienced seamstress and wanted to know if anyone else has done this before?
Sarah says
I have just finished a “Minion” for my six year old – it’s 11:30pm and it is taking a lot of restraint not to wake him up so he can see how clever Mummy is!!!
I used a full hand towel for the hood. The towels I used were the type where the hems are effectively the selvedge rolled over on itself. When it came to attaching the hood to the towel I overlapped the hems on the bath towel and the hand towel & kind of “stitched in the ditch”. This way I was sewing the thinnest parts of my towels together.
That might make it easier for some of the less sturdy domestic machines?
Thanks Amber for the great site – my four year old has demanded a TMNT…. Wish me luck!
Amber says
Oh a TMNT is a great idea too!!!
Lauren says
This might be dumb but how much harder would it be to see by hand? I don’t know anyone with a sewing machine and I can sew by hand pretty good are there any extra steps I may need to take?
Amber says
You could do it but it will be very time consuming!
Pearl says
Love the minion towel– was wondering if you had a pattern to make a poncho towel?
thanks
Pearl
Amber says
I’ve got plans for something like that the first week of June. 🙂
Bobbie says
This was easy and efficient up until pleating the towel. It took me three tries to realize that the pleat was on the outside…. Love the towel though. Thank you!
Renee says
Hi Amber –
I am about to embark on the shark towel tutorial. I am so excited!! Do you wash your towels and eye fabrics before you sew?
Thank you,
Renee
Amber says
Nope, I just start sewing!
erika says
What adjustments would I need to make or is it possible to make one of these for a 1st grader? The pics and comments seem to be about toddler/preschool aged kids and I’m wondering if this could work for a 7 year old or if it would be too small…
Amber says
My older kids still wear them the way I show you how. My 6 year old definitely does and even my 8 year old still tries. If you want you can choose to NOT cut the hand towel in half. Some of my readers do that.
traci203 says
Answer to your question. I made these towels for my grandkids 3mts – 7 years. The instructions provided gave ample room for the hood. The 7 year old had more than enough room too. Also, I used the other half of the towel that was cut in half and made pockets inside the towel part about halfway down so they could use them to hold their towel closed. Note* the pockets were open on the inside facing the back of the towel not on top like a regular pocket. We live on the lake and I can already see I will be making more for the swim dock. Also, if you find a hand towel with an applique, I just made sure to reverse the side of the hood that needed stitching and made sure to fold right sides together with applique on the inside. You will love these towels.
Peggy says
I am new to sewing and super excited I found you!! My question is do you have a printable version? My computer is at work and sewing machine at home. I can get it on my phone but would rather use for reference and have a printable one to go to. I’m excited to try the hooded towel, my daughter is going to love it!!
Amber says
I haven’t done it as a printable-sorry! I can see how that would be a good idea…
Cindy says
I didn’t see an actual pattern for the crown–could you tell me the length and height of it or do you have the actual pattern to download? Measurements of parts of these hooded towels are the only thing I have a hard time figuring out from your photos. But you do a FANTASTIC job. I’ve made 3 so far and my niece wants the Princess towel for Christmas. Thank you for your time and effort in doing this for all of us uncreative people.
Amber says
The pattern is on the princess towel post under supplies needed: crazylittleprojects.com/2013/11/princess-hooded-towel-tutorial.html
Zoe says
I love your tutorials. They’re very helpful. I was wondering what sewing machine you use? I’m looking into purchasing a good modern sewing machine. I have a very old singer. .Thanks
Amber says
I recommend Janome. I actually have a whole post on this here: http://crazylittleprojects.com/2013/02/sewing-machine-recommendations.html
Kristina M. Hahn says
I am a little confused. When you say cut the towel in half cut the short dide? So that would make the piece long and skinny? Also, when you sew the hood onto the towel do you center it on the long side or the short side? Thanks. Wish there was a video.
Amber says
So it should be short and fat when you cut it in half and then sew that raw edge to the towel.
Kelly says
I wish I could zoom out on the pictures. The close ups are confusing me. I like to see the big picture since I’m not very good at sewing crafts and its easier for me to follow along with pictures.
I’m really confused on the pleate.
LEILA says
I was wondering where you buy your towels for your hooded towel projects?
Amber says
I get my towels at Target
Ariadne Monfalcone says
I did this project many years ago (yikes, 14 I think!) with a friend for our toddlers. It’s incredibly easy when you get the hang of it. That 14 year old towel is still used by my 18 year old daughter, LOL! Great to see this in print. They make great gifts and so personal. We bought our towels at Costco–GREAT quality at reasonable prices. i was reminded of that recently when I had to buy towels for my kids going to college. You can’t beat the quality for the price, anywhere–and they would still be great for this project. Thanks for posting, you’ve reminded of this and I’m going to pull out my machine and make a few more!
katie k says
Hi, Amber
I am not a great seamstress at all but love crafts and hope I can make the lion. The only part I don’t’ quite get is the cutting of the hand towel (do I cut a short cut (cut in half so almost squares) or do I cut a long cut the long way and make two long rectangles for the hood? I couldn’t interpret the horizontal because I could see both ways being called horizontal, depending. Thanks for the help. I hope mine turns out as cute as yours!
Amber says
Cut it so that you get the sort and fat version, not the long and skinny.
katie says
Thanks so much for clarifying! I am going to get started this weekend.
Lisa says
Just started trying out my sewing machine I got a year ago! I have never sewed anything before but really want to start! I made two of the hooded towels, super cute and my kids love them. I do think that if I make them again I will use the entire hand towel instead of half, they are 6 and 4 so they are bigger kids. Am loving your sewing classes and looking forward to doing lesson 3. Thanks so much for this, I am loving this little new hobby!
Amber says
Love hearing this!
Lynette says
I started this months ago (the day before my son’s birthday and then deciding I had more important things to finish for his birthday—like the cake! 🙂 , making the lion one, and this morning I decided to just do a basic one so I know the process and can get it out of my ‘finish,’ pile! So easy, and so fast. For sure next time I’ll be making an animal one!
alice says
I have a sewing machine for two years and have only done basic alterations ie hems but can’t wait to try this
thank you for posting it .
Amber says
Good luck! You can do it!
Melissa says
Question about the hood…do I only use one half of the hand towel after cutting it in half? It doesn’t seem very big after cutting it.
Amber says
Yes, you use half. Some of my readers haven’t liked the sizing and end up using the whole thing instead.
Carolyn says
Thank you for this tutorial! I made Monster Bibs yesterday and this will be the perfect addition to my Monster themed gift for a friend. I am adding Monster Children Books to the package and I know it will be well loved by the new Mommy and Daddy who have been joiking that they are looking forward to their newest little monster.
By the way a walking foot makes sewing over the multiple layers a breeze.
Amber says
Oh that’s a fantastic baby gift set!
Donna Beach says
I don’t understand how you are to attach the hood . I have trouble with patterns I ha e better luck with pi ture showing how to do all the presedure.
Amber says
You just center the hood on the towel with the hood on the outside of the towel and zig zag. Not with right sides together or anything, just one on top of the other. Does that make sense?
Cindy says
First I want to say, this is my very favorite website! I’ve made 3 hooded towels and they are so cute. For those having issues with thickness, I found it easier to decrease the pressure adjustment lever. You may want to give that a try.
I do have a question, when you sew the hood to the towel, are you putting right sides together and making a seam or are you laying the hood slightly over the towel and just zig-zaging it on (wrong side of hood to right side of towel). I actually put right sides together to form a seam but your pictures look like you may do that differently.
Thanks so much for all your posts! Just love them!
Amber says
I layer one on top of the other. Does that make sense?
Cindy says
Makes sense. I will try it that way. Thank you!
Hailee says
Hi, I am so excited to make the monster towel! I just read through the instructions for the basic towel and im just wondering if i need to sew the pleat? Im worried my machine won ‘t sew through all that but also just wondering if it’s necessary to do the pleat? Thankyou!
Amber says
Nope, you don’t have to. It will still work just fine without it.
Mary Jane says
Wow, sorry that was so long…I’m an extremely fast typist and didn’t realize it was that much!
Mary Jane says
I was so anxious to do this–wanted to do a hooded towel for my 18 month old granddaughter. I changed the needle to heavy duty and commence to sewing. Try as I might, gently pushing and pulling, the thick towel would not budge…just kept sewing over and over in the same place until finally my electronic (Brother cS6000i) sewing machine made some scary, awful sounds and totally froze up on me. The error message said tangled thread, but that was not the case…it took a lot of investigation but we finally saw underneath the needle plate the BENT needle. With the needle being bent and not in the correct pathway, and because it was frozen (including the handwheel–would not budge even manually) we could not bring the needle up. Tried to take the needle out and that wouldn’t work since it was wedged tightly and stuck from underneath. Finally, my husband had to cut that sucker out! This took about an hour and 1/2! After that I tried to insert the needle I’d previously taken out and crazily, it wouldn’t go back up all the way (wouldn’t hit the needle stop) and that made no sense (the entire needle HAD come out so that wasn’t the problem). After I tried all I could to make it go in, my husband turned the machine upside down, just so he could get a more detailed look–he then inserted the needle and it went in all the way. (Obviously, I’m not going to be very happy if this is how I have to insert needles from here on out, turning it upside down?! Crazy! Not sure why it went in like that and not the “normal” way). I’m thinking it must have knocked the area around the needle out of alignment or something (despite us being as gentle as possible). My machine seems to be working okay for now, and hope it will continue to do so. I do love this sweet little machine, especially the fact I don’t even have to use a pedal. Obviously, this particular machine will NOT let me do a hooded towel (it has let me sew a rag quilt with no problem), which is too bad. I won’t be trying a towel on thre again…I just hope my machine will keep working and no damage was done (since this machine is fairly new and not used much at all)! I do have another old Singer, which seems to be a real good workhorse, so maybe I could try it with that, but not sure I will. Anyway, not sure why I’m telling you all this…I’m disappointed I wasn’t able to make the towel, not your fault of course…but I’m sticking with your lessons (thank you so much!) and hope I’ll have better luck in the future. I really do want to learn how to sew, it just seems like more times than not the fates are against me in this. I’m wondering if anyone with this machine actually were able to make a hooded towel. I wonder if it would have worked properly had I inserted the walking foot?! Anyway, thank you for all the lessons you are providing us…I’m trying not to give up!
Amber says
Oh wow. I am SO sorry! I have had other readers say they’ve had a hard time getting their fabric through too. I think some machines just handle it better than others. Sorry that happened to yours!
Tosha says
Hi, Mary Jane, I have the same sewing machine and I was able to make one, I am hoping to make 12 more! I was using a regular needle but when it came time to attach the hood to the towel, I also had trouble with the clunking noise and the jamming, I found that if I went very slow and sewed the least thick path, even if that meant giving up some towel space, I was able to get it done. I am hoping a heavy duty needle will work through it easier, but now I am afraid to try because of your experience! Good luck in the future!
Sharon says
Hi, Somehow I just ran into your blog/tutorials through some posts/links on facebook (need to figure that out). I have been making hooded towels using a bath towel and half a hand towel for 20 years. I never made them with the cute faces, ears, etc. I also didn’t turn under the edge of the hand towel (the front part of the hood) and I didn’t pleat the center of the bath towel when attaching the hood. Not having a pleat might help some who are having trouble with the thickness. To make them decorative, I often sewed a decorative ribbon along the front edge of the hood (baby, boy, girl, sport theme ribbons) or sewed on appliques on one side or top of the good or a side of the towel. Just my experience with the same project, just a different way. Hope it helps someone. They are really great for kids, grandkids, and to give as gifts. I’ve even had adults have me make them one using a beach towel and using more than half of the hand towel – works great!.
Linda says
Just finished my towel and I even put ears on it. Very proud of myself. Thanks so much for this series. I am learning so much. My burp cloths didn’t turn out to great (but i got the lesson and learned a few things) but my towel is rocking it. Lol My grandson is going to be so excited next time he visits.
Amber says
Nice work!
Sherry says
Hooded towel complete, looked super cute on my 4 year old!!
Victoria C. says
Update: I did take my Morse Apollo 6400 back to the shop where I had it serviced and he gave me a manual to a Montgomery Ward machine which is similar to mine in features! 🙂 Thank you for that advice. Also for older machines like mine (1950-65) the straight/zig zag stitch are the same you just adjust the width wider and it becomes a zig zag. Mine stays a straight stitch on the 0 setting. I love this series!
Amber says
Oh that’s good news! And good info!
Nicci says
What is the reason for folding in and sewing the sides of the bath towel? Can I skip that step?
Amber says
Sure you can skip it. I just think it gives it a nice finished look but it’s not necessary. 🙂
Tanya says
Do you cut the hand towel in half the “hamburger” way or the “hotdog” way?
Amber says
Hamburger. 🙂 I had posted that on another tutorial and someone was like “what in the world is the hamburger way?!” so I am glad you know that terminology.
Lynette says
Thanks for the clarification! I was wondering hotdog or hamburger too! 🙂
Beth says
Thanks for the clarification on that! I have had this tutorial up for the past week but was afraid to cut the towel because I wasent sure which way. Lesson learned, read the comments.
this is so cute!!!!
Allsion Spencer says
The thickness made it a struggle to start and backstitch without it looking messy. I tried pushing it gently from the front, and pulling from the back and stitching super low, but all of my start/ends look like choppy wiggly satin stitching. Is there something I can do different to make it prettier? Also, sewing the ends of the towel in, four inches, was a little tricky because my presser foot wanted to slide off the “hump” of the thick fabric down to the single layer. My stitching is anything but straight! But I love the lesson and the experience!! I’m anxious to try one face. I want a dragon for my granddaughter! 🙂
Amber says
Good point. I usually don’t start my stitching completely at the end if it is really, really thick there, I start in about a centimeter. I think keeping the presser foot where you want it just takes practice. You’ll get it!
norma stone says
have you tried a walking foot that we use for quilts and thick items. Just a suggestion.
Amber says
Good idea!
Megan says
could you add the words “hand” and “bath” in wherever it says “towel”? maybe when I have my towels in hand I will understand it better, but for now it is confusing. For example – this part “Now, fold the towel in half so that whichever part you want to have for the outside is on the INSIDE for now.” – is that the bath or the hand? I think its the different towels used in the pics that are confusing me. Thanks! My daughter and I are very excited to try move onto this lesson!
Amber says
I just went through and tried to clarify a little. Thanks for the advice!
Megan says
thanks so much!
Andra says
Dumb question alert!!!!! The step for the bath towel that says “on each side fold the edge under about 4 inches and sew it in place”, is that all four sides, or just the long sides, or just the short sides? Thanks!
Amber says
Oh sorry-I can see how that would be confusing! Just the very ends. Not the top and the bottom, the sides.
Emily says
Is there a trick to getting the material to fit in the sewing machine better ? My towel was kinda thick and it was tough to pull it through
Amber says
No tricks I don’t think. Just do what you did.
Christy S. Lube says
I think on most machines there is a way to lessen the tension of the presser foot, which might help with thicker fabrics like that.
Dulsy says
OH just loosen up on the pressure foot and lengthen your zigzag stitch that should make it easer for you .
Sharon L says
Thank you! We are expecting two grand babies this spring, and this will make great gifts!
Christy S. Lube says
What do we do if our machine ONLY does a straight stitch? I have no zigzag option 🙁
Amber says
Really? I didn’t know there were machines like that. But you don’t ever HAVE to use a zig zag, it’s just a more sturdy stitch. So, when it asks for a zigzag just use your straight stitch.
Christy S. Lube says
This is the machine I inherited from my husband’s grandmother, I’m sure all the ones that are newer than 80 have a zigzag… LOL.
Thanks! 😀
Anne Marie says
You can buy a zig-zagger for older machines. I have one.
Megan says
isn’t this up early? I thought it was next week’s lesson?
Amber says
This is next week’s project. I needed to have the post up before then so that when the time comes you can all do it. 🙂
traci203 says
I loved making these towels for my grandkids. I however, used the other half of the hand towel by cuttingnitnin half then making pockets on the inside so they could use them to hold the towel closed and wrapped around them. Note* the pocket is open on the inside. Not the top of the pocket. Works terrific.
Amber says
GREAT idea!