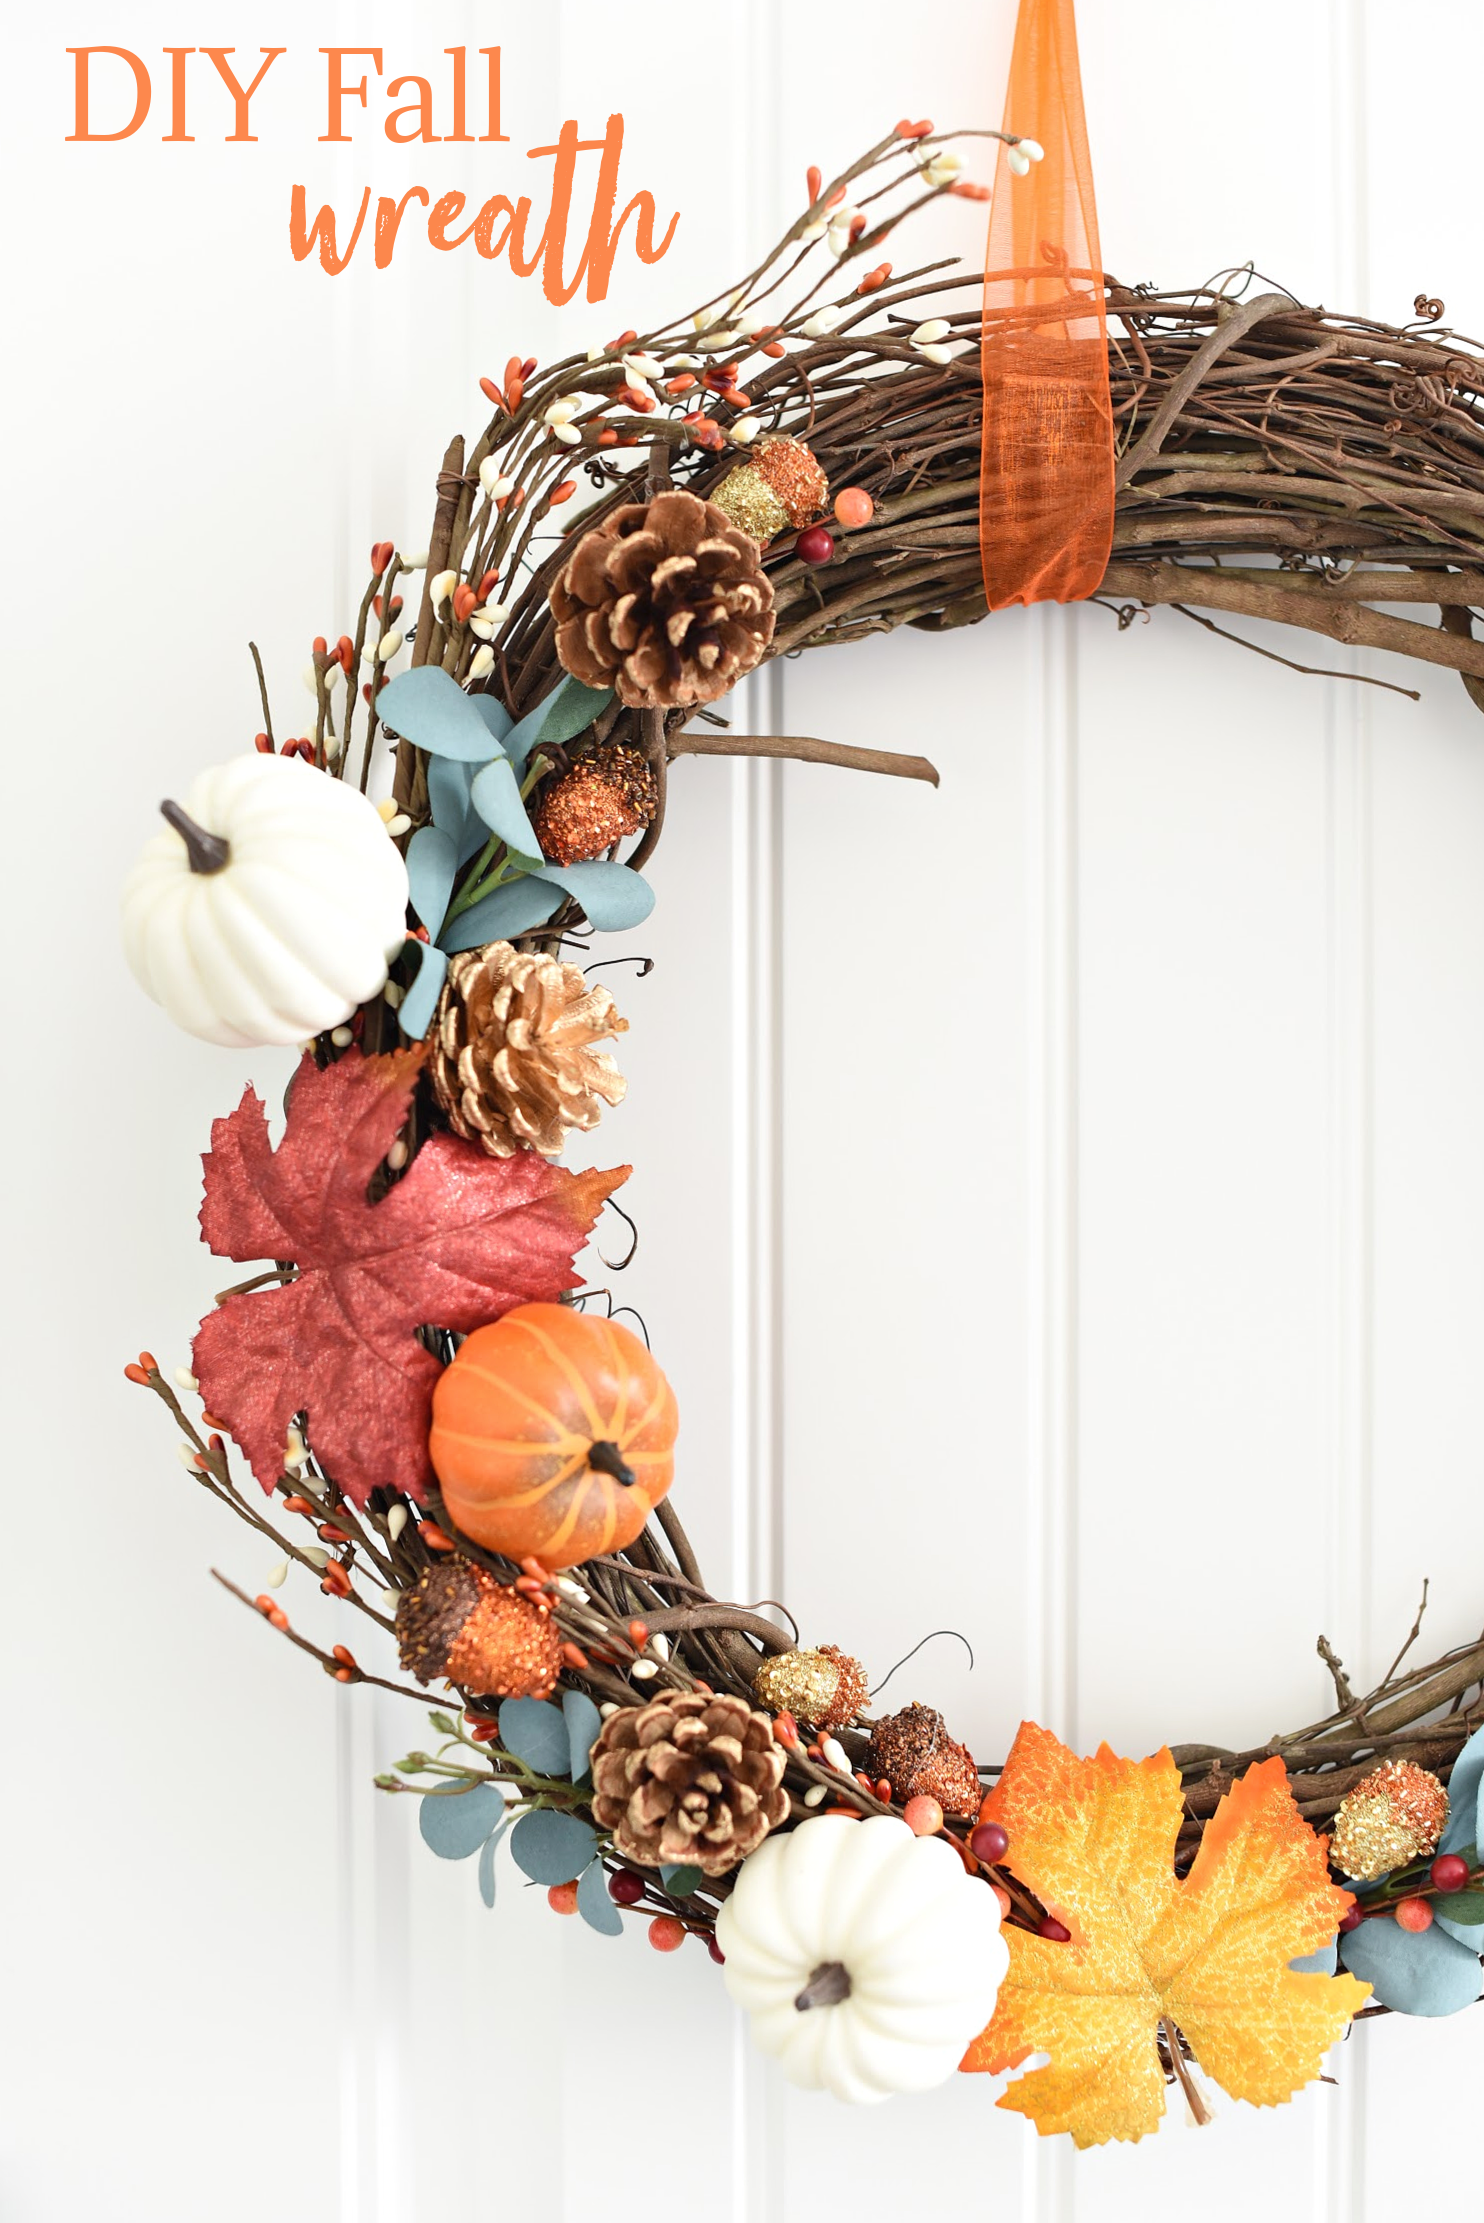
What’s the Project? This DIY Fall wreath is easy to make and turns out beautifully. You can tweak and adjust to make it your own and to welcome in the beautiful Autumn weather as it hangs on your front door.
September has arrived which means that taste of Fall is starting around here.
Actually, that’s not totally true. It’s supposed to be in the 90s here for the next few weeks. But the nights are getting colder which makes it feel like Autumn is knocking at the door.
And speaking of doors, here is a fun DIY Fall wreath that you can hang on your door.
 I’m not usually that big of a wreath person, though I did make a fun Christmas wreath recently that I really love and I’ve got plans to do a Halloween wreath this year too.
So when I do make a wreath, I like it to be subtle and not something too bold for my front door. I think this one fits the mark.
And it was simple to make. It took me under twenty minutes or so to make and I love how it turned out. Even my boys really liked it (and one of them helped me put it together).
So if you’re ready to embrace Fall (this would also be a perfect Thanksgiving wreath), make this DIY Fall wreath today!
How to Make a Fall Wreath:
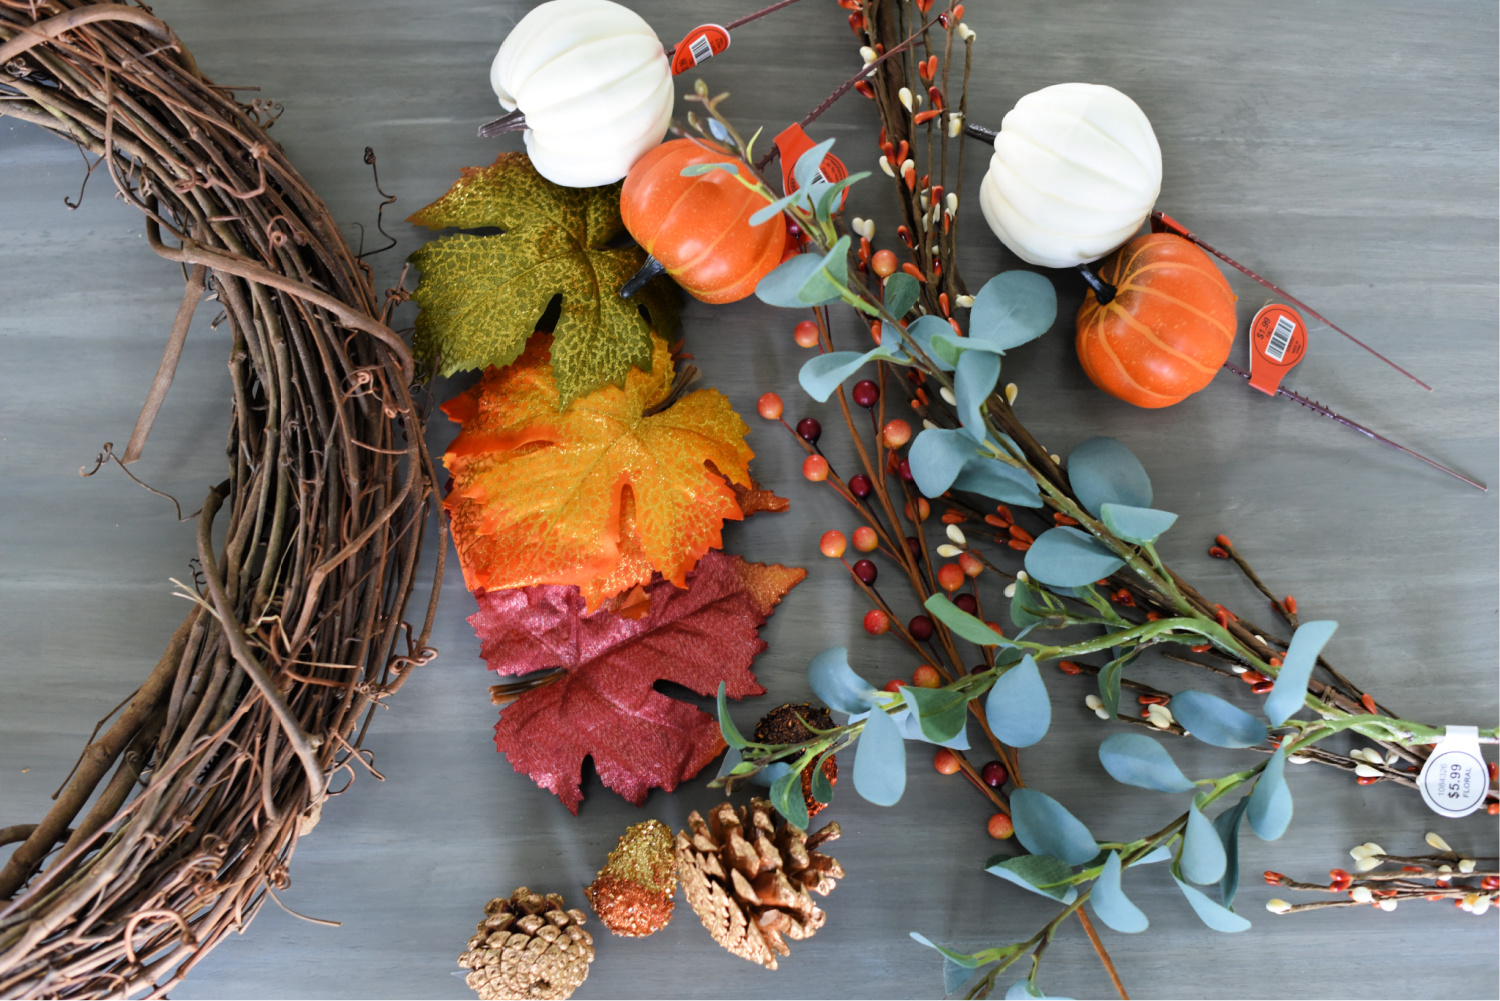
You’re going to need to gather some supplies to make your wreath. I went to Hobby Lobby and wandered around and grabbed stuff I thought I might like, then pieced it all together. So yours is going to look a little different than mine, which is nice because you can make it what you love!
Here’s a peek at what I chose (and why):
- Grapevine Wreath Form (affiliate link) I couldn’t find that at Hobby Lobby but did find one at Michael’s. You can also order one online. Make sure it’s at least 18 inches.
- Fake Fall leaves (mine had glitter on them-bonus!)
- Greenery (I wanted a tiny bit of green in my wreath)
- Fake pumpkins (I wanted both white and orange. These came on little floral sticks.)
- Pine cones (mine are spray painted gold-they came that way)
- Acorns-these came in a pack with the pine cones and are covered in glitter and I love them!
- Sprigs of color-I actually found a long cluster of orange and white bead/bud type things that worked out great. I also bought some smaller pieces to
- Hot glue gun and glue
- Ribbon to hang it
All of these things can be found in the seasonal and floral departments at any craft store. Pick and choose what you love.
Assembling your DIY Fall Wreath:
Before I start attaching anything, lay it all on your wreath to get an idea of where I want things to go. That way you can tweak and adjust without anything being permanent.
Try to get a good mix of colors and textures throughout.
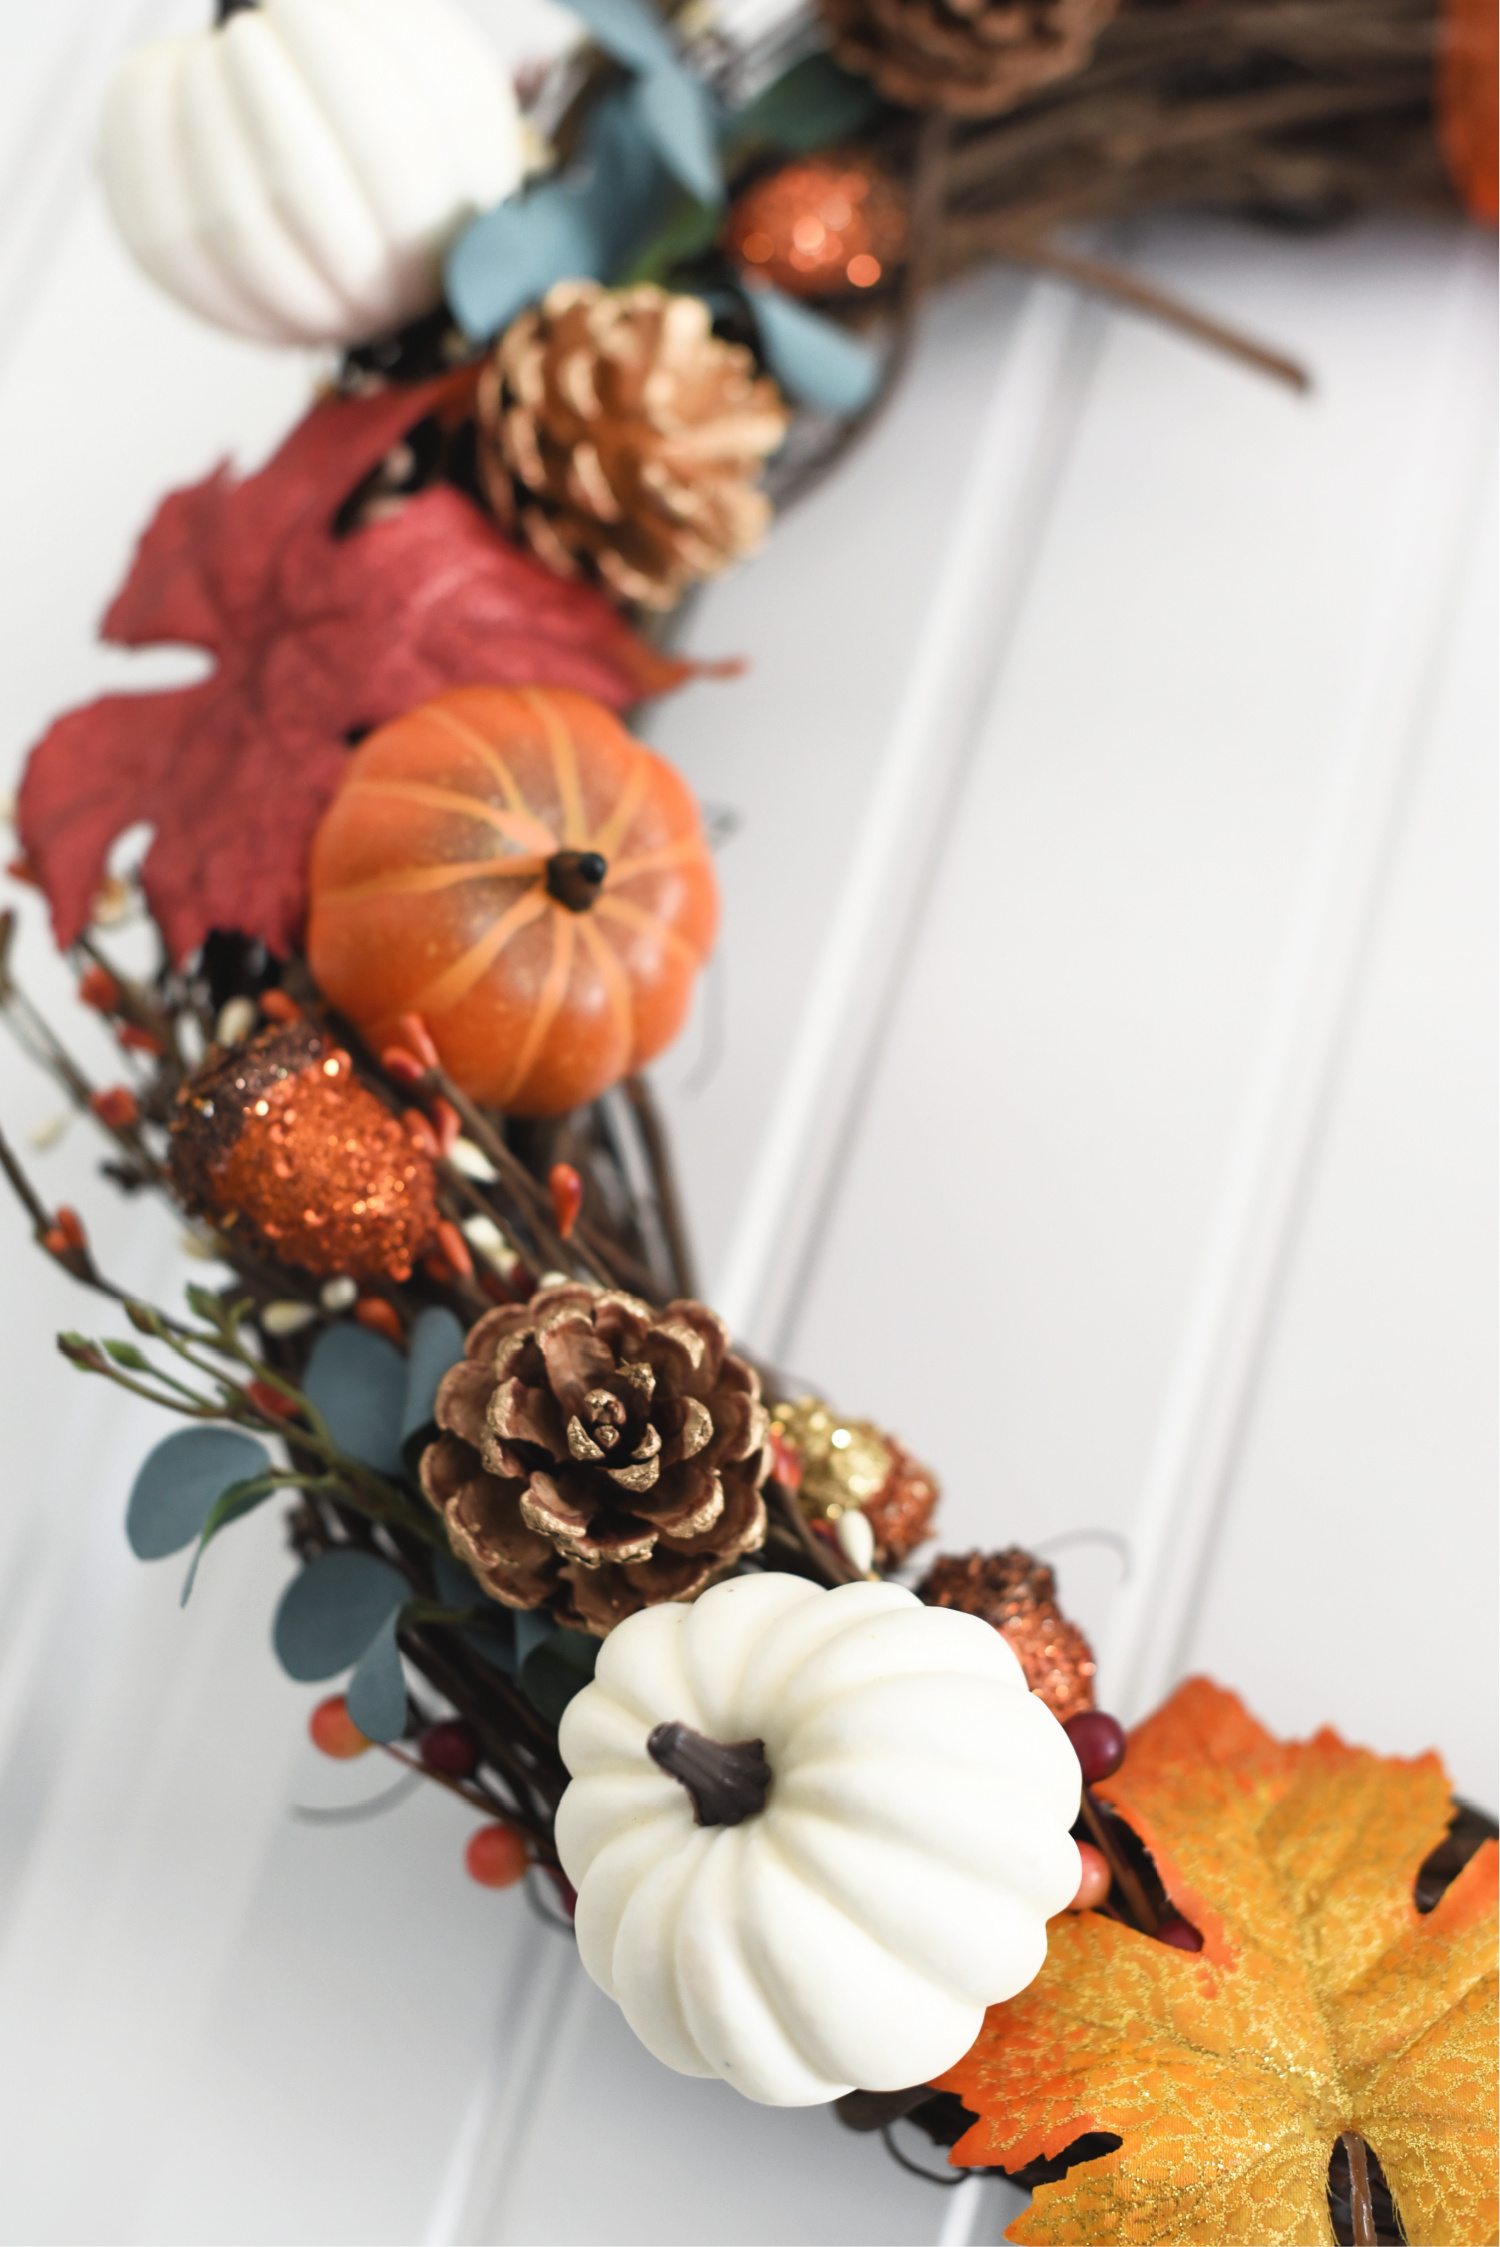
Once you’ve figured out how you want things, carefully pull them off, keeping track of where things were, and hot glue them in place.
Add a ribbon to the top and you’re all set with your easy DIY Fall wreath!
You Might Also Like:

How to Make a Christmas Wreath:

Pin It:


Leave a Reply