What’s the Project? If you’re new to sewing, understanding all of those sewing terms can be tricky! This beginner’s sewing dictionary will help define some of those words to get you going.
If you’re just getting started sewing, it can be really intimidating in so many ways! Maybe you’ve prepped yourself with all the things you think you need to begin sewing, but when you sit down to tackle that first project, the instructions are confusing and there are sewing terms thrown in there that you don’t understand!
Words like bias and backstitch and applique-what do these all mean? You can’t sew this project unless you understand them, right? This beginner’s sewing dictionary is designed to walk you through some of those beginning sewing terms that might trip you up so that you can get to the fun part-creating something fantastic!
I’ll break down a lot of sewing terms for you here. If you’re brand new to sewing, be sure to check out the beginner’s sewing guide as well as the Learn to Sew lessons. There’s tons of sewing information packed in there.
Beginning Sewing Terms Defined:
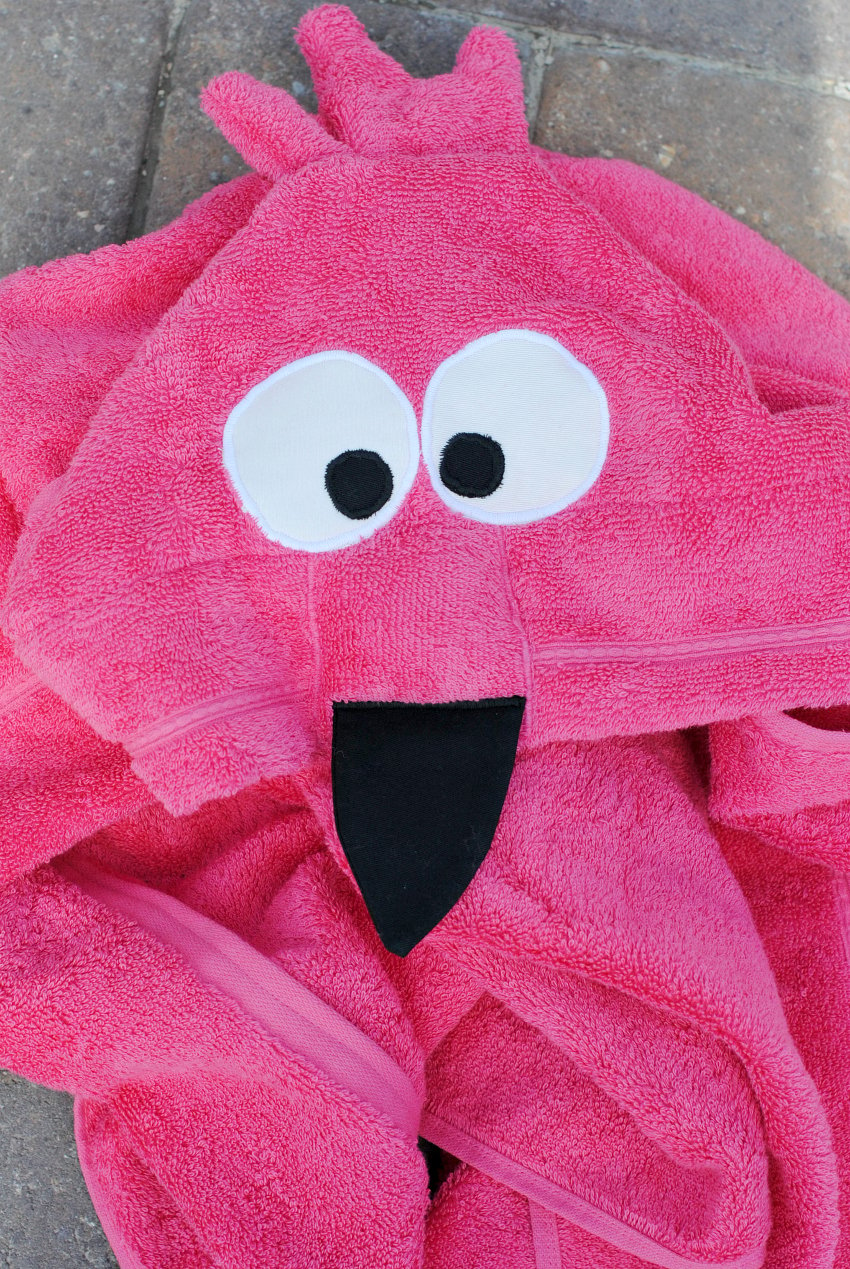
Applique: To applique is to sew one piece of fabric on top of another, done with a satin stitch (a very tight zig-zag). The eyes in the picture below are appliqued in place. To do this you will set your machine settings to very close together stitches on the zigzag setting.
Back-stitch: To back stitch you will simply hold down the reverse lever or button on your machine and the machine will sew backward. You will do this when you need to knot your fabric. (See Knot below.)

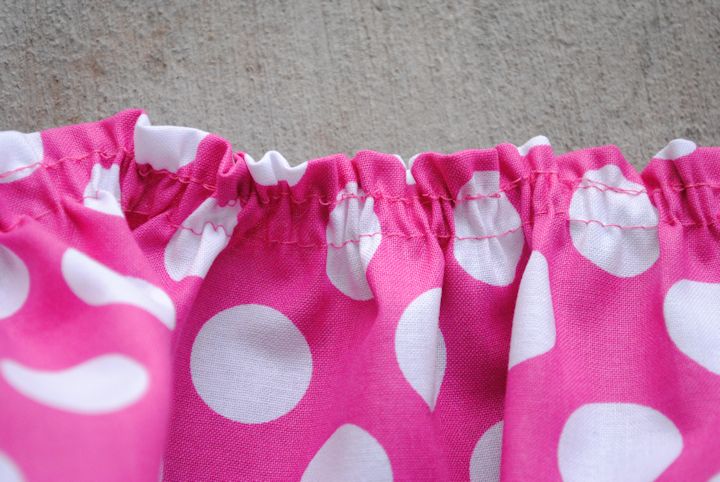
Baste: A baste is a long and loose stitch-the longest possible that your machine will do. To baste you will need to set your stitch length to its longest setting (how to do that here). When you baste you won’t knot the thread at the beginning of the end. A baste is usually used just to hold the fabric in place prior to sewing or is used to gather fabric. See how the stitches in this picture are long and farther apart than a typical straight stitch and it is not knotted at the beginning?

Bias: The bias of the fabric is the 45% angle from the grain of the fabric (see grain below). So basically, if you turn or cut your fabric 45% (or diagonally) from the straight up and down direction that the fabric would typically go, you are cutting on the bias. This is sometimes called for in a clothing pattern because it changes how the fabric hangs (like in a skirt or dress).
Bias Tape: Some patterns you use will call for bias tape. You can buy this at the fabric store (you can also make your own, but I always buy mine). It will come in a package (see the first picture) and is typically used to edge things. It is cut on the bias which means that it bends easily around corners, making it perfect for finishing an edge on some items.


Bobbin: The bobbin is the thread that comes up from the bottom and meets the thread from your spool to form the stitch. You will have to wind your bobbin and then insert it in your machine properly (learn how here). Wound bobbins look like this:
Buttonhole: A buttonhole is a hole sewn to pull a button through. Many machines will sew one automatically for you. If you are doing it yourself it is done by sewing 2 parallel satin stitches the length of your button that are connected at the top and bottom and then sliced open in the middle to create a hole.
Fat Quarter: A fat quarter is a particular cut of fabric. Imagine a yard of fabric laying in front of you. Then imagine that you cut it straight down the middle going lengthwise and straight down the middle going horizontally. (So basically like cutting a cross or a plus sign into it.) You will now have 4 pieces of fabric, each of which is a fat quarter. This is different than a quarter yard of fabric which would be cut just lengthwise.
Foot Pedal: This is the part of your sewing machine that you press with your foot to make the needle sew. It goes on the floor where you can comfortably reach it with your foot:

Fusing: You can buy fusing at your fabric store (also called Heat ‘n’ Bond). It will adhere one piece of fabric to another. To use it you will iron it onto your fabric then peel off a paper backing and iron it onto whatever you are wanting to adhere it to.
Gather: When you want to create ruffles you will need to gather your fabric. To gather you will do a basting stitch on your fabric and then, holding the threads that are at the end of you baste, gently pull the top thread while keeping the bottom thread steady. This will pull your fabric so that it starts to create a gather. Once you have it gathered as much as you want it to be, you sew it in place to make the gather permanent:
Grain: Look very closely at your fabric and you will see threads that go up and down and sideways, perpendicular to each other. This is the grain of the fabric.
Hem: A pattern will often tell you to hem the bottom of an article of clothing or another item. To hem you will first fold the fabric over about 1/2″ and press it in place. Then fold it over 1/2″ again (so now no raw edges are visible) and press it again and then stitch it in place. This image shows a finished hem on a pajama pant leg:

Interfacing: Interfacing can be bought at your fabric store just like fabric but in a special section. It is used to stabilize fabric or make a project a little more sturdy and is sewn on the inside of the fabric. In some patterns, you will be asked to use interfacing. There are many different weights of interfacing, so refer to your pattern to determine what you need. If it says fusible interfacing it will need to be the type that can be ironed onto the fabric to adhere it in place.
Knot: To knot your fabric while sewing you will sew forward about 1 inch, reverse (or backstitch) back over those stitches and then sew forward again. It should look something like this when you are done: (though you will typically keep sewing beyond the knot instead of quitting after it like I did in this picture)

Lining: Lining is a layer of fabric that goes underneath whatever you are sewing. Think of it like this, if you lined a skirt, the skirt would have the outer fabric that is seen by all and then an under fabric that would give the skirt a little more substance and make it less see through. Some patterns will call for lining. Typically the fabric you use for lining will be a neutral solid color that blends well with your main fabric.
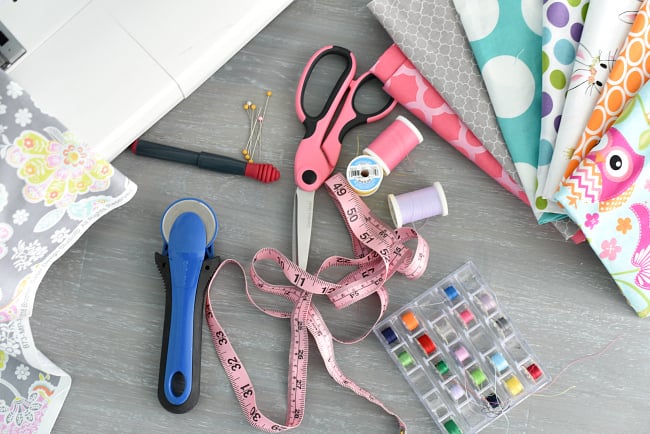
Notions: Notions are the accessories you will need to sew a project such as a zipper or buttons, thread, possibly bias tape, etc. It could also include the tools like the seam ripper or pins. Need help deciding what to get? Here’s a rundown of beginning sewing supplies for you.
Pin: You will use pins a lot while sewing. Pinning helps hold the fabric in place before you sew it. When you pin you will want to place the pins so that you can sew through them without hitting the pinhead or so that you can easily slide them out of the way as you sew towards them. In the first example, I could easily sew along that raw edge without removing the pins because the pinheads are well out of the way. In the second example, you would sew towards the pins and then slide them out before you sewed over them, just before you got to them. Either way is acceptable:


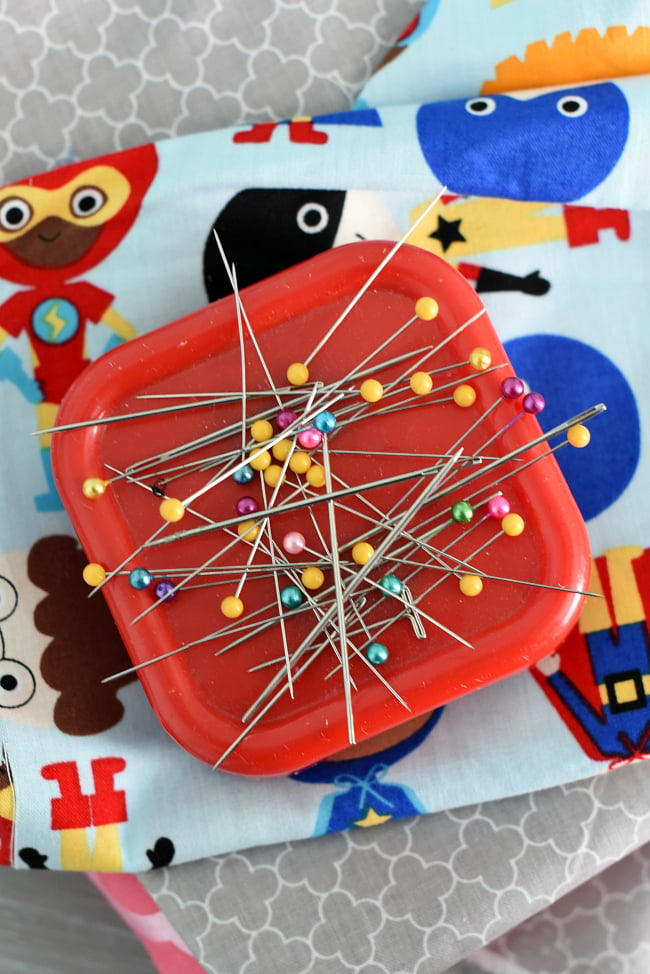
Pin Cushion: A pin cushion holds you pins for easy accessibility. It’s not always a “cushion.” Mine is magnetic:
Press: Iron your project to make it lay flat.
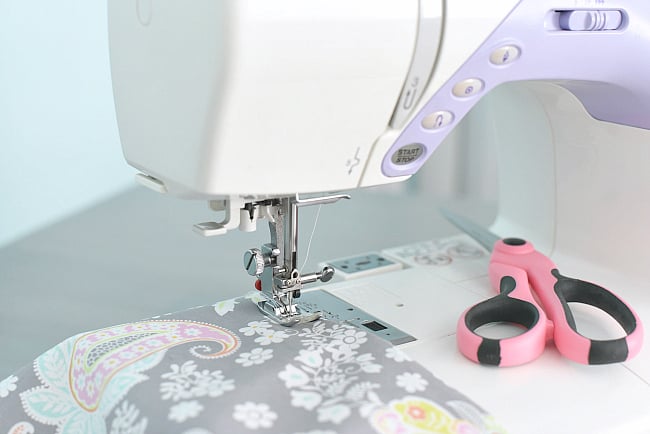
Presser Foot: The presser foot is the little metal piece near your needle. You will lower it to press down the fabric (there’s a lever just above it and to the right) while you are sewing and then lift it again when you are finished. It’s function is to keep your fabric in place while you sew. There are also other feet that you can use while sewing including a zipper foot or button hole foot, but the main foot is your presser foot.

Raw Edge: The raw edge of the fabric is the edge that is cut (as opposed to selvage-see below).

Right Side (of the fabric): The right side of the fabric is the side with the pattern or pictures or design on it. On some fabrics, it won’t really matter one way or another, but on some fabric, there is a definite right side:

Right Sides Together (RST): This means that you put your 2 pieces of fabric together so that the right sides of the fabric are touching each other on the inside and the wrong sides of the fabric are showing on the outside.
Satin Stitch: A satin stitch is a very tight, close together zig-zag stitch, like this:

Seam Allowance: A seam allowance is the amount of fabric that is between stitch you are sewing and the very edge of your fabric. For example, if you are instructed to sew with a 1/2″ seam allowance, you would have 1/2″ between the stitch you are sewing and the edge of your fabric.

Seam Guides: The seam guides are built into your machine and will help you sew the correct seam allowance. They are marked with various seam allowances and are found right down near your needle and presser foot, in the area you will be sewing. If you are told to sew a 1/2″ seam allowance, find the 1/2″ seam guide on your machine and guide your fabric as you sew so that the edge of your fabric stays steady with the 1/2″ seam guide. This will create a 1/2″ seam allowance. In the image below the seam allowance would be the amount of space between where the needle is sewing and the edge of the fabric that you see to the right of the needle. In this case that would be a 1/2″ seam allowance. Notice the etching in the metal below and also to the right in the plastic. Those are the seam guides:

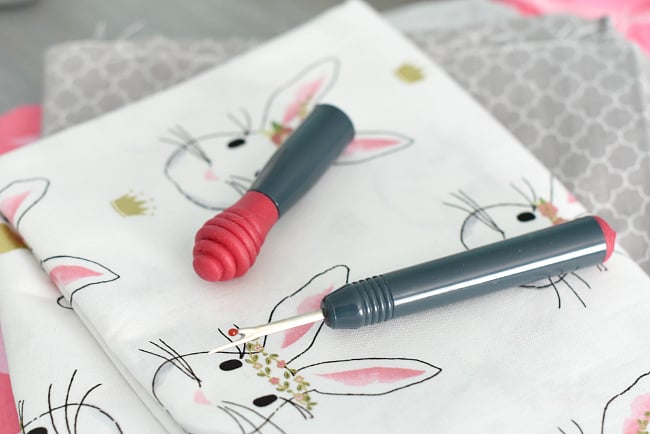
Seam Ripper: A sharp pointed tool that you use to rip out a seam when you make a mistake. Take the sharp point and poke it underneath a stitch to break the thread. Continue to do this on any seam that you need to take out.
Selvage: The selvage of the fabric is the finished edge of the fabric that is on it when you buy it as shown in this picture along the bottom edge of the fabric. It won’t always be printed like this one is (this one has the brand of the fabric and also shows coordinating colors to use with the fabric) but sometimes will be the same pattern as the fabric:
Sewing Machine Needles: These are special needles that are inserted into your machine to do your sewing. There are a few varieties, but Universal is the standard (you can also buy needles that are heavy duty, twin needles, etc.) You will want to have extra sewing machine needles on hand so that if you break a needle while sewing (which will happen sometimes) you can replace the needle without a trip to the store.

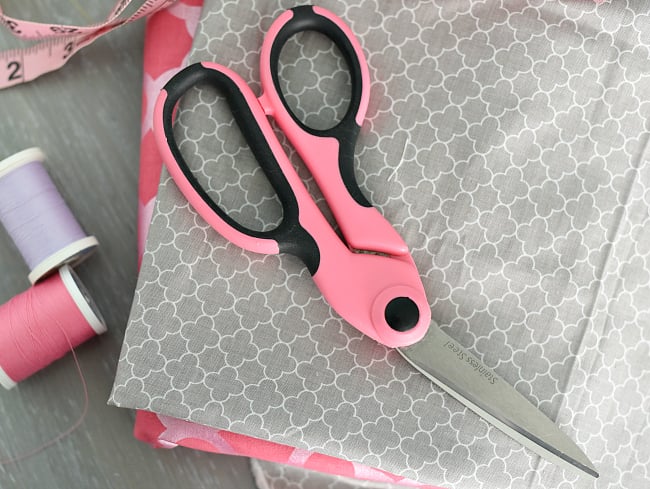
Sewing scissors: When you are cutting fabric you want very sharp scissors. You need a pair of scissors that are used for only cutting fabric because cutting paper or other things will dull the blades.
Straight Stitch: A straight stitch is a simple, straight line.

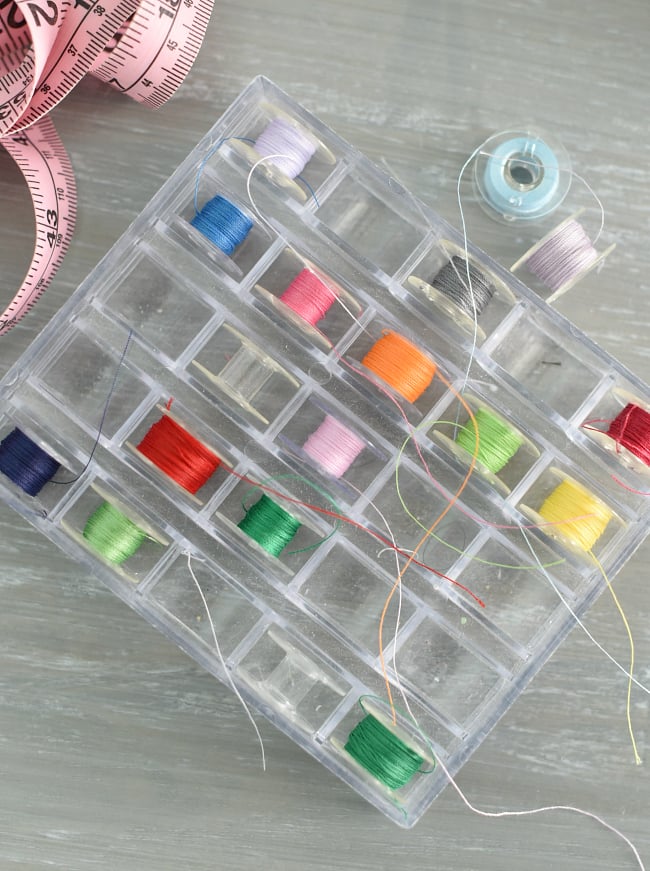
Spool of Thread: The thread that you use to create the top part of the stitch (coupled with the bobbin). You will need to thread it onto your machine (learn how here) and you will want to buy a variety of colors. You will typically want your thread to match the fabric you are sewing on as closely as possible.
Top Stitch: To top stitch is to do a finishing stitch on top of an already sewn seam. For example, on a bag strap you might sew the strap together, turn it right side out and then do a top stitch to give it a nice finished look:

Turn: Often in a pattern, you will sew with right sides together and then be asked to turn your project. This simply means to pull the fabric through an opening so that the right sides of the fabric now face out.
Webbing: A braided strip of fabric, like a belt, that you might use for straps on a bag or backpack. It can usually be purchased by the yard at the fabric store:

Wrong side (of the fabric): This is the underside of the fabric. On some fabric, it won’t matter, but on many fabrics, there will be a clear difference between the right side and the wrong side:

Zigzag: A zig-zag stitch is just that-a stitch that zig-zags. It’s often used to sew along raw edges to prevent them from fraying. It is also used in a satin stitch and applique:
Zipper: You can buy zippers at the store in packages. They come in a variety of lengths and colors so know what you need before you go:

Hopefully having these sewing terms defined helped! Now go sew something fun!
You Might Also Like:
Pin It:


thalia says
so,so helpful. Thank you for writing!
Sara says
Helpful. Thanks
Sarah says
Thanks for the information, would definitely start up with something
Grace says
Hi! My machine keeps breaking down and I need to bye a new one. Can you tell me what kind of machine you have? Or what kind of machine works good but is still easy enough for a beginner? Thank you so much.
Amber says
I love Janome! Check this post: https://crazylittleprojects.com/best-sewing-machines-for-beginners/
Lynda V.E. says
Thank you so much for enlightening a sewing dummy! I usually hand sew, but I also do some machine sewing. For now I only sew simple things like clothes for my many different dolls (Barbie, Dawn, Takara Jenny, etc.) and am trying to learn a little more difficult stuff.
Emily says
I just bought my first sewing machine and have neen so overwhelmed by everything there is to learn about sewing. This is by far the best blog I have found online. It explains things from a beginners perspective and is so easy to understand. Thank you for doing this!
Amber says
Oh I’m so happy to hear that! Good luck in your learning!
Doina A. says
This is a great set of terms for sewing beginners!
emily says
This has been super helpful! Thank you for compiling and helping newbies like me! 🙂
Helen McRuffin says
Can you tell me what pulling taut is? I read it once on a different website.
Amber says
Pulling it tight.
Jennifer says
I found this dictionary VERY helpful. Thank you for creating it. I just have one question. What is facing?
Amber says
Facing would mean interfacing.
Ev says
‘Facing’ is the name of a small pattern piece that is cut to match the curve of the neckline, armhole, etc. It is then sewn onto the neckline or armhole and turned to the inside of the garment. Sometimes ‘interfacing is added to the wrong side of the facing to give it more stability. It can also be the part that is folded back at the front of a blouse or jacket to support buttons and buttonholes.
Gail McMenomy says
Thank you so much for your hard work on this dictionary of sewing terms. My Mother (RIP) & Aunt Ruth (RIP) tried teaching me to sew during the winters we were snowed in & school was called off. I must admit I didn’t appreciate the time & effort they spent on me way back then. Now I can only wish I had that time back with them as we all sorely do in hindsight looking back on our teenage years at all of our “bumpy road” choices. I’m retired now, and am surprised at how much I actually DID pay attention back then, lol, but I still found some gold nuggets of info in your dictionary. I’m sure they’re looking down on me and shaking their heads with satisfaction knowing “I would need to know how to do this someday!”. At any rate, to show my appreciation when I turn out a garment or quilt or craft, I always put TYM&UR as my credits. (Thank you Mom & Aunt Ruth 😉 ) Again, thank you very much for the dictionary information!! Many blessings to you & go with God my friend!
Sincerely, Gail McMenomy
Amber says
My mom tried to teach me when I was young too and I didn’t pay much attention. I sort of just taught myself during college. Love that you are embracing it now!
Siew Chai says
I’m so glad to find your page! This is very helpful for me as a beginner. Will move on to your tutorial. Thank you so much!
lidia serrano says
Hello, I am an english student that have looked for one thing like that for ages.
I teach sewing and estudy english but that is an special vocavulary for my teacher,
if you could show more about sewing I would be very kind of you.
words like thimble, hem, dart.
I´m not sure it is right.
thank you very much, you are a good teacher
Sarah D says
This is so helpfull. Thank you for putting time into doing this. A lot of sites don’t go into detail like this. So when i read a term like ‘baste’ i thought it was a type of material. Sometimes experienced sewers assume newbies know the terms automatically. You do a very good job at explaining terms and not going too in depth. Just informational and to the point! Thanks again!
Charlotte says
Just a word of caution: When talking about pinning the pieces together you said that in the top picture you can sew over the pins since the heads were out of the way. This isn’t a good idea because your needle can still hit the pin itself and either break or bend the needle. If that happens it can cause problems with your machine if it is computerized. Just talking from experience.
Amber says
True. I do it anyway. 🙂
RaeLynn says
Thank you so much for sharing your time and talents! This is very helpful. I plan on looking through all your sewing tips and classes!
Renee says
Thank you!
Juan says
Hello Amber,
I am new to sewing as hobbyist. My mother was a seamstress back in our country and she is very knowledgeable but when I went out to buy my first pattern and sought out her help, the language barrier stopped us from proceeding too far into my project. The pattern was gibberish to me and I couldn’t translate half the ___ into Spanish. Through the drawings we were able to decipher some of the patter but we finally reached a wall, an obstacle that I was not going to allow me to stop my project.
I am so glad that I found your blog/website. This dictionary has cleared up so much for me. I feel confident that if I continue to read through your “cracylittleprojects” I will be able to finish my project!!
Thank you so very much!!!
-Juan T.
Amber says
Oh that’s fun to hear! Thanks!
Jamie says
and i learnt a lot from this page
Jamie says
awesome
Douglas says
Thanks a lot for this page! I am teaching English in Spain and have just been assigned a couple of year-long classes in a fashion academy. Didn’t know the first thing about sewing terms (until now!).
Smalm says
Thank you so much for this handy visual dictionary! I was trying to do the pattern out of a book and I hit the word that laded me against a brick wall: Selvage. I tried to look it up in the dictionary and couldn’t find it. This visual dictionary is definitely something to print out and keep! 🙂 Thanks so much! Very helpful! 🙂
Edna says
Amber, thank you so much for the pictorial dictionary. It’s very useful and easy to understand especially for a newbie like me. I now have better understanding of common sewing terminology and more confident in my sewing projects.
James says
Just wondering what happened to my comment/question about symbols on a pattern? Last I seen it was awaiting review and now it is gone. The original question was, what does the side ways T mean on a pattern? Any help would be appreciated, I am sewing a dress for my wife for Valentines day and may have a couple more questions. Was hoping from post and comments that I had seen on here that this would be a good place to get help/answers. Thanks in advance for any help.
Amber says
I never saw the comment. I don’t know the answer to your question but maybe a reader will.
James says
Thanks Amber, After posting my second comment, somehow my first one posted back up saying it was awaiting mediation. I am thinking that the sideways Ts are where the triangles should be for marking how the different pieces go together?
James says
I am new to sewing and have a question. I printed a pattern off of the internet and it has a symbol that I do not know what it means. It is a sideways T with the bottom of the T on the seam line. Can anyone please tell me what it means? I am trying to sew this dress for my wife for Valentines day.
Amber says
Oh now I am seeing your question. It’s probably just to help you line things up?
Ellie Hammond says
Thank you for these tips they are wonderful.. as I had a stroke a few years ago and couldn’t remember different things and now i know, I will be printing these out so I can paste them in a book… 🙂
Kay says
Thank you so much! I am just starting out and your picture dictionary is so helpful!!
celeste says
So helpful and comprehensive – thank you!!
Wendy W-S says
Hi! This is a wonderful dictionary, I am so happy to have found this resource. I am about as new to sewing as one can get and I wanted to read this before I set off to the craft store to buy some of my first supplies. Thanks so much, I can’t wait to explore the rest of the site. Cheers!
MichElle says
Something to add to your dictionary: “yoke.” What is that?
Amber says
That’s one I haven’t heard in sewing!
Evelyn Roth says
Men’s dress shirts always have a yoke at the top of the back. Many women’s shirts have yokes at the back and sometimes at the front too. A yoke is a piece of fabric the width of the back that goes from one armhole to the other. It is includes the shoulder seam of the garment.
Pattie says
I did not look at comments, but one many new sewers do not know is “Understitching” I have used it for years don’t know where I learned it from but I did and it is one of those sewing tricks I love and use often.
Sandra Annunciacao says
I am just starting to learn. It was very helpful. Ty
Sophie says
Thank you
Dama says
Perfect!!…thank you very much!!
Diana says
I just started working at a Fabric Store and I am lost.. you have no idea how much this is helping me, thank you so very much for putting this together, I have been sitting her for the past 20 mints slapping my forhead going ‘ so that’s what that is!’ thank you
Amber says
Love it!!! 🙂
mary Lou says
This is a great site with clear information – BUT with one confused photo that confused me and I’m a long time sewer. When you show a filled bobbin, it’s filled with black thread but you can see some white thread that looks like it’s looped around the top of the bobbin – what’s up with that? Thanks, Mary Jo
Kim says
I just want to say thank you so very much! I really want to learn how to sew, but when I see what is labeled as an “easy” pattern, I can’t understand the lingo! This is great! I will be pinning you to my wall and checking back frequently!!
Pawneace says
Finally I found easy instructions that I understand that will greatly help in my desire to learn to sew. Thank you so much sharing your talent with others, and explaining things very simple…the pictures that go along with an instruction is absolutely wonderful!!
Thank you!
Rachel M says
Another term I’ve seen (while shopping for a machine) is feed dogs. I figured out what those were, but it might be another thing to add to this dictionary. 🙂 (& thank you so much for creating it!)
Kay says
Thank you so very much!! I too took a sewing class in school about 40 years ago and I have been trying my best to pick it back up. I’ve been teaching myself as I go along, but, with your help it makes it easier to understand again. I now have several grandchildren and both of my children want me to sew for the babies. I have made tons of bibs and burp clothes and baby blankets and oh the paci clips too. But thats about to the extent of what I have been sewing and I so want to sew much more than that. Thank you again!!
Helen says
This is great! I took one sewing class in high school some 40 odd years ago since then iv been teaching myself to sew through books, help from other people, sewing shows, and anything else I can get my hands on. Your sewing dictionary is one of the best and well written set of instructions iv seen. The pictures are a great help as well. Much of the information I have already learned but you have made the information much easer to understand thank you
Shannon says
This is so very helpful, thank you so much.
Jem says
Wow! Such clear explanations with great pictures. I am just starting out so this is a great help. Bless you!
farah says
Thank you
So helpful.
Christina says
Found your link on thediydreamer.com! So glad I did, this is so helpful. Thank you for putting it together!
Jenny says
I love your site! Do you think you could add different hems to your dictionary? I have no idea what a blind hem is or what an overlock stitch is, but I think maybe I should know… Any help?
Amber says
Good ideas. I’ll try to get those added!!
Esther says
Wonderful. I am a visual learner so this is a great tool for creating crazy little projects. Love it. Don’t ever stop.
Thank you for helping me learn more about sewing.
Catherine says
Thank you for such a complete list for us beginners. I have scoured many websites and have not found both picture AND a nice description to go with. 🙂
Aqueelah says
This is sooooo awesome. Thank you!
Solenne says
Thanks a lot. I’m french and this dictionnary will help me a lot when I will sew english/american pattern !
Ayan Shire says
I just found your blog as I am gathering enough courage to buy a machine and learn to sew. Your sight has been so helpful and its giving me confidence that I can do this 🙂 Thank you for putting this together I will be subscribing to your blog
Love your newest Follower 🙂
Amber says
You can do it!!! It’s fun and addicting.
Linda says
Amber, I love this. Need to print this and make a book for my granddaughter. Thank You.
Kimberly says
I have sewed by hand since I was in 9th grade. I have almost completed a king size simple quilt. I have had several sewio machines. Can’t figure them out. Got any suggestions? Think I need sewing for people who are stuck in the 80s? Please help!!! Thank you
Amber says
I ave a post about understanding your machine-maybe that will help? http://crazylittleprojects.com/2012/12/meet-your-sewing-machine.html
Dina Hassanein says
Thank you so so much!!!!!! I just bought my first sewing machine and I felt kindda overwhelmed when I tried to check online tutorials. This is easy and very helpful. Hope u keep on posting 🙂
Dina Hassanein says
Thank you so so much!!!! I just bought my first sewing machine and I felt kindda overwhelmed when I tried to check online tutorials. This is easy and very helpful. Hope u keep on posting 🙂
Kimberly says
This is great! I am preparing to give my first ever sewing lesson for our home-school group and this will be a great visual for my first time students!
Alejandra says
Thank you! great work, so useful for beginners!
Diana says
Thank you so much for the quick picture dictionary!!! It was easy and I enjoyed learning!!
Deniz says
Hi Amber!
I haven’t used a sewing machine since I was a child (apparently Barbie didn’t have enough clothes) so your dictionary is a great tool for getting started again! Thank you for your help :))
Cheers,
Deniz
Hannah says
Very helpful!! This is great for beginners!
mandy says
Hi, i saw this on pinterest and I just had to share it with my readers!! thank you for this awesome post!
http://hkchic.blogspot.com/2013/04/pinaholics-anonymous-meeting-2.html
Cece says
thanks for posting this! i’m very new to sewing and all the terminology was confusing. i greatly appreciate the simple explanations! thank you, thank you, thank you! 🙂
Mel says
Thank you so much! Very useful 🙂
Meagan says
This is so very helpful. I am learning to sew and I was getting so overwhelmed with not knowing the terminology. You are a LIFE SAVER!!!
Amber says
Thanks. That makes me feel good. 🙂
Mary Jane says
I’m going to once again attempt sewing…I’ve tried quite a few times over the years but just couldn’t seem to “get it.” I love how you explain everything. I’m having trouble with my bottom stitches not looking very good, and definitely looking different than the very neat top stitches. It is a fairly new machine, less than a year and half old, a Brother, and it hasn’t been used very much. I did make a rag quilt on it, and that was it. The stitches were fine then. I know I’m threading it right, as well as winding the bobbin. I’ve played a little with the tension dial but it doesn’t seem to change. I’m really befuddled and don’t know what to do. Other than this, I love my machine (it even sews without a pedal!)but the lack of neat looking stitches is taking away the fun for me. Should I take it in and have a “professional” look at it? It shouldn’t be messing up this early in the game and after having not been used very much. Anyway, I sure hope I can learn to sew…they say you can’t teach an old dog new tricks but I’m hoping to prove this saying wrong. Thank you for all your help.
Amber says
If your bottom stitches are the ones messed up then it means it’s your top tension that’s off. If you have adjusted it and it isn’t helping, something may be wrong that only a pro can fix. How do I know this? My machine is in the shop right now for that exact problem. 🙁 Google it though-there are a few helpful hints out there that might do the trick for you-like making sure there’s no lint stuck in it and things.
Mary Jane says
Yes, I have adjusted it, but no change. I also took off the plate around the bobbin and cleaned the lint out-still no change. I think I’ll try changing the needle…I know a rag quilt and all that flannel can really give a needle a beating. So I’ll try this, but after that, there’s nothing left for me to try, at least that I can think of right now. And I’m pretty much all googled out. I hate having to take it in this early in the game; This really should not be happening. There’s only one place around here that fixes machines and when I took my older one there years ago just for a basic cleaning I came home and they had broken a part. Very discouraged.
Mary Jane says
Oh, and am I correct in assuming that the stitches on top and bottom are supposed to look exactly the same???
Amber says
Yup! 🙂
Jen says
Thank you so much for such a great break down! I am learning on my own and after reading so many tuturials online and being completely lost by some of these words.. I was starting to become a bit frustrated. You’ve renewed my sewing motivation.. thank you again!
Micha says
Thank you very much for taking the time to put this sewing dictionary together. This is just what I was looking for. I am looking forward to your Learn to Sew series. I just found your webpage and I am already loving it!
Christine says
YAY!! You have been featured at The DIY Dreamer… From Dream To Reality!! Come on over and grab your featured button.. You deserve it!! 🙂
http://thediydreamer.com/from-dream-to-reality/from-dream-to-reality-linky-party-49/
Betty says
Can you help with the tension when sewing. If it is not right how do I fix it?
Amber says
There are a couple of different dials on your machine that adjust tension. Can you tell me what’s going on? If I ever have a problem with tension I google it and usually find a helpful answer, but I will also say that I try not to adjust tension much on my own. I leave that to the pros (my machine is in the shop right now getting fixed because of a tension problem).
Christine says
You are AWESOME!!!! Did you create this just for me????? LOVE YOU!!!!
Thanks so much for sharing this at The DIY Dreamer.. From Dream To Reality!! HAPPY NEW YEAR!!
Meredith @ Wait Til Your Father Gets Home says
What a fabulous resource!
Congrats! We’re featuring you today from last week’s Keep Calm & Link Up! See you tomorrow for the party…can’t wait to see what you’ve been up to!
xo, Meredith
http://www.waittilyourfathergetshome.com/2013/01/02/ten-projects-to-pin-this-week/
Jennifer Dawn says
What a fantastic resource! I can tell you put a lot of work into this. I’d love for you to link this post up to my weekly link party. Hope to see you there! http://thelifeofjenniferdawn.blogspot.com/2013/01/a-little-bird-told-me-link-party-23.html
Faith says
Thank you for this info! It is VERY helpful for me 😉 I can’t wait to start your lessons
Sofia says
Just what I was looking for!! You have saved my sanity, THANKS!!
Janet says
This is great…. I am completely new to sewing, I have been reading… I love your way of explaining, it very clear. Thank you sooo much. God Bless You!
Amber says
So good to know. I am hoping to make it clear but haven’t been sure how I am doing.
Stephanie says
Definitely tuning into this series since I just got a sewing machine for Christmas and embarking on a year of learning to sew. Now I don’t have to teach myself everything! Woohoo!
Gjeometry says
Very helpful, and I’m going to tune into your Learning to Sew series on Mondays. I have also started a “Techniques” page on my blog and hope to grow and add to it as time goes by.
Cheers.
Debbie says
thanks for the tips they will come in handy
melle e says
this is awesome! thank you!
Jess says
This is an awesome collection of terms. I still consider myself as a newbie sewer, so this definitely helps!
Linda says
Thank you so much ! Some of this I knew but a few were kicking my tushie. I looked all over for “basting” and couldn’t really get it but your explanation nailed it. And “selvage” that threw me too until I read this. And who would have thunk what those lines were next to the presser foot…lol
I’m still a little stumped on “bias” but maybe I’ll have it figured out by the 7th.
Ashleigh Aubrey says
Thank you for this! Very helpful for me!