I just can’t seem to stop making bags. I just love them! I’ve had lots of fun with several other bag tutorials already-messsenger bag, ruffled tote, and sling tote-but there’s something that just always makes me want to make more bags! (Really if you have a bag you want me to make a tutorial for let me know and I’ll give it a try.)
Now, I am calling this bag the Summertime Beach Bag Tote, but it’s not summer yet and I live no where near a beach. I just needed a pop of bright color and summertime cheer in my life. But really this could be a going to the park or the pool or just around town bag.
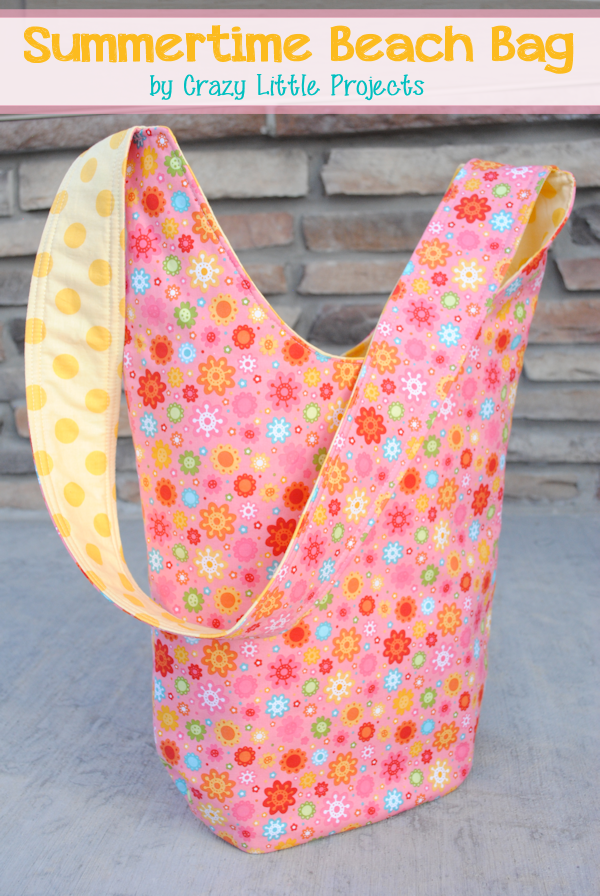

Sunglasses, book, towel. Who’s ready for summer?
Summertime Beach Bag Tote Tutorial:
Supplies Needed:
1 yard each of 2 coordinating fabrics
About 1 yard (a little less) of fusible fleece interfacing
Some readers have had a hard time getting the pattern to print correctly. I am going to give you the measurements of the bag so that you can either just eyeball it or so that you can verify that your pattern printed correctly:
From the very top corner down to the very bottom is 20 inches.
From the bottom of the rounded part of the top to the bottom is 14 inches.
The width at the very top is 16 inches and tapers down to 12 inches at the bottom.
The bottom oval is 9 inches by 5 1/2 inches.
Instructions:
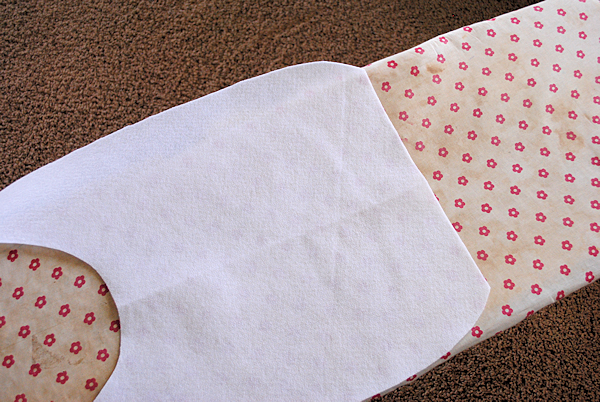
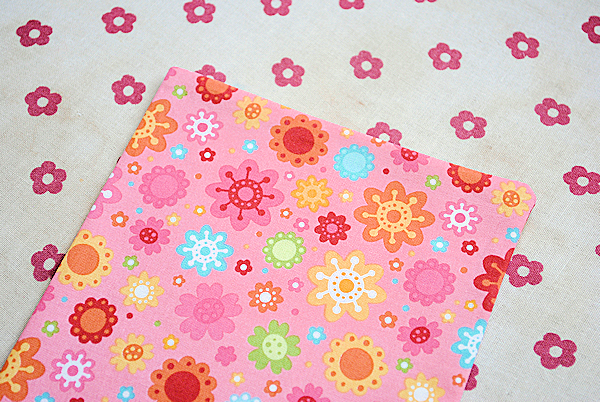
Start out by printing your pattern pieces and cutting them out. Then cut 2 pieces for the bag of the main fabric (for the outside) and 2 for the inside. Also cut a strap that is 37 inches by 3.5 inches. Cut this from both fabrics.
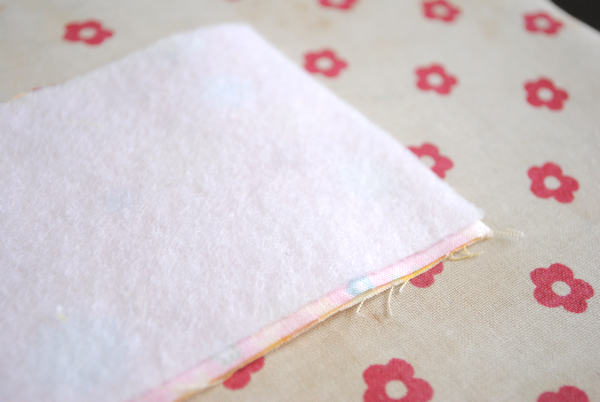
With your interfacing cut 2 of the bag pieces and 1 of the strap pieces.
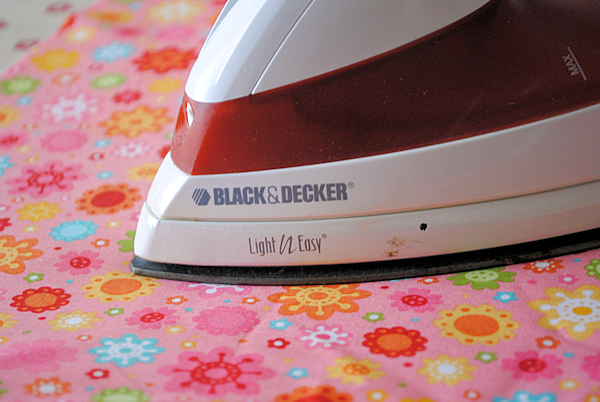
Iron your interfacing to the main fabric pieces following the instructions on the interfacing:
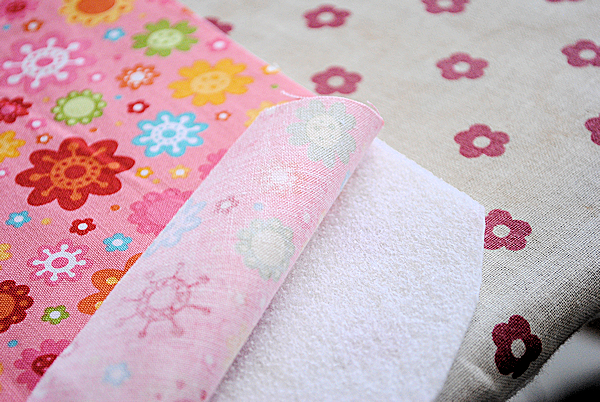
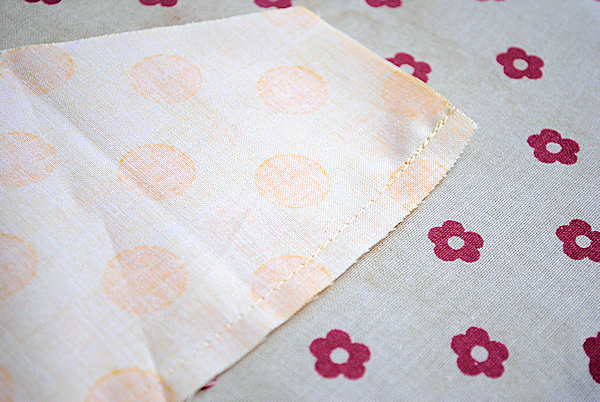
If you want a pocket on this inside, make that now. I cut my fabric 12″ x 12″ then folded it in half with right sides together and sewed most of the way around leaving a small opening to turn it. Then turned it right side out and pressed it flat:
Then center it where you want it on your bag (don’t do it near the top of the bag or thing will fall out) and sew around the side, bottom and other side. If you want to make some compartments just sew a straight vertical line down the pocket:
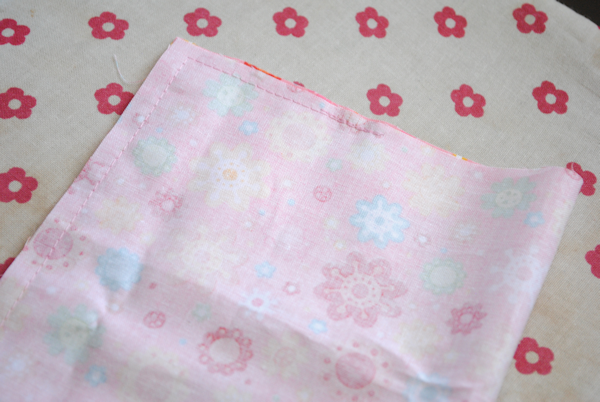
Now, take your two bag pieces and place them with right sides together. Stitch up the two outer edges. Do this with your inner fabric as well:
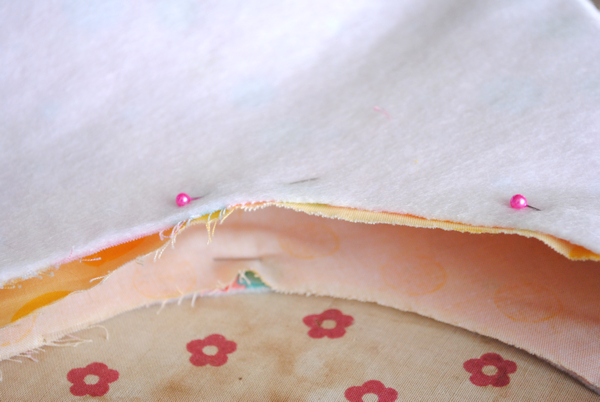
Grab your bottom piece and pin it in place:
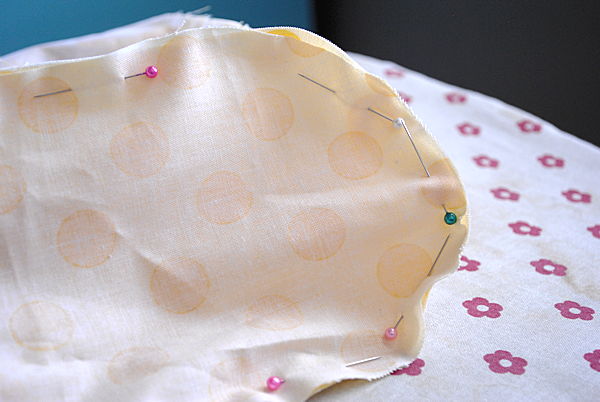
Sew that in place.
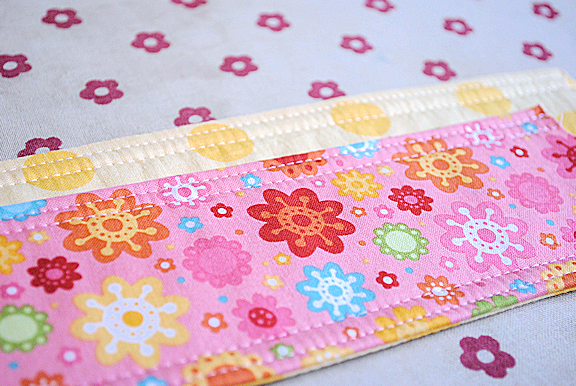
Now let’s make the strap. Take your pieces (you should have your interfacing fused already) and place them right sides together. Sew up the long part of both sides and turn right side out. Then top stitch the strap several times to make it nice and sturdy and cute:
Now, turn your inner pieces of your bag right side out but leave the other pieces inside out. Stick the inner bag down into the outer bag. Take your strap and stick it down in so that it is between the two layers of bag and the ends of the strap stick out like this:
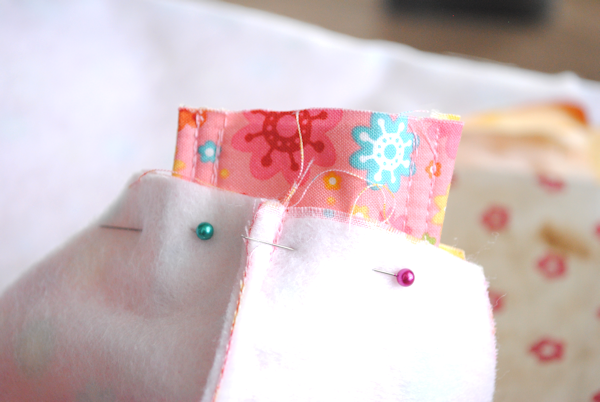
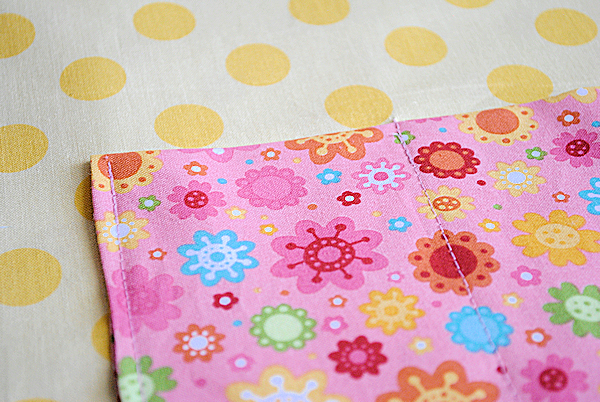
Now you are going to stitch your bag all the way around the top edge across the straps and around the other side just leaving a small opening to turn everything right side out.
Turn it all right side out and tuck the inner fabric down into the outer. Press the corners out:
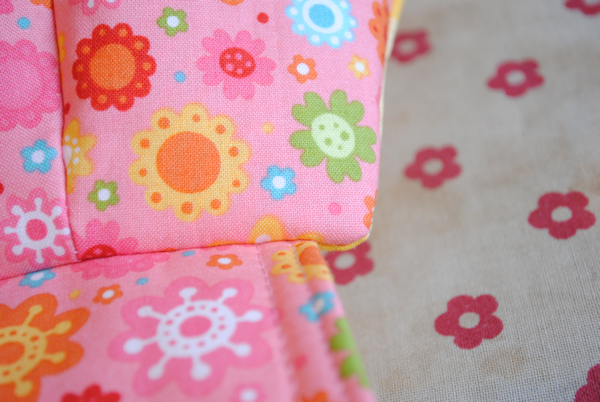
And iron everything so that it is nice and smooth. Then top stitch around the top. This will close your opening and hold everything in place nicely. 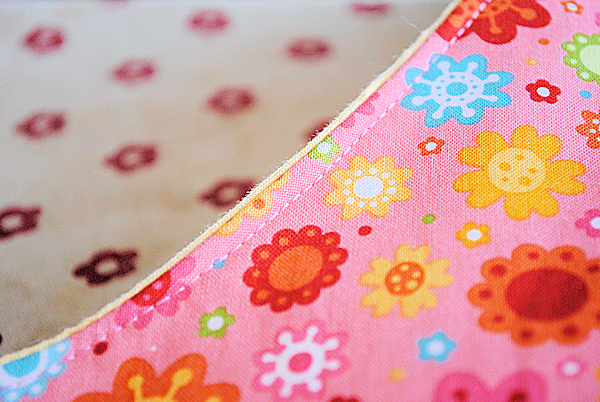
Now, hit the beach! Or the park. Or the pool.


mara says
Hi, I’ve made this bag for three of my nieces and just searched it again to make it for my other two nieces. I do not have much patience for patterns, but this one is so easy and the bags keep coming out time and again. Thank you for sharing this free pattern!
rachel says
Hi Amber, I don’t understand the section where you’ve said grab your bottom piece and sew it in place? I have no idea how do to this? Thanks
Judy Russell says
Hi
When I down loaded the pattern the actual pattern pieces did not download
Could you please tell me what I missed
Thanks
Judy Russell
judyrussell6@bigpond.com
Amber says
You should get 3 pages of pattern in a PDF so make sure you are using a device that can download PDF files.
Jill says
Hi! Do you think I could use a knit fabric (cotton lycra or French terry)? Along with interfacing. Thanks!
Amber says
Yep!
Ilka says
I have a question about cutting. You state to tape the top and bottom pieces together, then cut. What I can’t figure out is if the bottom piece is taped with the curve on the same side as the longer handle extensions on the top are or not, and does that side go on the fold as stated on the top pattern piece. The top indicates where to fold the fabric and place the pattern to the fold. However, in doing that the curved bottom of the bag will not be on the fold. Is the straight edge, with the curve of the handle on the top, supposed to be on the fold? Thanks for the pattern. I can’t wait to make it.
Amber says
The bag should be wide at the top and narrow at the bottom. Does that help at all?
Julia says
Hi Amber
I love your bags – so fun to make and great ideas every time. I was wondering: could you make a tutorial for a sports bag/work out bag (and even better, one that incorporates a tennis racket?) I know this is asking a lot…. but thought you might come up with something fantastic!
Thanks!
Julia
carol says
Could you give the dimensions of the 3 pattern pieces because they are not printing in a proportional way and I’m not sure if the dimensions you give for the bottom oval, for example, are the final size or the dimensions for the pattern.
Thanks,
Carol
Amber says
The bottom oval should be about 9 inches across. If you can get it to size that way then you should be good.
michelle wormull says
I love your bag patterns. Im looking to make a bag finished size 35 x 20 x 20 cm to use on an aeroplane on way to holiday then as a beach/pool bag on holiday possibly extendable in some way for at the pool. Perhaps you can steer me in the right direction. Thanks
Amber says
You can resize any bag before you sew it to be that size.
Claire says
I love this for the summer.
Could I ask what interfacing you use? The ones I’ve tried are too rigid
Thanks
Amber says
I use fusible fleece
Tora Geirs says
SO COOL I´m going to make me one for the pool 🙂 thanks for the pattern and tutorial
Enid says
How about making a YouTube tutorial video I’m a beginner sewer and can’t follow instructions well I’m a visual learner! Thanks!
Amber says
You’re like the 10th person to ask me to do a video this week. I think I better start doing videos. 🙂
Minimah says
Yes I do agree with Enid. I also have that problem following instruction. Please Help! Thanks
Amber says
See my response to her. 🙂
Jenn says
This is so cute Amber! Love the material – especially those polka dots! Pinned!
Theresa says
This is a great pattern! I have linked to it on my blog – http://alittlebirdmademe.wordpress.com/2013/06/14/20-beach-or-weekend-bag-free-tutorials/
Heather says
I have noticed some comments that the patterns are not printing right. From experience you need to have your printer set to actual size for it to print true to size. You need to check this everytime before you print a pattern to be sure it’s set.
Amber says
Yes, I should add a note that says that.
AnnieG says
The bottom of the bag is giving me fits! I’ve never done the bottom of anything like this before. Any tips?
Amber says
My biggest tip is don’t be too hard on yourself! It might not be perfect but no one but you will notice! What’s the problem? Is it just not laying flat? Too big, too small? If you need to you can cut the oval bigger and start pinning and then cut it down to size as you go so you can get a better sense of how big you need it.
AnnieG says
It wasn’t fitting nicely but now I have made my straps and realized that I messed up already before that. So frustrating. I am trying to make this for my sister when I visit her next week and it’s all wrong. When you state “Grab your bottom piece and pin it in place” are you stating do two separate bottom pieces one for the inner and one for the outer? I’ve made a mess of this one. And when you sew the pocket are you only sewing it through the inner fabric?
Amber says
Yes, you will have 2 bottom pieces. On in the inner fabric which you will pin only to the sides of the inner fabric and one of the outer fabric which you pin only to the outer fabric. For the inner pocket yes, sew it only to the inner fabric.
AnnieG says
Ok gotcha. Last night I had to unpick my whole bag and bottoms I had done previously because I realized I had done it all wrong! 🙂 Maybe third time is the charm??! LOL
Hani Shabbir says
Love the shape and fabric of the tote.. So adorable!
Frederique says
Great tuto, I love this bag!
Thanks for sharing
Diane Morrill says
I love this bag! Is the shoulder strap long enough to go across the body when wearing the bag? I also need help with printing the pattern. I printed it at “actual size” and it printed small. I’m looking forward to making this bag, and maybe for my Girl Scouts, too. We’re taking a road trip this summer and this would be perfect!
Amber says
Yes, the strap is definitely long enough for across the body. Here are the bag measurements:
From the very top corner down to the very bottom is 20 inches.
From the bottom of the rounded part of the top to the bottom is 14 inches.
The width at the very top is 16 inches and tapers down to 12 inches at the bottom.
The bottom oval is 9 inches by 5 1/2 inches.
Hope that helps?
Jackie Sorich says
I love bags too, and yours are great with excellent directions! What I hope to see is a tote bag with a zipper top. Why? If it can fall out it will. The idea is for a take-with me bag for goodies I find while on a trip to Chicago (my first time). Then the goodies are contained, and maybe I can stash my little purse in there too. Most bags have the magnetic snap, I really love a zipper to contain everything. That being said, is there a logical way to do the zipper with out the anxiety that sometimes comes along with zippers? Thank you very much! Jackie
Amber says
Have you read my tutorial on zippers? 🙂 http://crazylittleprojects.com/2013/02/learn-to-sew-6-how-to-sew-a-zipper.html
I will put that on my to do list. A zippered bag.
Robin says
I would love to learn how to make a reversible Nantucket ditty bag. Do u have any helpful clues for this type of bag?
Sandra :) says
WOW that’s the prettiest beach bag I’ve ever seen – the shape and fabrics are fantastic! How big is the finished bag? Pinning for some fun summer sewing – thank you for taking the time to prepare and share a tutorial with us!
Amber says
I just added the measurements to the post since I had several people asking. 🙂
Jess says
Love your new design!!
What a CUTE idea!! 🙂 Pinned it for later!
I would love for you to join my Link Up this week!
http://www.pluckys-secondthought.com/pluckys-link-up-4/
Kimberlee says
Thanks so much for this tute Amber! It’s a great bag! I like the length!
AnnieG says
When printing out the patterns do you maximize it to a certain size? I just printed and the first page is about 4 inches by 3 inches. Should it be bigger?
Amber says
Make sure you have it set to print at 100%. It should be bigger than that for sure. I will add the measurements for the bag later today if that will help.
AnnieG says
Oh perfect! Thanks! I’m looking forward to trying this one out.
Amber says
I added the measurements to the tutorial since the pattern seems to be giving some people problems.
AnnieG says
Ok so let me ask you this. I see the measurements but on 8.5 by 11 paper it wouldn’t be able to print that way anyways. Sorry! I am just struggling on how to make it work. With my luck I will try using just your measurements and it will be a disaster for me. 🙂 HA HA. Maybe we need a tutorial on that! LOL j/k It’s such a cute bag and I am dying to try it this weekend.
Amber says
The pattern is just half of the bag because you would fold the fabric in half and then cut. And I have it in two pieces on two pages so you would cut the pattern pieces out and tape them together, then cut your fabric.
AnnieG says
YAY! Got it and I totally understand. I am going to do it this week. Thank you for the explanation.
Jill @ Create.Craft.Love. says
OMG – LOVE! I definitely want to make one of these for the pool! Great job! What fabric is that? It’s adorable!
Amber says
It’s Hello Sunshine by Riley Blake. And….I’m going to meet you in a WEEK! 🙂
http://www.theribbonretreat.com/Fabric/hello-sunshine.aspx