This one was planned for next week, but when I realized that it’s Shark Week right now I figured I better post it!
With one more month of summer fun, I thought we needed something that screamed summer for your towel this month. Who’s ready for a….cue the Jaws theme song…SHARK!!! It’s a Shark Hooded Towel!

I totally love how this one turned out! I can just picture a cute kid walking around the pool or the beach wearing this towel this summer. Want to learn to make it?
Shark Hooded Towel Tutorial:
Supplies Needed:
Bath Towel (obviously I used gray but I think could also make a cute light pink or light blue one)
Matching hand towel
White hand towel
Small amounts of white fabric, black fabric and Heat ‘n’ Bond
Shark Hooded Towel Pattern Pieces
Optional: stiff interfacing for your fin
Note: You may want a heavy duty needle for your sewing machine for this project as well. You will be sewing through many layers of terry cloth at a time. Some machines may struggle with this a little and a stronger needle may help.
Instructions:
Because I do so many hooded towels on my blog, I don’t usually write out all the instructions for creating the basic hooded towel. I have a tutorial on that here. I’m going to teach you how to create the head and then that tutorial will teach you how to attach it.
Start out by cutting your hand towel in half horizontally (so that you end up with a fat piece, not a long skinny one).
Now cut a shark fin out of the other half of the hand towel using the pattern pieces.
With your white hand towel cut out a bunch of teeth. You need 2 pieces per tooth and I used about 9 teeth for my towel, so cut out about 18 of those teeth pieces.
Sew the fin together leaving the bottom open to turn it right side out. Note: this fin is floppy. If you want to make it stiffer I recommend putting some heavy, stiff interfacing inside of it.
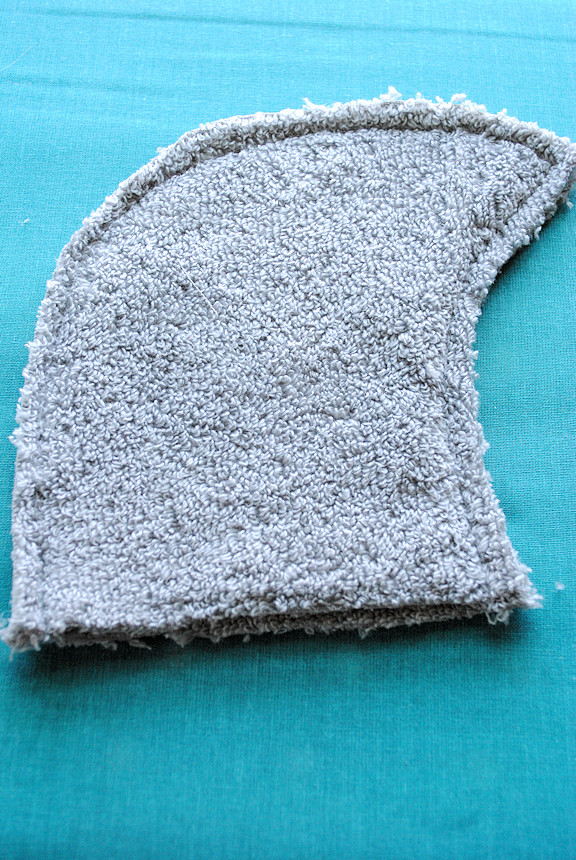
Turn it right side out and set it aside for later.
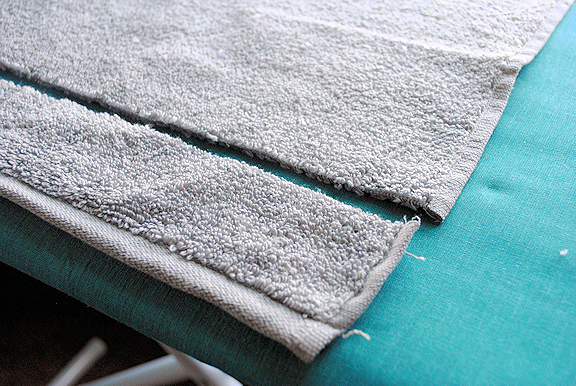
With your half hand towel, cut the selvaged edge off about 3-4 inches up:
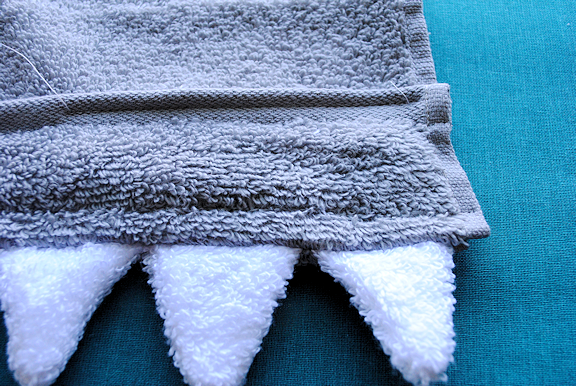
Now sew all of your teeth around the two long sides, leaving the bottom open:

And turn them right side out. Use the end of your scissors to push out the tips to make them nice and pointy.
Now lay the teeth along your hand towel so that the tips point up and the bottom of the teeth is even with the edge of the hand towel: (ignore the eyes in this picture. We’ll add those later.)

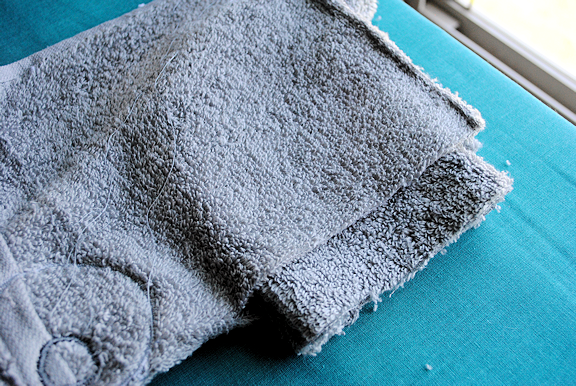
Now take your piece that you cut off from the hand towel and place it on top of your teeth and pin it all together: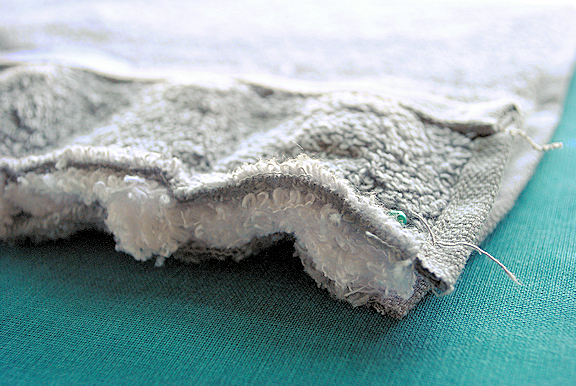
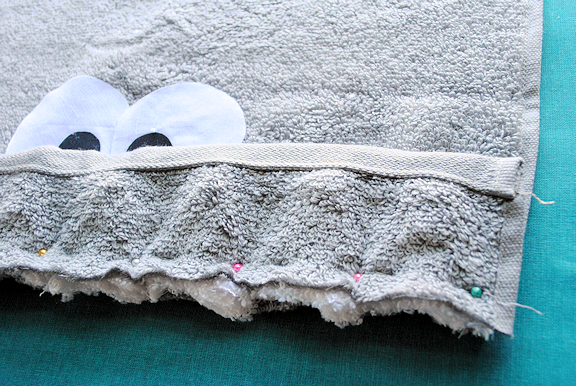
Sew through that line (this may be tricky if you sewing machine isn’t tough. Be patient and guide as needed.)
Turn it all flat and then tuck that hand towel piece at the bottom under and top stitch along the selvaged edge AND along the part near the teeth to hold it all in place:
Cut out your eyes from the white and black fabric as well as coordinating Heat ‘n’ Bond pieces for each eye piece. Iron the Heat ‘n’ Bond to the backs of the eye pieces. Place your eyes where you want them on your hand towel. Applique around both the black and the white parts of the eyes.
Let’s add the fin. Cut your towel up above the eyes:

With your fin turned right side out, fold your face in half and stick the fin into the slot that you just created:
Sew the slit shut, catching the fin in your stitch. And then stitch down the back of the head as well. I use a zigzag for the back of the head to hold it extra tight: 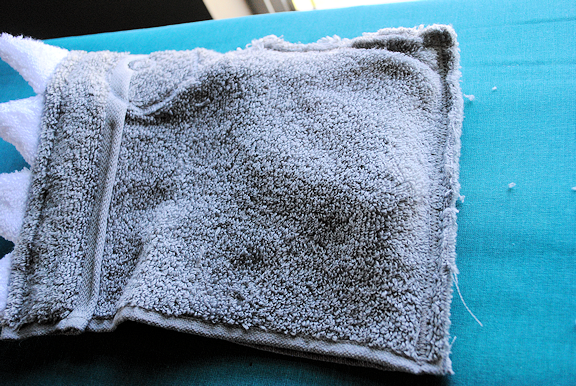
Now you just need to attach your head to your towel and you are all done! 
Do you love it? Are you scared?


Laure says
Hi Amber! What size is the hand towel? The ones I found are 16×26 inches so it looks kinda small when cut in half. Thank you!
Amber says
If it seems too small you can totally adjust it to be larger and have it work for you!
Nancy says
Hi Amber,
I’m having trouble getting the teeth right. They are turning out too small and bulky. Can you share any tips? Thanks!
I love all your designs!
Nancy
Amber says
You could do them with felt instead and just have them be one layer. Or fleece could also be a single layer-that might help!
Paulette McAuley says
Decided to simply appliqué my little ponies from
Fleece
Paulette McAuley says
As I will be making this shark towel for my grandson this Christmas do you have a pattern or any suggestions for making a my little pony or unicorn towel for my granddaughter? Thank you
Amber says
I’ve been meaning to do a unicorn for a while and haven’t gotten to it! I think you could do something similar to any of these, but use yarn where the shark’s fin is to be hair for the horse.
Kay says
Love this towel. So I’m not the amazing seamstress. I’m attempting the teeth and my sewing machine can’t handle the stitches. The foot won’t come up far enough. I have done it by hand to try to at least keep it in place without the straight pins and clamps, but it’s still too thick. I must be missing something totally obvious, but I’m not sure what. (BTW, I tried with with the serger — bad first serger project – I think I broke it!) But I just know I have to be able to do this on the sewing machine. Thanks for any guidance!
Amber says
Yikes! I know that that part can get tricky! Did you get it to work? My machine was able to do it if I lifted the presser foot higher than it typically goes. Does your machine do that?
Melissa says
Thanks for the pattern. My daughter loves sharks so I just made this one for her son, my 16 month grandson for an Easter treat. Great template and wonderful easy instructions. I can’t wait to tour the rest of your site.
rondi says
Thanks for the tutorial! I just made this for my son for his birthday.It turned out great! Thanks again!
Amber says
Love hearing that!
Vanessa says
Hi! I’m hoping to make this for an adult. How would you adjust the sizes for an adult? I was thinking a bath sheet, but am wondering mostly about the hood. Thanks!
Amber says
Just don’t cut the hand towel in half.
Jamie says
I found this just in time for Shark Week. I made it for a friend’s son, and he loves it. So many people do too, and now I am making more. I did the teeth a little differently. I used a stiffer cotton and cut 4 inch squares to make “prairie points”, so I didn’t have to turn little terrycloth teeth right-side out. Thank you for the wonderful idea and tutorial!
Amber says
Smart idea on the teeth!!!
Shirley S says
Thanks! Could you give approximate measurements for the hood pieces (not the fin or teeth). I bought fabric by the yard instead of towels.
Amber says
It is about 15 1/2 inches wide by 13 inches before you fold it under.
Paula says
Thanks so much for the tutorial! I can’t wait to make it. I just tried to download and print the pattern pieces. When the pattern downloads there’s nothing on the screen. I’m not sure if this is just my issue. Is is possible for you to email the pattern? Thanks!
Amber says
It will open as a PDF so you need to make sure you have adobe enabled on your computer. I just tried it and it should be working.
Amber says
Thank you so much for these wonderful towels and tutorials!! I am attempting to make the shark today for my son and hopefully your butterfly one next for my daughter! So creative, thank you again!!
Katrijn says
Great idea!
But i was wondering how big the shark fin and the thooths are?
Amber says
There’s a template/pattern on that post. Did you see that?
Luanne says
I love you mama! hahaha you and your projects are so awesome.
This is my favorite site of all sites! hahaha
must get me a bigger sewing machine, mine is just the mini and definitely will die if I make this. hohohoho
Amber says
Awww thanks! And you’re right. Sewing these towels takes some machine power for sure.
Line says
Hi Amber!
The hooded towels are so sweet! Thans for the tuts!
How big are tour towels? We do not use the same ‘names’ here in DK 😉
Are there a cow coming up 🙂 ?
Amber says
Just any large bath towel should work. I’ll put cow on my list
Happier Than A Pig in Mud says
Absolutely adorable! I’ll bet your cute model loved it:@)
Sheila Perl says
The shark towel is too cute! I just love it!
I have been dithering about which towel to make for my 2 year old grandson, all your designs are so adorable….I think I’ll start with this one 🙂
Jill @ Create.Craft.Love. says
This is officially my favorite now, Amber!!! L.O.V.E. Pinning!!