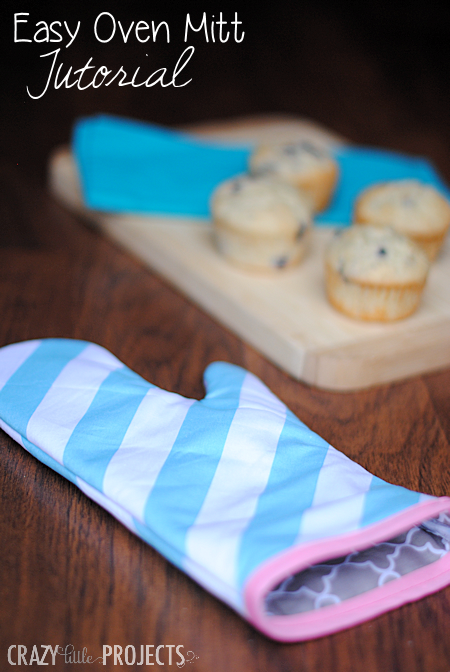
What’s the Project? If you want to learn how to make pot holders, this easy oven mitt pattern is perfect for you! Easy to follow and includes two versions-a regular oven mitt and a heart shaped oven mitt!
A few years ago for Christmas, my sister in law made me a super cute oven mitt with fun fabric. I loved it from the moment I got it and years later, and it still works great! I use it all the time. I had never thought about how to make pot holders, but when I looked at it I realized it was totally doable! They are easy enough to make so I decided to give it a try myself and ended up making several oven mitts.
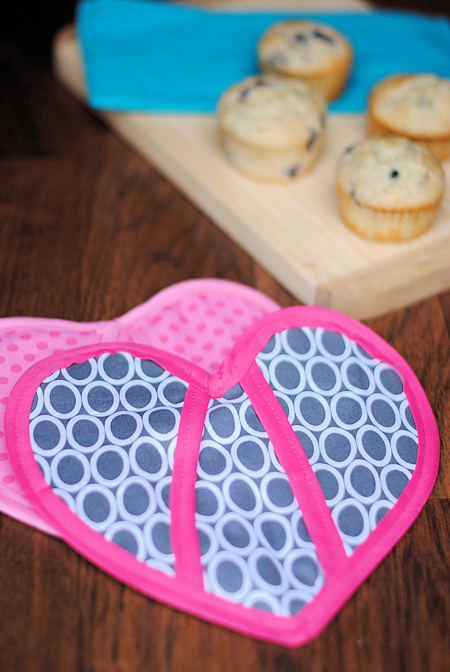
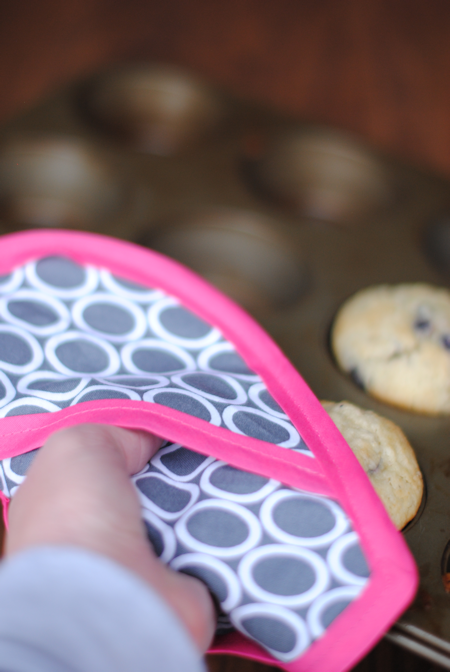
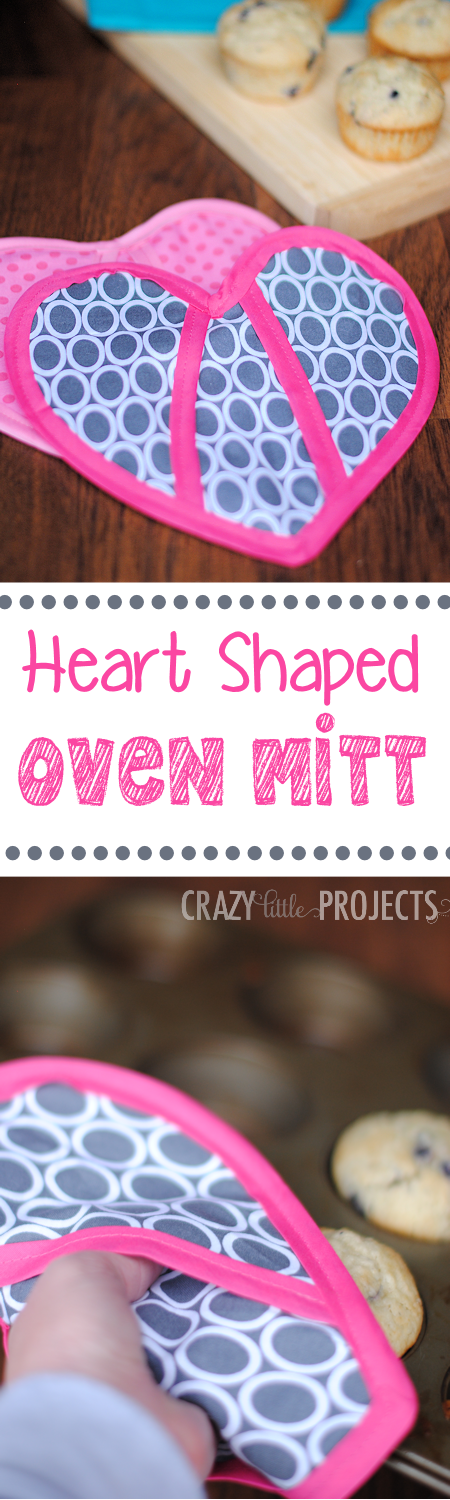
Sometimes it’s fun to sew up something that is small and handy and won’t take too long right? This is one of those projects. I’m giving you two options on this project-a Heart Shaped Oven Mitt Pattern or a Classic Oven Mitt Pattern. The heart is cute, but a little harder to make. The classic oven mitt is quick and easy and very handy! So take your pick! Here’s the heart-shaped oven mitt.
Or here is the Classic Oven Mitt Pattern:
These oven mitts are great for your own home or they make a great gift!
Note: The Heart one looks easy. And for the most part it is-but I warn you that the bias tape can be a little tricky. The classic oven mitt is actually a much simpler project, so if you are looking for easy I suggest starting there and then moving on to the heart.
Heart Shaped Oven Mitt Pattern:
Supplies Needed:
- 1/4 yard each of 2 coordinating fabrics (you won’t use all of them-fabric scraps are perfect for this project)
- 1/4 yard of thermal interfacing (you should be able to find this in the interfacing section of your store)
- 1 pack of Extra Wide Double Fold Bias Tape
- Heart Shaped Oven Mitt Pattern
Heart Shaped Oven Mitt Sewing Instructions:
Cut out your pieces according to the instructions on the pattern.
Pin bias tape along the flat edges of the two small pieces and stitch it in place: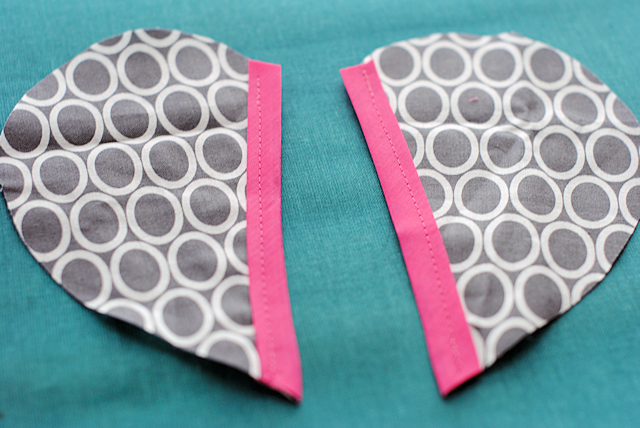
Grab your two heart-shaped pieces of fabric and your interfacing. Place all of the layers together with the thermal interfacing in the middle and the fabric on either side of the interfacing with WRONG sides touching the interfacing and right sides facing out.
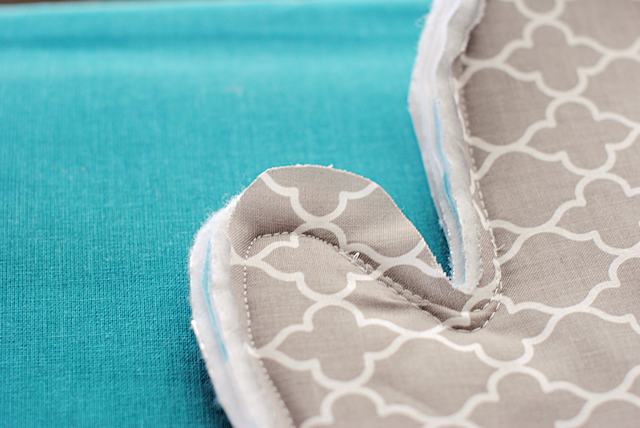
Then place your two small pieces on top so that they match up with the curve of the heart. Pin all of this in place and then zigzag around the edge all the way around to hold everything together:

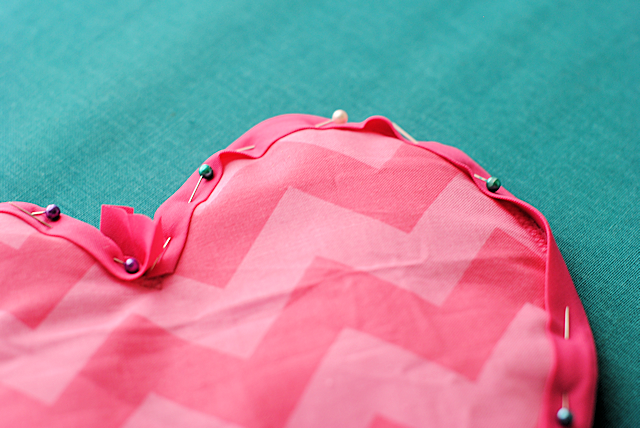
Now, beginning at the top center of your heart begin pinning your bias tape all the way around. (If you are new to bias tape and need help, there’s a chapter in my ebook all about sewing on a bias, making your own bias tape and using bias tape.)
This is the tricky part of this project. Getting the bias tape around the curves can be tricky. Pin a lot and go slowly and carefully. At the bottom point, you will need to take a small tuck to turn the corner. Then, when you reach the start point again, cut the bias tape about 1/2″ longer than you need and fold that part under and pin it: (In this picture you can see that I cut it longer but I haven’t pinned it with it folded under yet)
Now sew all the way around. And that’s it! If you’re like me your lines on your bias tape don’t look perfect. Go easy on yourself. It’s hard to get it perfect.
Then you can stick your hand inside the flaps and use it perfectly to grab hot food.
OK, now let’s try the other one!
Classic Oven Mitt Pattern:
Supplies Needed:
- 1/4 yard each of 2 coordinating fabrics (you won’t use all of them-fabric scraps are perfect for this project)
- 1/4 yard of thermal interfacing (you should be able to find this in the interfacing section of your store)
- 1 pack of Extra Wide Double Fold Bias Tape
- Oven Mitt Pattern
Oven Mitt Sewing Instructions:
Cut out your pieces according to the instructions on your pattern.
Place your main fabric pieces together with right sides touching:
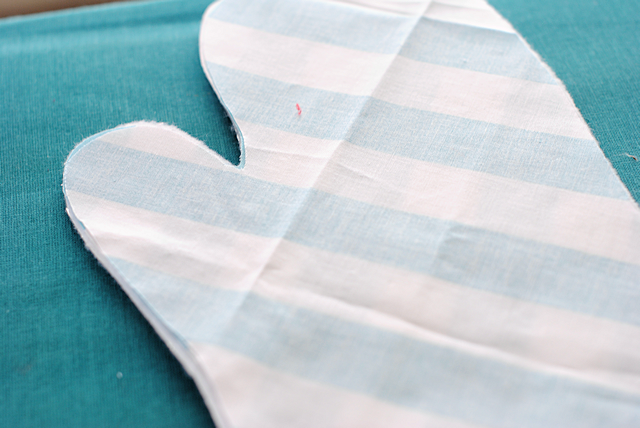
Then put a piece of interfacing on the top and one on the bottom of this:
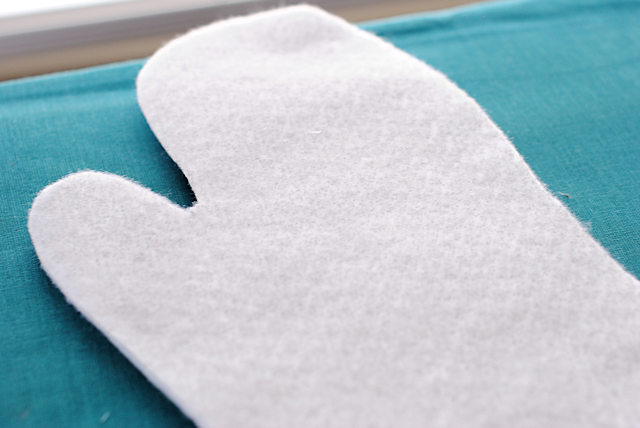
Then place your inner fabric with right sides facing OUT on top of the interfacing-one piece on each side of the interfacing. So one on top, one on the bottom:
You should now have a pile of 6 layers of fabric. The center should be your main fabric with right sides touching, followed by the interfacing and then the outer fabric with right sides facing out on the outsides.
Stitch all the way around. Once you have done this, trim off as much excess as you can. For example, see how my thumb here has a bunch of excess fabric? Trim all of that away:
Then, clip several shortcuts into the inside of the thumb. Go right up to the stitching but not through the stitching. This helps it turn rough side out better. 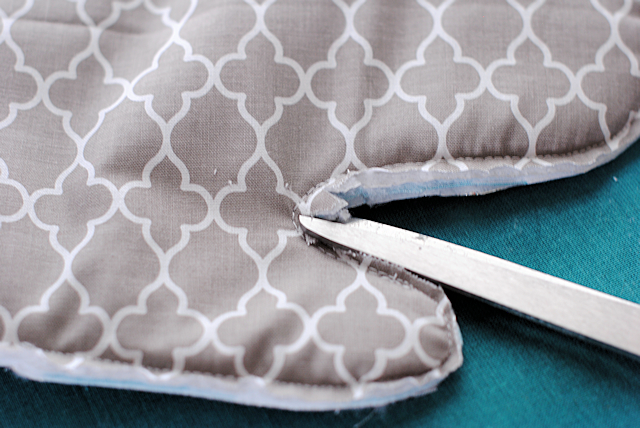
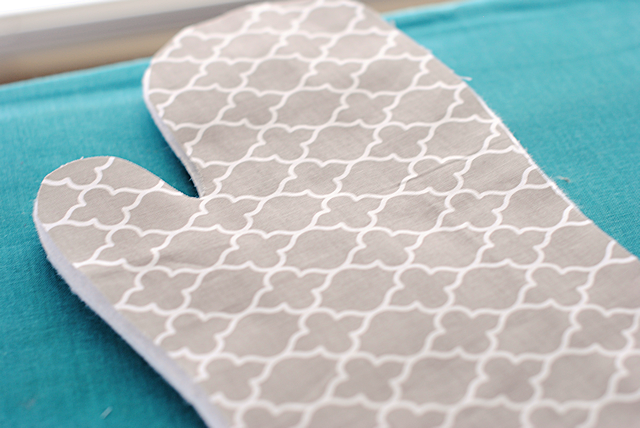
Now, reach inside and grab the main fabric and turn it all right side out. Push out all the corners and get it nice and smooth (iron if necessary).
Then with your bias tape, pin it all the way around the bottom edge and stitch it on:
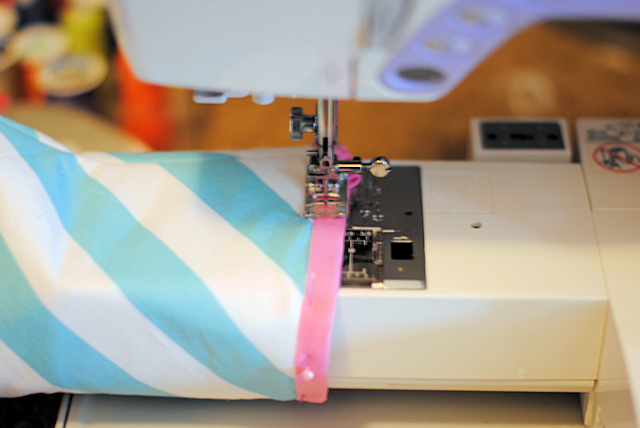
And that’s it!
They’re kind of pretty right? I hope you love sewing these oven mitts.
You Might Also Like:

Pin It:


Jenny A says
Which side of the Insul-Bright should be facing the hand, once completed? The silver side or the wide side?
Amber says
I believe the white is best.
Janine Evans says
Love the heart shaped mitt. Would make great gifts for the Mother’s day stall at school.
Leslie says
Thank you. I have been looking for instructions for the heart shaped mitten potholder. This is great, instructions are easy. Very nice.
Amber says
Glad you like it! 🙂
Sheila says
Another site suggested NOT starting at the point as it was too crowded with several layers of bias tape. Start & stop on the straight edge instead. Insul-Bright is the product I use.
GlitterLover says
Will make this today. Looks easy enough…..and super easy for me, a beginning sewer. 🙂
Amber says
How did it go?
Aneta says
Thank you for this tutorial and patterns! I was searching for ones that I love for a very long time – and I love yours! Can’t wait to start sewing. Thank you!
Emily says
Love these patterns so much;)! Thank you for taking the time to share with us all!! Got tons of scraps that need to be used and Valentines Day gifts to be made. A win win;)! Thank you again!!!!
Brittany says
These comments were so helpful to find the interfacing at Joann’s without having to track down an (ever hard to find) employee!
Imani says
That was a cute fun fast project and my son loves the mitt I made him
http://thesemicrunchymom.blogspot.com/2014/02/sewing-challenge-oven-mitt.html?m=1
Allison says
Am I the only one having trouble upolading the pattern for the oven mitt? It might be my computer
Amber says
Did you ever get it to work?
Allison B. says
Yes I did tonight. I think my computer needed to update. Ready to make this for my BFF for the project this month. Thanks Amber for all of your hard work and dedication to the site.
~ab
Mary Jane Wetmore says
When sewing the classic oven mitt, do I stitch all the way down to the bottom edge (the open part that the hand goes in)? Thank you!
Amber says
Yes, all the way down but not across the bottom.
Susan Armstrong says
I think the “thermal Interfacing ” that Amber is referring to is actually a fusible heat-resistant batting meant to protect you from heat. Google “thermal interfacing fabric”. Interfacing is a much thinner fabric used to provide body in garments (collars, cuffs, etc.) but it is much too thin to provide adequate heat protection in pot holders. One brand that I found online is called Insul-Bright & it sounds like it might be silver on at least one side – much like an ironing board cover.
Instead of Insul-Bright or other similar products you could use 1-2 layers of 100% COTTON quilt batting. In fact, all of your fabrics should be 100% COTTON and NOT synthic or blended fabriscs. Most synthetic fabrics, especially polyester and nylon, will melt and stick to your skin causing serious burns. The whole point of a potholder is to avoid nasty burns!
Amber says
Thank you for the tips. What I used was an interfacing sold with the interfacing at Hobby Lobby. I am told that you can find it with the utility fabrics at Joann.
Sara says
I may have to make these! Also, I love love love your site’s name! Because I get it. I call them “fevers”, when I get a crazy idea for a little project, recipe or whatever, and I just have to try it out even if its something silly =) Too bad I can’t take good pictures like you do =)
Amber says
The picture taking is the hardest part for me!
Kari says
I definitely need help with bias tape. I found this great tutorial on Dana Made It that explains how to do it the ‘correct way’ with out cheating. I am going to try really hard to follow these directions while making your heart hot pads!! Can’t wait to get home from traveling to try it.
Lisa says
Just curious about the interfacing. Is it sold with the other interfacing and called thermal? My Joann’s tried to sell me ironing board covering material that was really thick and shiny gray. It didn’t look at all like the pictures above.
Amber says
Hmmm, I got it at Hobby Lobby-not sure exactly what they called it. It is white but has silver inside.
Yvonne Bohne says
I bought it at Joanns today. It was with the “utility” fabric. I asked for thermal interfacing and when I told them I was making an oven mitt, they knew exactly what I was looking for.
Jen S. says
I didn’t know much about interfacing so I asked the ladies at Hancock Fabrics. They said Thermolam (a thermal fleece type of interfacing) is used for these project as well as a thermal fleece that has silver threads in it (she said it was similar to Insul-bright). She also said she’s used 2 layers of 100% cotton batting before and it’s turned out nice and heat resistant.
Luanne says
I think you could try I soul right.
Luanne says
I think you could use insulbright.
Amber says
Yes!
Tiffany says
I found it at JoAnn. But it was with utility fabric. I had to ask for assistance.
Sarah @ the magical slow cooker says
I love this pattern! And your fabrics are gorgeous!
Colleen says
Am I missing where the patterns are?? I’d really love to make these, but I’m not sure if I need to buy the patern or if I’m missing them somewhere here 🙂
Amber says
I am trying to get them uploaded but my computer is moving like Molasses. They should be up in a few minutes.
Colleen says
Thanks!! Sorry to hound you first thing!!
Lucille Mckeon says
Where are the patterns for the oven mitts ? I can’t vdrde$
Amber says
In the supplies list you will find a link to them.