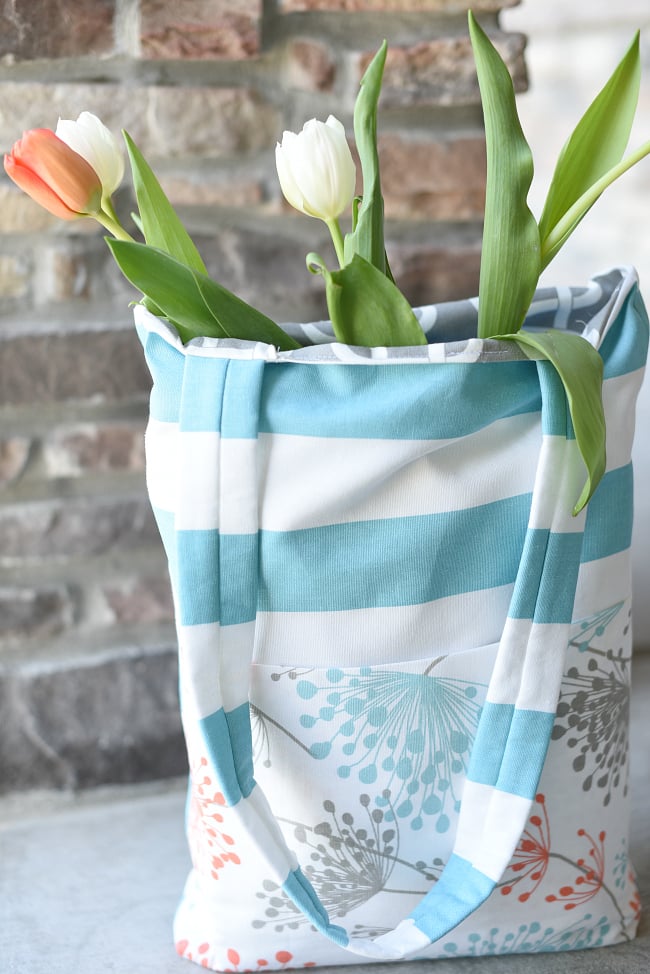
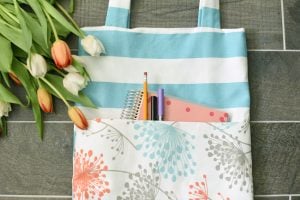
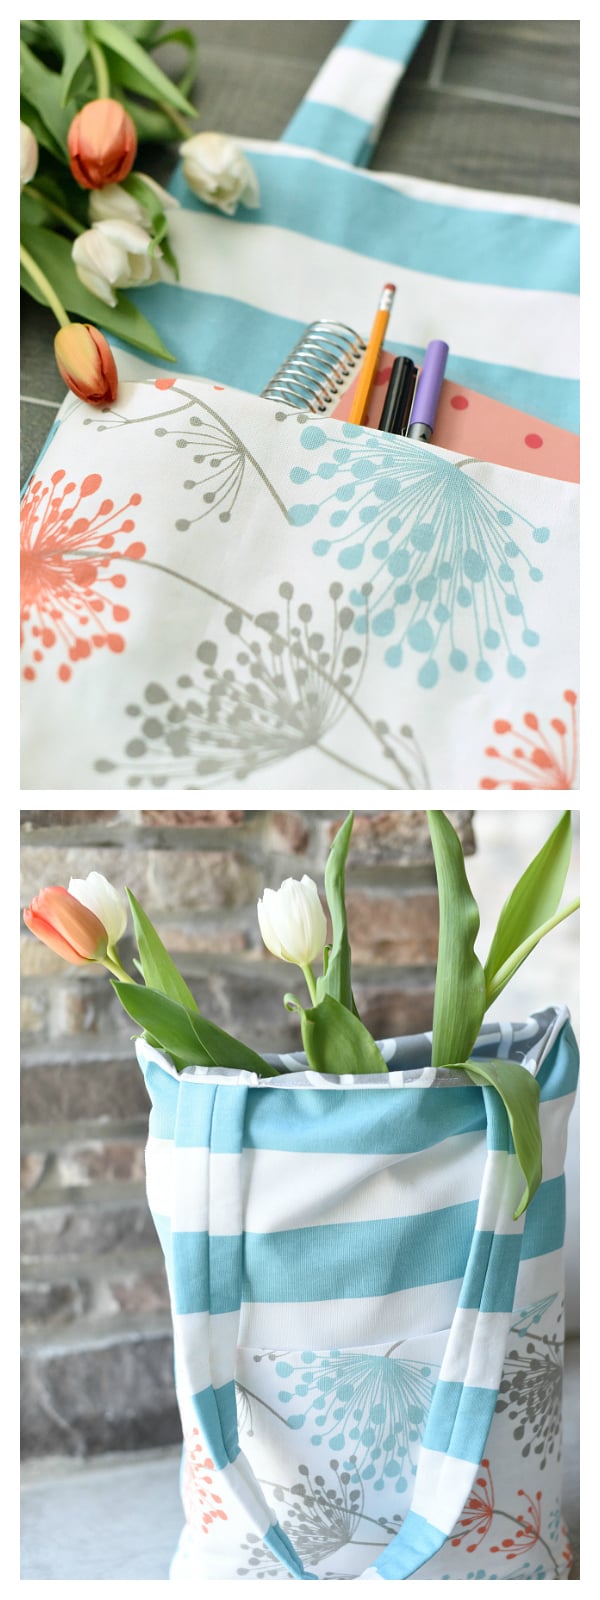
What’s the Project? This easy tote bag pattern is super simple to sew and turns out so cute. A roomy pocket on the outside, two straps, and a big tote bag opening makes this a simple bag to carry all your things in. You’re going to love it!
Everyone needs a great tote bag to carry, don’t they?
A year or two ago I made a fun and easy tote bag pattern because my friend needed a bag for carrying her church stuff. I made her the bag, took pictures of the process, and put the pattern on this site.
And it’s ended up being one of the most popular posts on Crazy Little Projects! So when her sister asked for a church bag too, I decided I could make her one and blog it too. Because this one has a little twist. It’s very similar to the original, but it’s got an outer pocket. Super handy!
So, here you go-the Easy Tote Bag Pattern-enhanced with a pocket.

Cute right? And you can make it in any fabric so it could be good for anyone!
And when I say easy, I do mean easy. (Although I did make my fair share of mistakes and have to use the seam ripper more than I should have.)
Let’s make this easy tote bag pattern.

Easy Tote Bag Pattern
Supplies
- 1/2 yard fabric for the inside of the bag
- 1/2 yard fabric for making the pocket
- 2/3 yard main fabric I used canvas fabric
- 1/4 yard fusible fleece
Instructions
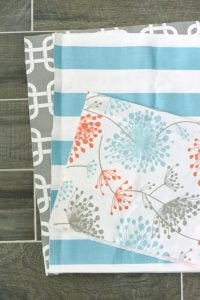
- First cut your main fabric (on my bag it's the blue striped fabric). Cut 2 pieces that are 17 inches wide by 19 inches long and 2 strap pieces that are 31 inches by 4 inches.
- Next cut fabric for the inside of your bag. Cut 2 pieces that are 17 inches wide by 19 inches long.
- Next cut the fabric for your pocket. On my bag, it's the fabric with a floral print. Cut 1 piece that is 17 inches wide by 22 inches long.
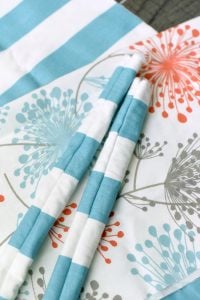
- Next, cut your fusible fleece. Cut 2 pieces that match your strap pieces.
- Iron your fusible fleece to the back of your strap pieces.
- Fold the straps in half lengthwise and sew up the long side leaving the two ends open. Turn the right side out (this can be a little tricky-be patient) and iron them flat so that the seam is in the center of the back.
- Take your inner fabric and place with with right sides together and sew around two sides and the bottom.
- Fold your pocket fabric in half so that it is 17 inches wide by 11 inches long. Place the outer fabrics together with right sides together. The pocket needs to go between these two fabrics. Sew down the side, across the bottom and back up the other side.
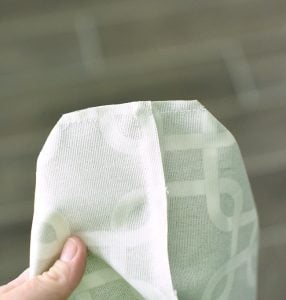
- Now you are going to give each of your bag pieces box corners. To do this, hold your corners like this and sew across the tip about 1.5 inches down from the top corner.
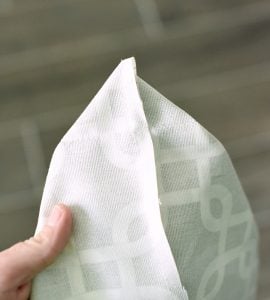
- Then snip it off.
- Do this to all four corners. But you’ll need to be careful with the pocket and make sure it stays on one side of the bag and doesn’t get caught in the box corners in a weird way. I had to do a little seam popping to get it where I wanted.
- turn your inner bag right side out and leave your outer bag inside out. Slide them together. Slip your straps down between the two layers and pin it in place. Make sure that it isn’t twisted inside and make sure that the side with the seam is facing the inner part of the bag.
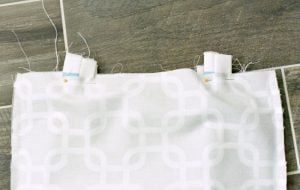
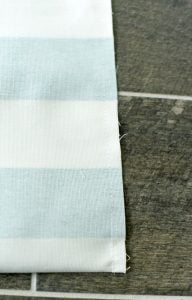
- Starting between two of the straps, sew all the way around the top leaving 3-4 inches between the straps to turn the bag right side out. Turn it right side out and press it flat. The corners should look like the photo:
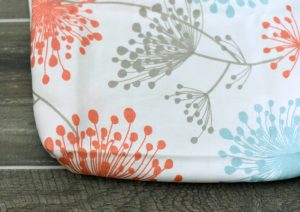
- And you’re all set! Pack it up and head out!
So cute right? Love this easy tote bag pattern!
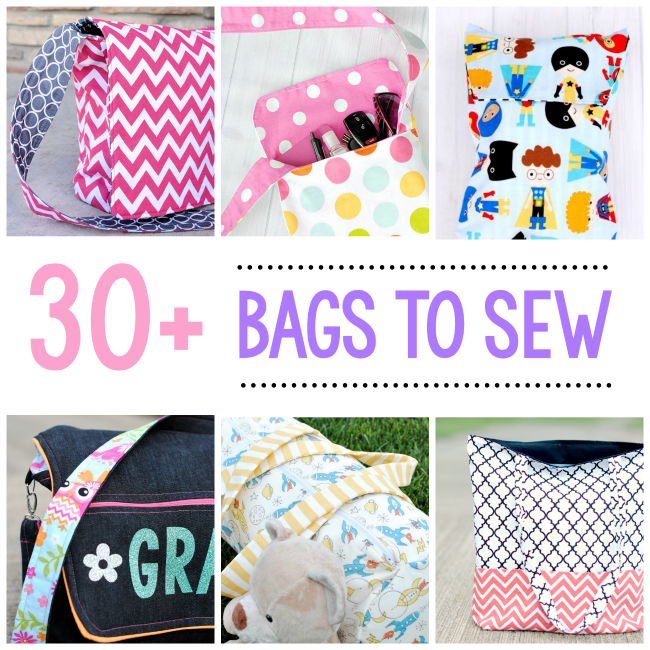
You Might Also Like:

Pin It:


Susan Krueger says
How do you attach the the pocket to the outside of the tote????
Amber says
Sew it on before you do the rest of your steps.
Judy Anzo says
you have a mistake on measurements for the pocket, change the 16 to 17 that has to be corrected.
Isabel Baumgartner says
I wish you had made a video that was specifically for the bag with the pocket. Or at least illustrating instructions that are specific to the bag with the pocket. I’m very confused about putting the pocket fabric on the inside of the outer fabric. Do you fold the pocket together with the right sides together or wrong sides together? And my pocket fabric sides aren’t matching up with the outer fabric sides so I don’t know how the sides would stay up…I’m just unsure of how to proceed because I don’t want to do something and have to undo it because it didn’t work.
Chelsea says
Your learn to sew series and tutorials have been so helpful as I just unboxed my first sewing machine! I did the kid’s mini messenger bag (except it is for me!) and I’m ready to try a full size one. I was wondering, do you have to use a different needle when sewing canvas? I’ve only tried with cotton so far. What fabrics would you need to change the needle?
Amber says
Only with really heavy ones usually like denim or if you are sewing through many layers of thick ones.
Fay says
How far from the edge should I place the straps
Amber says
It doesn’t matter a ton. Wherever you want them.
Lindsay says
One of the easiest ways to turn the handles out is to use a mini-blind rod. They work like a dream to turn it out and make it a quick task! Loves these bags.
Melissa says
Hi. I am wanting to make matching bags for my daughter and I, for our Girl Scout camping trip this weekend. I would like to make my daughters smaller. How would I go about figuring out measurements for that? I have been sewing now for a few months. I started out with 18” doll clothes, then some pajamas and dresses for my daughter. I have also done some coasters, center pieces and table runners. I would really love to make 2 of these in the next few days.
Amber says
You honestly could make this one any size at all. So easy! Just take a few inches off both the length and the width and you should be fine.
Gay Ferland says
Nice bag! I made many and have been giving to my girlfriends for their birthdays. I added a flower clip that coordinates the fabrics, so sassy chic!!!
cheryl says
Hi, I am very new to sewing and want to give this tote a go, Id like to make it for my mum and have some fabric that she will love. However its not canvas and as i am on a tight budget don’t really want to go buying other fabric. Is there some way i can use the fabric I have, I believe its just cotton. Thank you
Amber says
Yes that’s totally fine!
Carmel Bergin says
Hi, love the Tote, so many uses. I have made them before and purposefully made one handle about 3/4″ to 1″ (inch) shorter than the other so that when carrying in the hand the shorter handle fits neatly beneath the longer one. Also it doesn’t affect wearing it over the shoulder.
PS: this grey coloured font is very difficult to read.
Carina says
I can’t wait to try this!! I plan to stitch the top from the outside so i would not need to turn them. Do you think that would work?
Amber says
Probably, it would just take a little tweaking. Let me know how it goes!
Meredith says
Hi! I was wondering, what type of sewing machine do you prefer?
Amber says
I love Janome. I have a post about it: https://crazylittleprojects.com/best-sewing-machines-for-beginners/
Emma says
What kind of fabric did you use?
Amber says
I used a canvas for this to give it a little bulk
Karolyn says
Beginner here and I want to sew this bag for my next project. I’m kind of confused about the pocket though. How did you get that top stitch? Did you sew the material for the fabric before placing it between the 3 outer materials and stitching?
Amber says
Yes, do that part first.
Katie says
Good afternoon! I’m currently working on cutting the pocket fabric, but I am confused on the sizing. I have a fabric that needs to be a certain direction (it’s chevron), so I’m trying to figure out which direction to cut the pocket fabric. However, when I looked down at the later instructions of what you actually do with it, it said fold it in half but the dimensions you gave don’t seem to match up with the size I’m supposed to cut. I don’t want to cut the fabric unless you are certain you’re dimensions are correct. 🙂 Thanks so much! I’m going to go work on the handles in the meantime! I’m excited to complete this.
Amber says
Cut the pocket width the same width as the bag. 🙂
Carol L. Simpkins says
Just finished my tote today. I love it. Had fun matching up the owls for the outside pocket I added. Wish I could post a photo of it.
Amber says
Sounds great!
Shae says
I’m confused about leaving 3-4 inches at the end. Ate we sewing the whole top shut when doing the handles? I thought we’d just sew around the top to secure the handles but I’m confused why I need the gap for turning.
I’m new at sewing. Sorry!
Amber says
Because you will need to be able to pull the bag through the little opening to turn it right side out.
Sheila says
I just bought a machine. Haven’t sewn in 40 years. I found this while looking for beginner projects. Thank you so much for sharing your expertise with us.
Sandy says
I’ve made several of these and love the pattern. I add a pocket to the inside, but like this idea on the outside as well!
Karen P says
Thank you for the tutorial. I have a question. Once you have turned the bag right side out do you need to do a hand stitch where you just turned to make sure all the inner is no longer on show? Many thanks in advance Karen
Amber says
You don’t have to but it’s not a bad idea at all!
Elizabeth Clark says
I love your bag so much!!
I’m a beginner at sewing and you made this seem so easy for me! Thank you so much for making your easy tutorial. I’m going to give it a try.
By the way, where did you get your fabric?
Amber says
That’s from Hobby Lobby. 🙂
Christine L Goodness says
it took 3 days and some odd hours to turn the handles. I will definitely do that differently next time. Also the instructions on making a box corner with a pocket…is this even do-able? I am winding up with an ugly mess! I may do this step differently also. Cute bag though!
Christine L Goodness says
silly me, i was turning it the wrong way! It worked perfectly!
Amber says
Oh good!
Patricia says
I’ve been wanting a tote like this for some time! Thank you for this tutorial! Pinning to my “Next” board!
Judy S. says
What a pretty bag!! I think the outside pocket is a versatile addition. And the fabric combination is very appealing. From what fabric line is the dandelion print? I would love to make some bags using all the coordinating colors.
Amber says
The fabric is from Hobby Lobby.
Sara says
I love your fabrics! I enjoy making bags and you’ve just inspired me to make another one 🙂 I think I might cut my straps 6 inches wide then fold the edges to the middle then fold in half and sticth to get a 1.5″ wide strap. (I don’t like having to flip it otherwise.)
One question about the sizes to cut the fabrics, is there a typo on the lining size? I would think we would need to cut it 17″ by 20″ just like the outer fabric?
Amber says
Yes, should be the same as the outer
Rachael says
Is there also a typo on the pocket dimensions? Just wondering where I’m supposed to get an extra inch at. It says to cut it 16″ wide by 22″ long and says to fold in half to make it 17″x22″ that’s impossible
Amber says
Whoops-yes, probably just a typo. 🙂
ashlee hoelck says
Hi! Love your tutorials… you should probably edit it though because now i’ve got a pocket an inch too small and my lining all serged up… trying to decide how to not waste fabric and save this bag :[
Linda says
I haven’t made this yet but plan to. Look nice and easy..p
Laura says
Do you use quilting fabric or canvas for this tote?
Amber says
I used canvas. Should have mentioned that! Whoops.
Mary says
where do you find such cute Canvas. Love your tutorial. Very helpful
Amber says
This is from Hobby Lobby.
Carmel Bergin says
Hi Amber, that a lovely tutorial. I love tote bags and make them. I have adapted two things on the handles. One is about 3 inches long strip of padding on the shoulder part of the strap. The second one is I make one handle approximately 1 inch shorter than the other so that when I’m carrying the bag in my hand the sorter strap fits neatly below the longer one and of course its padded and easy on the hand.
Paulina says
You did!