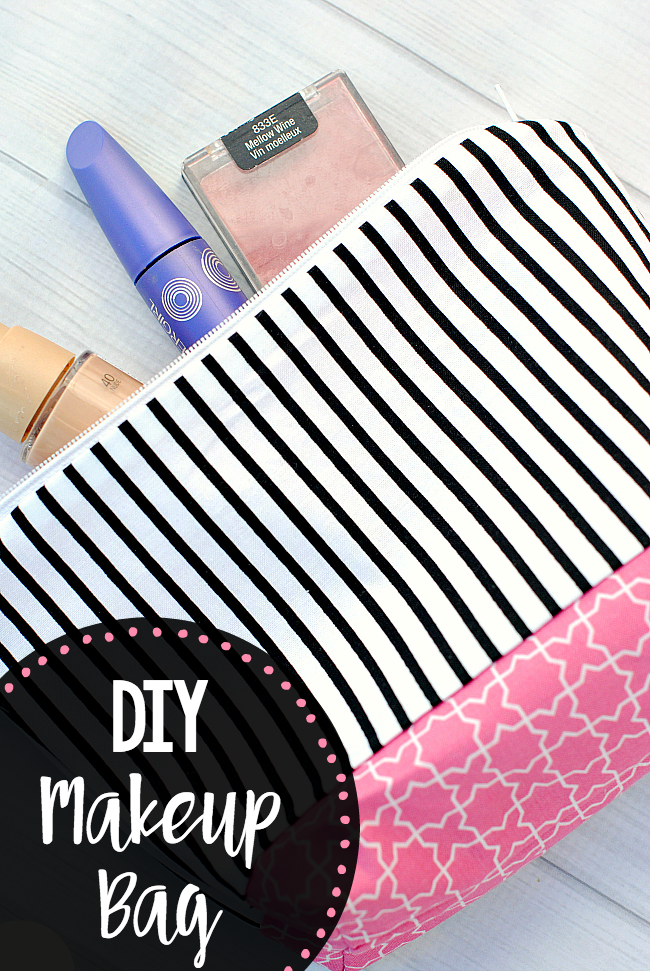
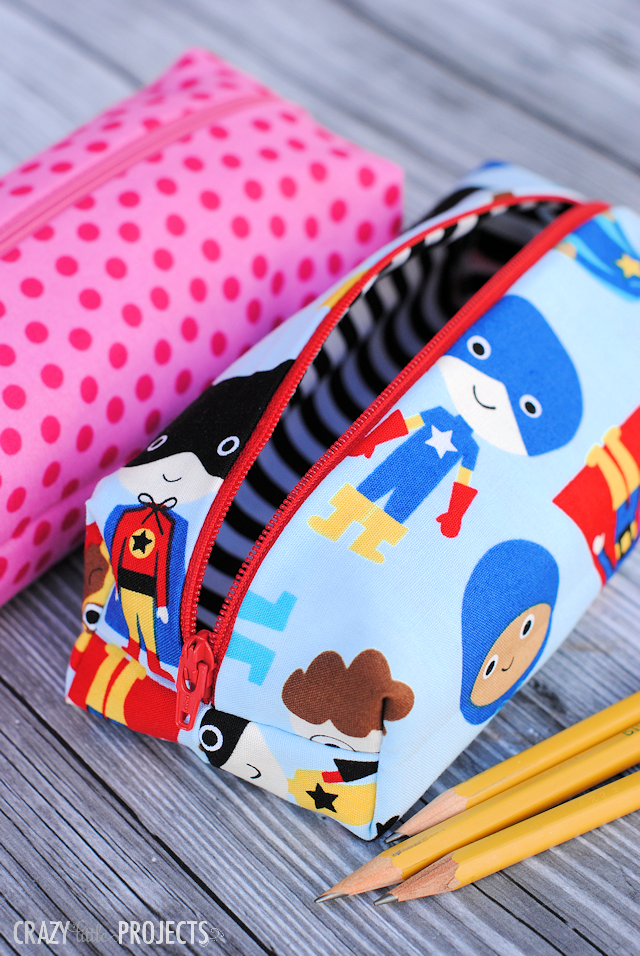
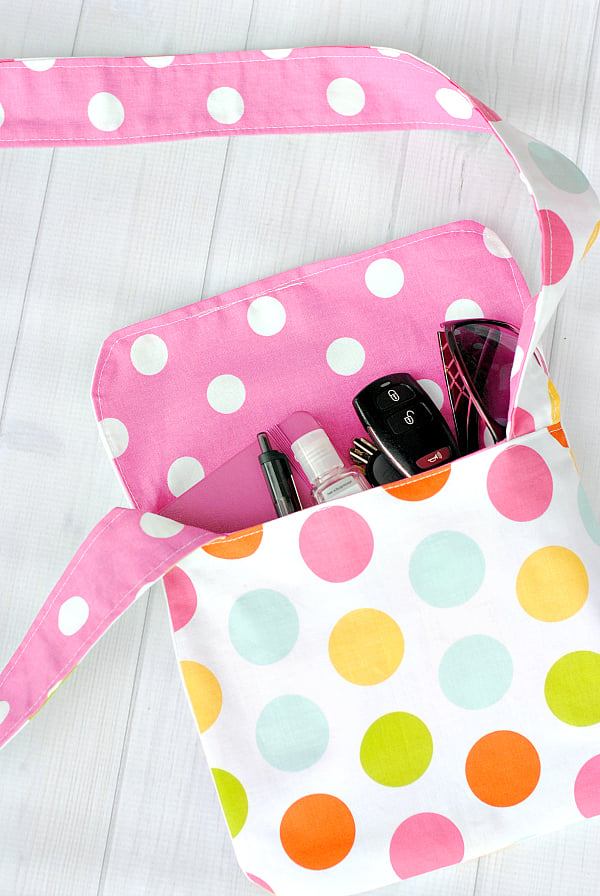
What’s the Project? This easy to make DIY Makeup Bag is perfect for travel, storage at home, as a gift or for any reason that you want a great cosmetic bag pattern. Easy to follow sewing instructions will have you making this little bag in under an hour.
Who doesn’t love a handy little bag? They’re fun to make (and easy!) and they’re handy to have around.
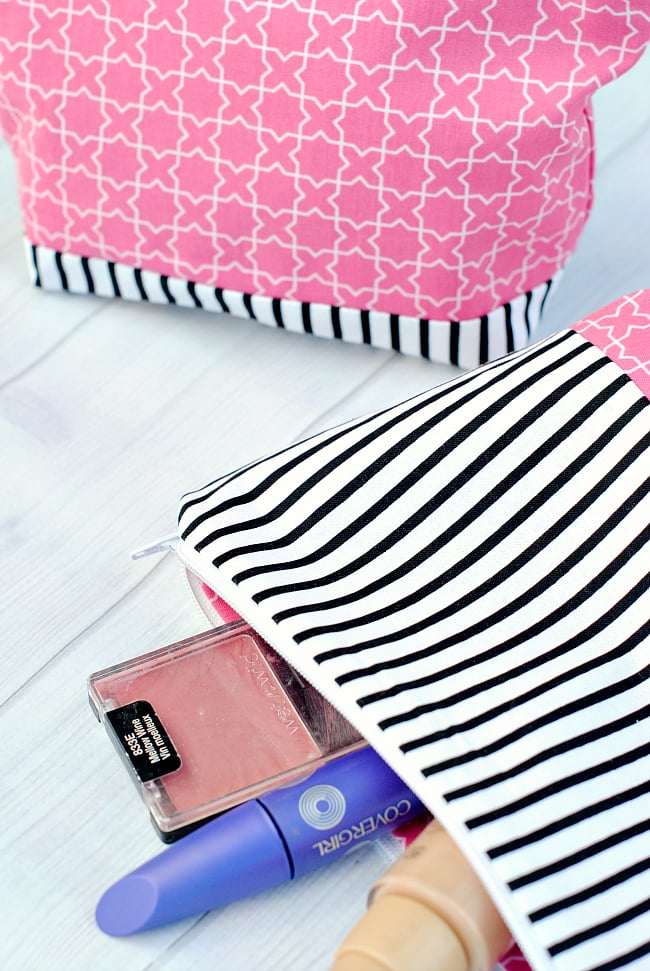
Stuff this little makeup bag full of cosmetics or any other little trinkets that you need to tote. It would make a fun gift too-fill it with cute things and give it to a friend! Here’s a simple makeup bag tutorial:
How cute and fun is that? It’ll only take you maybe twenty minutes to make!
Let’s do it! Let’s sew this cute DIY Makeup bag!
Cosmetic Bag Pattern
Supplies
- 1/4 yard each of 2 coordinating fabrics You will have leftover fabric
- 9 inch zipper You can use bigger if you want a bigger bag.
Instructions
Cutting Guide
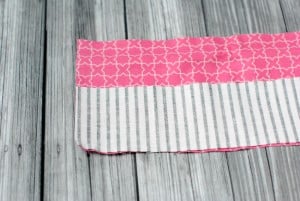
- Cut 2 pieces that are 9 1/2 inches by 6 inches from main fabric.
- Cut 2 pieces that are 9 1/2 inches by 4 inches from coordinating fabric.
- Cut 2 pieces that are 9 1/2 inches by 10 inches from either fabric (for inside).
Sewing Guide
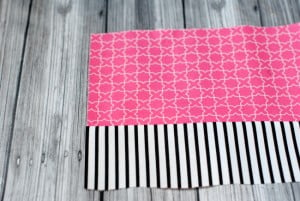
- Grab your piece that is 9 1/2 by 6 and your piece that is 9 1/2 by 4 and sew them together along the long side.

- Do this with both pieces so that you have two larger pieces and press open.
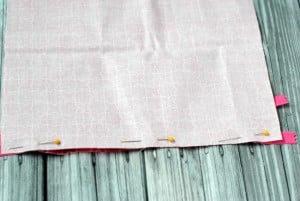
- Now grab your zipper and place it face down at the top of your piece that you just created. Place one of your inner pieces (9 1/2 by 10) on top face down so that right sides are facing each other. Pin in place.
- This is what it will look like from the inside.
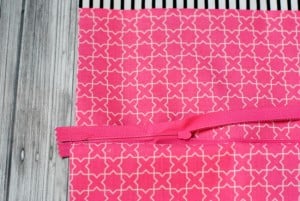
- Sew along that. You can see in the pictures that I have to zipper pull halfway down. You will want to knot your fabric remove it, move your zipper pull out of the way and continue sewing.
- Now do this to the other two pieces of fabric on the other side of the zipper.
- Make sure your zipper is about halfway open.
- Place the fabrics so that the two inner are facing each other and the two outer are facing each other like this (zipper is in the middle).

- Starting at the bottom of the inner fabric, sew all the way around this rectangle being careful when you sew over the zipper (don’t hit the zipper part with your needle!) leaving a 3 inch opening at the center of the inner fabric.
- Now you need to make box corners. I have a whole tutorial on how to do them here if you are not familiar with them. But here’s the basics. Fold a corner so that the seam is in the center and stitch across the triangle about an inch in. Then snip off that corner. Do this on all 4 corners.
- Now, start turning things right side out. Sew the opening closed and then tuck the inner pouch into the outer and press everything nice and neat and you are DONE!


Enjoy this fun DIY Makeup Bag!
You Might Also Like:


Quilter4Charity says
Hello. First, thank you for the cute pattern/instructions. Second, in step #5, what is meant in the second sentence? I am not understanding.
Amber says
You’re just going to sew along that seam where the zipper is but you’re going to have to pause part way down, move the fabric out of the machine, slide the zipper to the spot you already sewed, and then keep sewing. Does that make sense?
Donna says
Things went bad for me at the zipper place. I put everything exactly as pictured and described and I ended up with the lining on one side and the outside pieces on the other side of the zipper. I made it all work, but these directions left out sewing the outside pieces of fabric at the end. That’s how mine ended up. So my lining has the box corners, and the outside fabric does not. I almost sewed it completely closed. I had a little hole to turn the outside fabric, but the lining was already all set. Very strange. I made the tote bag first, then wanted this bag to match. It’s my first projects.
fatemeh says
oh my god, this is very cute, i like this bag
Judy Seaman says
Adorable! Thank you for publishing.
Jeri Meachem says
Very cute and I ran out to get fabric and try it. Hoping to make for my golf team for them to carry tees, markers, change, etc. in. I may even embroider their initials on them. I’m stuck on the zipper part. I’m sure it’s just me, I’m not good at directions sometimes. Also just getting back unto sewing after 30+ years. When you say at the top of the pieces I just sewed together are you referring to the main piece? Because in the pics it seems like sometimes the stripe is on the top and sometimes bottom. I also agree that the inside piece will have to be a bit smaller to allow for he seam allowance already in the two pieces. Thanks for your time. I know I’m going to enjoy your site.
Amber says
I made two bags and I might have used different pictures-one of one bag and one of another? There are more pictures about how to do this here: http://crazylittleprojects.com/2014/08/pencil-case-tutorial.html
Gayle says
WOOHOO! Another great bag tutorial! And another bag in my arsenal! 😀 Thanks so much!
Aria says
I love this! It’s so cute. The combination of prints and colors is purrrfect! Saving! I will probably need to make a makeup bag, now. 🙂
Billie says
Very cute. Just was looking up tutorials for make up bags to make for an upcoming trip and your post showed up in my email. Perfect timing. Love your tutorials. Thanks for sharing. I made the Mini Messenger Bag some time ago for my granddaughter and she loves it. She promptly put her ballet shoes in and it has become her go to bag for her dance class necessities.
Amber says
Perfect-hope you enjoy making it!
Carolynn Scoffield says
I think the your measurement are off! When you see together your two exterior pieces @ 9-1/2″X 4″ & 9-1/2″X 6″ you are taking a 1/4″ seam allowance ( I assume) from each piece, resulting in a finished exterior size of 9-1/2″ X 9-1/2″, not 9-1/2″X 10. So, your pieces cut for the lining at 9/12″X 10″ would be 1/2″ too deep. That could cause your lining to not want to fit down inside the exterior correctly! 😉
Amber says
Yep, size it down a little if you want.
Stacey says
So cute! Thanks for sharing such cute stuff. You always use the cutest fabric combos! Wondering how floppy it is without interfacing?
Carla says
Love it, I want to try it. I am a beginner sewer!! Love the fabric, do you know where that is from??
Thanks for sharing, you have such great projects.