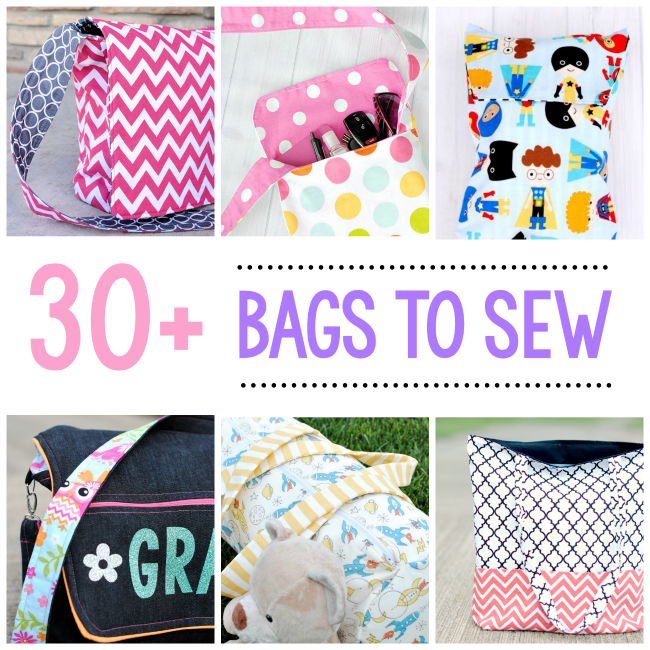
What’s the Project? This kid’s messenger bag sewing pattern is perfect for little girls to carry and they could even sew it themselves or you can make it for them! An easy sewing pattern that turns out so cute! A perfect sewing project for beginners.
This is my very first post that was ever posted to Crazy Little Projects and to be honest, I totally love it! It’s been popular since the beginning but I wanted to update it with some new images and a slightly different way to make it! I am pretty excited to bring this one back to life because it is a very easy sewing project that turns out great and I know you are going to love it.
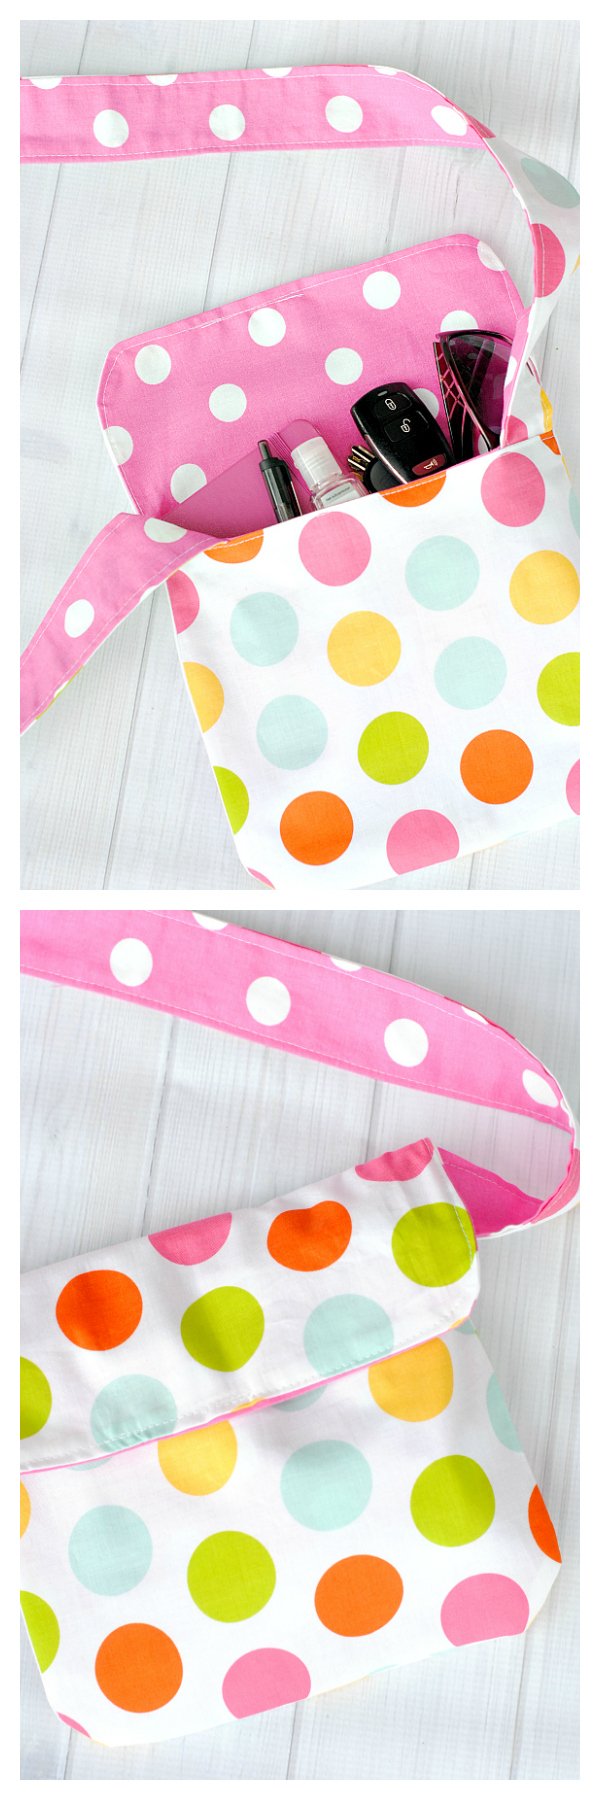
It’s a Mini Messenger Bag that’s perfect for kids to carry and could even be perfect for them to sew if they want to learn! Or it’s great if you just want a small bag to carry a few things. A great beginner sewing project.
(If you’re looking for a bigger messenger bag sewing pattern, I’ve got a couple of others:
But here’s the mini kid’s version.
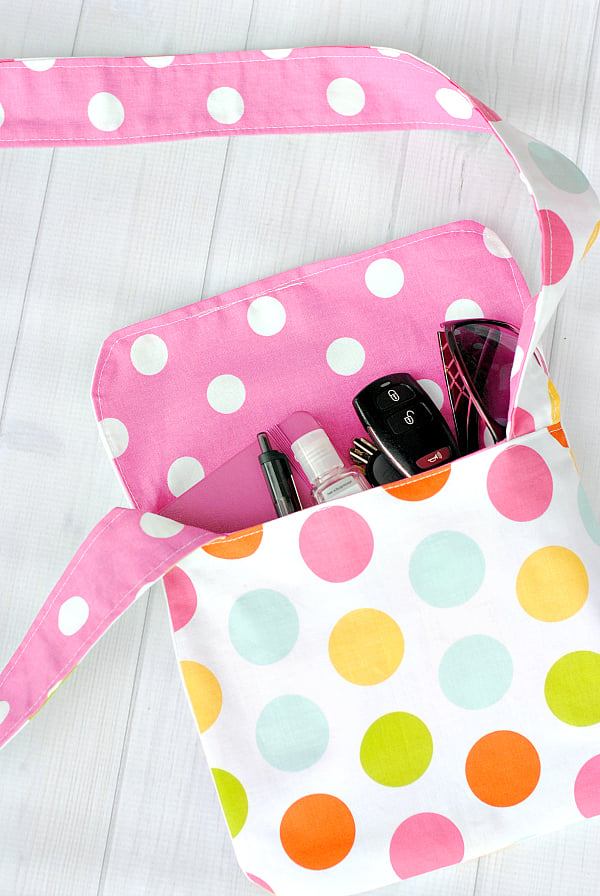
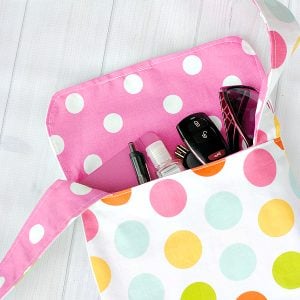
It’s just right to hold just a handful of things. Keys, wallet, phone, you know.
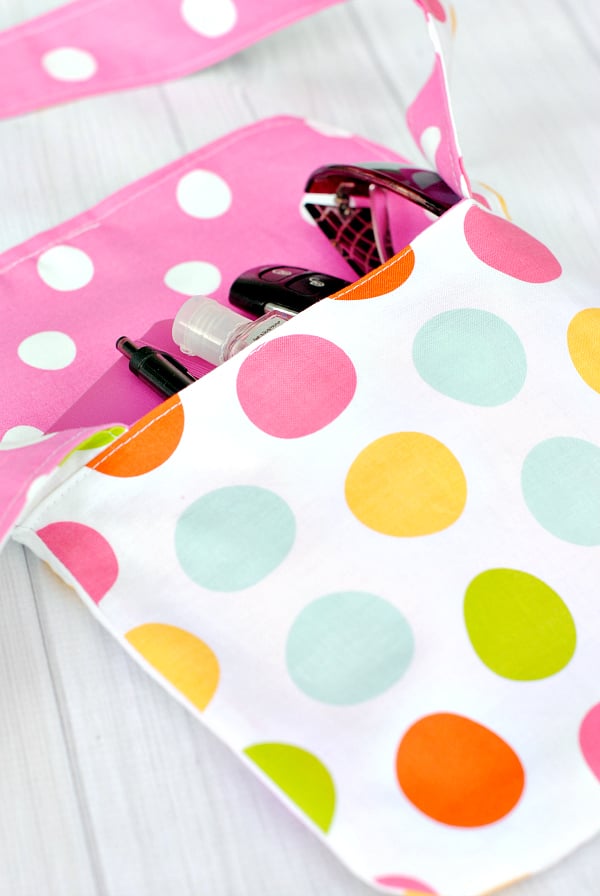
OR, it’s just right for a little girl! A tiny little purse for her to carry. 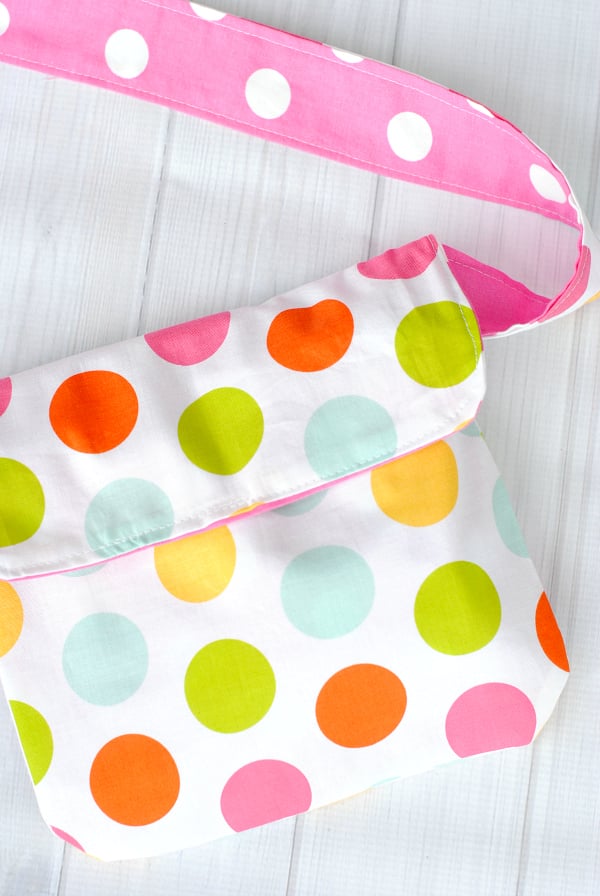
And just for old time’s sake, here’s the original version that I am now updating:

Mini Messenger Bag Pattern:
First, here are the pattern pieces you will need to print and cut:
Mini Messenger Bag Pattern Pieces
Mini Messenger Bag Pattern
Supplies
- 1/3 yard fabric #1 If using a directional fabric, you'll need 1/2 yard instead of 1/3 yard
- 1/3 yard fabric #2 If using a directional fabric, you'll need 1/2 yard instead of 1/3 yard
- Mini Messenger Bag Pattern Pieces (see above)
Instructions
- *Note, there are two videos below this post that can also help. There are 3 pattern pieces to print and cut out from the pattern-the Front, Back, and Flap. Find the pattern pieces above.
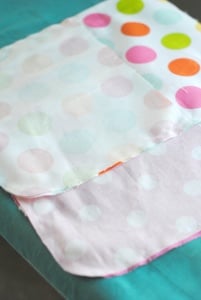
- Cut out your fabric pieces by folding your fabric and then placing your pattern pieces with the straight edge on the fold. Cut one front piece and one back with flap from each fabric. You should now have 4 pieces cut out.
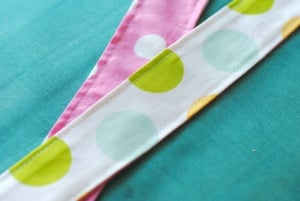
- Now you need to cut out a strap too. Cut a piece from each fabric that is 3 inches wide by about 38 inches long. You should now have 6 pieces of fabric to work with.
- Using your other pieces, put right sides together on matching fabrics and sew around the edges of the front part on the three outer edges. Do this step with both of your fabrics.
- Turn your inner piece right side out and stuff it down into your outer piece. Get your strap and place it between the two layers. Match up the corners of the two layer and slide the strap in so that the end is poking out. Make sure that the strap is not twisted inside and do this on both sides of the bag.
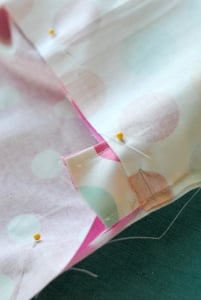
- Match up the sides of the bag and the flap and get everything all pinned together.
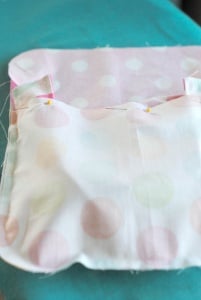
- Now you are going to sew around the bag starting at the top, down the side, across the center piece (only catching the front pieces) and up the other side making sure to leave a 3-4 inch opening at the top to turn it.
- Now, turn everything right side out and tuck the inner part into the outer. Press the opening closed and top stitch around the same part that you just sewed. This will close your opening and make everything look nice.
- Now press the whole bag and you are set!
Kid’s Messenger Bag Video Tutorials:
I hope you loved this mini messenger bag pattern!


Julie says
Hi there! I’m getting ready to make this! I don’t see the videos, however. Are they still available?
Amber says
There’s one video just below the printable instruction section. Can you see that?
Mary Beth Toca says
I am 13 and a beginner at sewing. This is such a great project! I have been having trouble finding patterns I can follow but this was easy. It turned out super cute and I’m proud to tell my friends that I made it! Thanks!
Amber says
Fun!
Kids Bag says
One of the best reversible messenger bag reviews that’s I ever read. Thanks for your fantastic tutorial. 1st time I missed something, but when I review everything again, everything clear to me. I hope the next day I finished this.
Tarin says
Every time I try this bag it’s ends up being two open flaps when I reverse it, I have wasted so much fabric pissing around with this tutorial! I’m so frustrated. I can’t get this tutorial to work for the life of me, sincerely a true beginner at sewing.
Joyce says
I just started sewing and this was my first real project. Wow, it turned out better than I could have imagined. The tutorial was wonderful! I can’t wait to make another one.
Amber says
Congrats on your first sewing project!
Kalpani udugampola says
Hi,i am a begginer in sewing and this is the first ever sane project i did with a practical usage and i love it,thank you so much.Yet i seem to have a problem with the strap.When i close the flap the strap seems to be in an uncomfortable state.Is it simply the design or have i got it wrong?
HelloSewing says
This messenger bag is so cute and yet so simple to make! I featured it in my Easy Sewing Projects for beginners on our blog! Check it out here – https://hellosewing.com/30-super-cute-easy-sewing-projects-beginners/
Thanks for sharing!
Grady Elliott says
Oh wow, Really it’s a so beautiful bags. I am reading your blog and i get the valuable information. You share the tutorial is very useful for me. Thanks!
Kylie says
Thanks for the tutorial-but am I missing something?? The straps on the front of my bag mean the flap doesn’t close when worn?? I must have stuffed up. Think I’ll cut the flap off 🙁
Sharon L says
I just made one & ran into a he same problem- I added 2 pockets and I cut fabric for 6 of these bags – I think I’ll add a gusset to make room for the strap to sit at the sides of the bag & not the front – I like the thicker strap & this way it’ll seem like a more authentic messenger bag –
Billie Petty says
I love this pattern. I have now made 4 – by request from family and friend and the kids love them. I make them quilted in specialty fabrics.
In fact I love all your patterns, your instructions are really the best.
Amber says
I love hearing that!
Fabiola De Leon says
The link for the pieces isn’t working! 🙁
Amber says
It’s fixed now. 🙂
Rebecca says
Hello! When I go to download the pattern pieces, it says the firewall Is not set up properly and the site owner should contact them for support. Any ideas? I’ve tried on my phone and laptop.
Amber says
It’s fixed now. Sorry about that! 🙂
Sarah says
Hey, this looks like something super fun to make, but the pattern pieces won’t show up! It says the firewall isn’t configured properly, and it should show up in a few minutes, but they won’t show up!
Do you have another link I could visit?
Amber says
So sorry about that! I’ve got it fixed now.
Brittany Lewis says
I don’t know how to embed a photo, but this was my first bag. I made it for a birthday girl in my little pony print. I only shortened the strap and added a bow! Thanks for the awesome tutorial!! I will email you a pic if you like.
Amber says
Love to hear that!!!!
Kim A says
OMGosh I love this bag! I want to make one to replace my leather one so I can use iron on transfers on it. Do you have any idea how much you should shorten the strap to fit a (very short) teen?
Amber says
Sorry it took me forever to answer this. I would say just take a couple of inches off.
Juli says
Hi! Love this pattern! Just made this bag today and my straps don’t seem to lay correctly. Are they only sewed between the front layers or along the back piece too? I watched the video a few times, but I am still struggling. Help please! Thank you!
Amber says
Because that bag is so small the straps can be tricky. You can fold them in half in the spot where you sew them in to have them take up less space and that can help.
Deborah says
Just made one of these but don’t like that the straps prevent the flap from folding down over the front of the purse. I see yours is that way, too; why? I’m going to take it apart and see if I can do the straps differently. Other than that, I love this little purse! I’ll be making some for my granddaughters, too! Thank you for the pattern and tutorial!
DeeDee says
Hello, Thanks so much for this pattern! I’m making this for my sis-in-law for Christmas! 🙂 Anyways, I bought 1/3 yard of each fabric and there really doesn’t seem to be enough left for the strap unless I piece it together. I tried a bunch of different layouts before cutting and it didn’t seem to work. How did you lay it out? Maybe I did something wrong!
Amber says
I’ve pieced it together before too to make it work.
Clara says
Thank you for this tutorial. What is the size of finished bag?
I think I want to make a bigger bag so what do you say if a make pattrern %110 bigger. Will it be good?
Amber says
It’s probably about 6 inches finished. You can definitely size it up.
Crystal @ Hello Creative Family says
Amber it was so lovely to meet you at SNAP. This project is so sweet. I think I’m going to let my 7 year old pick out some fabric and sew it up together. 🙂
I included this project in a roundup of some of my favorite DIY and craft projects from people attending SNAP! I’d love for you to take a peek. You can find it here:
http://hellocreativefamily.com/27-diy-projects-from-creative-snap-bloggers/
Best Wishes,
Crystal
Amber says
Fun!!!!
Kathleen Watson says
Pinned it on Pinterest for later…nice for carrying things while on bike
Cathy A says
Found the giveaway Target card 🎉
Amanda Hudson says
found it!
Dori Troutman says
Found the giveaway entry!
Georgia says
Hi! How do i get the flap to stay flat when folded over opening? Please explain.
Amber says
It should lay pretty flat. You can also put a seam there if you want to help it fold.
Alicia says
What seam allowance do you use? Thanks!
Amber says
About 1/2 inch
Dana says
I LOVE this bag! I got all excited and started making it this morning and then got really confused by the directions. Was I supposed to cut 2 full pieces of the back and flap? It looks like in one of your pictures, you have just the half (back) sewed to the full (with flap). Then I’m confused by the next directions: Turn your inner piece right side out and stuff it down into your outer piece. Get your strap and place it between the two layers. Match up the corners of the two layer and slide the strap in so that the end is poking out. Make sure that the strap is not twisted inside and do this on both sides of the bag.
Do you have pictures of this part? I’m new to sewing, so I’m having a hard time following. Can you help??? Thanks!
Amber says
You should have 4 pieces total-2 back-one of each fabric. You’ll sew the front to the back and then use your inner pieces and do the same. THEN you can put one inside the other to do the sewing. Does that help at all?
Janice says
Shame this is listed as things to with fat quarters – can’t get the straps out of a fat quarter, unless you cut and join them. Otherwise, a cool pattern which I will make for my grand daughters.
Adrienne Szat says
Just saw this – came from one of your emails I subscribed to; very nice.
I may add some light stiffening. Thank you.
Kristine says
Thanks for the pattern. Would have helped if I read the instructions thoroughly. Since the pattern didn’t say to place on fold I cut it out as is. Now I have a tiny cell phone purse of Curious George material! Whoopsie!!
Keelan says
I love this! I am 7 years old it was kinda hard doing the flap but some help from my mom I did it ,I added a button.So cute!
Amber says
Nice job!
Sue says
What do you suggest to use for a closure for this bag for a girl of about 10? I don’t want everything flying out of it.
Amber says
Maybe a magnet?
Sophie says
I am making the mini messenger bag and I am having trouble. You said that there is a video, but I couldn’t find it. Where is it?
Amber says
There is a video on the messenger bag page here: http://crazylittleprojects.com/2012/09/messenger-bag-tutorial.html Down near the bottom of that post.
karen Allen says
Hi there,
I am struggling with this one! No matter what I try, the bag will not close because the handle is in the way!! Am I doing something really silly?! I keep looking at the instructions but the handle seems to come out at the front of the bag which stops the flap from coming over! Please help, this is driving me mad!!
Amber says
It shouldn’t be at the front of the bag, just right along the side, as far back as you can get it. If it bugs you, you can pinch the handle or fold it in half where you sew it in place to get it to take up less space.
Marga says
I was going to ask the same since it looks like the strap is sewn at the front of the bag and not along the side. Good I found the answer before asking again!!! Amber, I’ve been making your old version for my girl and friends, and I love it. I see that this new one is simpler since the flap and the back is just one piece. I am looking forward to give it a try!!! Thank you so much!!
Karen says
I decided that being reversible wasn’t important to me so I sewed a little bit of velcro to the flap and the body so nothing would fall out and that keeps the flap closed.
Astrid says
Exactly the kind of tutorial I was looking for!
Going to try and make it as soon as I can find the right fabric!
Lajenga says
I’ve been looking for a reversible messenger bag tutorial for my 6 and 7 year old grandsons. Would this be the appropriate pattern or should I use the regular messenger bag pattern and cut it down? If so, any suggestions on sizing?
Amber says
This one is very small. I do have a kids messenger bag if you are looking for something school sized?
Sue says
Where is bigger kid size pattern/tutorial?
Amber says
http://crazylittleprojects.com/2013/07/personalizedkidsmessengerbagtutorial.html
Grace Tee says
The bags are so adorable. Bright and playful. This is perfect fit for summer and spring. Might wanna have one of it soon.
Grace Tee
http://neohandbags.com
Lucy says
Thank you so much for your tutorials – I am all cut out to start construction on the full size messenger bag tomorrow! I’m a little excited.
I’m not sure if you’re still checking the feedback from this thread and it’s been a while since you posted so I apologise if you’ve already learned this trick – I spray my finished bags with a cotton waterproof spray (test on a swatch of your fabric first just in case, but I’ve not noticed any discolouration).
It helps keep the dirt off, stops the colours fading (on the odd occasion we have sun!) and it means I can use any cotton I like and still be a useful bag.
Amber says
Great idea!
Jae says
Nice pattern but the straps at the front of the purse prevent the flap from closing properly when worn. I discovered this problem when sewing the bag today. Also, directions for where to place straps are a bit confusing for step where everything is inside out – do they go between the two front pieces or between the back and front pieces? I believe it’s between the two front flaps, but there’s still the problem of the strap placement. If anyone has any advice for me, I welcome it. The purse turned out pretty, but the cover flap does nothing when wearing it!
Lesley says
Hi Jae, I had a similar issue but will move them to the side when I next make it. Perhaps some Velcro or a button and loop closure would help?
Lesley says
Hi, just wanted to thank you for this pattern, my little girl wanted a Peter Rabbit backpack to wear for her 7th birthday party and I have been able to make one using your pattern, thank you. I have never made a bag before!
Celeste says
We are also adding Velcro to it, to keep it closed. We messed up on the first one and made 1/2 of the bag, and I call it a pencil bag thingy.
Celeste says
Hey, me and my mother made one yesterday. The strap was a little fat, so we halved it, and it looks Much better!!!! Just so u know
Melinda Christensen says
I want to make one for my grand daughter. She will love it. So cute!
Karen says
Thanks for sharing your pattern. I love this little bag. I made one from your original tutorial and I especially liked the wider strap. The only thing I was trying to figure out was a way to have the strap be wide all the way to where it attaches at the bag, rather than have it folded in half where it was secured to the bag. I see one of the modifications you made to the new bag was to reduce the width of the strap. Also, I put a velcro closure on the flap because I use it outside to walk the dogs and I didn’t want anything falling out.
Megan says
Thanks for the post. I’m going to make one for myself sometime. I think I may try adding a magnetic snap to the flap.
Dawn says
This project is exactly what I was looking for…thank you. However I do not have a printer so I am unable to print the pattern pieces. Can you tell me the measurements of the pieces so I can hand draw them? Thank you so much!
Dawn
Amber says
The width is about 9 inches, the front is 7 inches and with the flap the back is 12.
Lynne Poulson says
Hi Amber,
I was going to make this, but the link to the pattern pieces won’t open. Please can you help, or could it be a tablet thing, and I need to use my laptop?
Thanks x
Amber says
Yep! It’s a pdf so that’s probably why it won’t open on a tablet.
Jenny says
I’m starting this project and am not clear on how to cut the fabric!? It says to lay out the fabric and cut the pattern. Then it says to cut three sides on a folded piece of the fabric, leaving the fold intact. Help! I’m making 8 of these little guys 🙂 🙂 🙂
Amber says
Fold the fabric and place the pattern on the fold. Then cut.
Nicole says
I wonder if you would sewn a small magnet into the flap and front part might work. The bad would still be reversible, but give a little extra protection from loosing stuff. Will give it a whirl when I make mine next week ;). Will try an update.
Amber says
Yep!
Di says
I have never made a bag in my life but I have now sewn two of these and love them! Wish I could post a piccie of them to show you. Thanks for the free pattern.
Kimberley says
Hi Amber lovely tutorial I enjoy it; One Query I from where you say. Put the t two matching fabrics RS Matching & Sew the edges on three sides leaving about 1/2″ unsewn at the beginning & ending part to fold the pieces under/ down. Repeat this Step with other fabric.
3. Now lay both of your sewn together pieces so that front parts are RS facing/touching each other & the Back/Flap pieces are on the outside.
Sew the pieces together just around the top part stopping before you get to the front pieces. Could you Simplify this part; thanks in advance.
However the other parts of the tutorial are straight forward & congrats to you on making your very first patten ever; u did a good job for your first time. Look Forward to your Response A.S.A.P! TAFS & I will definitely bre making a few of these soon because they’re just so cute & thanks for your inspiration. Have a Blessed Day Ahead & Beyond.
Ally says
I have the same request as Kimberley. I am stuck at this part
“Sew the pieces together just around the top part stopping before you get to the front pieces”
Can anyone who has made this bag comment please?
Thanks
Amber says
I have a brand spanking new version of this tutorial coming out next week if that helps?
Di says
Thanks for the pattern. I am use to sewing and found the pattern ok and automatically put on the fold. Bit confused whrn putting the outer and lining in one another and then sewing just the front flap but I got there eventually lol. It’s a lovely little bag for when I go out with the dog. Might have a go at a larger one now as this one was the first bag I have made, thanks.
Lynn says
I am going to attempt to do this with my 9 yr old granddaughter today. Have you thought about doing a video tutorial? I find them so helpful!
Stacy B says
Got a sewing machine last week… never sewed on a machine before but I have always been crafty and have hand sewn a bit. Found this after practicing a few pillows, and made a cute little purse tonight. Only delay/trouble in instructions was realizing to put the straps BETWEEN the inside pieces before sewing their top edges down/together. Not sure how to clean up the instructions for that for future newbies, but forewarning it might take a little trial and error to get it right. I am pleases nonetheless and thank you for such a straightforward first real project!
Julia Pierce says
Crazy about your projects!Busy as you are,it’s great you share with all of us.Am planning to make as many of your bags as possible for our churchs donation to the Operation Christmas Child boxes we fill every year.Wish me luck….need about 1000 by the end of Nov. Thanks for helping me out with this pattern!!!
ShawnAnne says
I will be teaching a class to 10-14 year old kids in a couple of days. This small bag looks like a perfect beginner project. I am confused and I hope you can help me understand your directions. I have sewn around the 3 outer edges of the front piece and it says to do this step with both fabrics. Do I sew the back pieces together then turn right side out? Your photo looks like the front piece is sandwiched between the 2 back pieces?
Amber says
You sew each separately and then put them together with right sides together to sew them together and then turn right side out. Does that make sense?
Amy says
I am excited about this bag and am making it as a birthday present for my daughter’s friend (they are 3 yo and love to play dress up). Can I suggest you put into the instructions not to get a fabric with a pattern has to go a certain direction? The hello kitty’s on the fabric I purchased are right side up on the bag, but when you flip down the flap, they are upside down. I had to do a little cutting and resewing to get them all in the right direction. It’s something I didn’t think about since I haven’t done a ton of projects, so it could be helpful for new sewers.
Amber says
Good idea!
Amber says
Oh actually, I just looked and those instructions were already in there! 🙂
Dawn says
Thanks so much for this pattern! I have a question, I would love to make the reversible version for my girls (I have 4 of them) for their Bible Bag for church. I think your pattern might be a little small. Do you have any suggestions for making it a little bigger? Thanks again, these are super cute! 😉
Amber says
Just add a tiny bit to the dimensions.
Rita Pirkey says
How do I print this without all the ads?
Amber says
You can copy and paste the content into another document.
mmmmarg says
love the bag. i cant stop making them. i have tons of random fabrics and some dont match, but i still make em……thanks! after the 4th one, i think i mastered the strap attachment and cleaning it up near the strap. keep up the great work!
MARY BETH REED says
I love this bag, I made one tonight. I need to figure out a better way to not have raw edges hanging out where I attach the handles. I make purses also. I will watch for more from you.!!
Rita Pirkey says
I attached my handles on the outside…. just turn in the raw edges first.
Charlsye says
What a great tutorial! The instructions are great and easy to follow. I like your fabric choices better. Some pics of my bags are at: http://bit.ly/1omq0Ef
Amber says
Cute!
Jessie says
Hi! I LOVE your crafts and projects! With summer here, i’ll have more time than ever! I’m 12 years old and i’m making one of these as a birthday present for a friend. So far its been easy, but I’m having trouble on the flip part….when its flipped, i just end up with my flap and two inside out pockets, back to back! Can someone help me on this? I can’t get the two pockets inside each other. By the way… I made my own pattern to go by by drawing on a piece of paper and using that, for those of you who would like your bag to be a different shape, bigger, etc. I also added fusible fleece. Love this project and all your ideas, summer’s gonna consist of Pinterest and this awesome website! But please help me on the flip! Thanks.
Jessie says
Never mind about the flipping part.. I got it! 🙂
Amber says
It sounds like you just need to stuff one into the other? Did you get it to work?
Stephanie says
Love this! I taught a couple 13-year olds to sew using this pattern! Thank you 😉
Beth says
I just whipped one of these up. Wow, it was quick! I got confused at the stage where you flip it all so it’s right side out, with a pocket inside… it took me some time to figure out where to put which bit… but I got there in the end and I’m happy with the end result!
I did it in Hello Kitty fabric on one side, for my daughter. I’m sure she’s going to like it. I think I will be making more! Thanks!!
Jessie says
How do you do the flipping part? I’m having trouble there.
Jessie says
Never mind… I JUST figured it out!!! 🙂 I’m so happy!
Sandra says
I love your tutorials. Lovely things to make. I made my niece the diaper and wipes holder and she absolutely loves it. She uses it all the time and now all her friends want one. Thankyou for your wonderful ideas.
Julie says
I have made three of these bags, and each time I’ve done it a little differently. LOVE how they turn out. On bag #3, I added some fusible fleece to give it some extra stability. All three are adorable for my girls and their friend.
Kristen says
If you put magnets (double sided) in the top flap and where it connects to the bag you could keep it reversible and still be able to close it. Just a thought. 🙂
Amber says
Good idea!
Makenna says
I’m alittle confused on the cutting how do I do this?
Amber says
Use the pattern but make sure you fold the fabric so that you get a symmetric shape. I need to update this tutorial a little. I think it was the very first sewing tutorial I did!
Natalie says
I am a little confused on how to attach the straps. Can you clarify where you attach it to be able to use it on the reverse side. Overall, I enjoyed the tutorial, some areas were a little unclear but other than the straps I have been able to figure it out! Thank you!!
Amber says
Once you have the outer and inner pieces sewn together you should just have the front seam that is still open. Just stick your strap down in there and then fold the raw edges inward and sew that part shut, catching the straps as you do it.
Carolynn says
Hiya! I know this is a super old post, but I tried it just today and loved the outcome. I’m posting a picture of it on my website: http://sewingjane.blogspot.com with a link to this page! Thank you for sharing the pattern and for the wonderful tutorial! I had a bit of difficulty with the straps, but it was more of a me problem hahahaha than something wrong with your tutorial!
Amber says
Oooh I really like how yours turned out!
Carolynn says
Aww, thank you!!! 🙂 it’s all thanks to you!!! God bless you!
Kathleen says
This is an adorable bag, but my sewing skills are not as good as some, I had a tough time with the strap and found the 3 inch size too big, I also had a hard time understanding about leaving corners open, oh my…..anyway mine turned out ok, but its more of a small clutch and maybe I can find some thinner strap to use or makes some about an 1or 1/2………..
Maritza says
Thank you so much for all your sewing tutorials. I’ve always been scared of sewing but I received a sewing machine for my birthday. This is the first project I tried and it was a success!!! Thanks so much!
Bev says
On my second bag, I found an easier way to put this together. Press under the top edge of the 2 front pieces; I did 1/2″. Lay the front piece on back piece and mark where the front piece ends. Remove front piece. Sew the two back pieces together on the flap end first, stopping where you marked. Clip on your mark just to where your seam is. Turn, press, and topstitch flap. Also stitch across where flap ends and the back part begins (i.e. at the clip). You should now have one flat piece with a flap on one end and 2 loose pieces on the other end. Sew the two front pieces onto their respective bottoms. Because of the clip you made this should be easy to do and you know where to stop. Turn, press, and tuck one inside the other. Make strap, insert and topstich the font edges as you instruct.
Miki says
I love this bag. I teach a sewing class for young girls and this will be a fall project for us. Thanks for the great tute! The girls are going to love it.
Blessings!
Mary Ellen says
I think the beginning instructions and pattern are confusing to those of us who do know how to sew. If a pattern is supposed to be placed on the fold, the pattern should indicate that. I just did what the pattern said and cut 1 from each fabric, but the cuts are totally wrong. Are we supposed to fold the fabric for just that one pattern, or all of them?
Amber says
I just looked at the post and it does say to fold your fabric first and there is a picture of the fabric folded and then the pattern being cut? Are you having problems beyond that?
Corina says
I’m confused. You said cut 1 piece of each. I did that. But then you say to put your matching fabrics together. Is this the front of the 2 different fabrics? You should also add pics of how you taped your pieces. I got stuck on that too.
Amber says
No, you should be cutting 1 front AND 1 back piece of each fabric. Then stick them together.
Chelsea A says
Hi! I was wondering if you could do this bag in a bigger size, and also if you could make a bigger mesenger bag without fusible interfacing.
Amber says
Sure size it up as needed. And with the bigger one you can definitely do no fusible fleece. The first one I did didn’t have it.
Barb Lieberman says
LOVE this pattern! I just made it for my daughter, as a bag for when she sells her wares at craft fairs. Now I want one!
Barb Lieberman says
I meant to add that I slipped a piece of interfacing into the back side of the bag before finishing, to give it more stability.
Amber says
Good idea!
Rae says
Hi! Have you ever sold any of these? I made one similar but larger and was wondering what to sell it for. Thanks.
Amber says
I haven’t sold any. I used to sell things I sewed…till I got totally burned out. Sorry! 🙂
Claire says
I don’t get quite how to put the pieces together because the pattern has the front and back only have one rounded corner. Can you explain?
Amber says
Sorry, not sure what you mean? Both of the bottom corners should be rounded. You cut the pattern piece on the fold. Did you do that?
Julie Quinn says
Just made 8 of these in a tan fabric I had left over from my basement curtains. My daughter is having a Nancy Drew/spy birthday party and these are making fabulous spy bags to carry all of their gear as goody bags. Had a little trouble with the straps, but it will be ok. Left the straps long so they can wear it across their bodies. Thanks for a wonderful, easy and FREE project.
Amber says
Oh my word. That is the funnest idea ever!
Christine Sherman says
Hi, wanted to say thanks so much for this. My grand daughter is here and wanted a purse. This was quick and had super instructions! She picked the ugliest fabric I had, even after the coaxing to pick my best prints 🙂 She loves it and I will be making more for my other grand daughters, thanks again!
Stacey says
Good tutorial, had 2 attempts lol – cant really do the handles lol.
http://www.craftster.org/forum/index.php?topic=424566.0#axzz2W788reAt
Amber says
Great job! I love seeing people’s finished projects!
michelletripp says
I was wondering if you remember the name of the turquoise flower fabric you used here??
–michelle
Amber says
It’s Michael Miller (designer) and I think it’s one of the Lil Plain Jane line?
Sara says
Hello, found your pin today and I love the idea!! When I go to print it, the wording on the patterns is all jibberish…. is it supposed to say something in English? Not sure why it is doing this?!?
Amber says
OK, that was just crazy! No idea what happened! But I think I got it fixed. Thanks for letting me know.
Kristy says
Love this! Adorable!
Gloria says
Did this project today. The bag turned out great, but I’m very new to sewing and I didn’t realize you had to fold the material before cutting the pattern, had to cut it twice. The rest of the tutorial was good. Loving the learn to sew series
Mary Jane says
Is it necessary to pre-wash this fabric since this is a bag? (Although I guess doing so would enable it to be washed later on if it gets dirty, without it shrinking then). Maybe I just answered my own question, LOL! This bag is so pretty. Love your choice of fabrics. I bought the material today for this bag, and it’s really pretty, so I sure hope I don’t mess it up. As I read through the instructions I’m not 100% understanding it, but maybe I’ll get it more as I’m actually doing it.
Amber says
It’s always best to prewash. But I never do. 🙂
Dominique says
Hey Amber!
What are the final dimensions for this bag? I want to make it for my 9 year old sister but I am unsure if I should increase the size a little or if it will be just right! Thanks!!
Amber says
It’s small-like 6 or 8 inches across.
Mary Jane says
I haven’t made this yet, but I want to; in fact, I am quite behind and have only made the burp cloth in lesson one. (I was already behind but now am even “behinder” due to a family emergency that I’ve been dealing with). A question I have for this as well as the other messenger bag I hope to eventually make: can the lining be a batting (it’s a high quality 50/50 material that I used for when I made my rag quilts)? Thank you, and I will probably have more questions later on…I am a TRUE BEGINNER when it comes to sewing.
Amber says
Sure! You could definitely do that!
Britni says
This is ADORABLE, amber! I am definitely making one of these for my daughter, she would love it! Pinning and hopefully attempting soon! 🙂
stacy says
This is great!
Im soo slow and never understand but you explained this really well!
Now to get some fabric and give it a go!
Faith says
I so love this little bag an it was pretty easy to make…I made one with lots of success and plan on making some more! Thanks Amber 😉
Tui says
Thank you so much, I have been looking & looking for a pattern for this since my friend & I went out dancing. We kept setting down our purses (mine a shoulder bag hers a clutch) all night & then having to run back to make sure they were still there. So I’ve wanted a little fun night out purse to make.
Amber says
Happy to help. 🙂
Stepganie says
I saw a pin that linked to your homemade gifts and I love this little bag. Would you say it would work well for little girls? Would you shorten the strap? How much? I would like to make one for my niece (6yrs) and my daughter (4yrs). Thanks!
Amber says
Yes, it would be PERFECT for little girls. I might shorten the strap a little. The strap currently leaves the bag at about the height of my hip, so I would take off several inches for younger girls.
Sarah says
I made this bag this morning. This is the very first time I have used a pattern and the very first time I have made a bag. It turned out SO cute. I am very very pleased with myself. I had a bit of trouble turning in the edges of the opening and intserting the straps, but I think I will get better at it on my 2nd try. I’m going to make at least one more for Christmas gifts.
Amber says
I love hearing that sort of thing!!! Yay! Way to go. (By the way, I am going to have a learn to sew series starting in January that is going to be awesome. Sounds like you know how to sew, but it might teach you a few new tricks so you should check it out!)
Anne S says
Thanks for the tutorial. 🙂 I used it to make a mail pouch for a playset for a birthday gift. http://www.flickr.com/photos/31739127@N03/8108858964/
Amber says
Oh that is SO cool! Thanks for sharing that!
Elisia {aT} craftyhousemom says
Hi new follower from http://craftyhousemom.blogspot.com would love if you visited
Marilyn Clark says
This is so cute! 😀
lotusbomb says
Hi! I just wanted to let you know that your reversible messenger bag inspired the one I made for my self-imposed Pinterest Craft Challenge 🙂
http://lotusbomb.blogspot.com/2012/08/30-day-pinterest-craft-challenge-day-2.html
Emily says
Super Cute pattern and fabrics. I’m trying to sew more so this would be a great project for me.
Polkadot-pretties says
Thank you for linking up this fabulous project!!!
This week’s Linky Party is up!!!! http://polkadot-pretties.blogspot.co.uk/2012/04/you-inspire-linky-party_28.html
I hope you will stop by an link up another lovely project..
Claire x
Christine says
Thanks for sharing this at The DIY Dreamer… From Dream To Reality!!
Ginger says
I’ll be featuring you on Thursday. Thank you so much for sharing at {wow me} wednesday. 🙂
Ginger @ gingersnapcrafts.com
Erin says
I love the colors! 🙂
Erin
takingtimetocreate.blogspot.com
Jill ~ Jillify It says
CUTE messenger bag!! I would love for you to share it at my party going on now at Jillify It!!
Jill
http://www.jillifyit.com
Amy L says
I love this little bag – I need to make one for myself as well for those rare occasions that I do not need to haul all the kid gear with me.
~Amy @ Permanent Kisses
Connie says
Hi Amber: I’m Connie @ http://hotflashncraftn.blogspot.com/, your new GF friend. I would love you to stop by and be mine too.
Great bag, I love over the shoulder bags. Your’s is pretty, I may have to try to make it.
Thanks for sharing!
Alison @ Oopsey Daisy says
Incredible tutorial!! 🙂 I love the fabric here. SO sweet! Thanks for sharing at oopsey daisy!
Sewing for Utange says
A beautiful little bag – thanks for the tutorial!
Christine says
SO COOL!!! I just bought a little messaging bag for my daughter.. and it’s not this beautiful!! I will have to try and make one! Great tutorial!
I sure HOPE you’ll share this at The DIY Dreamer… From Dream to Reality!
http://thediydreamer.blogspot.ca/2012/04/from-dream-to-reality-linky-party-10.html
Rose says
That bag is awesome what a good job. I am a new follower. I just love your blog it looks so good and cheery. I would love for you to come visit me and share at my link party @ http://www.arosiesweethome.com/2012/03/welcome-to-our-3rd-link-party-we-are-so.html
Hope you come
Rose
Crafty Cousins says
Super cute! I love the colors! I’d love for you to link up to Crafty Cousins.
http://crafting-cousins.blogspot.com/2012/03/what-i-wore-sunday-week-10.html
~Natalie @ Crafty Cousins.
Holla! We’re your newest followers! 🙂
Lynette @ My Craft Discovery says
oh you just solved one of my life’s problems! Instead of sewing the strap on, I will attach loops and hardware so that it can come off. That way, I can store my personal stuff inside my diaper bag, and attach the strap when I need to run without the baby (or huge bag). I will also add an inside zipper and a pocket. Thanks for the great pattern and tutorial!
Peggy thomas says
I like the loop idea, cause i made one and am not satisfied with how the handle attaches!
Kat says
I absolutely agree. It kind of lifts the flap open doesn’t it?
nbarnum says
I’ve officially subscribed via email. I’d love the bright flowery one. 🙂
The Tovey's says
I want one please!! I love both but my favorite is the blue and brown !! I’m following in Facebook
Vee says
Facebook stalking, too!
Vee says
Pinterest, too!
Nancy says
ohhh.. I love the flowers/polkadots 🙂 It’s so bright and cheerful 🙂
Vee says
Windows Live, baby! Flowers & dots. 8)
Vee says
Amber, you are Da Bomb! I am in awe at your many talents, business sense, motherly skills(always good to have sweet skills), and your boundless energy and enthusiasm. I’ll try to follow you on Google…I hope I get the hang of signing up to be a follower.
Liz says
And Pinterest! Yay! Here’s hoping I win since I can’t sew a single stitch to save my life. 🙂
Liz says
. . . and a Facebook follower. 🙂
Liz says
I like the brown and blue. And I’m a Google follower of your blog. 🙂
Nicole says
and also i follow you pinterest page:)
p.s. i like the bright flowery one!
Nicole says
aaah a blog! im so excited now i can always follow you craftiness 🙂
so i liked you on fb
Sarah Nielsen says
Pinterest too 🙂
Sarah Nielsen says
I also liked you on fb 🙂
Sarah Nielsen says
Hey Amber 🙂 I follow on my google reader 🙂 I like the flower bag.
weplusthree says
How do you do it all?!? You are amazing, I love this glimpse into your craftiness. I like the flower one 🙂
April says
Love this new blog! I love the flowers! apriljeanjacob@gmail.com
CodynStacey says
I also follow you on GFC! Love the blue/brown! They’re both so super cute!
CodynStacey says
Super cute!! I follow you on facebook! I love the blue/brown!
Shannon says
Totally cute! If I win, I would want the flower one. I love the fabrics! Im so happy you started a crafting blog!
Sarah McK says
I shared it! Bright bag.
Sarah McK says
I follow you on Pinterest. Bright Bag.
Iris Elaine says
What are the finished dimensions of the mini messenger bag?
Sarah McK says
I like you on FB! Bright bag.