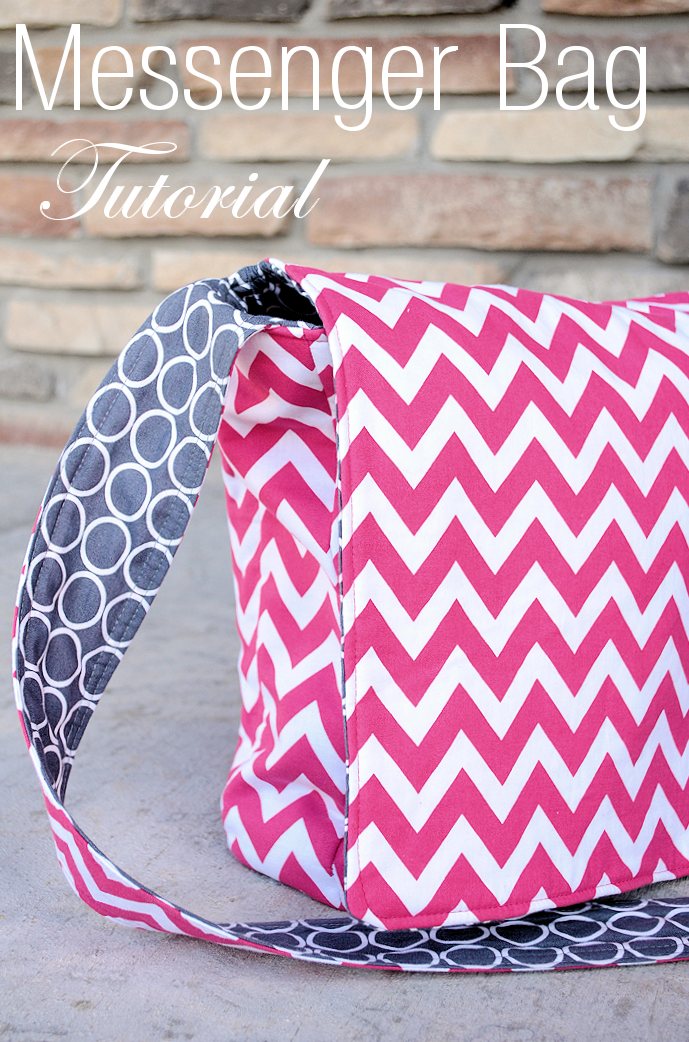
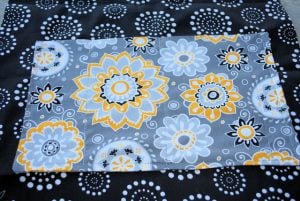
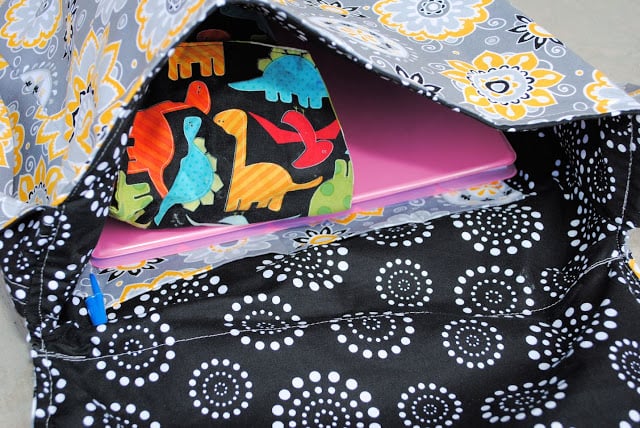
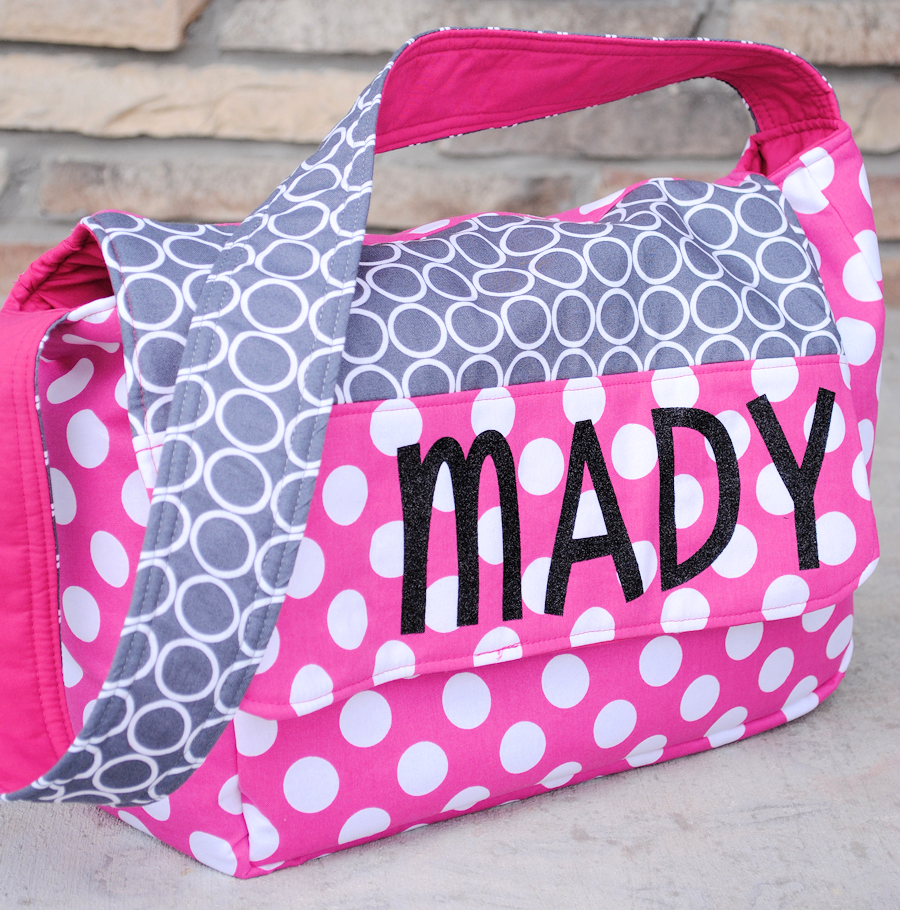
What’s the Project? Make this cute messenger bag pattern in any fabric to have a perfect, fun bag to carry to school, work or use as a diaper bag. Easy-to-follow instructions make this a simple bag sewing project that you can do!
I affectionately refer to my purse or bag as “the dungeon” because it is so large and full of so many random items. Goggles anyone? How about an old french fry? Soccer sock? (Tell me I’m not alone in this.)
I wanted to try to make a new bag that was less dungeon-like—maybe more compartments or maybe a slightly smaller bag so I created this messenger bag tutorial.
This bag works great as a diaper bag, to carry to the pool or to church or even a school bag for your kids. And it’s a lot of fun to sew. I think you’re going to love it.
Well, I succeeded in making a cute bag, but I am not sure that it is going to be any less dungeony. Oh well. I still love it.
Who else loves a good bag? I’ve got a major thing for them. (In fact, see my posts about 25 Bags to Sew and 15 MORE Bags to Sew.) And for hot pink. Put them all together in this messenger bag and forget about it.
And further proof that I love sewing bags, here are a few other free messenger bag patterns for you:
Messenger Bag Tutorial
Before we get to the actual instructions for this bag, here’s what you can expect. This messenger bag basically involves sewing an inner bag body and an outer bag body (usually with two different fabrics, but do whatever you like best) and then sewing them together. You will also, of course, sew a strap and you will add a pocket. You can add two pockets if you’d like, just duplicate the instructions for the first one.
Here are the detailed instructions, which I’ve made printable for easy access. There is also a video to help with the trickiest part of this bag.
Messenger Bag Sewing Pattern
Supplies
- 1 yard main fabric (cotton recommended)
- 1 yard inner/accent fabric (also good to use cotton)
- 1 yard fusible fleece interfacing
Instructions
- Final dimensions on this messenger bag will be about 16 inches wide by 14 inches high. You can easily adjust it to be other sizes if needed though.
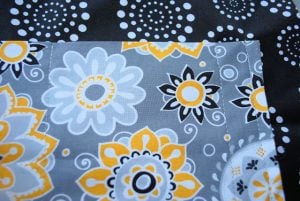
- CUTTING GUIDE:Rather than pattern pieces to cut, I've got a cutting guide for you. Grab a ruler or measuring tape. Cut the front piece of the bag 17″ wide by 15″ high with rounded corners on the bottom. Use a rotary cutter or scissors, whichever you prefer. (I recommend ironing before cutting.) Cut 3 pieces of this: one each out of your main fabric, your coordinating fabric, and your lining. (Please note that these images show a lightweight interfacing. I really recommend fusible fleece instead.)

- The back of the bag is the same width (17") but is 26″ tall. Again, cut it out of both fabrics and your interfacing.

- Cut 2 pieces that are 4 inches by 45 inches as well out of all of your fabrics. One of these pieces will be your bag strap and one will be the sides of the bag.
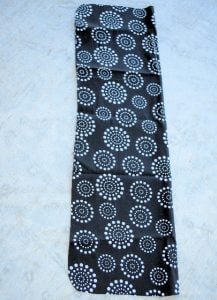
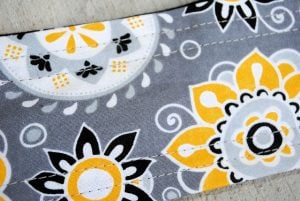
- SEWING INSTRUCTIONS:*Note that there is a video below this section that will likely be useful to you in sewing this bag as well. If you want any inner pockets now is a good time to do that. I did a large pocket on the back inner part of my bag. You’ll want to cut out fabric about 24 inches wide by 8 inches tall. Then fold it in half with right sides together and sew all the way around it, leaving a small opening to turn it.Turn it right side out, push out corners, press flat, and sew the opening shut.Then sew it onto the back inner part of your bag around the sides and bottom leaving the top edge open.

- I made some compartments in my slip pocket for things like my cell phone and a pen simply by sewing straight lines down the pocket to divide it up.
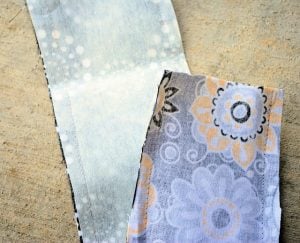
- OK, next let’s do the wide strap for the bag. Grab 3 of your long pieces, the 45-inch strips. One of the main fabric, one of the inner, and one of the interefacing. Place right sides together for your main and accent fabrics and then the interfacing on the outside of one of those. Sew down each of the long edges. Do not sew the short ends of the strap.

- Turn the strip right side out by pulling thorugh a short end, press it, and then top stitch it along each of the long sides using a 3/8 inch seam allowance.
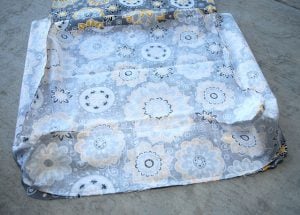
- Now let’s put the bag together. First, the inside of the bag:Starting with your inner fabric and your interfacing, put the other 45-inch strip along the edges of your front piece with the interfacing on the outside. Pin the raw edges in place all the way around the bag trimming any excess length off as needed.

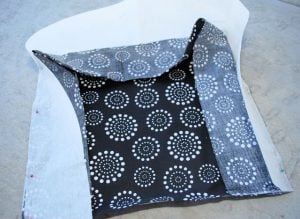
- Sew around the part you just pinned going down the side seam, across the bottom seam, and up the other side seam.Do the same thing with the back piece, matching it to the remaining side of your long 45-inch strip.It should look like this when you are done:

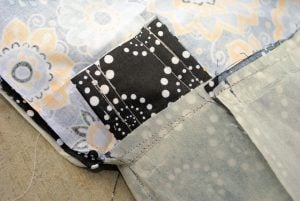
- Here’s a close-up of the corners:

- Now do the same thing with your outer fabric to form the outside of the bag. Now let’s put it all together. Turn the OUTER fabric right side out:
- and the INNER fabric inside out.Slide the OUTER fabric down inside the inner fabric matching up all the seams from the two pieces. So you’ve got the two pieces of the bag with one inside the other and right sides are together.Tuck your straps down inside the bag on the side panels so that the end part of the strap sticks out like this on each side. The straps should be between the 2 layers of the bag:
- Starting at the top center of the flap and working from the back of the bag, sew around the bag-down the flap, across the middle, back up the other side of the top. Leave several inches open at the top of the flap. (See the video below this instruction card to have more help on this process.) I go over the strap part several times to make sure they are very secure. You could also use a zigzag stitch here to add stability. Leave a small opening at the top of the bag to turn everything right side out.
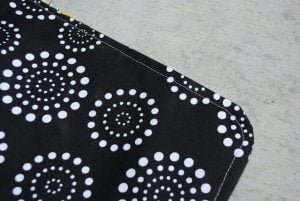
- Now, using that opening on the top of the bag, turn everything right side out and push the inner part down inside the outer part.Press it nice and flat and smooth. (That’s always my favorite part because it starts to really look like a bag.)Top stitch all the way around the flap. This will close your opening automatically as you do this and keep your flap laying nice and smooth:
- And you're all set! The bag is done.


Messenger Bag Pattern Video Instructions
Here’s that video tutorial that I promised that will help you with the tricky part of this pattern. This is the same process for about 5-6 tutorials on my site, so I’m showing it with the mini messenger bag in the video but it works the same for all of these different tutorials.
I go over the strap part several times to make sure they are very secure.And you’re done! I hope you love the finished product! Use it over your shoulder or try cross-body carrying.
This can also make a great diaper bag. I even tossed in my diaper and wipes carrier:
Pretty nice huh?

You Might Also Like:


KdKom says
Thank you! Fabric choice makes this almost a different bag every time! Was able to do the same progress for myself and a teen. Different looks, one recipe!!
Addoquaria says
I created this. But there were certain areas where I wish it were more specific. Or it was specific but maybe a “Do not” get added. For example the step where you sew the strap together, say *Do not sew the bottom material of the same specifications together!
For newbies it is easier to add the *Do Nots too!
Matthew Fox says
It took me all evening, but I just finished making this! I think taking the time to imagine how all the pieces fit together is key.
I’m a complete sewing beginner and I’m just about to browse the other projects to see what I can take on next! Thank you ☺️
Amber says
I know-it can be tricky the first time you sew something. Glad it worked out!
Katly says
One question, you never said if we need to cut the 26″ long in half to accommodate the 45″ strip all the way around. I would make note of that in this tutorial.
Kitta says
I think I am blind… I have been over the tutorial and this page numerous times, but I just can not find the pattern! Gorgeous bag and very informative tutorial, Thank you!
Amber says
It’s not a pattern you print out. There are dimensions to tell you what to cut.
Frances Hainsworth says
surely I need to cut three 4by45 strips or how does the lining fit?
Ashley Lei says
Do you have to use the fleece interfacing or will it be okay without it? I have some batting for blankets, would that be a good substitute?
Amber says
Totally a matter of personal preference!
SusanAnn Sheidy says
I would love to make the messenger bag and I will too. I have a little bitty problem where is the pattern? I have went up and down the page 25 times and can’t see it! I can follow the tute with no problem but I’m teaching my granddaughter how to sew and I use a pattern whenever I can for her sake. Tell me where it is on the page PLEASE!
Best Regards,
Susie
Laurel A says
I posted earlier, I thought it was a link for the pattern but it was only a photo that hadn’t loaded for some reason. I can’t seem to find the pattern to this bag at all. I have gone through the page 5 times and still cannot see it. Please make it easier to see if it is still on the page.
Amber says
There isn’t a printable pattern but a cutting guide so that you can cut the dimension indicated.
An says
Thank you for an amazing pattern! I adjusted it to be a bit smaller for an 8 year old with a Girl Scout binder and it worked great!
Erica says
I have one more question regarding the making of the bag. I sewed the outer 45″ strip to the inner front fabric. I hope this was correct
So I am stuck at the “Do the same thing with the back piece, , matching it to the remaining side of your of 45″ strip.”
What back piece are you referring to? the inner fabric or the outer fabric? And how do I pin and sew the 45″ strip to the 17″x 26″ long backing fabric?
Any help clarifying this would be greatly appreciated.
An says
All the outer pieces should be sewn together and then all of the inner pieces will be sewn together. I match the bottom of the strip to the bottom of the back piece and stitch the parts that the strip can attach to. Then you can insert the outer piece into the inner piece and sew them together. I hope that helps.
Erica says
I had a few questions regarding the pattern. For the straps, should there also be interfacing for it? You made no mention of cutting it, but further down in the sewing instructions, you mention the interfacing on the outside.
Also how far down and to the left/right should the pocket be?
Amber says
Yes, I do interfacing on all of the pieces. The pocket is sort of a matter of preference-like do you prefer it down low at the bottom of the bag or higher up? Either will work!
Leslie Johnson says
I love this bag. I have made a few since I found it. Is my favorite. I’ve even made some to give as Christmas gifts. My favorite is to make geek bags and take them to salt lake fan x (comic con). Last minute I decided to make a pokemon bag with some embroidery. I was able to do it so fast and it looks great! I’ve gotten lots over compliments over the years. Thank you for sharing.
Amber says
Oh that’s super fun!!
Danielle says
I just spent a few hours making this bag and let me say it’s the EASIEST bag I’ve ever made. Until now I have mostly made tote bags and always found a problem with my work here or there and needed to fix or redesign. This one went together easily and it is a beautiful big bag that I will be taking with me when I get on an airplane this Thursday! Thank you!
Amber says
Oh that’s great to hear!
Susan says
In the beginning you mentioned fusible fleece. I am VERY new to sewing. Would you fuse it onto the main fabric? That part is a little confusing to me.
Amber says
Yes, fuse it to the back of your main fabric. It’s pretty amazing stuff!
Cindy says
Is this pattern for the messenger available as a PDF?
Amber says
Sorry, I just have the tutorial.
bukola says
so lovely thanks for sharing
Jess Hepple says
Thank you for this excellent tutorial. I will be making this for my daughter who needs a bag big enough to carry her arch-lever folders to school. I’m going to add an adjustable strap too
Amanda McCauley says
Hi! I LOVE this bag!! I just want to make sure I read one of your comments correctly. Did you say you could use regular fleece rather then the fleece interfacing? I am trying to use what I have at home already. Also I plan to make the outer out of duck cloth, have you tried that with good results? Thank you for sharing, I cant wait to try!
Amber says
I use fusible fleece for it which is SO nice! But if you don’t want it to be too thick, you can use a lighter weight interfacing.
inexperienced sewer says
Hi I’m on my last part of sewing up the bag where you put the outside of the bag inside of the inside of the bag but I’m really confused on where to sew. I’ve watched your video and keep asking my husband what he thinks and we are puzzled. Do you ONLY sew the flap of the bag and leave an opening and then turn the bag right side out? If you do that, how do you end up sewing the straps onto it? I have my straps between the layers of the bag but your photo shows a stitch line going across the opening of the bag near the straps and I don’t know where that stitch line came from. Maybe you can put some extra pictures on here with some arrows on where exactly we should be sewing for that last step. I embroidered part of my flap and the bag will be soooooooooooo pretty once I complete it but I just can’t get that last part done 🙁 Please please help! Thank you so very much.
Amber says
You are going to sew from the top of the flap somewhere near the middle, down around the side and across the front, up the other side and back to where you started, only you want to stop a few inches shy of where you started and then turn it there.
Jennifer Steininger says
I cant seem to find the pattern
Emma says
thank you so much for amazing tutorial and you are really perfect to make this and i am sure that i can’t make like this but i’ll try my best.
Zyla says
This is the best tutorial of bag i have even seen.. thank you so much.. i’ll try this
Brittney says
I have watched the tutorial video over and over.. I am having a hard time figuring out how to pin the bag with the straps and exactly how to sew it. The video doesn’t show the straps. I used the fleece interfacing as recommended so my bag is much thicker than your mini. I need help, I’ve been working on this bag for a week, extremely lowly to ensure I am doing everything correctly.
April K. says
Hi Amber! I LOVE this project!
What are the dimensions of the pocket you added? I’m trying to figure out how much to cut. I’m not great at making pockets!! 🙂
Amber says
It depends on if you want it to go the full length of the back or be smaller. For full length do the same length as the bag. But you can also make it smaller if you want?
Deborah says
I love the look of this bag and am excited to try it. I am reading through the directions, am only at the beginning and already have come across something I do not understand…
You said: “You should have 4 pieces total for each fabric.”
What 4 pieces for each fabric ? there is an exterior fabric and a lining… and then a fusible fleece. That makes 3. So I am totally confused here. Please advise.
Amber says
A front piece and a back piece for each fabric for a total of 4.
Jennifer says
I have made two of these bags and have really struggled on sewing the front and back pieces to the side. Can you explain how you sewed around the corners without making any of the fabric bunched up? Every time I get to the corners the fabric is bunched up and makes wrinkles.
Amber says
Did you clip the corners before turning it right side out?
Jennifer says
I am talking about the rounded bottom corners of the bag. How did you get them to not bunch up when you were sewing them?
Amanda says
I love this and plan to make a few for gifts. I was wondering what type material you used. Was it a regular cotton or something a little heavier like a interior decorating material? Thank you for sharing!!!!
Amber says
I used regular cotton but you can use heavier if you want!
Nicole says
How durable is this bag?? Like… Could it hold like 8 to 10 good sized library books?? Or a couple of text books??
Amber says
Yep-especially if you use the fusible fleece inside.
Kelli says
This messenger bag is cute. I’m a fan of Hobby Lobby also and look forward to picking out some fabric. I’m a beginner sewer and wondered if you would be able to do a new video of your sewing the bag. It might be helpful if your camera person filming was able to show shots of you sewing from above.
Archana Basavani says
Hi, i love all ur projects especially bags., I have too many rice bags can i use them as interfacing? Please suggest… Also need some projects recycling rice bags..Waiting for reply
Amber says
Not sure? I don’t know what they are made of but it might be worth trying?
Amanda Sykes says
Hi, love this bag. Could you please advise how to cut the curved corners? Do you just do them freehand and if so how do you get them all the same and looking professional?
Thanks
Amanda
Amber says
I just freehanded but you can fold one on top of the other to make sure that they match. Does that make sense?
Debbie says
Hi,
What I did was place a tuna can on the corners and trace a curve to keep them all uniform in shape and curved the same. Hope this helps.
Debbie. .. (0:
>
Amber says
Great idea!
Heather says
I scaled down your tutorial to make a scripture bag for my 3 and 4 year old. Just wanted to share the measurements for anyone else interested! The finished product is 10×8. The pieces I cut are:
Front: 11×9
Back: 11×18
Side/strap: 4×35
Would love to share a photo but I have no idea how. Thanks again for the tutorial!
Izzy says
I am a little puzzled on how to put the bag together? Do you put the stripe around the inner fabric?
Amber says
Not sure what you are asking?
Alicia says
I’m confused on that also. I can’t figure out the whole lining being attached to the “strap” and being able to turn it all. I’m a beginner and need more in-depth instructions. 🙂
Molly says
I made one of these for myself a couple years ago – and it was cute, but very… floppy? I used the fusible fleece, but it didn’t seem to give the bag enough stability to really hold it’s shape. I want to make another one for my husband, but I don’t want the same thing to happen, how do I make sure I’m getting the right type of interfacing?
Amber says
It is floppy with the fusible fleece. If you want something stiffer I would recommend getting some stiff interfacing.
Lynn says
Amber, have you made a fanny-pack? I’m looking for an easy tutorial/pattern for one to make as a gift. I think the designer fabrics would give it a fresh, current look!
Amber says
Nope-sorry!
Parra Marie says
Votre site web a l’air très interressant !!! Mais pourriez vous le traduire en français !!!!!
Merci beaucoup
Marie Parra
Ellen says
Is there a pattern to print? I’m having trouble finding it and I really want to try this.
Amber says
No, it would be too big. I just give you the measurements for each of the pieces.
Kathie says
I need to make some covers for quilts that I make. I needed a simple pattern and yours fits the bill perfectly. I don’t put the straps on but I add buttonholes and buttons to the flap. The bag stores the quilts beautifully and is great for transporting them to shows and meetings. Thanks for a great tutorial. Your video is really helpful and not all that poor of quality. It gets the point across well.
April Hansen says
I am going to use your tutorial to make one for my kids for school… I bought a thick interfacing to make it sturdy. Do you think it will distort the shape when I turn it inside out? I am just trying to figure out the best way for it to keep form. Thanks so much! PS. Your video was great and totally helped me to see what you were talking about 🙂
Amber says
I don’t think it will? I use the fleece interfacing and it works great!
Kay Stewart says
I love this bag! I’ve been looking for an easy bag for some younger 4-H’ers to make at their summer camp. The pattern we bought was too difficult for some of the kids as they have to have one-on-one help with even the simplest item, but we want them to have fun and enjoy their sewing experience AND be able to take home a finished project at the end of the 3 or 4 days. Do you have a PDF tutorial of this bag AND would you give permission for me to make one and use the pattern for the kids (probably under 10 children)? Thank you for your great tutorial.
Amber says
I don’t have a pdf but you can definitely use it.
Mary says
Hi Amber,
I found your blog and I love it! I can now sort of sew! I was wondering what the seam allowance is? Also, what is the thickness of your thread?(I want to make sure my bag is sturdy)
Thanks
Amber says
For this the seam allowance doesn’t matter really. Just do what you are comfortable with. And I just use regular thread-not the heavy duty.
Lily says
Hi,
I found this bag and now I can’t wait to try and make it. I was wondering if it makes a difference if you iron the fusible fleece on first and then sew on the pocket? Or should I sew on the pocket first and then iron on the fusible fleece?
I love your blog!
Thx,
Lily
Amber says
I iron the fusible fleece on right at the beginning.
Lily says
Ok. Thanks Amber
Kate says
This is an amazing bag! I have never really been into sewing but I can’t wait to try this! Since this is my like third time sewing, I was wondering if you could answer a few questions because I can’t wait to try this out! I’ve never worked with fusible fleece interfacing before so I’m not exactly sure how it works for this. So for the strap do I press the fusible fleece onto the fabric before I turn it or after I turn it when I press before I top stitch? Then for the actual bag part, do I press the fusible fleece onto the inner fabric before I sew it together, or when I press it after I turn the bag right side out?
I feel silly asking these questions but I just wanted to make sure that I do it right.
Thx so much for sharing this design and I hope to hear from you soon.
Kate
Amber says
Yep, you iron the fusible fleece to the back of your fabric so that it become like it is just part of the fabric. Then just sew as normal.
Kate says
Thanks so much for your reply. Do you know what kind of heat do I use for the fusible fleece? Also, is it harder to turn the fabric right side out once I fuse the fusible fleece?
Again, thanks so much for your reply
Amber says
I use the highest setting when fusing it. And yes, it can be a little harder to turn because it is thick, but not a lot harder.
Kacie says
Does every piece you cut out get fusible fleece ironed onto it?
Amber says
Yes, from one of your fabrics but not the other. So either the inner or the outer fabric all gets it.
Jessica says
This bag looks amazing! I’ve only sewn a few things before but this is making he take it up again! I’m really new at this but I can’t wait to try your design!
I just have a few questions. Do I use an iron to fuse the fusible fleece on to the fabric or just sew it together as if it were another piece of fabric?
Thx for sharing the design. I hope to hear from you soon so that I can get started 🙂
Amber says
Yes, you use an iron to fuse it together.
Jessica says
Thanks so much for your reply Amber! O have never used fusible fleece before and didn’t know how to fuse it together so I went online to search it up. However, they all talked about how one side had glue bumps and the other side was smooth. My fusible fleece isn’t like this. Did I get the wrong kind? If not do have an article on how to fuse the fleece onto the fabric or just some instructions I can follow? I have never done anything will fusible fleece before.
Thx
K says
This is amazing! I love this bag!
I’m fairly new at sewing though and had a few question:
How did you make the inner pocket?
As well, what kind of thread and needle did you use?
Thank you so much for sharing this design. I can’t wait to hear your response so I can try it out!
Thanks,
K
Amber says
Just regular needles and thread. To make the pocket, cut a piece of fabric, fold it in half with right sides together. Stitch all the way around it leaving an opening to turn it. Then place it on the inside piece of your bag and sew around the sides and bottoms making sure that your opening that you left for turning is at the bottom (because when you sew it in place that will close the opening).
M says
Hi,
I love this bag!! It looks amazing!!
I am really new at seeing and a bit confused to how to see the pieces properly together. I saw your video on how to make the bag but it wasn’t in all the steps and I am still confused. Do you think that you can make another quick video on where to see the pieces together.
Thank you so much
Joci McCann says
Thanks so much for doing all these patterns! It is very kind and you do amazing work with very simple instructions. I found everything I ever wanted to sew, right on this page. Thanks again!
Trayne says
Really like the pattern… only one thing I wish you had done was make a list of each of the size of the pieces like you did for the Kiddie Messenger Bag Tutorial… it is so much easier to follow… and maybe a second suggestion… a download able pdf so that I could print off the instructions and read, without going back and forth to the computer…. I much rather print offs..
BUT all in all, think this will be good. I am making it out of recycled jeans material.. for my grandson. He will love the bigger bag.. instead of a backpack.
Emma says
Hi,
I am fairly new to sewing. Would it be easy enough to basically have a separate piece of fabric for the flap as i want it a different color to the rest the bag to make it stand out.? would i just have the back and front pieces the same length and then have a separate piece 11 inches in length? or would i need to add extra to allow for a seam?? thanks in advance 🙂
Amber says
Add a little extra (like half an inch) for the seam allowance. Hope it works out well!
Joline says
Hi Amber!
I’m wondering if you could let me know the dimensions in the pattern for the first messenger bag (pink chevron). I like the longer flap, but am assuming the pattern here is for the shorter flap?
Amber says
I would say add about 5 inches to the longest piece measurement.
Grace Tee says
Messenger bags tutorial it is great.. Gudluck to this site and more power.
esther says
I made a bag using your tutorial and I posted the finished product on my blog, its made out of leather. Thanks for your awesome tutorial and hope you like my bag..I made a few minor changes..like size, since I wanted it smaller! I did post a link to your tutorial! hope thats okay? I’m new to this whole blogging thing… Here’s my site to go check it out http://www.estherchester.com. I found your blog to have the best tutorial I have seen for a messenger bag! I will be making more to use as gifts next christmas!
Amber says
GORGEOUS!!
Debbie says
Hey Amber,
I just wanted to say thanks again for this pattern. I made the first out of a really pretty duck fabic which almost proved to be too thick for my old Singer, but we got ‘er done. My second granddaughter loved it so much, I had to take her to the fabric store to pick out her own future messenger bag.
Debbie…(0;
Gayle says
What a great project and your directions (and video) were wonderful and easy to follow! I just finished mine and LOVE it. I used 2 old skirts that were BC (before children) so this project cost me under $6 to make. This bag is fabulously big but not gigantic to carry it all!!! Thanks so much!
Debbie says
Hey Amber,
Thanks for the free pattern. I took my tablet into my local fabric store and the lady there mentioned that they carry that particular fabric. They primarily cater to the quilting crowd there, but I discovered they have a back room with “other” fabric as well.
This will be the second messenger bag for me, the first was wee small for a doll diaper bag. Also, this will be for my granddaughter to use as a book bag for school.
I hope to finish it this afternoon after church. Again, thanks so much for the free pattern. If I run into problems, I’m sure I’ll find my answers in the comments section.
Debbie…(0;
Elisabeth says
I love this bag and I cannot wait to make one for my best friend (and one for me)! One question, the fusable fleece, I saw some at the store and i think it said one sided fusable. What kind do I need to get? I am new to sewing…like 3 weeks new.
Amber says
Yes, one sided is just right.
sara says
Where is the link to the pattern? I don’t see it in the tutorial text.
Amber says
I just give you the dimensions to cut. There is no printable pattern.
Courtney says
I do projects with a friend that is about 10 years old. She usually comes over during the day for a couple hours to sew something then her parents come to pick her up. I am curious to how long it takes to measure and cut the material and how long it will take to sewing it all together. Also, it looks quite easy, but would it be a great project to do with a young beginner?
Amber says
Probably a couple hours but doable
Katie says
Thus was my first non-blanket sewing project and I’m pretty happy with how it turned out! I used normal fleece inside (it was cheep!) and some cute christmas cottons from Joann’s (on sale, so extra cheep). The fabrics are too quirky for everyday use (cats wearing Santa hats), so it will likely be donated to the school where my mom teaches. Other, less unique prints, will be used to make more bags in the future. Thanks for the tutorial!
Anna Strohecker says
If i wanted to put i a separator down the middle of the bag. How could I do that?
Amber says
Sorry-I am not really sure!
Christina says
Lets see if i can explain this correctly lol. Turn your finished bag inside out and measure the width plus an inch. I cut out a rectangle, finished the edges with a turned seam to look finished, and hand sewed it to each side the way I wanted it to go. Essentially its just a separator but works well to keep my stuff corralled. (baby stuff one side/ mommy stuff other side.) I have recently become a fan of those purse organizers that you can just pull out and move from bag to bag so i haven’t done this in awhile but you get the gist. Its the easiest way without reconstructing the inside.
Kirstie says
Hello,
Thank you for your sewing information. It has been very helpful. However, I do have a question about the messenger bag and I hope I’m not being “too” simple with my question(s). What kind of fabric are you using? I know it’s some sort of cotton but I’m new the sewing world, so I need “specifics”, LOL. I did read your article on how to choose fabric but I’m still not sure what kind to use.
Please help! Thanks in advance for your time!
Amber says
It’s just your basic cotton from the bolt at the store. It’s a designer fabric so it’s a little thicker and nicer than some.
Kirstie says
Thank you!
Nicole says
That is a really nice and simple bag! Great instructions. I’m pinning!
Michelle says
Hi Amber
I stumbled across your lovely blog today and fell in love with this fabulous messenger bag. I’m just learning to sew and I absolutely want to give this one a go.
Thank you for sharing.
:o)
Nicole Jefferis says
Do you have a printable pattern for this? Or is ot just a larger version of the one that’s linked to? I can’t seem to find the actual pattern!
Amber says
I just give you the dimensions to cut
elya says
what a nice bag and great tutorial! thank you for sharing with us!
Alejandra says
Thank you so much for the step by step instructions with pictures! I am a beginner so these tutorials help me so much. Can’t wait to try this because I’m in desperate need of a diaper bag/purse 🙂
Stacy says
I made this bag (twice) this weekend. I completed it the first time to not be satisfied with the dimensions….just my own personal preference. I’m a novice seamstress, so I wanted to do it exactly as directed the first time. I thought the directions were very easy to follow….thank you! I ended up shortening the bag by a couple of inches. I also wanted something a little more stiff than the fusible fleece interfacing, so I added an outdoor canvas material that I purchased from the bargain bin at the fabric store. I sandwiched it between the material used for the sides/bottom. I am sooo pleased with my final product. Thank you, thank you, thank you for easy detailed instructions! I can’t wait to try another one of your projects!!!!
Stacy says
https://www.facebook.com/photo.php?fbid=10154516353220088&set=pcb.10154516353325088&type=1&theater
Here is a picutre, if it will load. Sorry about the grumpy baby….first day back to school for me, so we were up and at ’em at 0530. Needless to say, I do not have a morning owl for a baby. 🙂
Jacki says
I’m fairly new to sewing and got a little confused/lost when you got to putting the bag together. So pretty early on. Do you have a video tutorial by chance or know of one that could help me out?
Amber says
There is one video tutorial in there
Shiree says
Hi I’m going to make a few of these and was wanting to make adjustable straps, so was wondering how wide the finished straps are? Thanks 🙂
Lisa says
I’m back with another question! I am up to the part where we start putting the bag together. I pinned the other 45 inch strip to the front piece with the interfacing on the outside and it looks like the picture. Here’s where I’m stuck : when it says do this to the back piece, is that without the outside fabric at this point ? And when and how do I add the outside fabric in to all of this?. When I try to figure it out, I end up with raw edges, not something reversible. I am really stuck, and have been trying to figure it out on my own for some time without any luck ! Thanks for your time, and no hurry 🙂
Alejandra says
I am having the same problem you had even after seeing her video.
Lisa says
Hello! I am making this bag for my daughter and she is very excited ! I have all my pieces cut, and would like to add an inner pocket as well. Can you tell me how you determined where to place it on the inner fabric of the bag? I’m having a hard time visualizing where it should be sewn on. Thanks so much for your time!
Amber says
You want it sort of near the bottom so that it doesn’t make the bag too top heavy, but not all the way down.
ridaa says
would it be a good idea to attach a zipper to the main compartment of the bag since i am going to be using it for school?
Amber says
You totally could! It’s just a little more work.
Sami says
I have been dying to make a messenger bag for school but I was not sure it would be able to hold my binder due to the weight. If I were to make it bigger how much bigger should it be in terms of fabric? And is there a specific fabric to use?
Amber says
I don’t think you would even need to make it any different. I load mine full of stuff and it’s been fine.
Tay says
So I was also wanting to make this for my daughter for school. She likes the messenger bags instead of the traditional backpacks. Was also wondering if it would be strong enough to hold the books, binders etc. if made from regular cotton fabric.
Amber says
Definitely. I loaded mine full. You can always do stronger fabric if you want to be extra sure.
Shiree says
Hi I was just wondering if there was an actual pattern for this somewhere? Thanks 🙂
Amber says
I just give you the dimensions to cut.
Jan Barnett says
Loved your Messenger Bag tutorial! I made it smaller..
https://www.flickr.com/photos/90261461@N02/14243725777/lightbox/
Vikki C says
Hey.
I’m fairly new to sewing so please be kind!
I was doing really well with the bag until I had to join the two pieces together. When I sewed round to join the inner and outer and turned right side, I have puckering at the transition from the handle to the flap. Any tips on how to avoid this?
I haven’t had much practice at curves or anything.
Thanks in advance.
Amber says
The main thing you can do is snip the curves. Cut little slits in the fabric right up to (but not through) the stitching you did. This helps it bend more easily.
isabel :) says
I’m totally going to try this! I just LOVE messenger bags!!!! <3 thanks for the great tutorial!
Anna Lord says
Finally finished my first attempt of a messenger bag, and the verdict is – it’s huge!!! I didn’t realise 🙂
Thanks heaps, will give it another go, smaller this time!
Have a great day, Anna
Pic of my first one here;
https://www.facebook.com/photo.php?fbid=771230189594596&set=a.180042762046678.53007.172483632802591&type=1&theater
Amber says
Oh it turned out amazing!!!
Anna Lord says
Thanks Amber 🙂
will have a go at a smaller one today!
Anna Lord says
I made another 2, smaller in a very special fabric from Josef Frank that my friend gave me;
https://www.facebook.com/photo.php?fbid=773845322666416&set=a.180042762046678.53007.172483632802591&type=1&theater
I made one for me, and one for her 🙂
Thanks again,
x anna
Tina says
I love this bag and what easy to follow instructions, thank you!
Noelle Schumacher says
Hi! I love the pink-chevron bag, (actually, I love all messanger bags 😉 ) and I was wondering if the tutorial you show is the same one you used for that. It looks like the flap is longer and it’s a little shorter and smaller in the chevron one. Could you post the tutorial for the chevron one if it’s different? Thank you! 🙂
Noelle Schumacher says
OK, so someone just asked that. Thanks anyway, I’m definitely going to try this! 🙂
Lisa Peden says
Noelle, do you think the Chevron bag looks shorter (and the flap looks longer) because it maybe doesn’t have as many items in it as the gray, black and yellow bag?
Hannah Park says
1 yard of fabric is not long enough to make the strap or the middle bottom part of the bag, what did you do?
I was thinking maybe use a scrap piece of denim for the bottom of the bag…it’s extra strong and useful, and sew the main fabric to it for the sides of the bag.
Karin says
I thought I did something wrong because I had the same problem. (maybe I did) I just used some of the scraps and made the sides longer. It is towards the top and not terribly noticeable.
Lisa Peden says
Hi Amber,
I like the Chevron bag because of the length of the flap. 🙂 Did you use the same measurements to make that bag that you used to make the bag pictured in the tutorial?
The gal who cuts my hair has been begging me to make a messenger bag for her for months–but I rarely have the time or energy to sew. 🙁
Thank you so much for posting this!
Hugs to you, Sweetie! <3
Lisa
http://LisasStitchingPost.com
Amber says
Yep, the picture is made using the details I give in the tutorial. 🙂
Joanne says
Great tutorial! Thank you 🙂 Just a question … could I easily reduce the size of this bag a little. I’d like one but not too big nor too small, for general use but large enough to carry a book or tablet in if needed. Thanks
Amber says
Yep, just trim a little off to make it whatever size you want!!!
Nancy says
HELP! I am having trouble with the first instruction. The first picture where it says “Cut this out of your main fabric, your coordinating fabric and your lining. (Please note that these images show a lightweight interfacing. I really recommend fusible fleece instead.)” Is the main fabric, coordinating fabric and lining all facing the same way? Right sides out? Or are the main fabric and coordinating fabric right sides together and the interfacing behind the coordinating fabric on the wrong side? Sorry this got so long but I am stuck on the first instruction. I just need to know how all 3 pieces are when laid out. I think once I get this, the rest will be a “piece of cake”! Thank you so much.
Amber says
Cut them all right side out. When you start sewing you will put them right sides together
Emma says
Hi, thanks for a great bag pattern, I made a patch work version with a zip pocket at the back and an adjustable strap.
Jean says
Hey! I started this tutorial and ironed my fusible fleece on all the outer fabrics but now am wondering if I was supposed to iron it onto the inner fabric? Help would be great. Thanks! 🙂
Amber says
Either way- it doesn’t matter.
Bianca says
I have made my messengerbag with your tutorial – and i am a beginner… it is soooo easy to understand and i think i am addicted now :o) I love it!!!
I linked back to your tutorial and if you wanna check my bag out, you can find it here
http://papiervision.blogspot.de/2014/03/meine-erste-messenger-bag.html
it is in german, i hope you dont mind… thx for your nice tut… you did an awesome job there!!!!
hugs, bianca
Crystal says
Hi love your bag. I have laptop that I would like to use it for but it is a big one. What size of the bag inside?
Amber says
Just change the sizing around if you need to. You can easily make it bigger.
Heulwen says
Thanks for this tutorial – very clear and straightforward to follow! I used it to make a patchwork variation – there are a few photos on my blog. 🙂
Jordyn says
Hey, I was just wondering what you meant by turning, pressing, and top stitching the strap? Sorry, I haven’t sewn much before so I don’t know that much
Amber says
Here’s a tutorial on that: 🙂
http://crazylittleprojects.com/2013/01/learn-to-sew-series-lesson-3-turning-and-top-stitching.html
Rose Beatrice says
I love your design, thanks for sharing. kisses
Savannah Vanderwier says
Can you please make a FULL length video. I’m more of a visual person and the tutorial is kinda hard for me to follow 🙂
Amber says
Maybe the next time I make one of these bags I will.
Sandra says
I love this bag! So far I’ve made 3, with plans for another 2 in the works. Will be trying out your piping tutorial to edge the front flap of my next one. I also love that you can make the bag in any size, I have one that is my go-to overnight bag, a hand bag, a laptop bag and my next two will be another overnight bag and a laptop bag. Thanks for posting this tutorial 🙂
Amber says
Yay!!!
Savannah Vanderwier says
Okay I don’t get this at ALL I’ve got everything cut out and I did the strap and then I can’t figure out the rest. Can you PLEASE PLEASE PLEASE make a full length video. Because I seriously cannot figure this out so It would be VERY helpful. 🙂
Jessie says
Quick question…..Do you need to cut a piece of innerfacing for each piece of fabric you cut or just 1 per side?
Amber says
I just do one per side
Molly says
I’m thinking about doing this for your February challenge and adding some piping, I’m so excited! I’m trying to think of where would be best to add the piping, I was thinking it would probably look best on the top flap, but I’m not quite sure how to add it to just the flap. Hopefully I can figure it out, but any thoughts are appreciated! My poor purses take a beating from trying to carry too much stuff in them, and I’m thinking a cute messenger bag would be just perfect!
Amber says
Great Idea! I would definitely just add it on the flap. Just start it where the flap meets the rest of the bag probably.
Mia says
I love this but im not sure where you have pin the straps along or where they are. Can you give a detailed explanation because i am determine to make such a cute bag
Amber says
They are on either side of the bag but the strap is down inside the bag between the two layers of fabric.
Irene says
Very nice tutorial. If you make your pocket on the front of both the lining and the outer fabric it can be reversible.
Twila says
I am unable to find the pattern. Could you please help? I love the look of this bag.
Amber says
I guess it’s confusing to call it a pattern. I have included the cutting guide in this post and you just follow that. Does that make sense?
Twila says
I think I’ll use butcher paper to make a pattern. I work better visualizing. Thanks so much.
Looking forward to making more of your sewing projects.
Megan says
Thank you for this great tutorial!!!
My husband wanted a bigger/less girly bag for church (the one we have now has flowers on it) and this was perfect! I used a blue, yellow, red and brown striped fabric from Hobby Lobby and he loves it!
Thank you so so much!
P.S I love your diaper clutch too! Those Costco wipes packages are huge. I may need to make me one!
Amber says
Great great great idea!!!
Saskia says
Thank you for this tutorial! The bag was my first sewing project ever and it was easy to follow and to make.
Here is the result, I used fabric in grey and dark red. My lining is very thick (probably a bit too thick) and I added buttons:
https://plus.google.com/photos/103462052751398390631/albums/5970243780090586081?authkey=CLT28PfCz7_JTQ
Amber says
Wow! I showed that one to my husband and he was super impressed by it too! Looks professional!
TONYA says
I am living this bag and really want to make it But I am having trouble finding the pattern. Am I looking over the link?
Amber says
Sorry, it’s not so much a pattern as a cutting guide. It’s up in the tutorial. Do you see it?
stephanie says
Any chance you’d be willing to do a youtube video? Thanks!
Amber says
There is a link to one in that tutorial.
Brandi says
Hi! I’m making a couple of these bags as gifts for friends and I have a question. Are the corners of the bottom of the bag rounded? I see in one of your comments you mentioned that only the corners of the flap are rounded. But in the picture where you say, “Here’s a close up of the corners,” and in the picture just following that picture, the corners of the bottom of the bag look rounded. I am very new to sewing, so this might be a simple thing for some, but could you please help me out? I didn’t cut rounded corners on my fabric so I’m wondering what’s the best way to sew the corners correctly. Thank you!
Amber says
You can do it either way, but I usually make it slightly rounded as I go around the corners at the bottom of the bag. I don’t cut them out rounded, I just sew a slight curve as I sew those corners. Either way you do it is fine though.
Brandi says
Thank you so much for your help! It’s so nice of you to take the time to read everyone’s comments and reply so quickly! Do you have any tips on sewing machine tension? My sewing machine tends to work fine for a while and then it won’t work for a while (I get little loops that show up on the top of the fabric and the back is all crazy looking). It’s in the not working phase right now, which makes it hard to finish projects that I’m working on. Just wondering if you have any tips. Thank you!
Amber says
With tension problems if you are seeing loops on the TOP of your fabric it means it’s the bobbin that is messed up. If it’s on the bottom then it’s the top thread that is messed up. When is the last time you had it tuned up? Sometimes I think machines just need a tune up from pros.
cheryl says
Do you have an approximate size for the pocket you put on the inside? Thanks so much.
Amber says
Mine is probably about 10″ long by 5″ high or so when it is done but you can do any size that feels right to you.
Emma says
I am stuck on the “do the same thing with the back piece” part. I can’t work out how you attach the 45 in piece to the longer piece of fabric. Please help! From what I can see the picture underneath where you say that “it should look like this” has no fleece attached at all – or is it underneath?!
Also, jumping forward have I understood it correctly that I will put the inner bag/fleece material together separately to the outer bag material? Then sew them together later on?
Amber says
You are going to attach it the same way that you did with your front piece. Start at the bottom and work up the sides. You will obviously have flap piece left hanging. And yes, you will assemble the outer and then the inner and put it all together. When I did those pics I wasn’t using fleece, so that might be confusing you?
Brandi says
Hi! I am new to sewing and I just finished making 2 of the bags on your site, including this one. I really appreciate your “learn to sew” series and I appreciate all the time you took to write your tutorials. Thank you for making learning to sew a fun experience!
Amber says
Thank you for your kind words! 🙂
Helen says
Hi, thank you for this tutorial – found it on facebook :] I made the bag yesterday, I used a cheap main fabric and a fleece blanket for the inner bag [doing it on the cheap in case I mucked it up!!] Being a newbie to making things I didn’t round off the corners as I didn’t quite “get” where to do that on the larger piece and I didn’t have enough fusible interfacing to do the gusset and the strap but I figured the fleece would give it some shape :] It was an outstanding success, my daughter has the bag now {I didn’t get a look in} I am very pleased with it and I’ll be making another [for me] once I get some more interfacing :]
Very pleased, thank you
Helen :]
Amber says
The first time making a project always has a little learning curve. Glad you liked it in the end.
Leah says
Amber, quick question…. or several….. Have you tried adding plastic canvas (like this http://www.amazon.com/gp/product/B001DEGKMO/ref=as_li_ss_tl?ie=UTF8&camp=211189&creative=373489&creativeASIN=B001DEGKMO&link_code=as3&tag=lizmckjoh-20 ) to make the bottom, and sides sturdier? And have you thought about adding little feet or pegs to the bottom to keep it off the floor/table?
Also, is there a material that you would recommend to be placed (or sewn) between the inside and outside pieces that would make this bag more thermal (like a lunch or cooler bag… to make it better for carrying pumped milk)?
Lastly, is there anything that I could use to make the strap more durable? Or is that what the fusible fleece would do?
This is absolutely adorable, and I am wanting to make a diaper bag with this tutorial. I’m not expecting, but I am ready. Now I just need to find a fabric that I like (I will likely go with a canvas outer for durability) and time off from work in order to make it!
Amber says
I haven’t used anything stiff inside mine because I kind of like it soft, but you definitely could! If you do, let me know how it goes. I HAVE tried using thermal interfacing on other projects like this: http://crazylittleprojects.com/2013/09/kids-lunch-box-pattern-tutorial.html I haven’t tested it out well to see how effective it is but you could try it. I just got it at the fabric store. The fleece will add durability to your strap but if you really want it to hold up (as well as the bag) I would recommend using canvas/duck material. It will be much sturdier with that. Hope that helps!!! And good luck. 🙂
Polli says
I also sew on the floor! But I use my knee rather than my foot on the pedal…
🙂
Love the tutorial!
Making a bag out of a big pair of bluejeans and your patterns looks perfect for my needs!
Thank you so much for sharing!
Amber says
Nice!! I guess we are kindred spirits! 🙂
Polli says
My blue jean version turned out wonderful!
Thank you so much for your tutorial!
Hoping my son loves it as much as I do…:)
Nicholaix says
Fabulous Tutorial!
I just made 3 of these with leftover decorator fabric for Christmas presents. Messenger bags are such a classic.
Didn’t have the link to my old tut on my new laptop, I am so glad I stumbled across yours.
I am an experienced sewer and I found your directions clear and nice pics. Great job!
Don’t suppose you have a clutch tut hiding away somewhere? hahaha
Amber says
Good to hear! I don’t have a clutch…yet. Maybe I should try that sometime!
Kim McCulley says
Thank you for the tutorial! I haven’t done much sewing for about 15 years, but got in the mood to give this bag a whirl. I used duck fabric to make it sturdier. I LOVE the way it turned out! It’s not quite perfect where the side/strap pieces curve into the front flap, but I think that would improve if I made another attempt. As it is, it’s still lovely for gift giving. I plan to fill it with an artist pad, graphite pencils and a few other artist supplies for my adult daughter. I can’t wait to see her open her Christmas gift! =)
Daisy Mayfield says
One more thing,
who sews with their feet up anyway!
May be that’s the trick with the bag, got to try it!
😉
Daisy Mayfield
Amber says
Ya i’m weird but that’s how I roll.
Daisy Mayfield says
I saw your messenger bag and just had to try it. Thought it would be so much fun, man was I wrong!
Your tutorial leaves out a lot of steps. Your pieces should be more clarified instead of front may be you could call it the “A” piece and so on. This would make it more understandable, less confusing.
You don’t mention when to put the front flap on or what to do with it. I guess you assume people who look at this, will already have a lot of experiences. Sadly this isn’t the case for everyone.
So I guess the joke is on me and the fabric pieces are ready to go into the trash.
Thanks for trying and the idea. May be putting out that some experience of sewing is needed, it would give a warning in advance.
Thanks again, I don’t want to sound that I don’t appreciate free tutorials.
I guess no one will see my comments, because it wouldn’t fit in.
sincerely
Daisy Mayfield
Leah says
The front flap is part of the back piece. Once the back piece is cut, you don’t need to cut the flap off of it. It just hangs over
Shuhada Feey says
Hi Dear,
Love the fabric color…
Can u share with me which patten is this?
Amber says
Just a fabric I picked up at hobby lobby
Shuhada Feey says
Hi Dear,
Love the fabric color…Can u share with me which patten is this?
Amber says
Just something I got at Hobby Lobby
Jenn says
Completed this bag today! Here is the link if you’d like to see it!
http://alearningwife.wordpress.com/2013/11/07/my-latest-sewing-project-a-messenger-bag/
Angela says
A friend of mine wants me to came him a denim messenger bag. I really liked you tutorial. Would I be able to use this tutorial for a denim bag? Please reply. Thank you. 🙂
Angela says
What I meant to say was he wants me to MAKE him a denim messenger bag. Not came. Lol
Amber says
I knew what you meant. 🙂
Amber says
Yes, just know that it will be thick so you might want to use a heavy duty needle.
Allison says
Is there a type of fabric that works well with this project?
Amber says
Any cotton will work GREAT!
Jenn says
Hello!
I am a huge fan of your website. Your tutorials and lessons are super helpful. I am attempting to create your messenger bag and I feel awfully unintelligent because everyone else has comments about it being so easy. Hopefully, I can show you the part I am confused on and get some clarity from you if you have the time!
Put 1 of the 45 inch strips from each of your two main fabrics together with right sides facing and the interfacing on the outside… Turn it, press it and then top stitch it.
Does this mean that i take 1 strap from each fabric, iron the interfacing on, then sew them RST and then use a turning tool to turn it inside out?
Amber says
Exactly! 🙂
Jenn says
Thanks so much! I am stuck on another part. Is there any way I can email you pictures of where I am stuck? I can try to explain her too.
So I attached my fusible fleece to my outside fabric and outside strap piece. I’ve got my strap piece attached to the inner fabric but I cant tell in the pic how you’re doing the attaching of the strap piece to the outer fabric. I’ve been looking at it off and on for hours, hoping if I leave and come back to it, I would understand, but I don’t! Would you mind helping me?
Thank you!
Jenm
Amber says
You mean to put the whole bag together? You are going to stick the strap down BETWEEN the outer and inner fabrics, then sew it all together as shown in the video. Did you look at the video?
Jenn says
I am stuck on the “do the same thing with the back piece” part. I haven’t even sewn my outer part yet. I’ve only done my strap and bag innards. 🙂 it’s just hard to see how you’re attaching the 45 in piece to the longer piece of fabric (the back part). I am so stuck !
Jenn says
I think my brain was tired and occupied because when I came back to it last night, I totally understood it. So never mind! Thanks for your helpfulness! 🙂
Dee says
Ahh~ I believe I have found what I’m making my nieces for Christmas this year! Thanks for sharing!
Tasha Reynolds says
I just bought cute fabric to do a different purse pattern but I think I will have to try this one. Very cute. Thanks for sharing!
Steph says
Love this pattern – made some of these this week. Will check out your other stuff as well – great site! 🙂
Tracy says
Just made this bag tonight… I left a section of the lining open to use to turn it rather than the flap… I’m a bit bummed that my flap doesn’t come down as far as the first picture of the pink chevron bag above.. I was going for that look..I can adjust it for the next one.. Thanks for the tutorial!
Alyssa says
I just have one question: Would using normal felt make it durable for a book bag?
Alyssa says
No matter what these people say, I thought was extremely easy and I was very satisfied with the results, and I’m 13! Thanks for this great tutorial! {:)
Amber says
Love to hear that!!!
Megan G says
I have a question about cutting out the pieces. Are all the corners on the long back piece rounded?
Amber says
Just the part that will be the flap is rounded.
Amber says
Not sure if that would work? Worth a try?
Karen Larkin says
Hi Amber, just to let you know I have now made over 80 of these bags, all different sizes and fabrics, some with pockets and some without. I am having a Christmas Fayre stall and will need 100, 20 of these bags are already being used by friends and family. One thing I did add was a reinforcing insert in the bottom of the bag to keep the shape and a crochet flower on the edge of the flap for a bit of extra detail, everyone loves them. 🙂 You should see my Minion bag, it’s awesome.
Amber says
Holy cow. Bet you can make them in your sleep by now! OK, I am LOVING the idea of a minion one. Might need to try that.
Karen Larkin says
Almost. lol I can make on in 2 1/2 hours but the minions take a bit longer. So far I have done 2 which were for friends and they adore them. They are going to be huge!!!
kerry says
Hello, i was wondering if you have a video tutorial of this? getting confused. Only just started sewing so i’m not that great haha
Amber says
I promise I will make one soon!
Deborah says
Wow – as soon as I saw this bag I had to make it. I used webbing for the strap as I needed it super long For someone over six feet tall. Thanks for the tutorial. I had a bit of difficulty putting it together to sew rhe bag inside out. Finally got it though. Worked like a dream!
Deanna says
Great bag! Just wondering what the final dimensions were – height, width and depth. Thanks.
Amber says
Final dimensions on this messenger bag will be about 16 inches wide by 14 inches high. You can easily adjust it to be other sizes if needed though.
summer mitchell says
i can’t wait to make my bag
Kiana says
I love this tutorial so much i am glad i found this website! i love the fabrics you used!
Dea Van Patten says
I have been making bags similar to this for years — usually with a more rounded top, hobo bags. I find that heavy duty drapery interfacing is good for stiffness, and on the one or two bags that I wanted really stiff, I simply left the flap all the way open until after turning the bag, and put pieces of cereal box between the front inner and outer and back inner and outer panels. The sides are still soft enough that the bag can be stored flat, but the cereal box pieces (cut to fit just inside the bag front and back) give it that stiffness that I wanted.
Dea Van Patten says
I forgot to mention: If you use the cereal box idea, DO NOT WASH the bag. The box will turn to mush! (I speak from experience!) If you need a really stiff bag but also think you might want to wash the bag, try using a piece of stencil plastic or something similar.
Gemma says
I may have missed this info but what are the finished dimensions of the bag I’m wanting a good big uni bag so will need it to fit leaver arch folder + other things
Thank you
Amber says
Te final dimensions are about 16 inches wide by 14 inches tall. Really though you can make it any size you want.
Susan says
I goofed when I cut out the fabric and it is 15 inches wide instead of 17. do I need to change other dimensions to make it work or just go with it 15 inches by 15 and15by 26 ?
Amber says
You should be fine. The 4 inch wide strip will be a little too long but just cut off the excess after you pin it.
Agnes says
Hi Amber 🙂
thanks for that Tutorial, I tried it out and it worked pretty good 🙂
if you want to look:
http://aliswerk.blogspot.de/2013/08/messenger-bag-fur-julia.html
greetings Agnes
Amber says
I really, really love seeing people make the things I create. Thanks for sharing!
Judy Blinkenberg says
This is a great bag. I have some Amy Butler I would like to use. What I especially like about this bag is the flap. I need one ro help keep my purse contents in. Thanl you.
figureskater11 says
Thank you so much started today, I’m trying it with out the fusible fleece…well see how that goes. I’m going to make another wider one for my skates but use the fusible fleece when I do that! Thanks again!
Isabel says
Instead of just pushing the inner fabric down into the outer fabric, can’t I just sew the pieces together beforehand and then make the bag normally? I don’t understand how to put the two separate bags together and then sew it. But I really want to make this bag! I already have the fabric and the interfacing.
Amber says
Yes, you could probably do it that way too. It’s really not hard to do it the way I described. Get your two pieces sewn up-outer and inner. Then put one inside the other and sew all the way around the flap leaving just a small opening. Then turn it right side out.
Amy says
Hi, I just found this tutorial and LOVE it. I reduced the size and made smaller ones for my niece and daughter and plan on making myself a larger one. I usually struggle with patterns, but this one was very easy! I can’t wait to try lots of the other tutorials you have too! Thank you for posting!
KatieQ says
Thanks for the great tutorial. I really love messenger bags, but I am trying to figure out a way to place a zipper so that when the flap opens the contents aren’t immediately accessible. I once had my change purse stolen from a messenger bag when I was on a bus so I am a little concerned about the top being completely open.
Amber says
I think you could do that up at the top-maybe find a pattern that is like that and meld the two?
Lauren says
Hey great ideas and I love your stuff! I have not used a sewing machine in years, but after I saw this bag on Pinterest I had to try it! I am a teacher in Houston and I am always on the look out for super cute bags that I can take to and from school. I made the messenger bag first and I must say for not having done anything like this in a while, it turned out great. I just got done with the reversible purse and I am about to make a second messenger bag for one of my girlfriends. I am in love with them 🙂 Thanks for making it so easy!
Amber says
Oh good! I love to hear that!
Amanda Kochkodin says
I am new to sewing, and I am not sure I am doing this correctly. I am confused when it comes to putting the bag together. I do not understand about putting the shell together? Do you have a video lol? ??
Amber says
I’m going to work on a video for this. I have had a lot of requests.
Desiree says
Question: Do you have a tutorial on how to make the strap for this adjustable?
Amber says
I don’t but I bet a quick search of the internet will help you find an adjustable strap and you could use it for this bag. 🙂
arah says
hello. I juist made this bag today. I LOVE it. I posted a photo on Instagram/facebook and have had a few people ask if I will make one for them. Are you okay with that? thanks
Amber says
Yup! I usually just ask people to give me credit somehow if possible. All I really want are readers, so as long as I get readers I am happy. 🙂
Kelley says
I’m extremely confused…could you possibly email me? I’m not sure if I skipped a step or what but I’m confused by the part of putting the outer shell and inner shell together.
Amber says
What part is confusing you? I’ve had a lot of readers confused with this part lately-I’m going to go look at it and see if I can clarify, but let me know if there is something specific you need help with.
Keelan says
That is supposed to say sew not see
Keelan says
I am confused, on the part where you say “now lets put the bag together. That whole paragraph confused me. So on the inner lining put your coordinating 45 in strip with the 45 inch interfacing? Then what? See it? This is where I get confused. Where does the back come in and the outer lining come in? Do I see the outer lining seperating from the inner lining and then put them together?
Amber says
I’m going to go in to the tutorial and try to clarify right now. Not sure what you are saying here-you should have 2 pieces of bag-the outer fabric and the inner. One goes inside the other so that right sides are together and the strap is between them. Then you sew all the way around and turn it. Let me know what I can help with!
iris strong says
Love the messenger toteI am just wondering if the messenger tote will be big enough to hold a lap top ands diaper bag?
Amber says
Yep-it should be! Measure your lap top to be sure and increase the size if needed, but I think it should work.
iris strong says
Oh thank you for getting back to me.
Karen Larkin says
Hi there, these bags are awesome, I have made 7 for presents so far but they all have puckered/bunched up seams where the back of the bag meets the sides, do you cut away most of the excess fabric before you turn it the right way around?
Amber says
You know mine typically bunch a little in that same spot too. I think it’s inevitable.
Karen Larkin says
I think I’ve cracked most of the bunching up by cutting away as much of the extra fabric as I can close to the seams without the seams coming apart. 🙂 I have now made 10 and it’s much easier. I find iron on interfacing is a godsend as I now only have 2 lots of fabric to sort out instead of 3.
karen says
If the sides are 17″, and the bottom is 15″, that equals 49″. However, you say to cut the side strip to 45″. I know that curving the front and back pieces will take a little off the 49″, but will it shave off 4″? I wonder if anyone has had trouble with the side strip coming up short?
Amber says
Keep in mind that you will have sewn the pieces together which will shorten them a little, but go ahead and cut that piece a little larger if you want and then trim it as needed. That’s what I do a lot.
Rhonda says
Thanks for the messanger bag pattern and directions. My granddaughter and I are making one and I have a couple of questions. Are all of the pieces of the bag lined with the fleece, both the outside and the inside? Also, what seam allowance do you use? I am using 1/2 inch and it seems to be working fine, but I was just wondering what you used. Thanks again. We are having fun.
Amber says
Just line either the inside OR the outside with the fleece. And yes, I use 1/2″ seams. 🙂
The Inspiration Network says
This bag is so super cute! You were featured at The Inspiration Network! Thanks for such inspiring ideas!
http://theinspiration-network.com/messenger-bag-tutorial-and-pattern-from-crazy-little-projects/
Diana and Melanie
The Inspiration Network Girls
cynthia v says
Is it durable to use as a book bag or does it depend on the fabric used?
Amber says
Definitely, especially if you add the fusible fleece interfacing
Lisa says
Ok – am starting to make this – you recommended fusible fleece – which I bought. Do I need to iron it to the fabric to make them stick together? Or does it sort of “float” between the two layers of fabric? Is this a strange question? Just want to make sure I do it right!
Amber says
Yep-iron it on. You could do it without the ironing but it makes it way easier.
Jackie says
Hey , this is awesome !!! I just have a teeny favor , I am little bit confused about the part right after the sewing of the sides ot the front and back of the bag , could you make that a little more clearer , maybe a video or something ?? Thx !
Gina G says
Since I don’t own a sewing machine, and have troubles sewing button back on, think you just need to sale these! Love the pink/grey, your choice of fabrics are great. They are trendy, but not over the top!
Megan M. says
Hi, I need this bag done for Saturday (I’m writing this on Thursday night), and I just have a question. When you’re attaching the strap when everything is flipped around (the bag inner and outer right sides together), do you simply put the strap into the the bag and sew, or put it between the bag pieces…? I’m sorry if this is a rather silly question, and I’m sorry if I’m not communicating my problem clearly. Thanks for the tutorial. It’s very good, I just have a hard time picturing each step in my mind.
Amber says
Place the strap between the two layers on the inside.
Megan M. says
Thanks so much! =)
Doreen Solum says
Love it Kari……Every Grandma could use one!
Michelle Potter says
I was thinking about making this bag for my laptop. Do you happen to know the dimensions?
Amber says
Of the finished bag? It will just be about 1-2 inches smaller than you cut it. You can cut it any size you like
Bryn says
Ok this is my first time sewing and I love this bag….So when this says now let’s start making the bag do you put some of your lining underneath the inner piece???
-Bryn
Amber says
Yes, I HIGHLY recommend using fusible fleece and ironing it on to your outer pieces before starting so it will just be part of it.
Bryn says
Also when it says do the same thing to the back piece is that the 26 inch one or the 17 by 15
-Bryn
1st time sewing
Bryn says
I know I’m asking a lot of questions….I’m only thirteen and my mom thought this would be easy but how did you get from one piece of each fabric to them sewed together….
Amber says
The back piece is the biggest piece you have. Which part do you mean for the second question? You are going to sew the long and skinny piece between the front and the back and that will form a bag of sorts. Does that make sense?
Bryn says
Yes that makes sense I just needed to read it a couple of times
Ai says
Would it be possible for you to clarify the part about joining the pieces together to create the bag? We literally spent several hours trying to figure out how to combine them but didn’t manage to because we found your instructions rather vague. It would be awesome if you could create a video tutorial?
Amber says
What are you stuck on? You should have both parts of your bag-one inside the other. The inside is turned right side out and placed down inside the outside which is still inside out. Then sew from the top of the flap, down the side of the flap, across the front part of the messenger bag and up the other side of the flap leaving about 3-4 inches open at the top of the flap.
Evi Peh says
Hi ! I like to ask whether I can wash this bag in the washing machine ? Also, is the strap supposed to be short ? Because I’m 156cm and the strap only reaches my hip. It’s kinda short
Amber says
Yes, I just washed mine the other day and it help up great. My strap hits at my hip too. That’s where I wanted it. That’s at my hip with it across my chest.
Ana from The Lost Apron says
I just pinned this tutorial to my Chevron board.
http://pinterest.com/thelostapron/
Amanda Nguyen says
Hi,
I just finished cutting up the pieces. I have a question though. I’d like to make a pocket for it, but I wasn’t sure exactly where I am supposed to put the pocket on the inner piece of the fabric?
Amber says
Just center it horizontally and put it a few inches from the bottom.
Cathie says
Merci pour ce tuto !!
Heather @GeminiRed Creations says
Thank you for this tutorial! I convinced a friend to make this for me. I just shared the end results and your tutorial on my blog – http://www.geminiredcreations.com/its-in-the-bag/
Amber says
So cool!
Sheridan says
I am having a really hard time with this bag. I cut out all my pieces, I sewed the inner fabric and the lining but I am having a really hard time figuring out how to attach the outer fabric. I’m sure I’m missing a step somewhere. Please help me figure it out? Thank you so much!!
Amber says
You should have an assemble inner section and an assembled outer. Turn the inner section right side out and leave the outer one inside out. The stick the inner down into the outer. Pin the strap in place and sew all the way around the flap but leave a few inches opening at the top of the flap. Turn everything right side out and voila! You’ll have a bag.
Michelle says
Hello there!
😀 I featured your tutorial on my blog so you might receive some traffic here:
http://www.misanthropycreation.com/2013/05/13-adorable-diy-tutorials-roundup.html
Please join my blog hop here:
http://www.misanthropycreation.com/2013/04/my-first-blog-hop.html
xo Michelle
Amber says
Thanks for the feature! 🙂
Jessie says
Great tutorial!
Nicola says
Am I crazy to want to sew this since ive never ever sewed in my life? I think I can follow it until you start flipping things inside out lol. Just so im not going mad, is this like two bags sat inside one another completely unattached? or do you sew the inside to the outside at some parts?
Amber says
No, it’s really not too hard. Have you seen my Learn to Sew lessons? (Top menu bar on the rightish side under Learn to Sew.) They will teach you everything you need to know for this bag in the first three lessons. Let me know how it goes!
AnnieG says
YAY! I finished this one today! Turned out great.
Heidi says
Thank you for the beautiful tutorial! I am linking to this post today from http://www.soyouthinkyourecrafty.com on a bag construction post. Thank you for your hard work! Heidi
Amber says
Thank you thank you!
Pj says
You read my mind
I was thinking about making my next bag a messenger bag and next day found your posting on facebook
Thank you
Darcy says
Do you have any tips/tutorials for making the top of the bag a zipper instead of a messenger bag? I’m making it for my “Disney Days” carry-all, but want a zipper so I feel like everything inside is a little more secure.
Amber says
I don’t currently have any but can try to do it in the future.
Andrea says
I have a question: Can I make and sell bags like these that I make?
Amber says
At this point I am telling people yes, but please link back to me (my main page is fine) stating that you got the tutorial here. Thanks!
Stacie says
I had the same question of selling some. I made one of these for myself and had SO many compliments and people wanting one! Thank you for being so kind to allow us to make and sell!!! I will definitely post link to your page! Thanks again!
Vanessa @ See Vanessa Craft says
So pretty!! Thanks so much for stopping by Do Something Crafty Friday! It was so nice finally meeting you at SNAP!
Andrea says
I love this bag and plan on getting fabric tomorrow and making it!!! It’s perfect for school!!
Paula Parrish says
Love your bag, super colors. Thanks for sharing this tutorial. ;o) I am now following along on your blog.
Jenni says
Super cute! I really like the chevron bag where the flap reaches all the way down to be even with the bottom. Did you just cut your first pieces longer than this tutorial calls for? Or are the dimensions in this post for the chevron bag? I’m a little confused since you show finished photos of both bags. Wasn’t sure which bag this tutorial was really for. Thanks!
Amber says
Hmmm, you know, frankly I didn’t even realize they were different. I didn’t use the measurements when I made the 2nd one (the chevron-I just eyeballed it. I have a bad habit of doing that). So, I’d say just add a few inches if you want it to fold all the way down. The measurements given will make it look like the gray one.
Kathy says
I wanted to make this for my daughter going into middle school and was worried about it staying shut or her things falling out. If I wanted to add velcro closure what step should I do that ? Thanks!
Amber says
Sure-just add pieces of Velcro to the lining on the flap and to the outer fabric down near the bottom of the front. Do it before you sew them all together.
Kathy says
Also, it looks big, but wanted to make sure. This is big enough to carry a binder and books for school, right? and…If I add a pockets do I need extra fabric? Thanks!
Judie Mixson says
A better way to close it would be to use a zipper at the top of the bag under the flap. You would add it to a piece of material the same size as the side panels, just make sure to keep it open before you get to the pint of turning.
Jen says
Hi Amber,
Just made two of these great Messenger bags today and they turned out fantastic! Thanks for the geat instructions!!! I plan on making a few more!
Amber says
I just made a new one too. 🙂
pauline says
this was pretty cool and I’m definitely gonna use this in the future for my own projects.
tiffany says
Love the bag but to big for me have you done a messenger bag for a pirse I cant find one online at all I love the bag though…but I wouldlwouldlove to make one big enought as a purse ….can u help me ?????
Amber says
You could easily size it down to any size you want!
Kelly says
I love this! I have been carrying a timbuk2 bag for a while and want something different but wanted to try making something myself. I am definitely going to try making this very soon!
Shannon says
Wow- your bag is beautiful. I think I need one! Thanks for the tutorial.
Heidi @ Bits of Sunshine says
I love this! I must get some nice fabric! I would like to make a bag to haul around my doggy things! Water and bowl and snacks! Love this!
Laura says
I did that too! I have a dachshund, and at JoAnn Fabrics I found some fabric with dachshunds on it for the outside, and fabric with dog bones for the inside. It looks adorable!
Tanisha J says
Great bag! Currently in the process of making it but I’m confused! How did you get from pinning and sewing the inner fabric and the lining to it being completely put together….when did you and how did you attach the outer fabric? Help?!
1st time sewing….
Amber says
There’s a step where you put the inner fabric down inside the outer fabric. It starts with this: Now, here’s the trickiest part. Turn the OUTER fabric right side out:
Do you see that part?
Tanisha J says
I just needed to read it! Totally got it…the bag’s all done and is gorgeous! Thanks for the tutorial! I love my bag!
Mallory says
I was confused about that part too. I read it a few times but it’s hard for me to wrap my head around. ( I’m an inexperienced 17 year old.)
Cheri says
Your tutorial says leave the outer fabric right side out and turn the inner fabric inside out. If you turn the inner fabric inside out, you won’t be sewing right sides together if the outer fabric is right side out and placed inside the bag. I have done it twice now, to make sure I was follow instructions and I end up with interfacing showing on the inside instead of the inner fabric. It needs re-wording in my opinion. Inside out, to me, is with the inner fabric on the outside, since it’s the inner fabric.
Amber says
You might be reversing things on which is inside and which is outside, but either way, just make sure you’ve got right sides together when you sew it and that they are on the inside and then it will turn out right.
Jorie says
Great tutorial… one issue I ran into before even cutting… 1 yard is only 36 inches, and most fabrics are only 43″ wide… so how did you get your 45 inch long pieces?
Also, if I’m sewing my second 45″ piece to my front along three sides, 15 + 15 + 17 = 47… Isn’t this going to come out too short to be the sides of the bag?
I have the fabric bought and I guess I’ll end up just improvising on this.
Amber says
My fabrics I get are usually about 45″ wide, so basically I just meant use the whole width of the fabric. Adjust it down just a little if needed.
Mackenzie says
I had the same problem when making my bag last night… I caught it when I was trying to put the sides on… I just unpinned and made the bag a couple of inches smaller which was better for me anyway.
Wendy says
Thanks for this tutorial! It’s my project for tonight. Will let you know how it goes! Jumpjumpjump!
Michelle C. says
So if I wanted to make this into a diaper bag for twins… and say I increased the width of the sides of the bag to 6″… could I still leave the strap at your given dimensions? I sew lots of girls dresses, but never tried a bag before! Thanks.
Amber says
Sure, the strap can stay just the same. 🙂
Kristy says
Hi there,
In the middle of making this bag and stuck on fguring out where to leave the opening to turn the bag. You say to leave the opening at the top of the flap, however when I go to turn the bag it only turns the flap right side out and I can’t turn the rest of the bag due to the seam across the middle. Have I left the right section of the bag open? Or is the top of the flap actually more in the middle of the bag?
Thanks!
Kristy 🙂
Amber says
You shouldn’t have a seam across the middle? Can you pick that out and then try again?
Kristy says
okay, figured that part out, I guess I only stich across the bottom of the flap when I’m doing my top stich, so now it turns okay. however, my straps are now hidden within the fabric when i turn the bag. When you asked us to put the straps down to the bottom of the bag and have the strap hanging out on either end, did you mean between your inner and outer fabrics, or actually right inside the big pocket of the bag?
Sorry for all the questions!
Kristy says
Figured it out! Completely the operator’s fault! Once I slipped the strap between the inner and outer fabrics and turned the bag, the strap came out properly. Thanks for the great bag! I love it! 🙂
Amber says
Oh good! It’s been a while since I made that bag so I was going to have to think pretty hard about the answer.
Sarah says
Love love love this bag looks soooooo good,carnt wait to have a go. Just one question im wanting to make it this as a baby changing bag (diaper bag) so am I better using an oilcloth material so I can wipe clean etc. Carnt wait to make it but very nervous I might mess it up.
Dezi. Lewis says
This is awesome!!!! Messenger bags have always been my favorite! My boyfriend was just given a ton of old Army BDUs and I was thinking that the material and pattern would be awesome for a bag!! He even has some left over duffel bag straps that I could use in place of making my own strap. My problem will be the extremely thick material and a seeing machine that is muuuuuuch older than I am (25. This thing is a singer that came in a seeing desk from the 70’s or earlier). Lol. Wish me luck!
Amber says
Fun idea! Let me know how it goes.
Mercia says
Thank you for the great tutorial and pattern – I have been wanting to try make a messenger bag – I am going to post your link on my sewing group <3
Amber says
Thanks! I love this bag. Carry mine every day.
Laura says
Hi Amber, thanks for posting this. I had been wanting to make a messenger bag for a while and your tutorial was easy to follow. I didn’t go wrong once, and even added some elastic to keep my drink upright at one end of the bag! Laura
Amber says
Oh that’s SO good to hear!
Erin says
Idk what happened but I guess I’m doing something wrong. I’ve been sewing my whole life and hardly ever have problems. So can you tell me what I’m doing wrong? I have step 1-5 done. But I’m have a hard time figuring out where the pieces for the flap go.
Amber says
The piece for the flap should have been part of the back piece. So you had 1 big long piece that forms the back of the bag and the flap all in one. Is that what you did?
Erin says
I think I got it. Thanks
Erin says
What do you mean when you say “do this” to the other side?
Amber says
I can’t find that in the tutorial-which part are you on? I found do this to both the outer and the inner fabric. Is that where you mean? If so, it means to sew the bottom/side piece to the front/back pieces of both the outside fabric that you are using, then set that aside and do the same to the inside fabric.
nissaMade says
Great bag! I love making bags too!
Megan says
Just an FYI, I tried using the tablecloth vinyl with the flannel backing for the inside of this bag. I wouldn’t do it again. It’s not as sturdy as I had hoped. When I went to flip it right side out, it ripped. Otherwise it is SO CUTE!!!! Thanks for the tutorial!
Tracy says
Love the bag and the fabric. They don’t have that fabric in my hobby lobby, and can’t find it online. Do you have a link?
Amber says
You know, I was at my Hobby Lobby yesterday and didn’t see it. Maybe it’s sold out. I bought it back in June or July? The brand is brother sister though.
Chrsity says
Thank you SO much. I am so glad you did a tutorial for this. I can’t wait to give it a shot!
Kerajinan Tangan says
wow.. very cute bag. it looks very easy to make, i should try this. thanks for the idea:)
Barbara says
Love the fabric! What a great tutorial too! Thanks for joining the party at Keep Calm and Link Up!
Barbara at Chase the Star
chasethestar dot net
Kaysi @ Keeping It Simple says
I love this!! You did such a great job on it and I love the fabric that you used!
Jill @ Create.Craft.Love. says
Love, love, love! So cute! Thanks for linking it up to the Pomp Party! =)
sue @ Cakeballs, cookies and more says
I love that! And I am so lazy when I sew, I never iron, I really should.
Natalie says
I adore your bag! Stunning, thanks for sharing the tutorial.
x
T'onna says
Nice bag! I love the gray fabric.
Margaux says
Wow great tutorial. And I love the fabrics you chose. I’m stopping by from Simply Designing link party, thanks for sharing.
Ashley S says
omg that is so cute! Looks professional like you bought it. love it!
meagan says
Can you please tell us what kind of lining you used for this bag! I think I bought something that isn’t sturdy enough. I like how your bag has some structure to it. I have some Hobby Lobby fabric too….can’t wait to get it put together 🙂
Amber says
Hmmm, what I used for lining I wouldn’t recommend. I think mine was actually embroidery machine stabilizer and it rips, so when I pick up my bag I can feel the lining ripping inside. Nice huh? 🙂 If you want a heavy duty lining you could probably use felt or fleece, otherwise any sort of lining. (In my picture I have a cereal box or something in there to make it stand up so I could get a good shot of it. It’s not usually that stiff.)
Marie B says
Smart!
Megan says
Just a question. Do you think you could use one of those plastic tablecloths (the kind with the soft backing) for the interior? I was wanting to use something that I could easily wipe out. Thanks!
Amber says
Sure, I don’t see why not?
Judie Mixson says
With regard to sewing on plastic fabric, I suggest that you make a sample first with fashion fabric or muslin so you work out any kinks. I’ve been sewing for about 40 years and I know from experience that plastic fabric is NOT forgiving. You cannot make a mistake and rip it out and do it over. The needle leaves holes in the fabric and it will allow water to get in. Otherwise it will work great. Lunch bag or swim bag it will be great. Also if you are thinking about a lunch bag try a thermal type material for the inside along with a quilt lining and it will keep your food hot or cold. Good luck!
Mel says
that truly is beautiful, great tutorial
Maryall says
It is soooo beautiful! I definitely like that!! and you make bag sewing sound so easy!! Thanks for sharing!
Robin says
Where do you get your adorable fabric?! Also what kind of fabric is it, quilting, home decor, something else?
Amber says
That’s from Hobby Lobby-just in their designer fabric section. LOVE hobby lobby fabric!!
Heather says
Hi Amber!
I have been making tote bags and wanted to try my hand at a messenger bag. Of ALL the tutorials on the web I picked YOURS. I’ve got a brand new machine and even with that, I still got this done completely in just a couple hours. Great instructions! I recognized the fabric immediately!! I love Hobby Lobby! I actually have a piece of that black and white that I was going to use for the liner but opted for another color. I do love the grey and yellow with it!! I will be sure to share your page for the pattern for my sewing friends!! Thanks!
Heather
(PS cant wait to try the little one too! So cute!)
Amber says
Thanks so much! I love Hobby Lobby too!
Sonia says
I can’t find the link for your reversible messenger bag. I’d love to make it but I’m just not any good at freehanding a pattern shape.
Thank you!
Amber says
http://crazylittleprojects.com/2012/03/reversible-messenger-bag.html
Roshini Davidson Stender says
I loved your bag and im so jealous of your clean lines around the corners.
And more jealous that hobbylobby doesnt ship to germany 🙁
Your bags at fab. 🙂
Amber says
I don’t show my mistakes in the pictures.
Jessic says
Hey I love this bag am making it myself how to you cut out your pieces I cut out the front and back bit don’t have enough for the strap I did get a yard of each color. I’m teaching myself how to sew and love the simplicity of this pattern. Thanks jess
Janet stephens says
Just finished making the bag. A little on the big size for me but I’m glad I made it. Going to be making lots more 😄. I wish I knew how to add a picture to this comment. I’d like to know what you all thought.
Thanks
Karah @ thespacebetweenblog says
GREAT tutorial … adorable bag!
Sarah says
Love the colors of this bag and your tutorial looks pretty easy to follow. If you get a chance come link up at our Pin Party.
http://justdawnelle.blogspot.com/2012/09/pintastic-monday.html
Tamara says
Lovely colors and prints! Great tutorial! Thanks for sharing 🙂
Erin@myveryeducatedmother says
You made this look entirely too easy! Love your fabric.