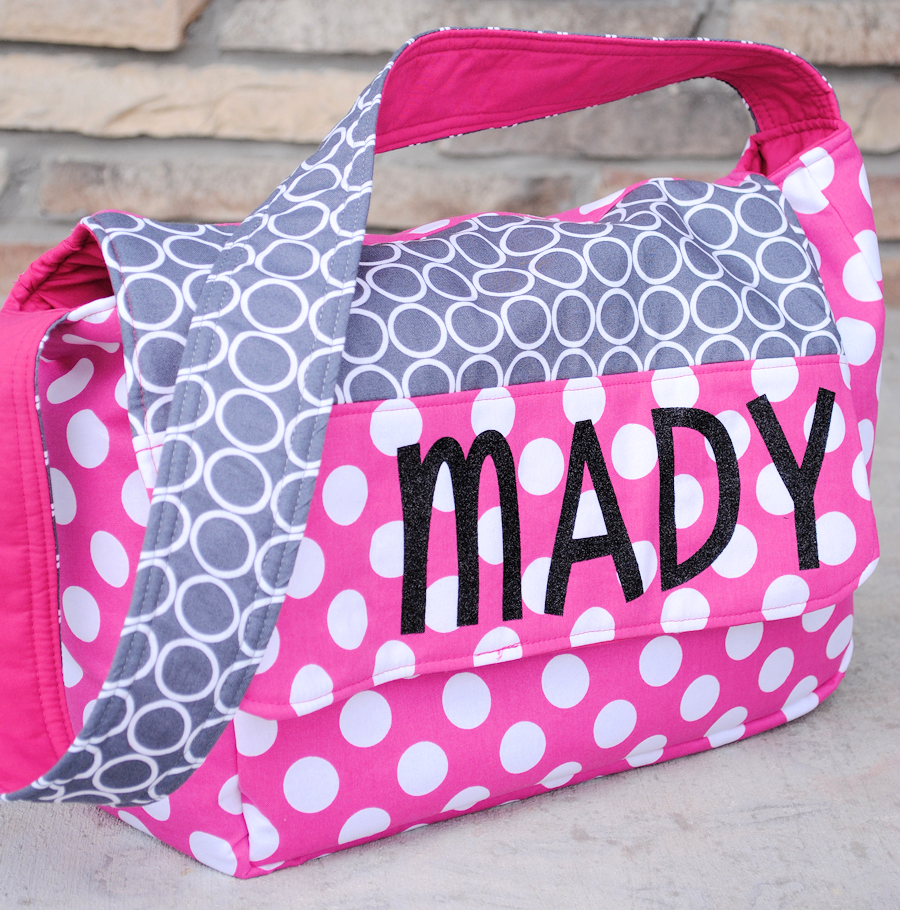
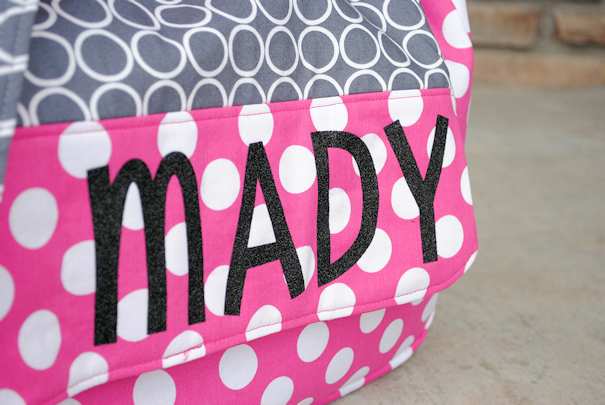
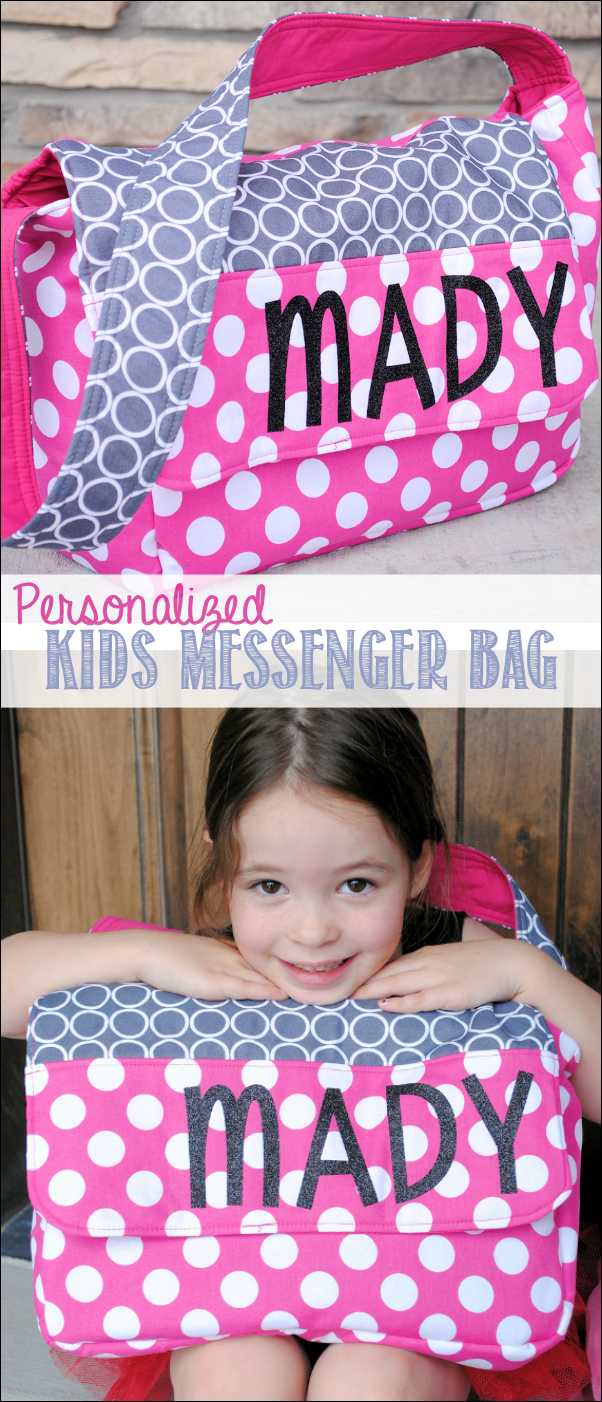
What’s the Project? This messenger bag pattern is perfect to make for the kids whether it’s to take to school or dance. It’s a fun pattern to make and turns out so great. Perfect for girls or boys, kids or teens or even for college!
I’m pretty excited to finally be showing off my Personalized Kids Messenger Bag pattern today! I made this one back in May but haven’t had it on the blog until now. If you like this bag, you are going to LOVE this new one. It’s the kid’s version and it’s personalized:
 This bag is very similar to my all-time favorite project on my blog, the Messenger Bag (adult version), with a few changes. I’m not going to show you the personalization part in this tutorial. I have a separate tutorial for how to use heat transfer vinyl here.
Kids Messenger Bag Pattern:
Supplies Needed:
- 1 yard each of 2 coordinating fabrics (you will have leftover fabric)
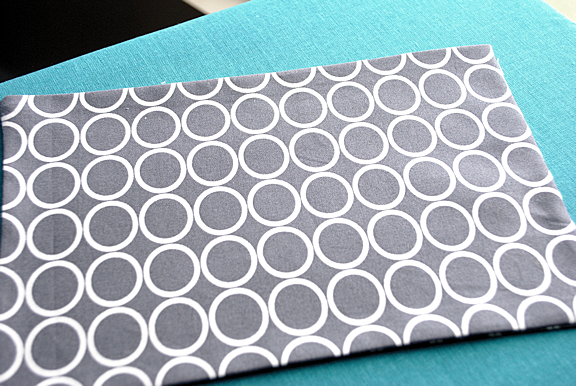
- 1/2 yard of an accent fabric (the gray dots is what I used for this)
- 3/4 yard of fusible fleece interfacing
Instructions:
Let’s start this out by cutting out our pieces.
From your main fabric you need to cut:
- 1 piece that is 4 inches by about 40 inches (this is your strap so make it longer or shorter depending on how long you want it)
- 2 pieces that are 12″ x 14.5″
- 1 piece that is 6″ x 38″
- 1 piece that is 5″ x 14.5″
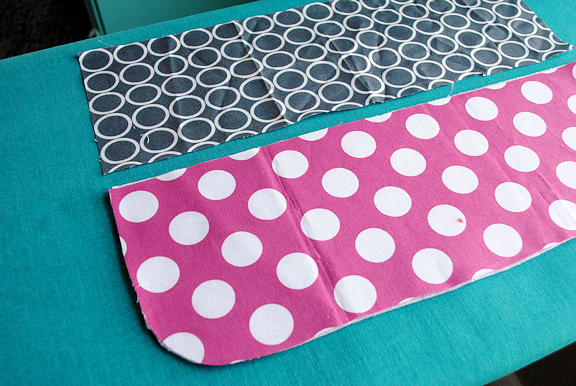
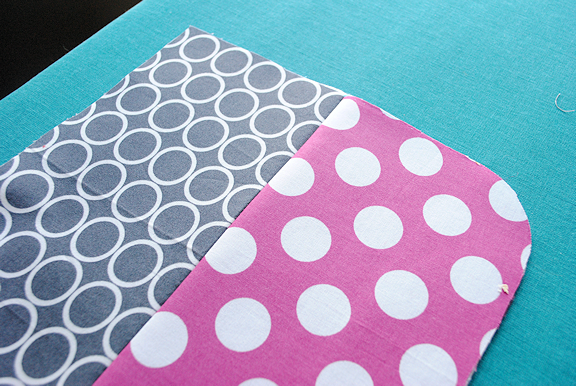
**Note: I round out the corners at the bottom of the 2 12″ x 14.5″ pieces and the 5″ x 14.5″ piece (see images below)
From your lining fabric:
- 2 pieces that are 12″ x 14.5″
- 1 piece that is 6″ x 38″
- 1 piece that is 10.5″ x 14.5″
From your accent fabric:
- 1 piece that is 4 inches by about 40 inches (this is your strap so make it longer or shorter depending on how long you want it)
- 1 piece that is 5″ x 14.5″
- Pocket (optional) see details on this below
From your fusible fleece:
- 1 piece that is 4 inches by about 40 inches (this is your strap so make it longer or shorter depending on how long you want it)
- 2 pieces that are 12″ x 14.5″
- 1 piece that is 6″ x 38″
- 2 pieces that are 5″ x 14.5″
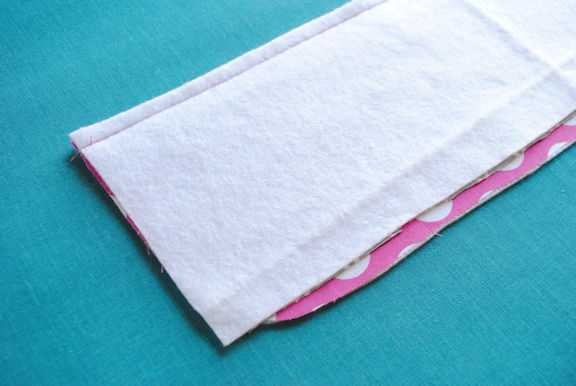
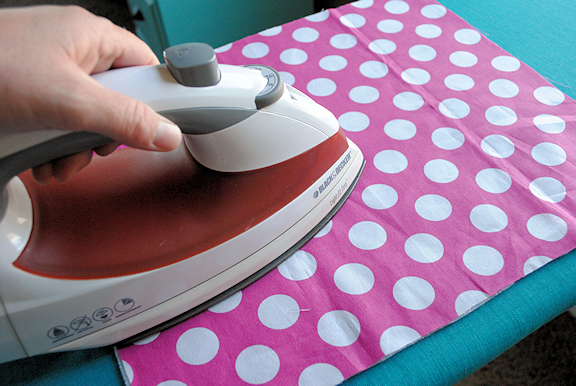
Make your strap first. To do this grab your two long strips of fabric. Iron the fusible fleece to the back of one of them (doesn’t really matter which) and then place them with right sides together and sew down the two long sides leaving the ends open. Turn right side out, press flat and top stitch to keep it nice and flat:
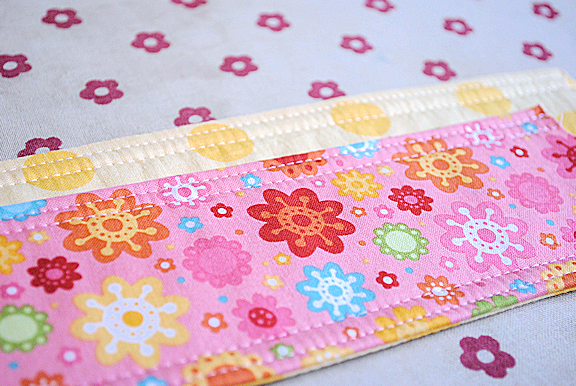
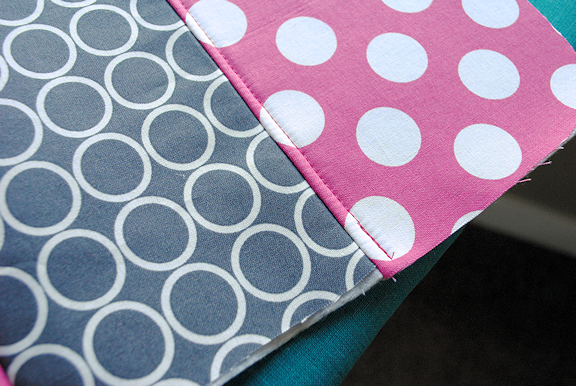
Set your strap aside. Next we are going to make the front flap of the bag. Grab your two 5″ x 14.5″ inch pieces. Iron the fusible fleece onto them just like you did with your strap pieces. Then, with right sides together sew them together across the middle:
And then top stitch across there making sure to grab the seam from the back into the top stitch just to hold it in place:
Now iron the fusible fleece to the back of your big 12″ x 14.5″ piece as well as your long 6″ x 38″ piece.
Stitch the flap piece that you already sewed to one of these 12″ x 14.5″ pieces to form the back of the bag.
Pin the 6″ x 38″ piece all the way the outside edge of your 12″ x 14″5 inch piece and then stitch it in place: 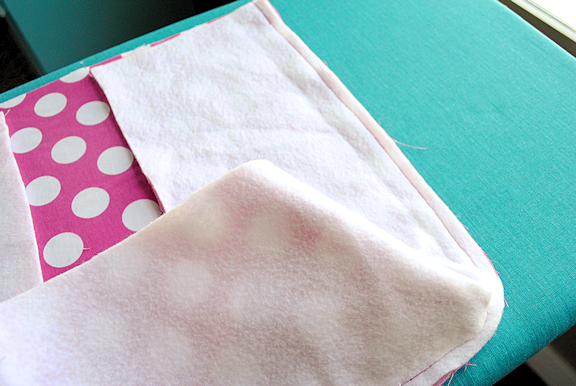
Now grab your back piece which is sewn to the flap piece and pin it in place the same way and stitch all the way around again: 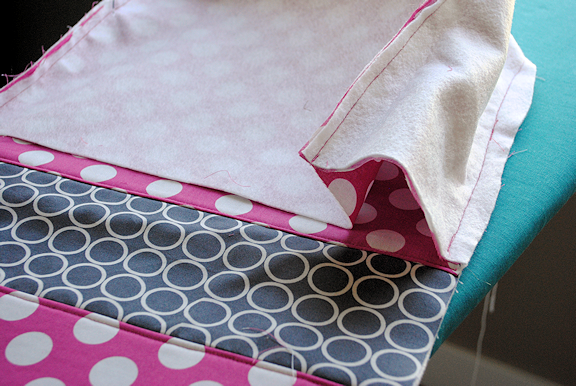
Now get your lining fabric pieces. If you want a pocket for the inside of the bag it’s time to create it. Cut a piece of accent fabric to be about 8″ by 12.” Fold it in half with right sides together and stitch all the way around, leaving a small opening to turn it. Turn it right side out and press it flat:
Now, get your piece of lining fabric that creates the back flap and position this pocket where you want it. Do it just a few inches up from the bottom of it. Sew all the way around the 2 sides and the bottom leaving the top open. If you want to create some compartments just sew vertical lines down the pocket with the spacing you want.
Now follow the same instructions that you followed to assemble the outside of the bag to assemble the inside.
Once you have that done turn the lining RIGHT SIDE OUT and the outer part INSIDE OUT.
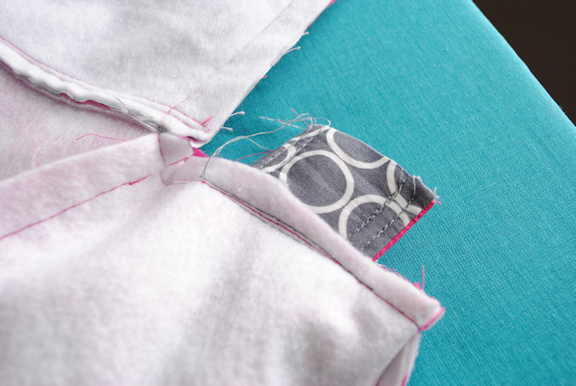
Put the lining down into the bag : 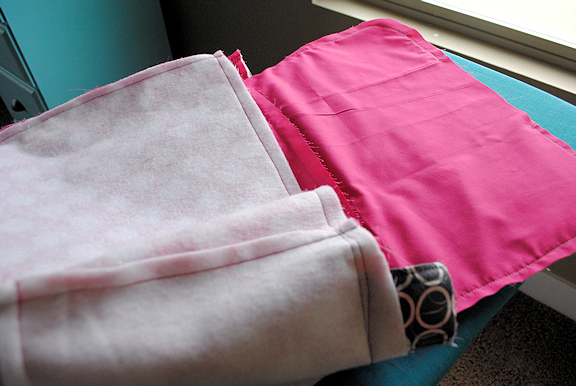
And insert the strap so that it is between to the two layers and sticks out the end. Be careful that it’s not twisted inside the bag.
Now, starting at the top of the flap sew around the flap, across the front of the bag and back up the other side of the flap leaving a small opening at the top to turn.
Here’s a video showing the process. This is the same process for about 5-6 tutorials on my site, so I’m showing it with the mini messenger bag in the video but it works the same for all of these different tutorials.
Now turn everything right side out and stuff the lining down into the bag.
Press it all nice and flat. I like to topstitch along the flap and the front of the bag to keep everything nice.
And you’re done! Want to personalize it? Follow this tutorial here.
You Might Also Like:
Pin It:


Lourdes Fay says
I am wanting to make this bag for my grand daughter to use as a lunch tote. I am seeing that it it 13.5 wide and 4″ deep. What is the height?
I can’t wait to shop for cute fabric!!
Thank you for sharing your tutorial.
Alana Perumal says
How would the pattern be affected if I used fuseable interface on the lining too?
Amber says
That will work-just will give it a little more bulk.
Laurie M says
Adorable bag, I want to make messenger style library bags for my kiddos. Do you have pattern for that?
Amber says
I’ve got several varieties including a library tote here: https://crazylittleprojects.com/easy-kids-library-bag-tutorial/
Rebecca says
Hi. I was wondering if this would be big enough(but not too big) to use as a teen’s dance bag? It at least needs to hold two pairs of dance shoes, clothes, and a whole bunch of hair accessories and makeup for contests and recitals. If not, do you have a bag that will?
Amber says
I think this would be just right for that probably!
Jennifer Steininger says
Hi! I am completely new at sewing and my first project was the mini messenger and it went great. Where can I find the pattern for this kids messenger bag?
Erin says
Thanks for the great pattern! Made it in a soft corduroy with a silky accent and it turned out great. Put some pockets under the front flap and on the inside as well – who doesn’t love pockets?
Robyn says
Hi,
This is a super cute idea.:-D I was just wondering, Would felt work instead of the fleece? And how easy is it to make?because I’m 12 and love sewing and would like to make this. One last question, do you have a pattern foyr it?
Thx bye
Amber says
I think felt could work? Not sure? It’s probably a moderate level project.
Sabrina says
Do you make and sell these bags?
Amber says
No-sorry! I just teach you how to make them. 🙂
Jess says
Just had to tell you – I was flipping through Pinterest and this photo came up (great tutorial!) and my three year old son said “look at that beautiful girl!” 🙂
Amber says
Cute! She is a neighbor of mine and one of my sons thinks she’s a beautiful girl too. 🙂
Debbie says
Did anyone else find that the 6 x 38″ piece between the front and back on the outside and lining are too long?
SISI says
What kind of cloth did you use…. can you please tell the name? like we have.. cotton, duck cloth… etc.
Amber says
I used just regular cotton but you could use anything really.
sisi says
Few more questions. …
you said “turn lining inside out and outside part inside out”
But the outside part is already inside out right?
2. “strap between two layers”
Is it between lining and outside part?
TJ says
Is the strap not made from the accent (grey) and lining (solid pink)? It says to cut the strap from the main fabric as well as the accent, but that’s not how it appears in the pictures.
Amber says
You can do it however you like it really!!
Megan says
So glad you’re still responding to comments. I’ve cut out my pattern pieces are for the life of me I cannot understand what the 10.5 x 14.5 lining piece of fabric is for – can you help me out? Is this the reverse side of the front/bag flap?
Amber says
Yep!
Tamara Chapman says
I really love this bag. Can you tell me how big it is once it’s finished? Also, I would like to add foam to the bottom instead of fusible fleece, how do I do this? If it’s big enough I’m going to make it as a sewing machine bag for my son’s sewing machine, it isn’t very big. Thank you so much for this wonderful tutorial. I hope this is the pattern I’ve been scouring the net for.
Amber says
It’s about 13-14 inches wide by maybe about 10 inches tall and 5 inches deep. To add the foam you would have to just stuff it down into the bottom after you turn the two layers the right way and before you sew it shut at the end.
Sherri says
I have purchased all the fabric needed and cannot wait to start this bag. My only question is how did you decide how large to make the curve?
Amber says
Just eyeball it. Just a gentle rounding.
Mary El says
I used one of my kid’s cups to make the mark for the rounded curve.
Lenore says
Do you apply the fusible fleece to the outside and inside (the main fabric on the outside and the lining inside) of the bag? It says you only need 2 pieces of fusible fleece in the directions, but if it goes on all the panels, lining and outside, wouldn’t you need 4?
Amber says
I only do it on the lining fabric. So just one layer of fusible fleece.
Lenore says
ok thank you so much! Finishing it now :). My little girl is soooo excited! She’s helping me make it!
Mary El says
I loved making this bag! I will be making more in the future! Thanks for the awesome tutorial. It was super easy to follow 🙂
nicolle says
I love this bag and lunch box. I have 5 girls so I am excited to make these for them, Thank you for the tutorial. I love how you answered everyone’s questions its nice to see someone so nice and helpful.It helps me just in case I run into a problem, to have read everyone’s posts
Melody Johnson says
Amber – thank you so much for this tutorial. I had a very difficult time with the flap also. Tried multiple times to get everything lined up. Here is a much easier suggestion for completing the flap. Sew the flap as a separate unit first – assemble the outside of the flap but don’t attach it to the bag. Then lay the lining piece face up, top with the fleece, then lay the outer flap piece face down. Sew the layers together around the two sides and the rounded edge. Trim the curved sections of the seam to reduce bulk and then turn right side out, smooth down the edges and press. Then assemble the outside and inside of the bag (being sure to leave the opening for turning), per your instructions, leaving the back unpinned. Now to insert the flap (still turned right side out) – take the completed flap and pin it between the outer fabric and the lining making sure to match up the fabrics. Then simply sew all around the top edge. Turn bag right side out through the opening left in the seam of the lining fabric. You can press the top seam prior to turning if desired; it makes a smoother line at the top of the bag. You dimensions are perfect and the flap fits into place perfectly. If desired, top stitch all around the top edge including around the flap.
Mar says
Adorable, I always wanted backpack for little boy with name on it, went with monogram instead after talking to a friend who said she remembered news article warning mothers against backpacks and shirts with kids full names on it since could give a perp ample opportunity to have reason to talk to kid if knew name, just thought I would let you know, I really do love the bag and colors, might do something for my sons books with just monogram though.
Cierra says
I want to make this size bag as a cross body purse for myself, however, I want the front flap to go all the way to the bottom, what adjustments do i need to make for that. Also, I don’t want such a deep bag, would it work to make it 4″ in stead of 6″?
Thanks for the tutorial. I really do love this bag!
Amber says
You might want to look at my regular messenger bag pattern. It’s going to fit your needs better I think: http://crazylittleprojects.com/2012/09/messenger-bag-tutorial.html
Happy Mama says
Thank you so much for this tutorial! I used it as an inspiration while making a diaper bag for my sister! See how mine turned out at http://www.happymamatales.com/diaper-bag-tutorial/!
Amber says
Love it!!! Great work!
Irene says
I’m really wanting to make THIS bag out of assorted feed bags( the type of bags that resemble tarps if anyone understands what I’m talking about) not sure, however of what I should do about a lining material. Any ideas??? I’m thinking this would look super cute with a rabbit pellet bag… The flap would contain a picture of a bunny.
Amber says
Do you mean just the fabric for the inside of the bag or the interfacing? I think you might not need interfacing since your fabric is thick. Inner fabric though would be good with anything!!
Melissa says
Hello! Thank you for this tutorial! I’m a little confused on where you sew on the pocket. Is it inside the bag or on the back of it? I don’t see it in the picture. Your description says “back flap” so I’m a bit lost. Thanks so much for this! I’m a beginner and self taught so I rely on tutorials and yours are wonderful!! 🙂
Amber says
I do it on the inside.
Julie says
Hi Amber I love all the beautiful things you make. I was wondering if you could tell me if the Messenger Bag would be strong enough for a university student to take her laptop and other things they would need to uni please.
Amy says
I had the same issue with the lining being too long. I think it had to do with the seam allowances for the front of the flap. I trimmed the lining to make it work but I think next time I’ll account for the seams and make the front of the flap longer.
I also had the problem of bunching where the flap meets the bag. what do you mean clicking the curves before turning?
Amber says
Take your scissors and snip tiny lines into it right where the curve is. Snip right up to the seam is but don’t cut it.
T Busch says
Maybe I don’t understand your directions or measurements but my fabric is way off. The piece that is supposed to be 6″x38″ is about two inches long and the piece that will be the back of the bag is about an inch too short, my outer side piece doesn’t fit… am I doing something wrong or should it be 6″x36″ and the back piece (s) should be 13″x14.5″?
Amber says
I gave you a long measurement for the 38″ one because it is easier to cut off the excess than run out of fabric. So just snip the excess off. If you are short on the back then go ahead and add in that extra inch if needed.
Giselle says
I’m having an extremely difficult time figuring out how to see the lining to the practically completed bag…. Is there a way I can contact you?
Amber says
Do you have both the outer and the inner pieces sewn together and ready? If so, I have a video of how to finish: http://m.youtube.com/watch?v=Nu0tkralVrk
Giselle says
I’m deciding to undertake my first real sewing project with this great bag with awesome instruction. I bought and cut all my fabric today except the interface. I bought some but it’s not enough for my project. I happen to have some quilting batting, could I use that instead or does it really need to be the fusible fleece? Thank you
Amber says
You could use batting but the fusible fleece is easier to work with.
M Nelson says
please say hello to Mady for me – I was a Mady at a time when no other little girls were named Madeline or Mady and the spelling M A D Y is still unusual. My mom wanted to name me Gabriella – dad wanted to name me after his favorite cousin. Mom agreed but only if I was called & spelled Mady . . . we’re special~!
Amber says
I love that name! This is actually a neighbor’s daughter but man, if I had a little girl, I would love her to be Mady!
michelle says
This is a very nice bag, gonna make a couple just what I was looking for.
Courtney says
So happy to say that I successfully completed this project. I haven’t sewed since junior high home economics. Got a sewing machine for Christmas and finally found some time to sit down and use it. My niece had a messenger bag on the mind so this was absolutely amazing to find. Thanks so much.
Amber says
Great to hear!
Alana says
Hi, I have never sewn anything but the most basic things (and not very well); this is the first actual project I’m going to tackle. That being said, what kind of fabric do you recommend? It’s going to be a small diaper bag.
Amber says
Just get a regular cotton. Not knit and nothing too heavy for your first try.
Dawn says
Made one so far, getting ready to make the next 2 but need to downsize it a little more for an almost 3 year old…..she has to have everything the other girls have 😉 any suggestions?
Amber says
Size down the main piece and then adjust the others accordingly. I would just move each side in an inch or two and the top down an inch or two. Does that make sense?
Melanie says
I’m about half way done and about to see the lining pieces together. One question, do you sew right side pieces together for the lining as well? For some reason I’m really stuck on this. Thanks!
Amber says
Yes, for the inner part do the exact same thing that you did for the outer part.
janine says
I just finished 2 bags for my nephews. They look good bt I’ve struggled with the corners where the flap meets the bag. When I turn everything and flip it in place it pulls/bunches up in those corners. Any ideas on how to make it lay flat? I may be making few more and would like to solve this issue.
Nice pattern.. Thank you for taking the time to make it.
Amber says
I have that problem sometimes too. The main key is just to click the curves before you turn. Did you do that?
Yvonne says
Try trimming close to the stitching line to remove excess bulk and clip up to the stitching line every 1/2 inch around the corners making sure you don’t cut the stitches
Joy Goncalves says
Thank you. The directions and photos are Great!
Just to clarify the finished sizes. Adult 16 wide x 14 high x 4 deep.
Kids 13.5 wide and 4 deep by what height? Is this correct?
Amber says
Yep!! 🙂
April Bowerman says
I see the width of the bag in your return comment above as being 13.5 inches. What is the height and depth? I am thinking of making this into a DSLR camera bag and another for a purse. I plan to add pockets on all 4 interior sides for organization.
Also, what are the dimensions of your adult sized bag, for my future reference in case I decide to make that one too.
@pril
Amber says
This one is about 4 inches deep and 12 inches wide.
Amy says
I’m a novice to the sewing world, and wanted to thank you for clear and concise instructions. You made me successful at the project! I did change one thing in making the bag for my girls. I added a section the same width as the gusset to the flap so that the accent would lay on the front of the bag. Super tutorial, and the bags came out super cute too!
Amber says
Yay!! Love to hear that
Angie says
Can you tell me what fabric line you used for the bag? The patterns are very cute!
Amber says
It’s from Hobby Lobby. 🙂
mandy says
one more, I have everything cut for 3 bags, but I want to check before I start, what is your seam allowance? I was guessing 1/2 inch?
Amber says
Yup, I do about 1/2 inch.
Mandy says
Love this! How big is the finished bag? Big enough for school supplies and a binder? Might need to whip these up for back to school! How would this work with hobby lobby home dec (cotton duck) fabric? Maybe no stabilizer? Can’t decide if it would be too thick, but it would hold up better than quilting cotton for school wear and tear 🙂
Amber says
The finished size will be about 13.5″ wide. Yes, I think you could definitely use that duck fabric to make it sturdier! Good idea. I still think you might want the fusible fleece. It would be a little bulky but very sturdy.
Debbie says
Just finished with duck fabric and fusible fleece. Is definitely not too bulky. Need extra sturdiness.
Dianna says
Fabric purchased. Machine set up. Nerve to make the first cut… yeah, not quite there! But I’m working on it! Thanks for the great tutorial.
Amber says
Do it! Do it! Do it!
Dena Martin says
This bag is adorable and will make a great gift for one of my granddaughters. Thank you!