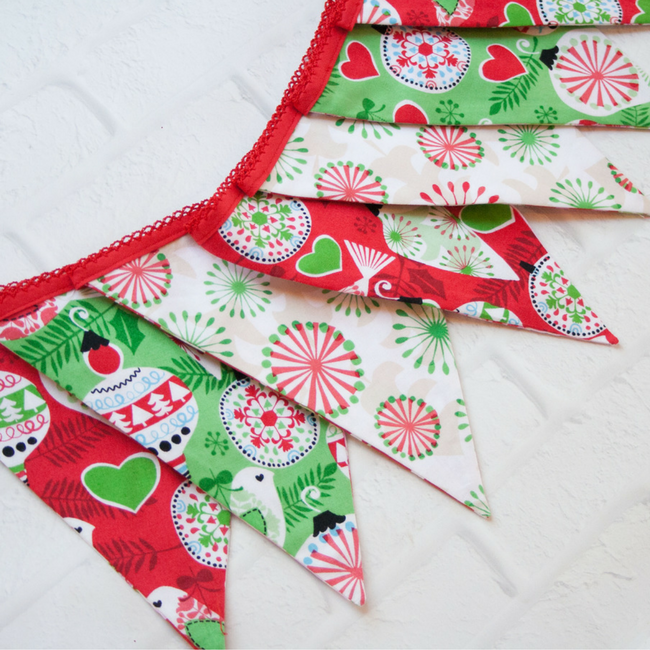
What’s the Project? Make this cute fabric Christmas banner to hang at the holidays! Then flip it around and hang it for Valentine’s Day as well because it’s reversible!
Just in time for Christmas, my fun contributor Kim from Sweet Red Poppy is sharing a cute pennant banner tutorial. The great thing about this is that you can make it now for Christmas, but you can make it reversible so that the other side is ready for Valentine’s Day! Check this out!
Here’s Kim:
I’m so excited to be sharing this fun, double-sided pennant fabric Christmas banner with you today! I love decorating for the holidays and I especially love decor that can be reused from season to season. This is the perfect tutorial to give your decorating some added longevity.
You saw the Christmas version and here’s a Valentine’s version:

So cute and so simple!
Reversible Fabric Christmas Banner Tutorial:
Supplies:
- ½ yard Christmas fabric
- ½ yard Valentine’s fabric
- 3 yards bias tape
- Matching thread
Sewing Instructions:
If you want your pennant banner to feature more than one print on each side, you will need approximately 1/4 yard of each fabric to yield two triangles.
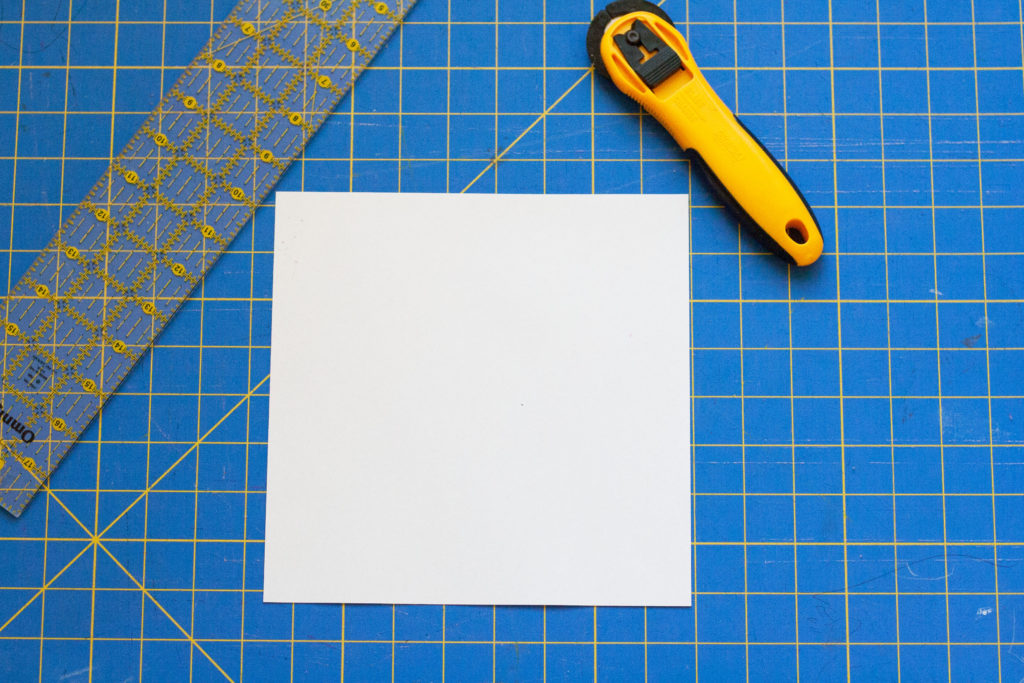
We will begin by creating our triangle pattern. To do this, start with a standard 8.5 inch by 11 inch piece of paper. Cut the paper down to an 8.5 inch by 8.5 inch square.
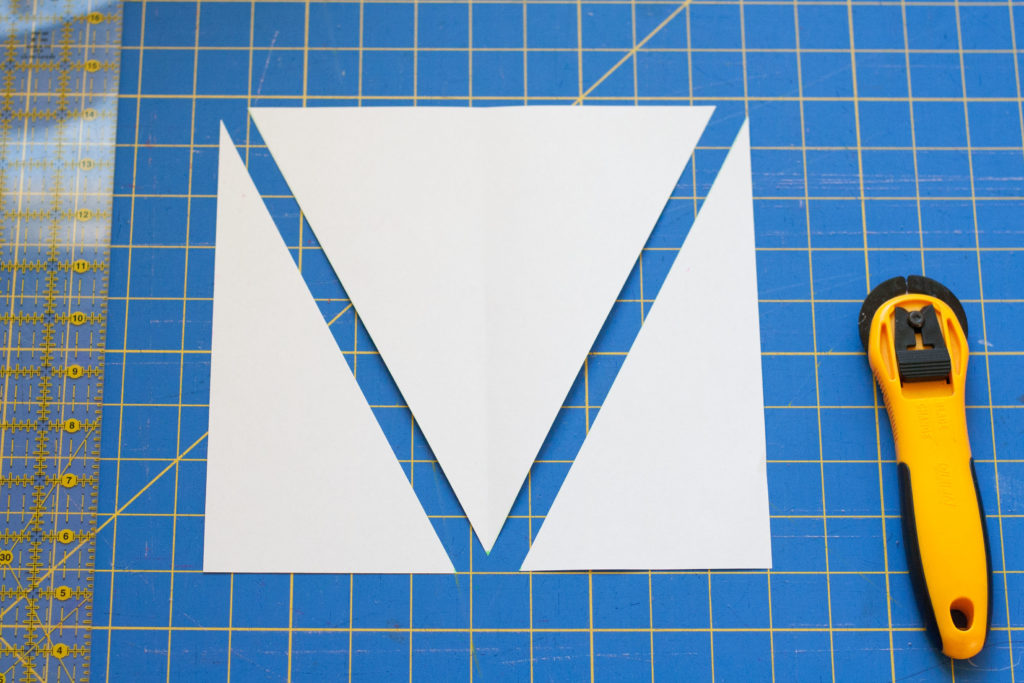
Fold the square in half and then unfold it. Next, mark a dot on the very bottom center of the square (bottom of the fold crease). Using a ruler, draw a line from the top left hand corner of the square down to the bottom center dot. Repeat on the other side to create a triangle. Cut away the paper to create your triangle pattern.
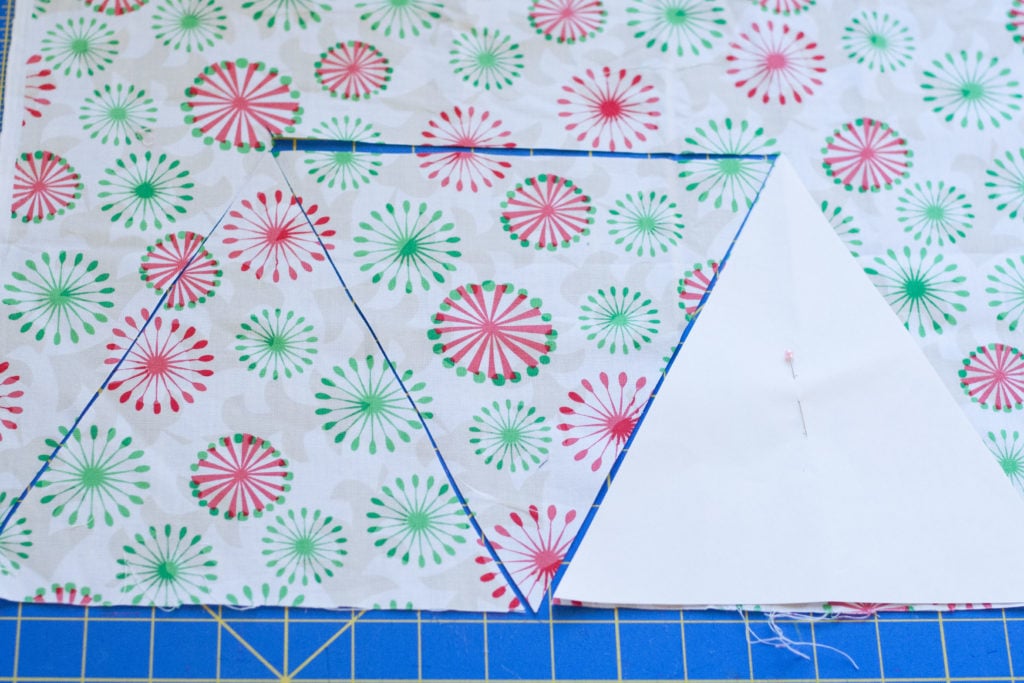
Align the bottom edge of the pattern piece with the edge of the fabric and cut out the triangle. Flip triangle over and cut again. Repeat this step until you have cut out seven triangles from each type of fabric. (You should have a total of 14 triangles).
Match up your triangle pieces with right sides together. Each Christmas piece of fabric will be put together with a Valentine’s piece of fabric.
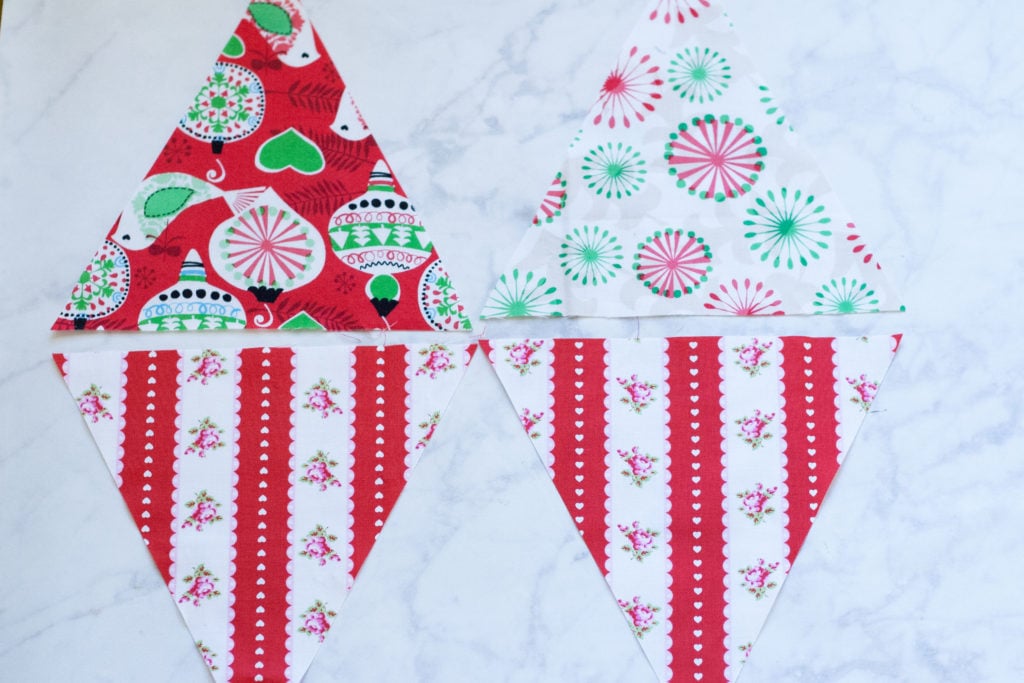
Pin along the sides of the triangle leaving the straight edge unpinned.

Using a 3/8th inch seam allowance, sew along the long sides of the triangle. Once you reach the point of the triangle, lift the presser foot with the needle in the down position, rotate the fabric and sew up along the other side of the triangle. Remember to leave the top of the triangle unsewn as this part will be covered with the bias binding.
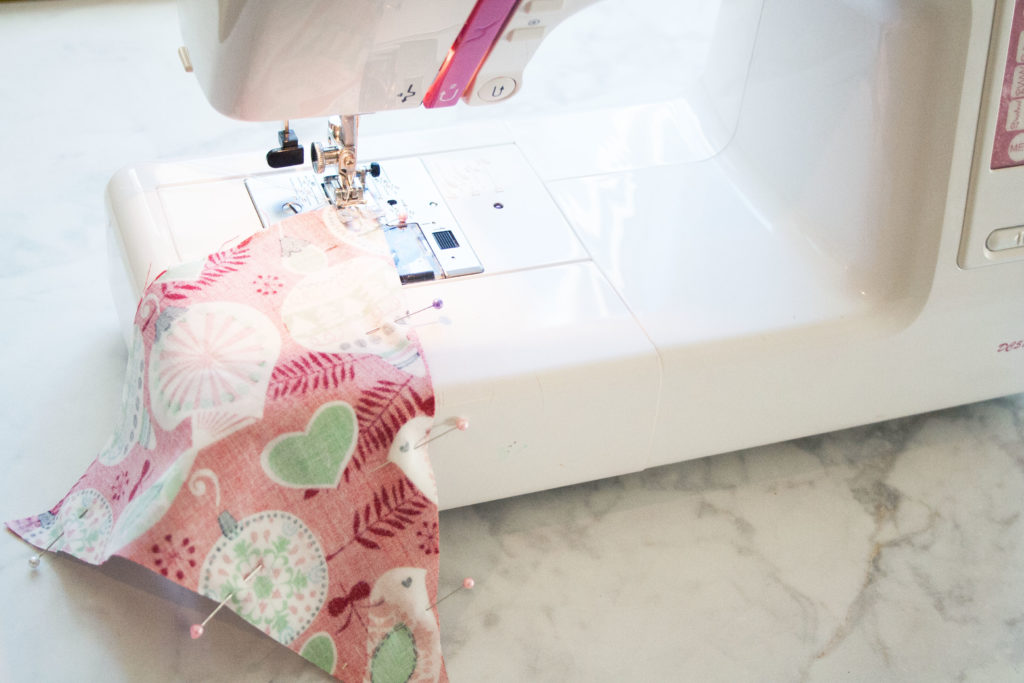
To ensure a sharp point we will need to trim the seams near the point. Clip right below the point of the triangle being careful not to clip through the stitches.
Also, clip a small amount from either side of the triangle to reduce the amount of bulk. This will help you to get a sharp point. Turn triangles right side out and press seams.

Clip the uneven seams sticking out from the top of the unsewn triangle.
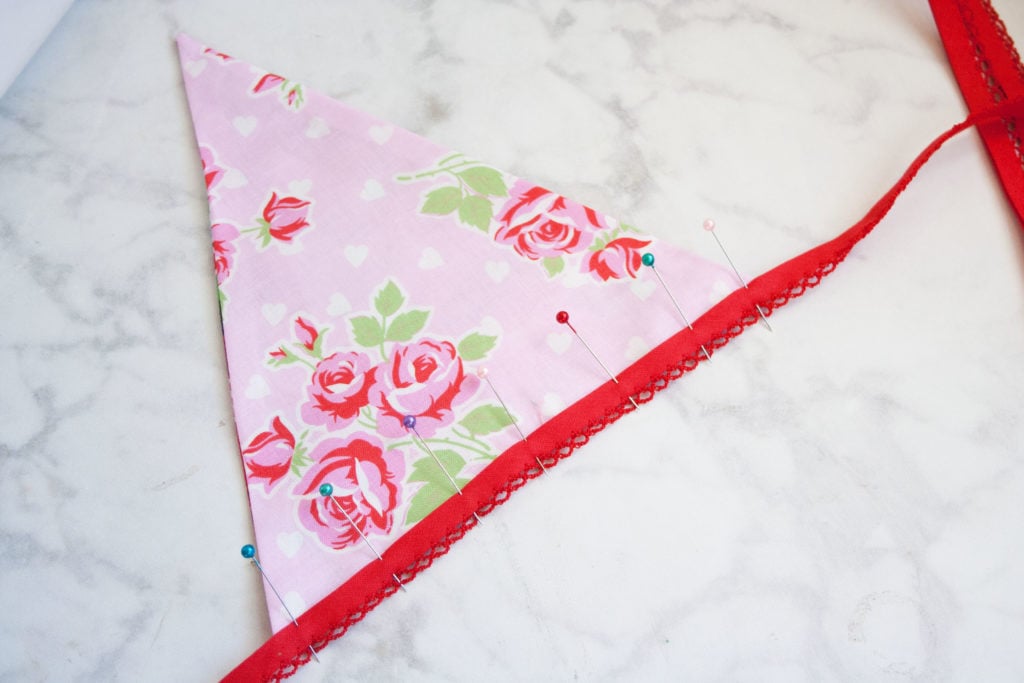
Find the center of your bias tape. Open up your bias tape so that the right sides of the bias tape are lying flat against the table. Sandwich the triangle into the bias tape aligning the top of the raw edge of the fabric with the center crease of the bias tape. Use plenty of pins to make sure that the triangle is well secured.

Repeat this step with the rest of the triangles. I like to begin by pinning my middle triangle to the center of the bias tape and then working my way out spacing them about 1 inch apart. Once you’ve pinned all the triangles to the bias tape, it’s time to sew the banner together. Starting at one end of the bias tape, stitch 1/8 inch away from the edge. Stop periodically and check to make sure that your bias tape is folded perfectly on top of itself so that you catch both sides as you are sewing. Continue doing this until you reach the other end.
You are finished!
Hang your fabric Christmas banner and enjoy your hard work.
You Might Also Like:


April says
What kind of bias tape did you use? It looks like it has a chain stitching edge. Did it come that way or did you add that touch. Cute project! Thanks
Amber says
I believe that came from Joann?
Abbie says
This is so cute! I love it! 🙂 I love all of your sewing tutorials. 🙂 Keep up the amazing work! <3
valeie says
I am thinking fall/halloween, Christmas/valentine, easter/spring, and 4th/summer.
Amber says
Yes!
Melissa says
LOVE this!! Super cute. Won’t have time to make it for Christmas, but could for Valentine’s Day. I might use the reverse side for Memorial Day/July 4th. Thanks for sharing! – Melissa from Craftylilypad.com