Is it spring yet in your neck of the woods? We had gorgeous yesterday and rain and sleet today. I guess that’s spring though right? I love my maxi skirts, but with spring here now I thought it was time to have some springy skirts! So I made a couple and today I will show you how. This is a Knee Length Knit Skirt tutorial that’s pretty easy and inexpensive, so you can make a bunch!
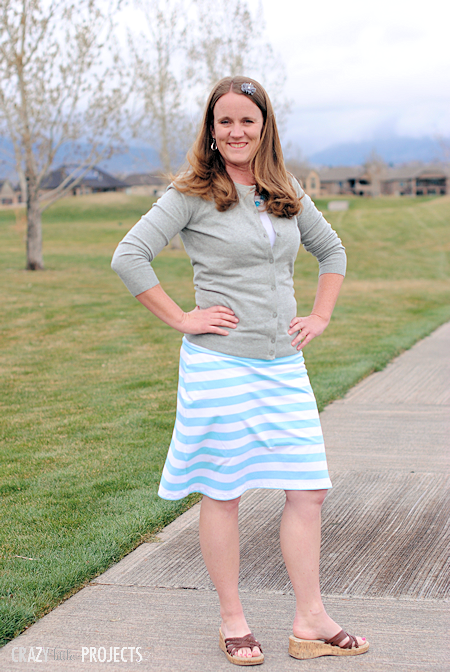
And…just so you know I loathe taking pictures of myself and posting them on my blog, so this is a big stop out for me. I had my 10 year taking the pictures and it was quite the undertaking!
Anyway, these are pretty easy to make. Sewing on knits can be a little tricky, but if you can handle that, you can make this skirt! Or lots of them!
Knee Length Skirt Tutorial:
Supplies Needed:
- Knit fabric-about 1 yard (possibly a little more if you are a size large or extra large)
- If you need help sewing on knits-try my ebook. There’s a chapter on it there.
Instructions:
This is made very similarly to the maxi skirt, so if you have made one of those you should be great at this!
We’ll start by cutting it out. You will cut 3 pieces total.
The first two are your skirt pieces. Before you cut you need to measure your waist. Let’s say you have a 32 inch waist. Subtract about 4 inches from that (because the fabric is stretchy) and use that number. So now my number is 28.
**One word of caution-it’s easier to size it down smaller if you make a mistake than it is to size it up bigger, so err on the side of making it too big rather than too small.
So, my waistband size is going to be 28 inches. Take that number and divide it by 4. So, divide 28 by 4 and you get 7. So 7″ is how wide the top measurement of your skirt will be when you fold the fabric in half to cut it out. Fold your in half and cut it to look like this:
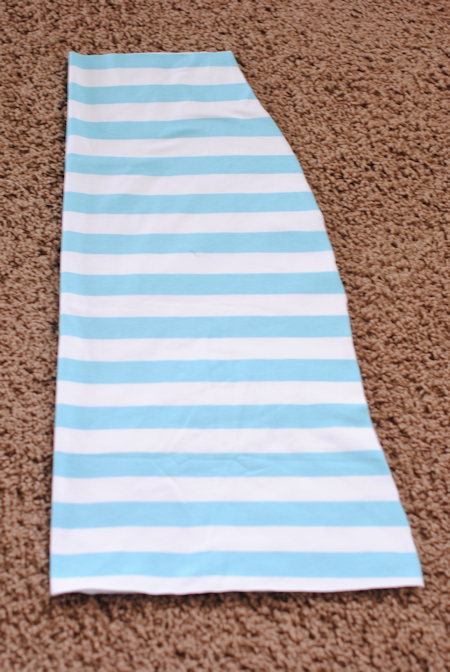
Again, the top measurement on that skirt is 7 inches (because my waistband size is 28). To determine the length, measure from your waist to just below the knee (leaving an inch or so extra for a hem). I cut mine 25 inches long. (I’m short.) And the bottom should flare out about 24 inches more than your waist (so 6 inches per side when it is folded). So mine is 52 inches around at the bottom. Just mark where you want it and angle it gently outward at the bottom as you cut.
Hope that all made sense! It’s hard to give these instructions!
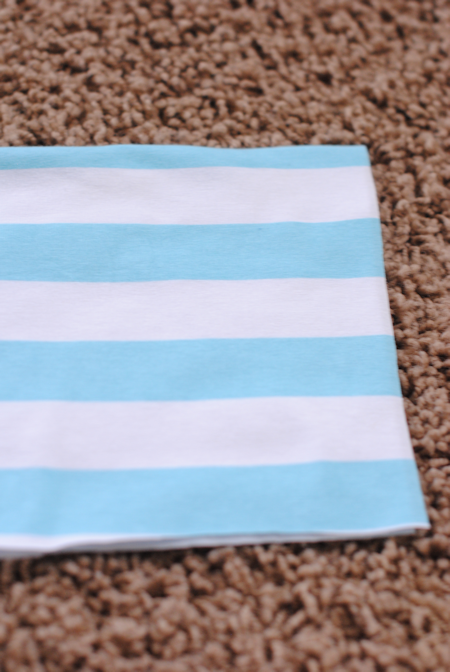
Now you need a waistband. Luckily this part is easy. Cut a piece of fabric as long as your waistband (so mine is 28 inches) and 12 inches wide. Then you will fold it in half to look like this:
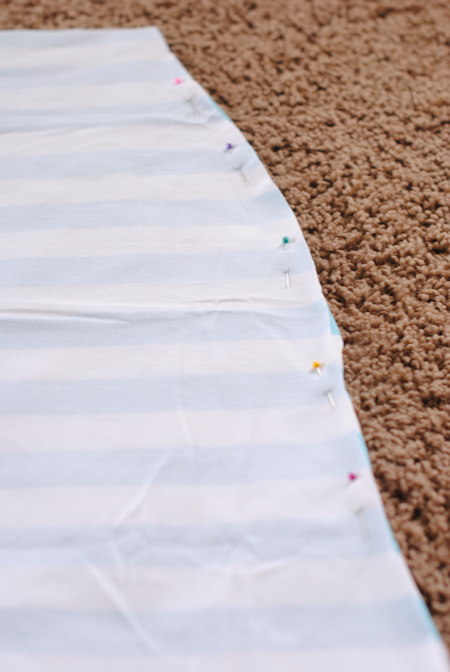
OK, cutting out was the hard part. Now all you need to do is place right sides of the skirt together and sew up each of the sides. Use a stretch stitch if your machine has one. If not, I recommend a long, narrow zigzag stitch:
Then, fold your waistband so that it forms a loop and sew the ends together: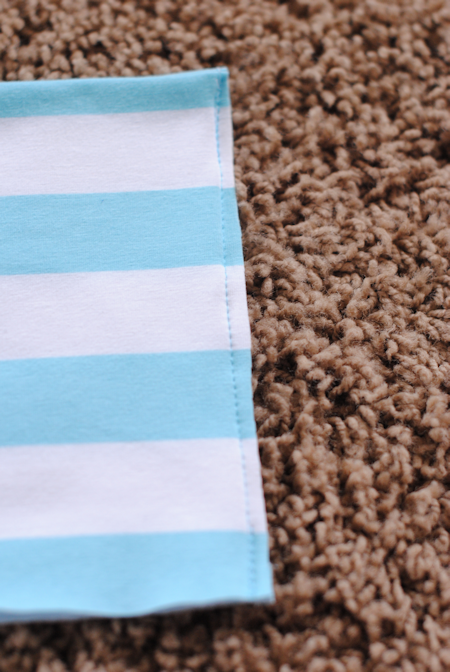
With your skirt right side out, slide the waistband down inside the skirt. The raw (unfolded edge) of the waistband should be at the top of the skirt. The raw edge seam (shown above) should be facing out (as in not touching the wrong sides of the fabric on the inside of the skirt). Match that seam up with one of the side seams on the skirt. Then, pin the waistband in place all the way around the top of the skirt and sew it in place. Then it should fold over the outside like this:

Last, hem the bottom. I just fold it under once when sewing on knits because it won’t fray. So fold it under about 1 inch one time and sew all the way around. I like to do a second stitch all the way around so that I have a nice double stitch for the hem.
And you’re done!
Here’s a fun idea! If you get solid colored fabric, you can add some fun embellishing with fabric paint! I used DecoArt’s SoSoft in Wysteria to add this stenciling to a skirt: ( I also used a DecoArt stencil)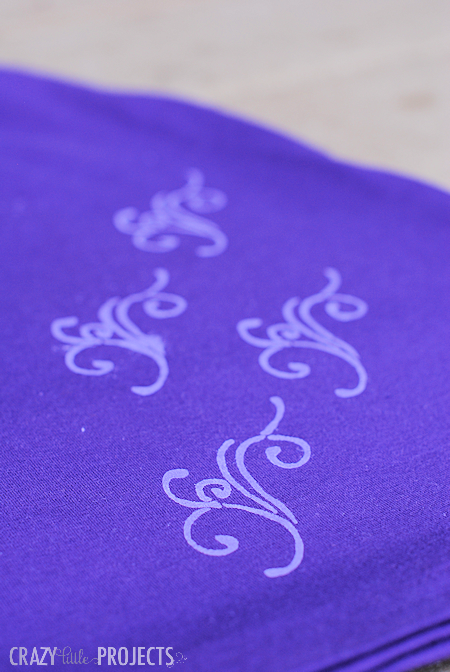
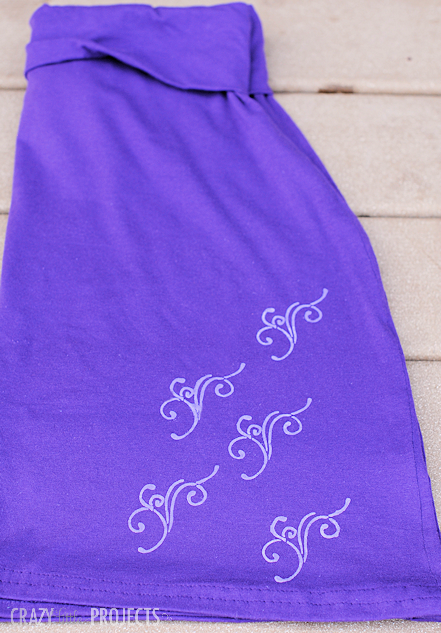
To do this I just used a sponge dauber and a simple stencil and put a tiny bit of paint on:
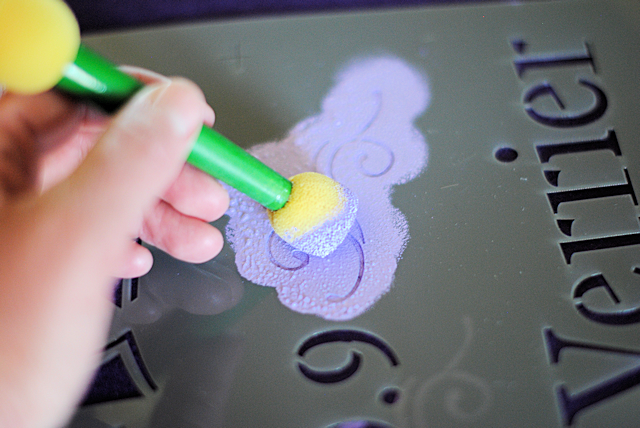
Love how that stenciling turned out!
")


Amy says
Thank you so much for this post! I’ve been sewing for almost a decade but never ventured into making any clothing. I got a wild hair to try making some clothes, and thought a skirt would be a good choice; I looked at a lot of tutorials online but settled on yours and it was so easy–especially since we must be the same size because all the measurements you listed were exactly what I came out with 😉 I successfully made my first article of clothing and I love it–thank you so much!!
Claire says
Awesome ideas. I just started getting interested in sewing. Looking forward to see more. Have a blessed week!
hohshop says
Love this skirt! you are looking so pretty in this pic.
Carmen says
Very nice pic. 🙂 The skirt looks chic and comfortable. I’ll have to try making one, hope it turns out as well as yours did.
maya says
Hi,Is it not needed to line the skirt?Wont the fabric be see through?
Amber says
If so, just wear a slip.
Myki says
Can you tell me the seam allowance to sew?
Amber says
I do 1/2 inch
Danielle says
I bought some fabric today and I can’t wait to try this out! Looks so cute and comfy! However, my fabric is kinda light and I’m worried about it being see through. Any suggestions?
Amber says
Wear a slip for sure
Anna says
Thank you for all the great ideas – as a newcomer to sewing this website has been an amazing help. I made one of these skirts & it’s so comfortable, I love it. Now I have the confidence to try the boxy pleated jersey dress for my daughter. Wish we could upload pics I’m so proud of my new skirt!
Amber says
I love hearing this!
Heidi @ Happiness is Homemade says
This is SO cute, Amber (and your picture is adorable! I totally hate putting pics of myself on my blog though, too!)! You make sewing look so easy! I can’t wait to take your class at SNAP, but honestly, I wish you were teaching one of the sewing classes because you always explain things so well!
Melanie says
Cute and easy. I did a similar one as a maxi skirt. So fun!
Molly Campbell says
So cute! I know this is seriously not the point of the post, but if I wanted to make it a few inches longer, could I do it with the same amount of fabric, or would I need more? Knee length is perfect when I’m standing, but I like to do it long enough that it’ll stay knee length when I’m sitting.
Amber says
Maybe a tiny bit more fabric but not much.
Melissa Jensen says
Where did you buy your knit? I’d love to make some maxis for myself and my daughter but I don’t know where to get cute patterned ones like your blue striped one. 🙂
Amber says
I got this at http://www.theribbonretreat.com
Heather says
Perfect timing! I was about to make a maxi skirt, but I really wanted it shorter. Will be pinning your instructions.
Katie @ Made to be a Momma says
So pretty! Love the feel of knit skirts…so comfy!
Crystal says
Super cute skirts! I love how you stenciled on the purple one. Pinning 🙂
Heather says
Can’t wait to make this skirt. And I love those sandals. Can you give me any info about them?
Amber says
Kohls a few years ago
Kelly says
I want it, but I need to make it ankle length I can’t wear anything shorter. Would I take this exact shape and continue to widen it as I lengthen it (like I do with an A line) or do I continue straight down from the hip and make it flare out only in the bottom section? I think both skirts are great, and I think you are too hard on yourself, you’re gorgeous 🙂
Kelly.
Vikky says
love it