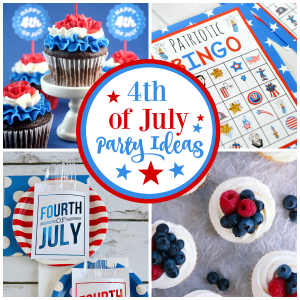
4th of July Baby Girl Dress


I love the 4th of July. Nothing says summertime like July 4th.

I have always wanted to have a little girl to dress up in a cute little patriotic outfit for the 4th of July. I still don’t have a little girl, so I have given up on that and decided to make a 4th of July dress anyway and give it away so that someone else can dress up their cute little girl in a red, white and blue dress.

This idea originally came from a candy corn dress (which I have also made and loved). I’ve just tweaked it a little to make it patriotic and I have included a pattern because I don’t have a little girl dress to make mine from like she did.

Here’s my 4th of July baby girl dress:

4th of July Baby Dress Pattern and Tutorial

I think she likes it!

patriotic dress pattern
4th of July Baby Dress tutorial
Patriotic dress pattern

Red white and blue baby dress

One really great part of this dress is that it takes very little fabric! I made this using scraps from other projects, so it really cost me nothing!

***The directions I am giving you are for an 3-6 month size dress. You can make this for any size just using a dress that you have as your pattern or by adjusting my pattern a little bit. For more information on how to do that, go here.

What You Need (for a 3-6 month size dress):
1/4 yard white fabric
1/3 yard of center fabric
1/4 yard of ruffle fabric
Button
1 yard ribbon for embellishment
1 inch piece of white cording or ribbon
Pattern pieces for bodice

Instructions:

Start out by printing and cutting out the pattern pieces for the bodice.

You then need to cut out 4 bodice pieces from your white fabric.

Cut your middle fabric (in my case it’s the blue with stars)  9″ by 28.” (Or, if you are making a size other than 3 months, make it 3 times the width of your bodice and as long as you want your dress to be in the end minus a few inches for the ruffle and hems.)

Cut your ruffle fabric (the cute red polkadot on mine) 90″ long by about 3-4″ wide. To get 90″ you will need to do 2 45 inch pieces of the fabric sewn together in the middle.

Sew 2 of your bodice pieces together around the edges but NOT across the bottom. Do this twice so you now have two bodice pieces that are each 2 layers of fabric.
Dress tutorial

Turn each bodice piece right side out.

Sew the 2 bodice pieces together at the shoulders and the sides.
How to make a baby dress

Patriotic baby dress

Now turn your bodice right side out. Top stitch around the arm holes and neck hole.

Here’s the part that scared me a little the first few times I made one of these. But trust me, it works and it’s ok. You can do it.

Cut a rectangular piece of fabric about 3 inches wide and about 1 inch shorter than the length of your bodice. Hem the top short side of it and pin it with right sides touching on the back of your bodice:
Baby Dress pattern

Now, brace yourself and then cut through the center of the rectangle piece of fabric and the BACK of your bodice down to about 1 inch above the bottom of your scrap of fabric.

Stick a short (about 1 inch) piece of ribbon or elastic or cording in a loop under the rectangle of fabric near the top.
Cute 4th of July baby dress

Sew down the slit that you cut in the rectangle, through your loop, and up the other side:
Patriotic baby dress tutorial

Fold the pieces of your rectangle to the inside and top stitch along the slit. Hand stitch a button in place to catch the loop.

Now your bodice is done!

Moving on now to your center fabric, you need to run a baste stitch all along the top leaving long threads at either end:

Gently pull the top thread and slide the fabric down it to form a gather. The keyword here is gently. You don’t want to break that thread or you will have to start over.

Gather it until it is twice the width of your bodice:

Sew the edges together to form a ring.

You are now going to sew it to the dress.

Turn the gathered section wrong side out and the bodice right side out. Line your pieces up like shown:

Slide the bodice into the gathered middle section and pin it in place. Sew all around. I usually go around twice to keep it nice and secure:

When you turn it right side out, it should now look like this:

You need to hem the bottom of your ruffle fabric.

Now run your gathering stitch along the raw edge of your ruffle fabric and gather it the same way that you did before. This one will be a little harder because it is so much longer. Again, make it double the width of the bottom of your middle fabric and then sew it into a ring:

Attach this to the center fabric the same way that you did before.

Turn it all right side out. You can top stitch along the white bodice now to keep it all laying smooth, or, you can add a little ribbon embellishment like I did. You can also hand stitch a cute little bow in place: Red white and blue dress

And you’re done! Wasn’t that fun and isn’t it adorable?!?

If any of this doesn’t make sense, or if you want to make a size other than for an infant, there are fantastic instructions here.

(By the way, want to see where the scraps for this project came from? Mostly leftovers from this:
Free 4th of July Apron Pattern and Tutorial
4th of July Apron

Comments

  1. This dress is so cute!! I love it – I don’t have any kids but I should make it and find someone to give it to. Thanks for the tutorial!

    Sarah from The House That Ag Built

  2. I ADORE this dress. We haven’t gotten anything for our Granddaughter to wear yet for the 4th of July and this would be absolutely perfect. She would be just adorable in this dress and it’s the perfect size too. I’ve got my fingers crossed. Geez, I’m not going to get anything else done now until the winner is announced. lol

    Thank you for the wonderful tutorial and the chance to maybe win this. I feel for you and not having a little girl to sew for. I had three boys myself and had lost a little girl before my oldest son. Luckily all my boys so far have each given me a granddaughter and one a grandson. Anytime you want to make pink and purple ruffly things I’d be more than happy to give you my address. LOL

  3. What an adorable little dress!!! Love, love, love the large polka dots with the blue fabric!!! Thanks for sharing your comprehensive tutorial!!! I would love for you to share this at our ONGOING linky that’s just for Girls’ Dresses…
    http://threadingmyway.blogspot.com/2012/01/threading-your-way-dresses-for-girls.html

  4. This is beautiful! I would love if you would link it up to my new fiber arts link party! That and your 4th of July apron -they are beautiful projects!
    http://www.mymerrymessylife.com/2012/06/new-link-party-hookin-on-hump-day-1.html

  5. This is adorable! Thanks for the pattern too! Bugs and blessings, Cindy

  6. Hi Amber, I’ve featured your 4th July dress today…
    http://threadingmyway.blogspot.com/2012/06/threading-your-way-features_23.html

  7. This is adorable! Found you through threading your way.

  8. Is there a trick to printing out the pattern piece (it says “pieces” but there is only one….) other than hitting print? because I printed it out and followed your instructions for the bodice….it turned out doll size. It was a waste of both time and fabric :( I am fully aware that I prob. printed it wrong or something? Help me please?!

    I even added a 1/2 inch to the pattern to allow for a seam, and yes I wanted it for my 3 month old and there is NO way that the bodice made with the pattern provided would eve come close to fitting over her head…….

    • Hmmm, I just printed it out and it seems ok-perhaps slightly smaller than it should have been, but not a ton. Did you print it out at 100%?

      • yes I printed it at 100%….

      • okay so I did a bit of tweaking and realized that the printer settings were set to “Fit to page….but it only gave me another quarter of an inch maybe to the pattern, and remember I already added 1/2inch for seam allowance….. not trying to pick you apart here, I just really want this to work! :)

Leave a Comment

*