What’s the Project? This cute On the Go Tic Tac Toe sewing tutorial makes the cutest little toy for the kids and you can make it yourself! Perfect for road trips or sitting in waiting rooms or playing at church, this is a simple sewing project that you’re going to love!
We just got back from a Spring Break road trip (that was amazing and warm and wonderful) and now we are counting down the weeks until Summer Break!
Anyone planning any fun trips this year?
Today Katie from Made to be a Momma is here with a fun on the go tic tac toe sewing tutorial that will be fun for any trips you’re taking this year. It’s a little On the Go Tic Tac Toe Game! How cute is this?!
Here’s Katie:
School will be out before we know it and the summer vacations will begin! YAY! I don’t know about you, but I am more than ready for some hot and relaxing summer days!
Spending any long length of time in a vehicle with our three young children can be a bit overwhelming but I have found that snacks, movies, and fun activities can make the trip much more enjoyable!
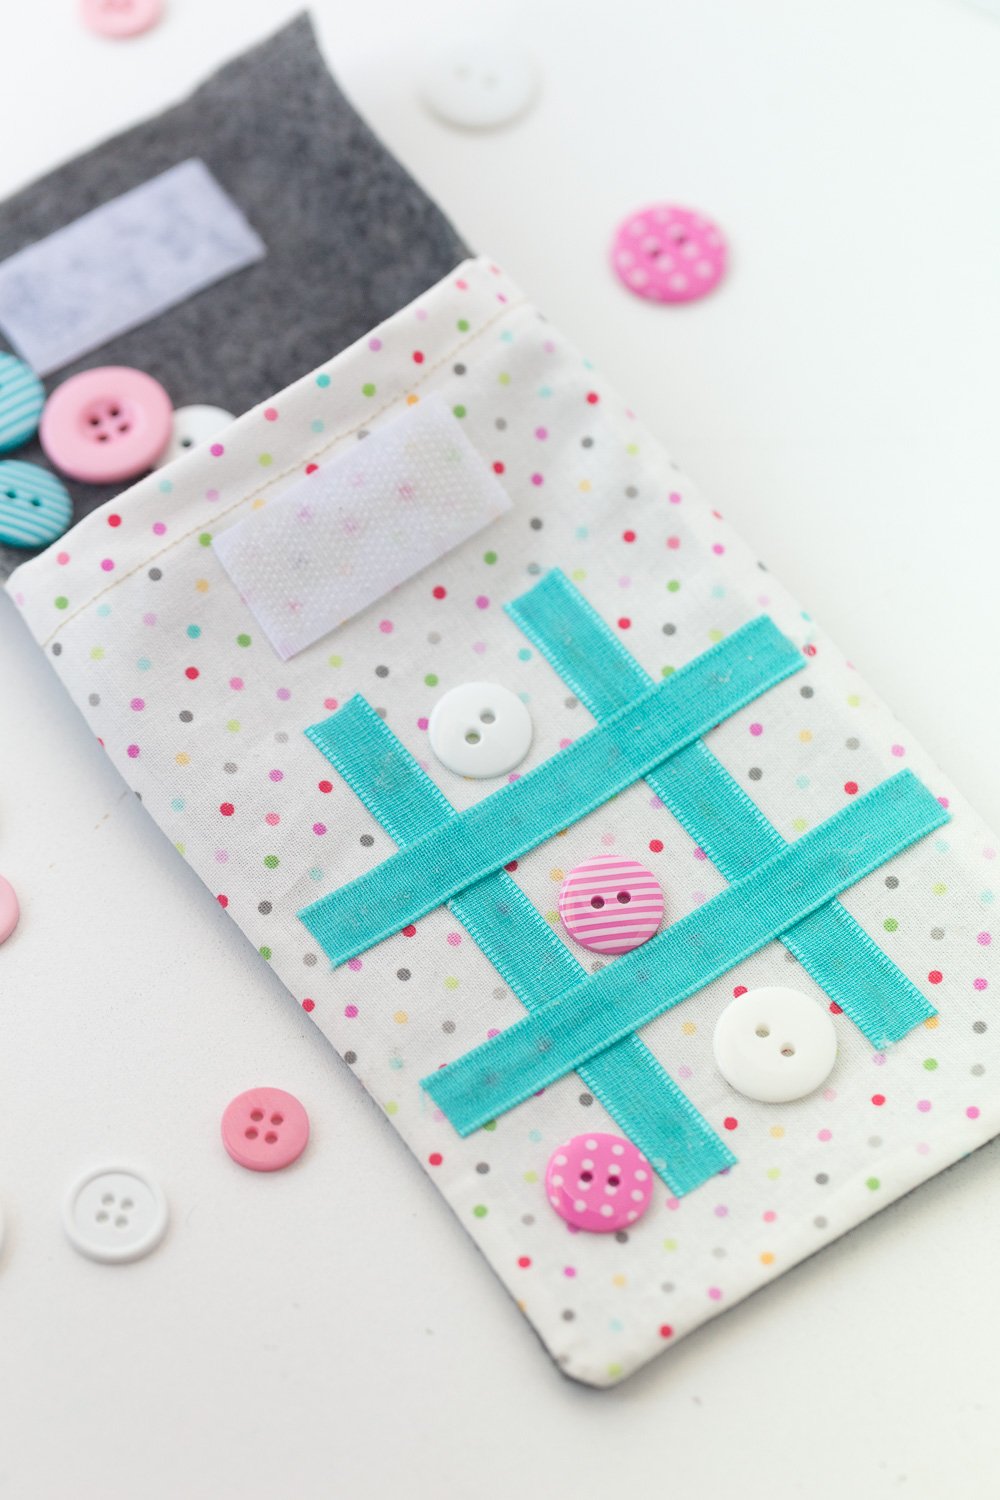
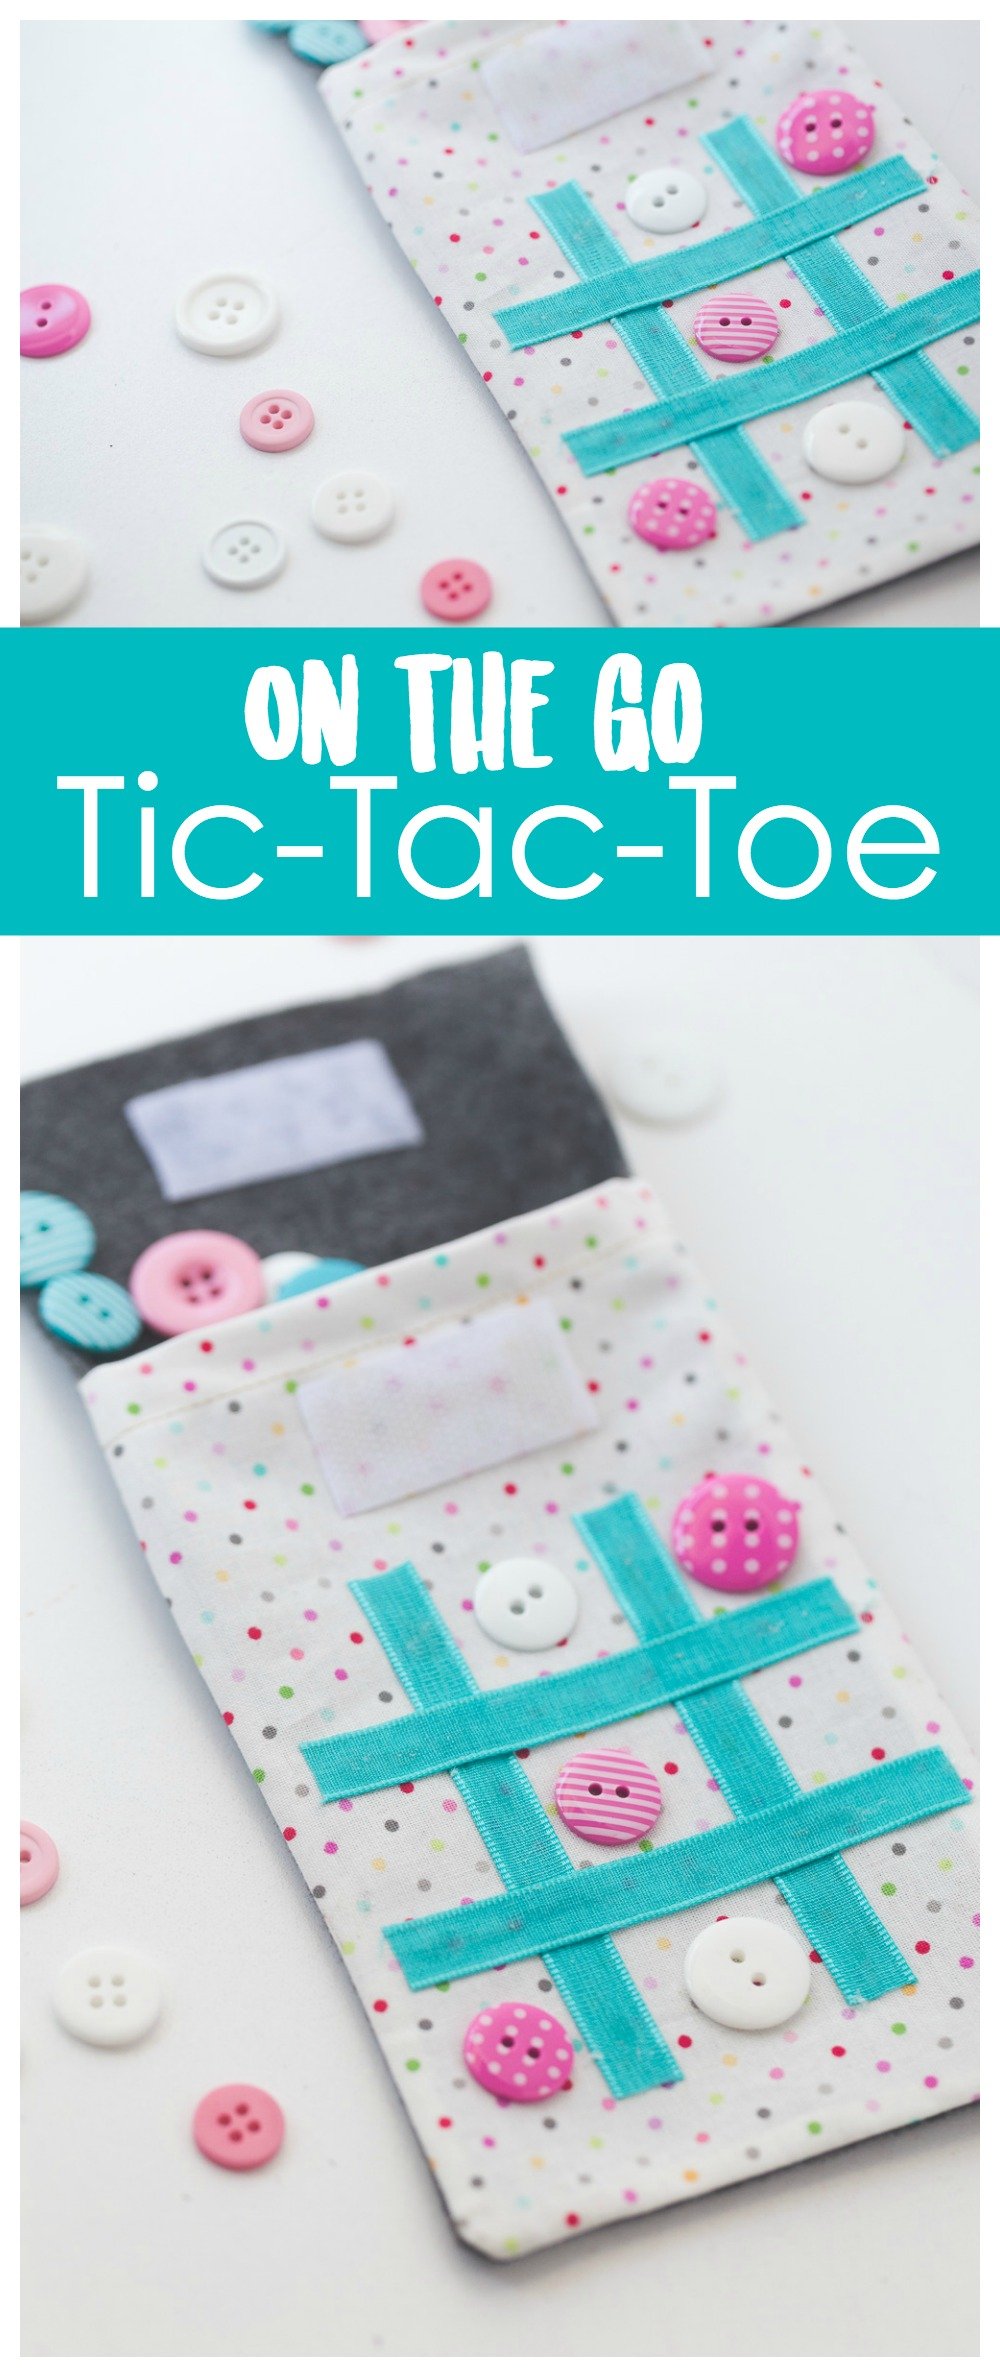
This on the go tic-tac-toe game is perfect for summer vacation travel, waiting in the Doctors office or at restaurants, and just a fun game for your kids to play! It’s not only the “game board” but it also stores the tic-tac-toe pieces in the pouch.
Kid’s Tic Tac Toe Game
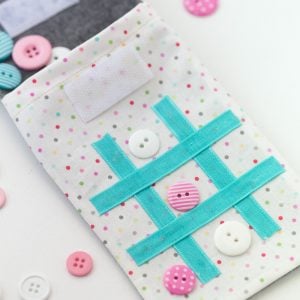
On the Go Tic Tac Toe
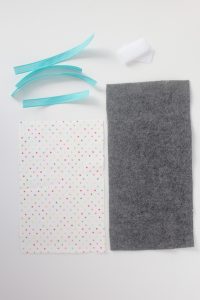
Supplies
- 1 piece of felt
- 1 piece of fabric
- Velcro
- Ribbon or strips of fabric
- Fabric glue
Instructions
- Cut your fabric and felt pieces to the size you desire. Just make sure you have enough room for a tic-tac-toe board. When cutting out your pieces be sure to make your back (felt) piece about 3 inches taller, this piece will fold down to close the pocket. You don't have to use felt, you can use fabric for both pieces or even felt for both pieces, I just liked the look and feel of the two different pieces.
- Take the top edge of your fabric piece of fold over a 1/4 inch and sew.
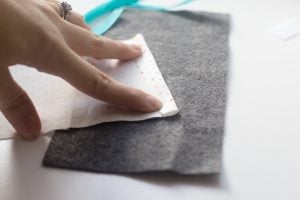
- Using fabric glue, glue your Velcro pieces in place. You may also sew your Velcro to your fabric pieces for extra strength.
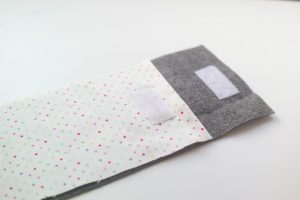
- Place your back fabric/felt piece, Velcro side facing down, on the table. Next place your fabric piece, Velcro side facing down, on top of your felt piece.
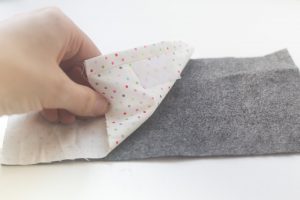
- Sew all three sides.
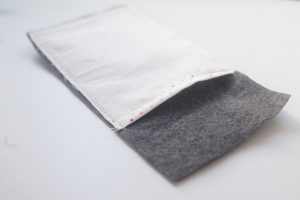
- Turn your pocket piece right side out and press with a hot iron if needed.

- Sew or glue your fabric pieces down in the classic tic-tac-toe design. I chose to use ribbon as it won't fray as easily as fabric would but fabric would work fine too!

- Your kids are ready to play! We used little buttons for our tic-tac-toe markers but there are others things you can use as well! My kids love the idea of painting some small rocks for their game.

Thanks Katie for this great on the go tic tac toe sewing tutorial! Hope you all love making it!
You Might Also Like:
Pin It:


Wendy West says
Do you have these patterns in a pdf form. A link to download all at once would be good.
Toby Thompson says
Love this project! I’ve got some fabric in my stash that would be great to use for this but I’d like to use cotton fabric for the back, instead of using felt. Do you have any suggestions on how I would assemble a cotton front & back and still include the flap on top? Thank you!
Tamera England says
This is a darling project, and I plan on making one for my 15 year old grandaughter who is a competitive cheerleader, and on the road competing right now. I love this, and I thank you for it.
Jacki says
Great idea! I just made two tonight for Xmas stockings. I sewed the ribbon on, forgot you said to just glue it. Oh well, it turned out great.
Amber says
That works too!
S. Patch says
What size fabtic? What dimensions are each piece?
mazzy says
Is the “3 inches taller” correct? I was wondering if that should be something closer to 1 inch taller. Although buttons are super cute, I’m going to make this for a yonger person. I’m going to either make felt animals or felt geometric object. The felt itself should stick. I never have much luck sewing ribbon. It always bunches up. And glue some times changes the color. HHmmm, what to do 🙂 Thanks for sharing. It was very helpful.
Amy P says
What a cute idea! This would be great for waiting….at doctors offices, at the restaurants, numerous places!
This game would be a great stocking stuffer gift to make for the kids! I’ve noticed one comment about adding buttonholes to help keep the buttons in place if using this game in the car. One other idea for this, would involve just a bit more time is to sew one side of the velcro piece in each square, and then glue the other velcro side to the backs of the buttons. (This sewing would have to be done before stitching the front fabric to the back fabric)
Chaya says
Looks awesome! Love to try it.
Something to think about- how to hold the buttons on the fabric- for things like a bumpy car ride.
An idea I thought of- if not to complicated, to put a buttonhole in each tic-tac-toe slot, to sew two buttons together, and put one thru the buttonhole while the other stays out. It could even work to make the buttons double-sided in this way…
Just a thought 😄
Amber says
Yes, that would be smart!
Maggie says
Great idea! Always looking for a little gift to sew!!
Laura Claydon says
What a great idea! I would suggest sewing or gluing your tic tac board to the piece of fabric before sewing the two big pieces together so that it is easier to sew down. Also you may want to use ribbon no-fray glue or spray for the ends (its cheap, you can find it at Hobby Lobby, and it lasts a long time), and if you are just cutting out strips of fabric. Just ideas to make it last longer, but otherwise this is great sewing inspiration! Thank you so much for your good ideas! Will put this on my sewing project lists for the next trip :-).
Linda M ReedLinda says
I thought the same thing, I would have sewn on the ribbon before sewing the seams. I would also use velcro dots on buttons and in the square so they can play with this traveling.
Brittany Wise says
This is super cute and perfect as a fun game (and great gift for a child)!