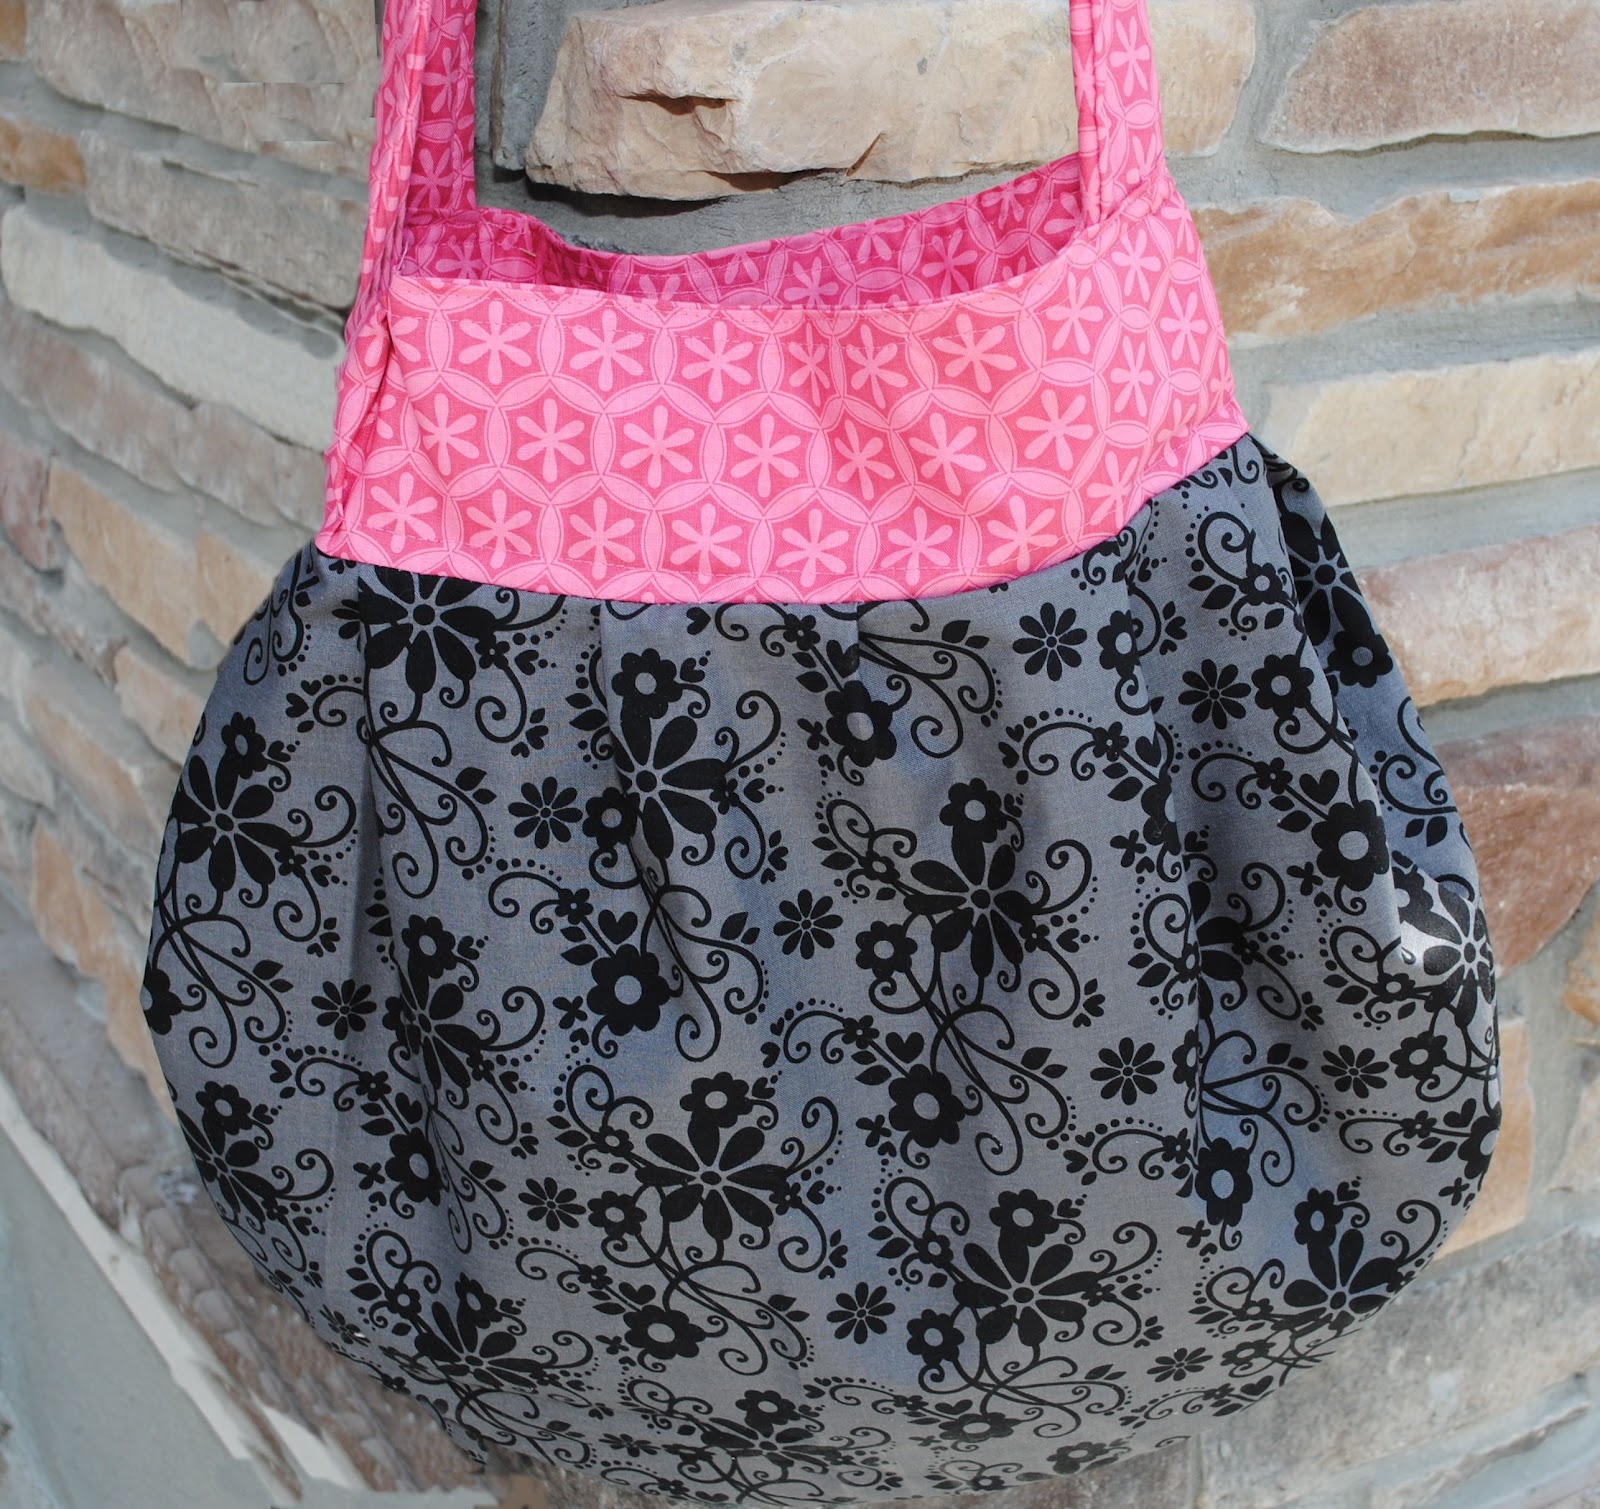
This sling tote bag was fun to make because I was making it for a gift and it isn’t really my own style, so it was something different than what I normally sew. And the person I made it for loved it which is always great.
It’s a sling tote bag:


I didn’t have a pattern, just pictures of similar bags and I figured I could pull it off, but I was a little nervous. It worked out great though and was really pretty easy.
Here’s What You Need:
1 yard main fabric
1 yard accent/inner fabric
1/4 yard lining (optional)
Here’s How to Make It:
Start out by laying out your fabric and cutting basically a half circle with these dimensions: 23″ across the top, 14.5″ from the top to the bottom of the circle. Cut 2 of these.

Now, to make the pleats in the bag you will start at the center of the bag and make one pleat that is about 2 inches. Pull the fabric under and pin it on either side:

Then, working out from there do two more pleats on each side each about another 2 inches apart or so. Make sure that the pleats match up on both sides so that your bag is even:


Here’s what it should look like from the bottom:

And here is what each individual pleat looks like up close:


Mine measured 13″ across the top once I had all the pleats in.
Once you have them all pinned in place, run a stitch along the top to secure your pleats. Then remove your pins:

Do that to both sides of the bag making sure that your two sides of the bag come out even.
Then, match up both sides of the bag with right sides together and sew around the outside leaving only the top open:

Now, using your accent fabric, cut a strip that is 4″ wide and at least 30″ long.
Pin it around the inside lip of your bag with right sides touching.

Pin all the way around until the fabric goes all the way around the top of the bag. When you have a full circle, trim off your excess and sew it together:

Then sew around the top opening. It should look like this when you are done:

Now, lay your outer bag on your inner fabric. You are going to use this as your pattern for your inside.

Cut around the bag to form your inner bag. Cut 2 pieces.
It should look like this:

I wanted a pocket on the inside of the bag, so I made that next.
Cut out a piece of your outer fabric that is 9.5″ by 7.5.” Then fold it in half, right sides together and stitch around it leaving a small opening to turn it.

Turn it and press it flat.

Place it where you want it on the inner fabric and sew it in place:

Now, with right sides together, sew around the outside of your inner fabric.

Now, turn the outside of your bag right side out and place your inner part down inside of it.
Now to make the strap. Cut 2 pieces of your accent 3″ by 33.” (My photo shows a 4″ wide strap but I felt like it was too wide.)
For the strap I wanted to line it so it would hold up better. You can use lining. I used felt. Either one works. The felt makes it a little bulky but also helps it stay sturdy.
With right sides of the fabric in and the lining on the outside (on just one side of the strap) sew down the long side of the strap. Do this on both sides:


Turn it right side out. Top stitch on each long side of the strap:

We’re almost done! Stick your strap down in between your inner bag and out bag pieces on the far edges of your bag. Stick it way down in there so it will be nice and secure. Pin it in place.
Next, fold down the inner and outer fabric on the top of the bag (towards each other) to create your top hem and press them. Stitch all the way around the bag. I did it twice-once with about a 1/2″ hem and once right at the very edge of the bag:

Last I top stitched where the outer bag fabric meets the accent fabric:

And that’s it! Now you’ve got a great bag to carry all sorts of treasures. If your bag is at all like mine, it will be a dungeon that will hide all the things you are looking for.


Di says
Rather than pleats, try gathering the fabric. To make it reversible, construct the inside identical to the outside. For a closure, add an inner magnetic snap or add a buttonhole and button.
Di says
Thanks for presenting a bag that doesn’t require interfacing!
Deb says
I just found this tutorial. Fantastic tutorial. It’s so clear and easy to follow! Thanks
Longchamp Soldes says
I don’t ordinarily comment but I gotta state thanks for the post on this one
:D.
Michelly says
Hi! I’m twelve. I love the purse and the fabric! Pink and grey go really good together. I’m hoping I can make this! Please check out my Etsy shop: http://www.projectsgirl1.etsy.com, and my blog: http://www.projectsgirl1.blogspot.com.
Manuela says
Hallo,
this Bag is very pritty..
Andrea says
Thanks for this great tutorial!! This is only my second sewing project ever and it came out with only a couple of hitches! Learned from my mistakes and I’m sure the next o e I make will be even better! I’ll be making several for Christmas gifts so sooner or later I should have it down pat!!
Aimee says
Thank you so much! Just made this for my daughter. Great tutorial. I’m certainly not an expert seamstress, and it worked out well. I also had the issue with the lining being a bit too small for the opening, so I added a pleat and it turned out fine. A super-cute, quick project. Thanks again!
Kayleigh says
I gave it a try a a newbie to sewing and I must say I am pretty happy with the results. If it wasn’t for your step by step I might not have tried it. I had a few problems with finishing the top and mine came up with the inside being a bit smaller but I added a few pleats near the handles and it came out OK.
Thanks so much amber!
Kayleigh
Guylaine says
Exactly what I was looking for! I do also prefer these kind of bags instead of traditional purses. I’ll sew one (or more) for sure! Thank you for sharing… from Montréal, Canada
Georgia says
The best tutorial I’ve found, thus far, for this type of bag (and I’ve been looking for a while because I’m being picky haha)
I can’t wait to start this project!! Thanks so much for the tons of pictures and clear explanations, I doubt I would be able to make it otherwise. (I’m on holiday, so now I’ll have plenty of time)
yvonne says
Love it, I’m going to try and make one this week!! Thanks for the tips 🙂
Jodi M says
Wow! These are AMAZING tutorials. You make it look so simple, I cannot wait to raid my fabric stash and get started! I’ve got some beautiful home decor weight fabric I bought on clearance at Jo-Ann for a couple of bucks a yard that I’ve been sitting on for a year, waiting for just the right bag tutorial. I’ve found it! If I can get my work table cleaned off enough so that the photos wouldnt embarrass me, I may do a sew-along with a link back and post to my blog, Wabi Slobby, if that’s OK with you.
Amber says
I’d love that 🙂
Kelly says
I am wondering how big the bag turns out to be? I could probably figure that out based on the tutorial, but I’m a little sleep deprived so please help, lol!
Amber says
It’s going to be approximately 20×15 or so.
Amber S says
I have fallen behind on other projects due to making 2 of these bags. One I use as a diaper bag and the other was gift for my niece. I love my bag. Great tutorial. Easy to follow along.
Amber says
Good to hear they’ve gone well!
Patti says
Hello
I am almost finished, but ran into
a problem. When I pinned the
lining to the outside bag it came
up to be about 3-4 inches too short, only
on the top. Trying to fix it only made it
bunch. If I make another 2 lining
pieces they might end up being too big.
Hoping that you have some suggestions.
Thanks
Patti
I am a bit frustrated. I guess I have
to make another 2 pieces for the
lining. It m
Amber says
It should match up exactly if you sewed them both the same. But, if not, take one out of the other and lay them on top of each other and trim them to match.
Patti says
Thank you 🙂
Patti says
Hi again,
It took some time, but I got the 2
different patterns and colors from
2 different sites.
My question is…. That half circle
looks moore oblong.
I was going to use a protractor
and try and make a complete circle.
Do you have a better idea? I see
this being the only obstacle.
Thanks
Patti
Amber says
No, you are right. Mine was probably a little bit oblong. I would say make it oblong just a little.
Patti says
Thank you very much. I just saw your ruffle tote… Oh boy, that will definitely be next on my list.
Patti 🙂
Amber says
Love to hear that!
AnnieG says
I made this bag and I think (for my first sewing project since I was about 8, now 33) it turned out very decently. There were several mistakes along the way but I cleaned them up. Great tutorial! I am going to use mine for my daughters diaper bag for daycare.
Amber says
Yay! I love to hear that sort of thing!
Patti says
Hi
I love the fabric.
Is there a site that I might
be able to buy it at?
Thanks
Patti
Amber says
I got those at http://www.theribbonretreat.com It’s Riley Blake fabric I believe.
Patti says
Thank you so much. The colors just seem to jump right up at you. I love the tote too.
Patti 🙂
lisa says
beautiful, love the material. place on list of crafts to do list
Violets Silver Lining says
So cute! Adorable! 🙂
midwestdomesticbliss says
i love your bag! thank you for sharing, just what i have been looking for in a purse, i plan to sew this it soon!!
The Thriftiness Miss says
So cute!! I love the colors and you made such a great tutorial! Thanks so much for sharing this.. Pinning for later 🙂
Christine says
I LOVE YOU!!!! Really!! I do!!! This is an AWESOME step by step… that I can follow!! You’re sooooooo awesome!
Thanks so much for sharing this at The DIY Dreamer… From Dream To Reality!
Jaime Lynn says
I love that!!! So cute!!
Visiting from Tip Me Tuesday.
– Jaime
mrsmamapanda.blogspot.com
Jeannie @ Living Loving Crafting says
Cute! Great tutorial!
Fashionista MH says
OMG I am going to make one right now!!!
Usakou うさこう says
amaazing !!! awesome tutorial, I’m gonna try this ^^ thanks so much <33
anula_un says
love it,!!
Sirena says
lindo lindo lindo,gracias por compartir,buen finde ,te dejo bechitos
Little Becky Homecky says
Great tutorial and the fabrics are incredible! Thanks for linking this up to Fantabulous Friday at Little Becky Homecky!!
Ann Marie says
Just had to pop in here as I was the LUCKY recipient if this lovely bag! Amber and I were in a gift exchange and she had asked me just a few questions about my likes/dislikes etc.
Let me tell you she nailed this on the head! It couldn’t be any more ME unless I had made it myself! Everyone asks if I made it when they compliment me on how beautidul it is! I always give Amber the credit! It is awesome to see it in tne tutorial and tne pics of it of it give me a different perspective of how others see the bag! I LOVE IT!!!!! Thanks again Amber!
Alisha @ Crafty Brooklyn Army Wife says
Very cute bag. I love the contrasting fabrics. Great tutorial too!! TFS!! Stopping by from Friday Fun Party and Features linky party.
Here is what I shared this week: http://craftybrooklynarmywife.blogspot.ca/2012/07/bow-pleated-purse.html
Jill @ Create.Craft.Love. says
Amber – this tote is darling! I adore the fabric you chose! Great tutorial! Thanks for sharing at the Pomp Party! Pinning to our Pomp Party board!
Tonna @ USS Crafty says
I love that black and gray fabric! Cute bag!
stacy says
Love it!!!!
Joyce says
Thanks so much. I know my daughter would love this style. Your instructions are very clear. Wow- now to choose my fabrics!
Bronwyn says
Great tutorial. SO many pictures to help along the way.
Starr says
Love this! And it’s super flexible with the measurements and fabric choices all throughout.. also, so easy to follow. Cool, thanks! 😉