What’s the Project? If you’re looking for a comfortable face mask pattern that’s easy to sew and customizable to all of the different members of your family, you’re going to love this one. Make it in under 20 minutes. It’s breathable, well-fitted, and easy to make.
Who would have ever guessed that face masks would be the new norm right now? But they are and it seems like they might be here to stay for a while.
I know that there are tons of face mask patterns already out there, but as I prepare my kids (and myself actually) to go back to school, I knew I’d need something that they could wear comfortably all day long and ideally something that was well-fitted to each face.
I’ve tried a few other sewing patterns for face masks…and they were ok, but I sat down and played with various options and did some tweaking and found something that is working really well for us in our family and I am hoping it might work great for you too!
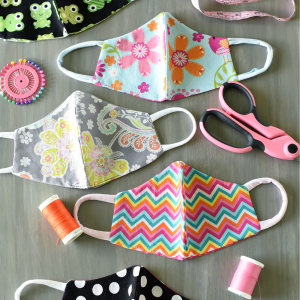
This is a super easy face mask pattern. Each time I sit down to sew one it only takes about 10 minutes. Even if you’re a beginner it shouldn’t take too long at all.
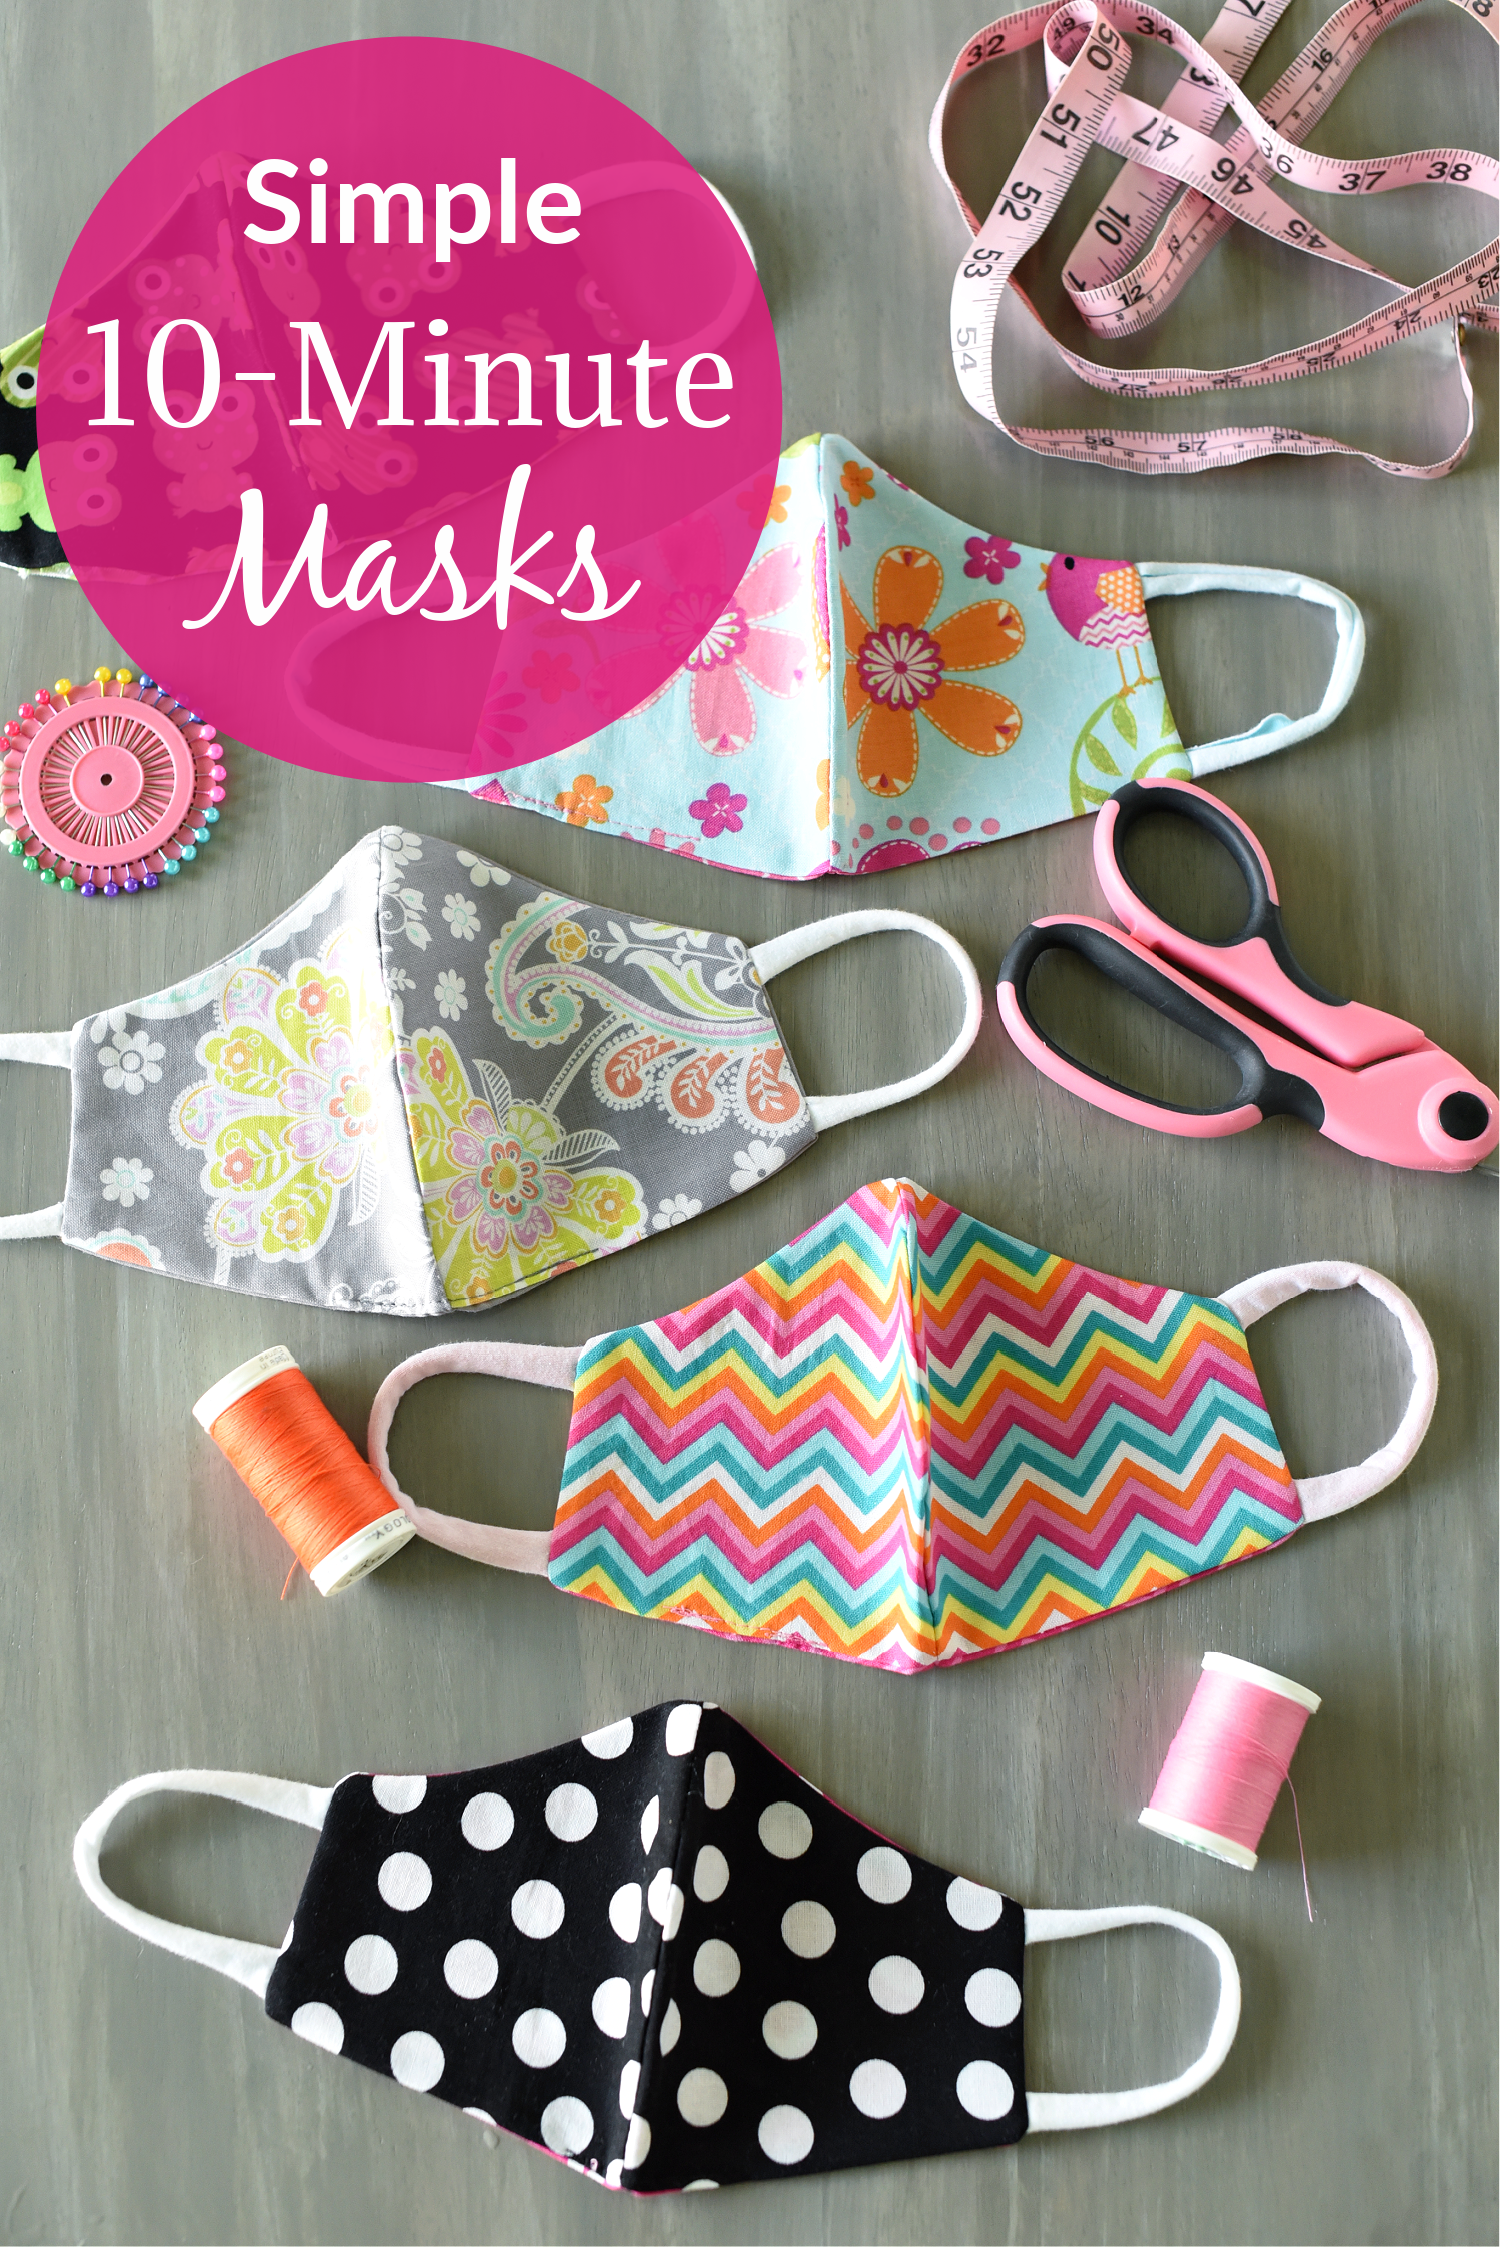
Plus, you can make it in ANY fabric, so it will be great for anyone in your family. I’ve had fun letting my boys all pick out fabrics they want and I’ve been making some cute little girly ones for friends too, just because the fabrics are so cute!
Ready to make some masks?
Face Mask Pattern Pieces:
First, here are the pattern pieces you will need to print and cut. There are 5 sizes to choose from and they will vary based on every person’s face. This is not an exact science, but here are your options:
Toddler/Preschooler: Face Mask Pattern Size 1
Kid’s: Face Mask Pattern Size 2
Small Women’s/Teen/Tween: Face Mask Pattern Size 3
Teen Boy’s: Face Mask Pattern Size 4
Men’s: Face Mask Pattern Size 5
Once you’ve got those printed, here is the pattern:
Face Mask Patterns
Supplies
- 1/4 yard each of 2 coordinating fabrics (you’ll only need a little bit of this actually and can get several masks out of each fabric, but you’re not going to want to go as small as an eighth or some sizes might not work)
- Knit fabric to use as elastic (or if you prefer elastic grab that-I just love using the knit and I will explain this process below)
- thread
- pipe cleaner (optional-for if you want wire in the nose. See details for how to do this at the bottom of the post.)
Instructions
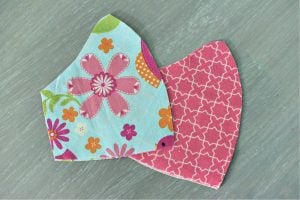
- I used a very small seam allowance for this. About 1/4″ is ideal.Cut out your face mask pattern.With your fabric folded, cut 2 pieces from each of your fabrics, for a total of 4 pieces. Each fabric should have 2 pieces that are a mirror image.

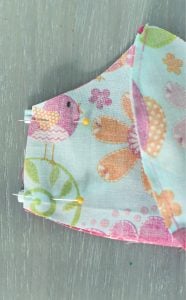
- Place the fabrics right sides together of each of the matching fabrics and sew down the rounded middle part (this is the nose section) of both from top to bottom, knotting when you start and finish.

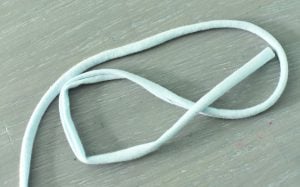
- To make your elastic if you are using knit fabric, cut a strip that is about 1 to 1.5 inches tall and as long as the width of your fabric with the stretchiest direction going the width of the fabric (so it’s stretchy along the really long side and less stretchy on the short, 1-inch side).Once it’s cut, pull the fabric and it will fold in on itself. Here’s a tutorial for this if you’d like more help.

- *Just a note, you can absolutely use elastic instead if you’d like. I just feel like this knit fabric method is really soft on the ears which is a plus.Cut 2 strips of your knit elastic. The length will vary by size:Cut 4.5 inches for size 1Cut 5.5 inches for size 2Cut 6 inches for sizes 3-5
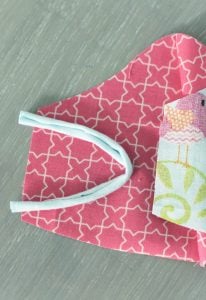
- Now, place your front of the mask and your back of the mask together with right sides facing in.Pin the top of the nose in place.Place your elastic on either side with the ends meeting with the edge of the mask and the rest forming a half-circle. Make sure it’s not twisted. Pin this in place on both sides of the mask.

- Here's a peek at it:

- Starting at the bottom of the mask, sew all the way around the mask leaving a 1-2 inch opening at the end so that you can turn it.Turn it right side out and push all of the corners out. If you want to try it on and make sure it fits well, now is the time. If needed you can always tweak a bit before you sew it shut.

- Optional Wire Nose: I’ve already had several readers ask about adding in wire for the nose. I did experiment with this and it went well. For me, the mask fit well enough that I didn’t feel like I needed it, but again, face sizes and shapes vary so much that it’s a valid option to improve your fit.Here’s how: Lay a pipe cleaner along the top edge of your mask and match it to the size from side to side and cut it just the right length. Before you sew your mask shut, insert it and pin it in place along the top edge. I then just top stitched to keep the pipe cleaner in place and it worked great!Fold the fabric of the opening in on itself and sew the opening closed.

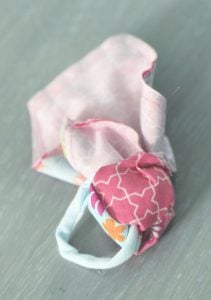
Press the mask nice and flat and you’re all set!
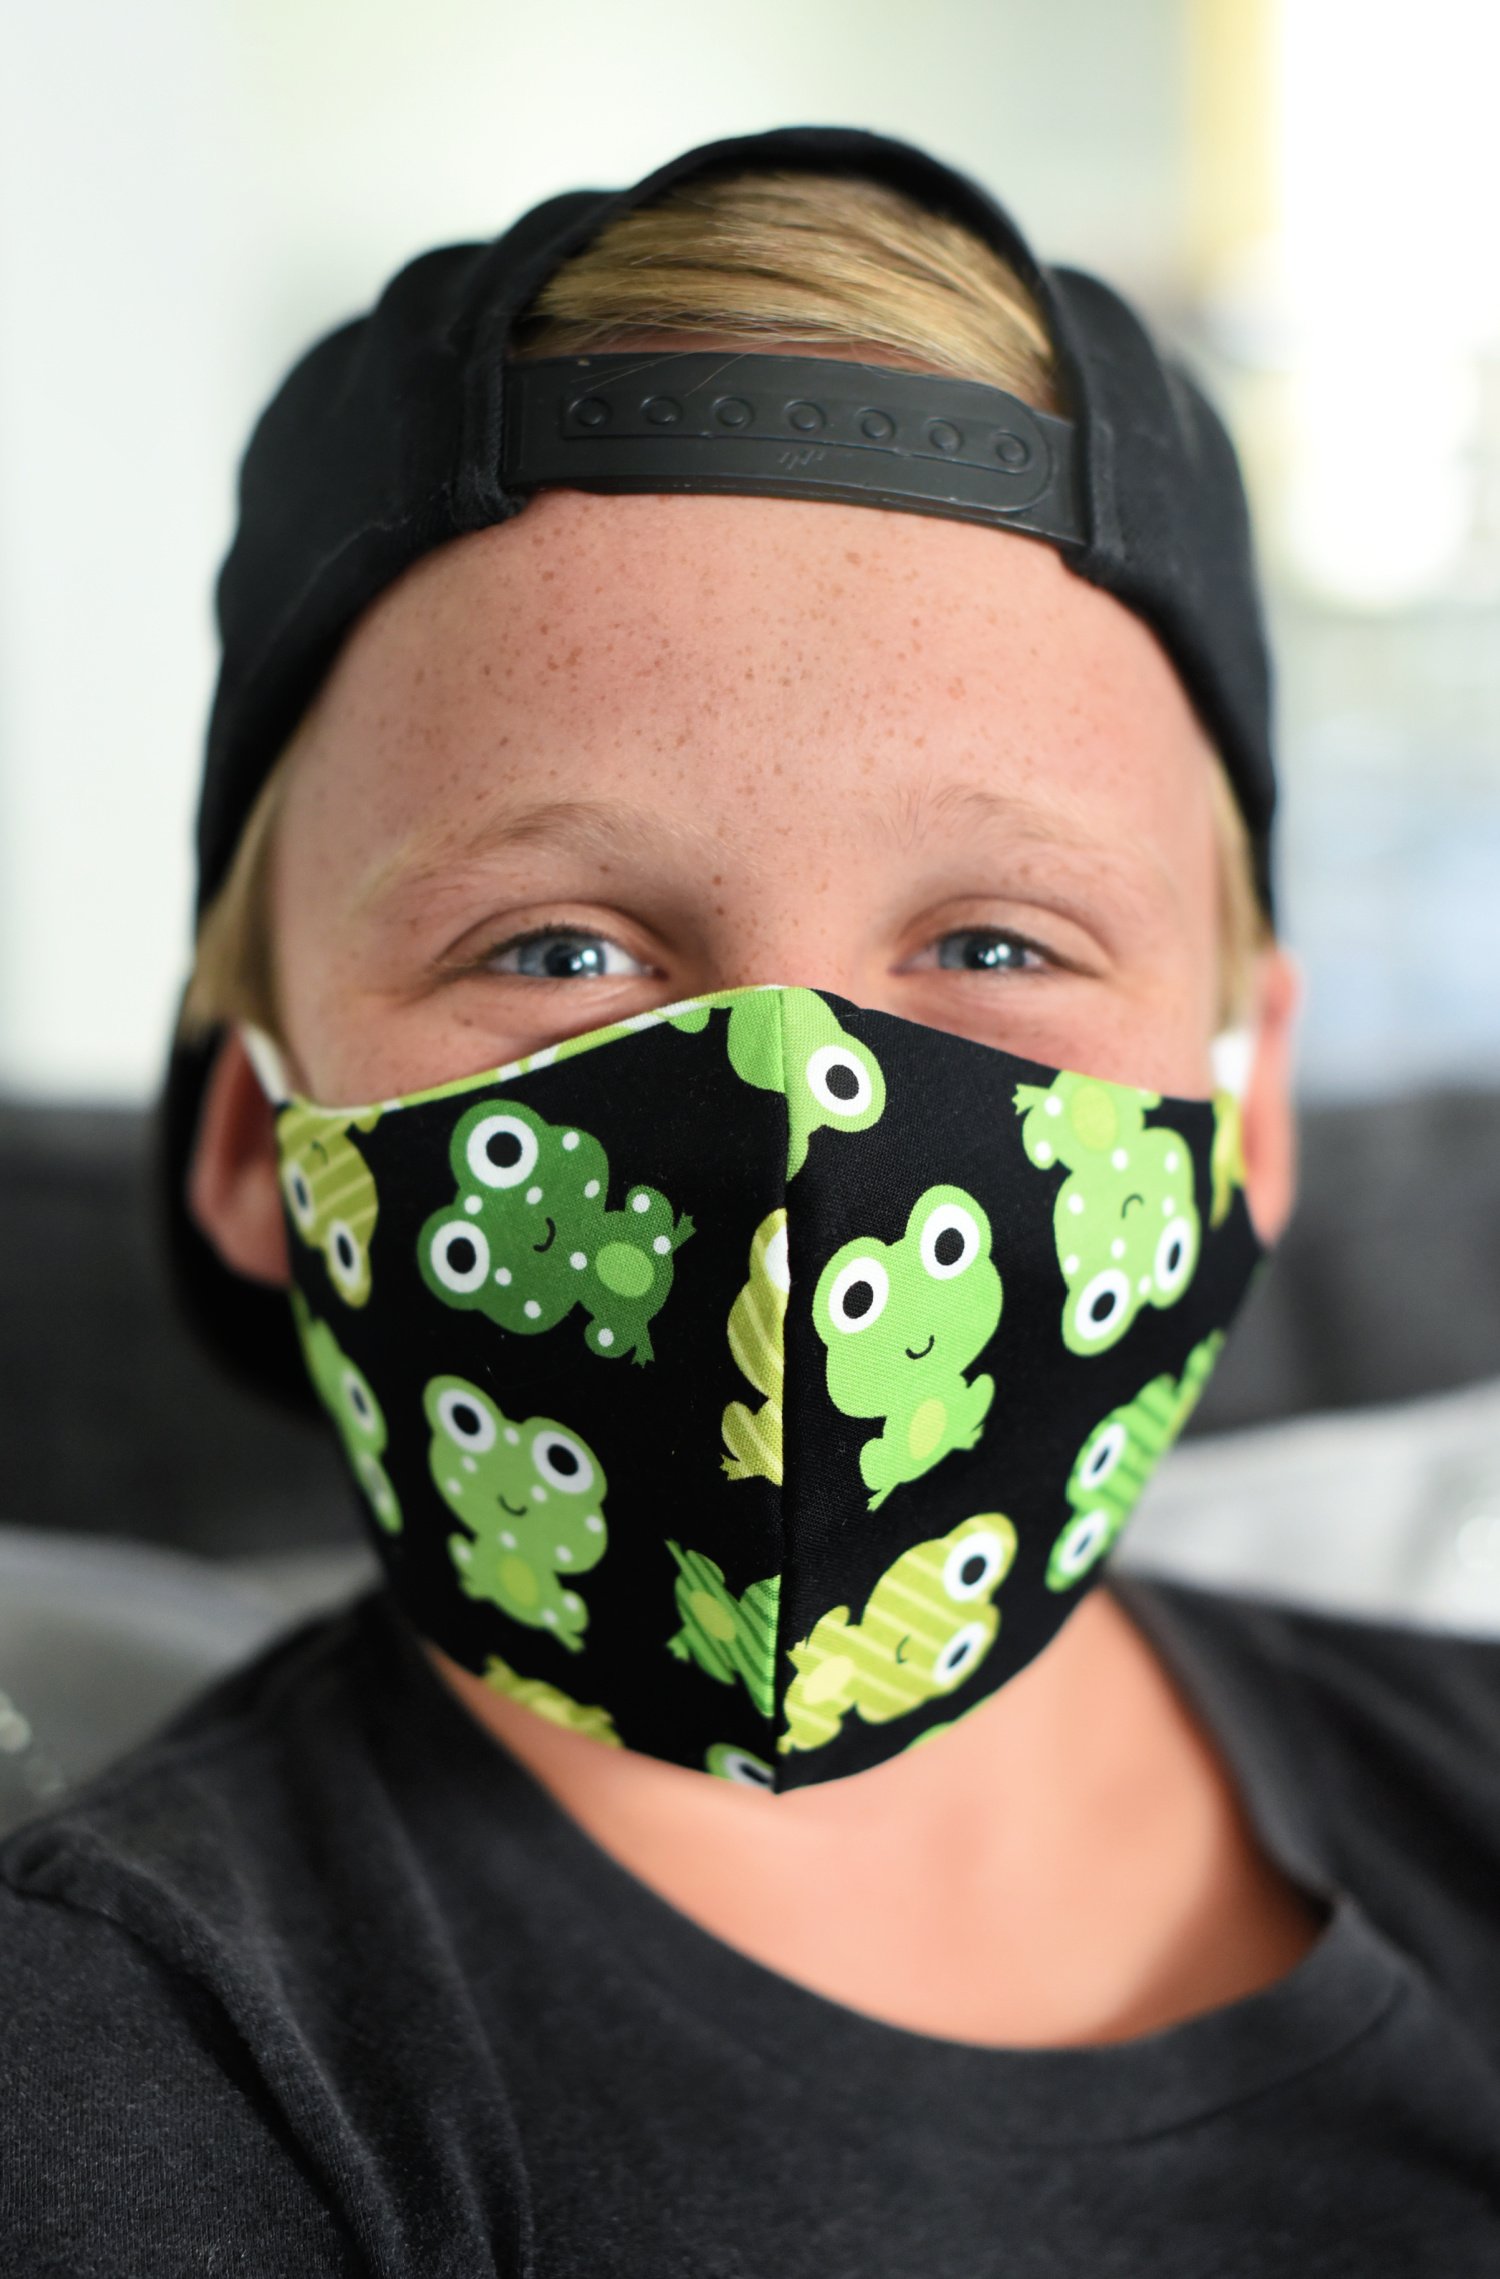
(He’s wearing a size 2.)
Best of luck to you and I hope this face mask pattern helps you and your family be safe and healthy.
You Might Also Like:


Audre Kimpton says
Amber, thank you so much ch for caring not only for your family but for others, and for alll the time involved!
Please email me your patterns, hopefully this will work for me. I’m wanting also to help others by sewing for my community.
Blessings!
Barb says
Thank you for this pattern! Is the 1/4″ seam allowance already included in the size or do I need to add it before cutting? Thanks.
Amber says
It’s included. 🙂
Linda says
I made a couple of these masks using pipe cleaners but found that the wire is too “wimpy.” You can use a length of fairly stiff wire (NOT as stiff as a clothes hanger!) However, a new trick I’d like to share: Those metal strips that are “glued” across the top of a bag of coffee or coffee beans work great. We like our masks to fit firmly, so I sew in two of the coffee strips. Hope they work for all of you!
Donna McCormack says
I was wondering if you could email me the pdf. I’m having difficulty with it. Pattern looks easy enough. Looking forward to making some for my grandkids. Just starting to get into sewing after all these years. Thank you!
Perl says
Thank you so much for these clear and easy to follow instructions. I am a novice sewer who taught myself to sew while we were all in quarantine. I am a school teacher so I haven’t had time to use these newfound skills until now. I just made masks for my kids and they came out amazing. Thank You!
Heather says
Thank you – I’ll be sewing masks all afternoon.
The knit fabric option is so clever!!!
You’re always so helpful
Cindy Rollins says
Thanks for this great pattern and easy-to-follow tutorial! I’ve made several different patterns and this is my favorite!
Belinda says
I made a mask using leftover fabric, I didn’t have any knit fabric so I used elastic. The length of the elastic needs to be longer for a women’s size mask when using elastic versus the knit. I made mine three layers for added protection. Mask was easy to make and fit well. Thank you!
Lynn says
Thank you so much for this tutorial! I’ve tried many different mask patterns over the past several months, and this has just become my new favorite (by a lot)! It is so easy and fits very comfortably (with or without the nose wire). A question for you (because my sewing visualization skills are pretty weak). . . can you think of any way this could be adapted so that it would have a filter pocket? Thanks again for a great pattern!
Dottie says
Thank you Amber for a fantastic post, I have been busy making masks for my family and grandchildren, this pattern is so easy, thank you and good luck with your Graduate Course.
Karen Gravelle says
As someone who is anaphylactic to latex I was so excited to see a pattern that didn’t use elastic! Thank you. I was getting tired of having to use bias tape to make ties, that just get tangled in my hair!
dilovean says
Thank you😘
Judy Bickell says
Can you give me the measurements of each mask please.For some reason the pattern does not print out properly.
Christina says
I like the design! Do you think it would work to cut the fabric on the fold, with the fold being at what is now the nose seam? Just wondering if having a solid piece of fabric across would be more of a filter than having a seam in the middle?
Amber says
Well the way that it’s made, the nose part is rounded so on the fold might be tricky.
Kay says
Thank you, your tutorials always help as a beginner even though I’ve known how to sew for a few years you make it easy to follow along. My first project was your reversible mini messenger bag!
MaryAnn says
I am thinking about leaving the lining open about 2-3″ to be able to insert a filter.
Jaime says
I love the idea of using knit fabric for the elastic. Thank you!
Elizabeth Rickert says
Hi, Amber, I have been trying to get the instructions for the masks to print. I am having no luck. How do I get to the PDF file?
Amber says
Were you able to get it? If not I can try to email it to you if you email me.
Cheryl Harris says
Thank you SO MUCH for the face mask pattern!! I had wanted this exact one and couldn’t not find the pattern. Your pattern is perfect, and as always, your instructions are perfect. I love your emails, instructions, patterns, your sense of humor and everything you bring into my life! God bless and keep it coming!!
Kim says
What about adding a piece of wire at the top nose section?
Amber says
Yes, I have tried that and should add that into the tutorial. The way I did it was to use a pipe cleaner and cut it the right length to go across the whole top part, then I inserted it right before I sewed the whole thing closed. I then just top stitched to keep the pipe cleaner in place and it worked great!
Patti says
Are they tight enough over the nose without a nose wire? How difficult would it be to add one?
Amber says
I’m going to add this into the pattern right now:
Yes, I have tried that and should add that into the tutorial. The way I did it was to use a pipe cleaner and cut it the right length to go across the whole top part, then I inserted it right before I sewed the whole thing closed. I then just top stitched to keep the pipe cleaner in place and it worked great!
Julia says
What a great and easy pattern to make.
Gina D from Texas says
How do these hold up to machine washing? Especially the knit loops since they aren’t sewn closed.
Amber says
I’ve only washed a couple so far but they’ve seemed fine. Probably need an ironing after.