What’s the Project? You’re learning to sew and it’s going well, but now you need to know how to top stitch or turn a project right side out. Here’s a simple online sewing lesson to teach you these two sewing skills.
You’ve done it! You’ve made it to week 3 of the Learn to Sew series. How have you done so far? Are things going ok? So far we’ve learned to sew a straight line and how to zigzag stitch. Today we are going to learn how to top stitch as well as how to turn things, along with a couple of other handy sewing tips. This is something that is used in lots and lots of sewing projects. It’s an easy skill but very valuable.
So, on to the lesson.
Lesson #3: How to Top Stitch and Turn:
How to stop stitch is the main skill learned in this lesson, but you’re going to need to learn to turn first because that’s going to come before the topstitching. So let’s learn to turn!
How to Turn in Sewing:
What do I mean by turning? Very often when you are sewing you are going to put the right sides together, stitch them and turn them right side out. That’s how you sew something without getting a raw seam on the outside. You’re going to use it all the time, so let’s learn how.
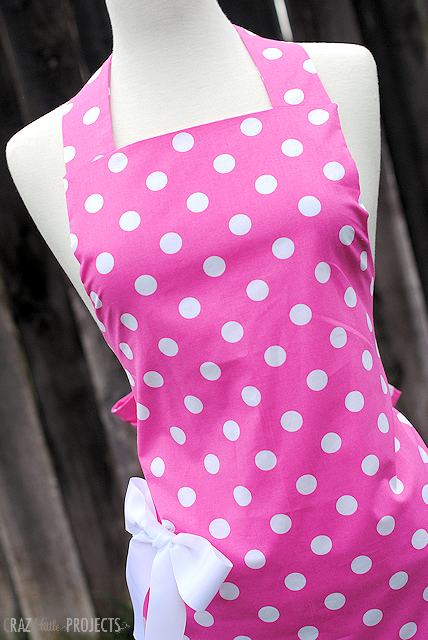
I am going to demonstrate this idea with the strap of an apron. In this example, I cut out my straps to the size I need. I then lay them so that the right sides of the fabric (the part that has the pattern-the part that I want to have show when I am done) is on the inside. So that the right sides are touching each other and I am looking at the wrong side.

Then, as you can see in that picture, I am going to sew it together (of course where you are sewing will depend on what you are making. This is just one example.)
Important: You will always need to leave an opening in your sewing of at least a couple of inches. Otherwise, you won’t be able to turn it right side out. Typically the pattern or tutorial will tell you where to leave your opening.
Once I am done sewing and have left my opening (in the case of a strap that’s easy-it’s just open at the end of the strap) I am going to start to pull the fabric through the opening so that it is right side out.

Sometimes this will be easy, but when you are working with a small space like a strap it can be a little tricky. There are a few tricks to help you poke that fabric through.
First, use something like your scissors or a chopstick or knitting needle to help you push the fabric through:

You can also reach inside the tube and pull from there a little:

My other tip is to put on a good show while you turn things. I prefer Gilmore Girls. 🙂
Once you get it completely turned you are going to press it nice and flat:

Then, in most cases you will need to sew your opening shut. To do that you will pinch it or press it so that it matches the seam you already had and then stitch it closed. Yes, this will leave a little bit of stitching on the outside of your item. That’s ok-it’s normal. Typically you will put it at the bottom of the project so it doesn’t show as much.
On a strap I wouldn’t have to sew the opening closed, it will just get sewn into the project. Just follow your instructions for whatever you are sewing.
How to Top Stitch:
Now, what is top stitching? Top stitching means to sew on top of the thing that you just sewed and turned. Hence the name top stitching.
There are 2 reasons to top stitch.
- 1. To hold what you just sewed in place. For example, if you sew the strap to a bag and then top stitch it, the strap will be more sturdy and your seams will stay where you want them instead of shifting around.
- 2. It can add a nice finishing touch to what you made.
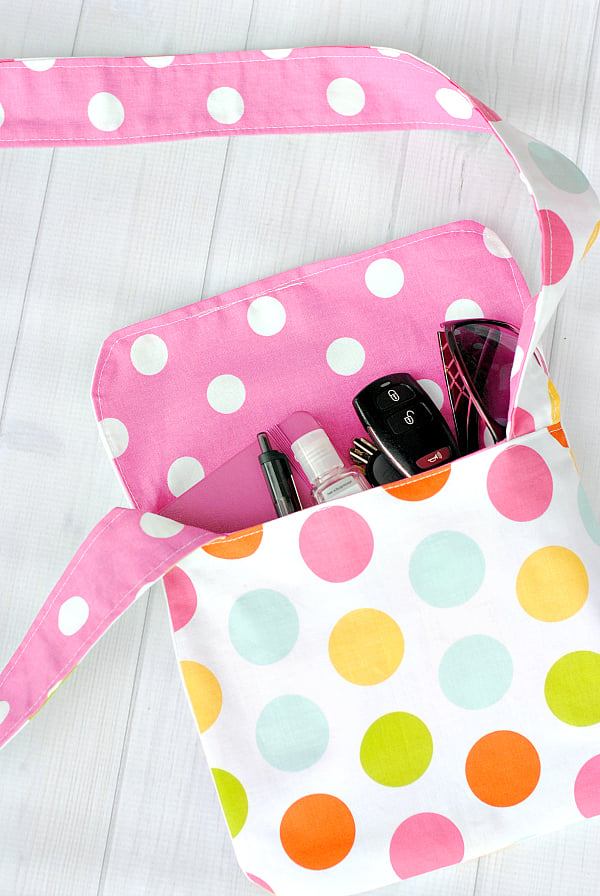
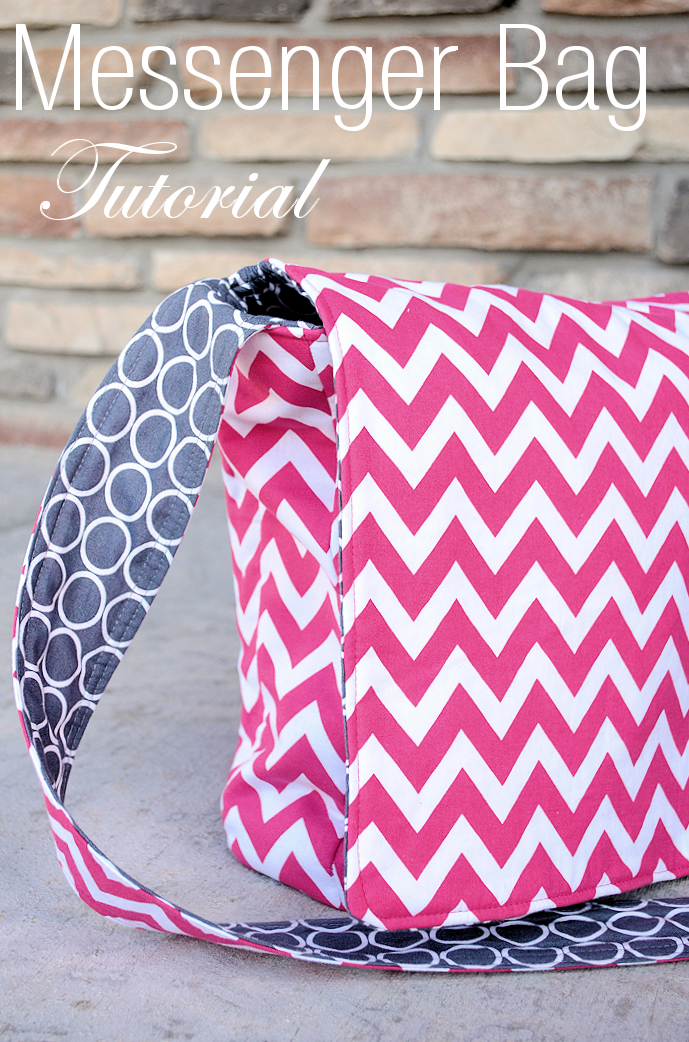
As you can see in this picture I top stitched this messenger bag strap. In this case I did two straight lines just to add a nice look to it.
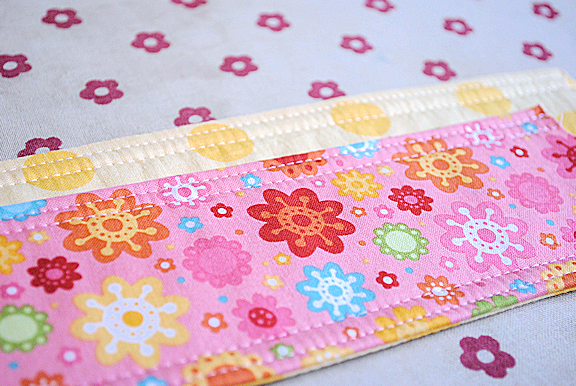

To do this you are simply going to line up your presser foot once at say a 1/2″ seam allowance and sew a straight line then do it again at a 1/4″ seam allowance. Easy. Just keep practicing those straight lines for this.
The main thing to remember when top stitching is that you want to keep the line as straight as you can because it’s going to show, so this may take a little big of practice for you to master!
Notes:
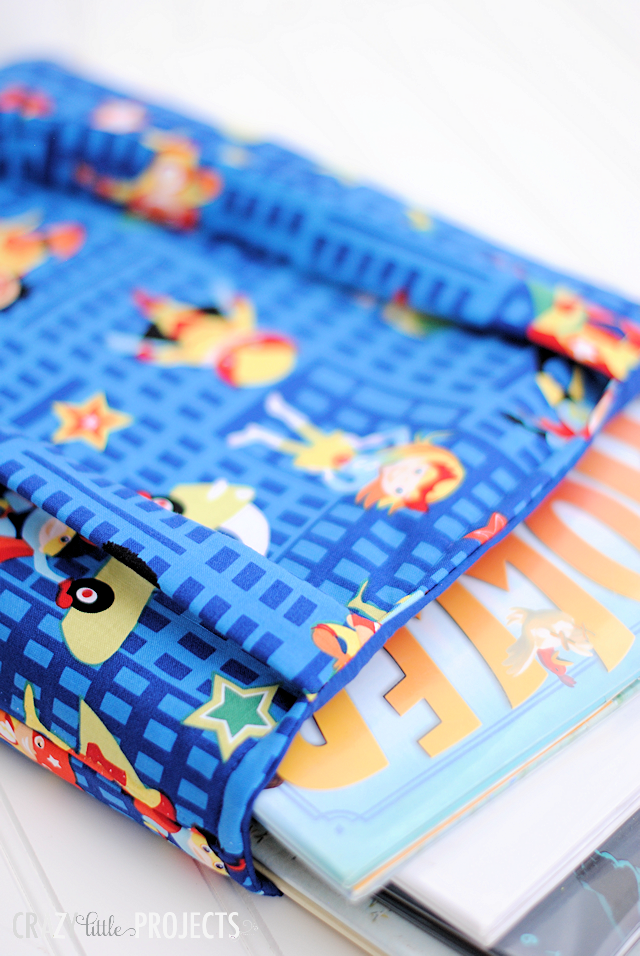
A couple more things to note for this lesson. Sometimes when you are sewing something that will need to be turned right side out, you will be sewing curves. When you sew a curve, before you turn it right side out, it is helpful to make some very small cuts in the fabric that go right up close to (but definitely don’t cut through it!) your stitching. This helps the fabric to not pucker and bunch when you turn it right side out:

See the little cuts in this now?

You can do this for any curves that you sew to help it lay more flat.
Your Assignment:
This week is easy!
- Pick any project that has you turning and top stitching. There are SO many to choose from. I will list several ideas here, but choose whatever works for you.
- If you are a more advanced sewer, simply choose a more advanced project.
Then move on to Lesson #4: How to Insert Elastic
Project Options:
Beginner Level:


Moderate Level:

I hope you are successful with how to top stitch. It can add such a nice touch when sewing.


Staci says
So thankful I found your site, what a wealth of information! The pattern I’m working on has me doing this with fabric that is fused with interfacing. When I turn it, will the interfacing get all bunched up?
Amber says
Not if it is sewn in place with the fabric.
Staci says
Oh goodness, yes, that makes perfect sense. Thank you! I’m a total newbie and bit off a little more than I am capable of for my daughter’s Halloween costume. Although, having a blast trying to figure it all out 🙂
Judy pabst says
Amber, I’m not making the messenger bag, but my question refers to turning the fabric. I’m trying to sew the tongue on one of your hooded towels. I’m really having trouble with the fabric getting “swallowed up” into the bobbin case and then it ends up so shredded it does not turn properly. Do you have a suggestion for me? I’ve just ruined my second tongue! Thanks
Amber says
Are you sewing and turning it you mean? Try to not get too close to the edge. Maybe even cut the tongue bigger, sew further in (bigger seam allowance) and then trim the excess off?
Tina Sitz says
can’t wait to make a messenger bag. Love top stitching, just makes items look crisp and neat. Thanks for the tutorial.
Patricia S. says
I love top stitching 🙂 It makes everything look nice, neat and finished. Now turning straps and thin tubes is another story…I avoid it as much as possible.
Noreen says
I discovered a tool called the Purple Thang (http://www.amazon.com/Little-Foot-That-Purple-Thang/dp/B001ELBCFG). It has a slot that you can thread the corner through and then pull your fabric inside-out. Then use the blunt end to help straighten. It’s hard to explain. Anwyay, the Purple Thang has many uses — I also use it to guide fabric when sewing. Check it out!
April says
I love your tutorials! All of the things that you have chose have been so cute. Thank you!
becca says
Thanks for the inspiration! I made one of your messenger bags (like the gray, yellow and black one) and I am super excited about it…not perfect, but I still like it!
Amber says
Mine’s not perfect either. 🙂 Pictures are deceiving but no one but the person who sews something notices the imperfections. 🙂
Heather says
How cute! ~~
Lynn says
Love your lessons! I will be making the ear warmer for my granddaughter. (Maybe the bag too.). Thank you for all your inspirational ideas.
HollyC says
Loving this series and learning about new shops and options out there on the web too!
Thanks Amber!
Heidi de Roda says
SO Easy!! LOVE the tutorial.
savana says
Love the series. Is there a way to help fabric from bunching when I serge a curve and then turn right side out?
Amber says
Honestly I don’t know! I haven’t ever serged. I think I need to learn.
Devin says
Thank you so much for your tutorials! I just found you yesterday and caught up to Lesson 3 already. I spent a day cursing at my sewing machine before I found your wonderful tutorials. Now we are friends, not best friends, but very close acquaintances!
Amber says
Wow! Way to go!!!
Karis says
Easy peasy, compared to sewing through those towels anyway 😉 My 2-year-old daughter already claimed the bag as her own 🙂
kim says
Looking forward to making this for a baby gift.
Amber Cavalier says
Thank you for this whole Learning To Sew Class, and your doing it FREE, THANK YOU!
Ive always had a passion to learn but not the money for the classes held at the local fabric store.
I have started late,, but have quickly caught up! I can say this was pretty easy, alot easier than i expected.
I made the bag wrong tho, somehow I made it toooo small, but hey I was making it for my one year old, so maybe it will be okay! lol. I need to practice cutting out my fabric, Im not sure if I printed it wrong or what on earth! (: But, I am deff learning a lot, thank you, Amber!
Amber says
Did you fold the fabric and then put the pattern on it and cut? That might have been your problem if you didn’t do that.
patricia says
My daughter and I are going downtown Athens(Greece) tomorrow to shop for fabrics. Maybe she’ll make the bag herself! You’re inspirational!
Patricia
Amber says
Nice!!!
Cathy says
Hi there
Love this blog!!
Sooooo informative
Thanks for the chance to win
Cheers
Cathy
Marlene says
Thank you so much for this series. You have taken the fear out of learning to sew. I have completed the messenger bag and I am so proud of myself. I would love to win the charm pack and make a quilt for my baby.
Donna Payne says
Thanks for these great lessons. I have been sewing for quite awhile but it is still a good idea to re-learn things from others as you can always pick up some new ideas from others. Thanks again! I had fun making the messenger bag!
Jeneta says
oops – forgot to say – I complete this week’s lesson!
Jeneta says
I am SO into messenger bags at the moment! Thanks for all your tips!
Leslie says
I am working on making the bag, which is such a cute idea, but I have practiced turning and top stitching before. These lessons are great, and I am learning so much! Thank you!
Susan Jaisle says
This series has been a complete blessing for me! I am learning so so much! Thank you!
Nikki says
Loved making this project. Can’t wait to make another!
Kelsey says
Okay. I made the bag – I’ve kept up, even though we’ve had three cases of the flu in the last week and a half, and we’re moving to a new house on Saturday. And my bag, well… it looks pretty good from far away! From up close, not so much. 😉 And I couldn’t get the lining to fold right, for some reason, even though I read the directions a bunch. Maybe it was my foggy brained, drug (NyQuil) induced state that made it awful? Who knows. Anyway, I’m keeping up!
Amber says
Good work. Just keep practicing!
Christine Sherman says
Thanks for all you do!!
Amber says
You’re quite welcome. 🙂
Susan Low says
I would love to enter for the charm fabric give-away. Thank you for all of the tutorials you have given us to try our hand on the sewing machine. Susan
Becky says
I am having so much fun following your blog! Thanks for all the posts!
Amber says
Thanks! 🙂
Pam S says
Thanks for the lesson! I’ve been sewing for awhile but have never done any turning! I tried it and learned a handy new skill!
Kim H says
I made the messenger bag for my daughter and she loves it! I had a few problems along the way, but nothing too serious. I find my straps interfere with the flap though. I’ll try this again soon. Thanks for these tutorials!
Cindy says
As usual, I’m just a little behind in getting through the lessons, so I’m really glad you are spreading them out! I actually combined the first two lessons and one of your projects to make burp cloths with zig zag accents (and now that I think of it, I guess I used the zig zag as a top stitch too). I’m having a great time, can’t wait to make the messenger bag!
Amber says
Sounds like you are doing great!
Heather says
Just finished hooded towel and CAN’T WAIT to do the mini messenger bag! Love little bags to put things in!
Sherry says
My daughter loved it!
Jona says
I love the earwarmers! I use the skills taught all the time, but love to read the tutorials so I can learn little tricks that I didn’t know before!
Darcy says
I was so excited for this project that I ran to JoAnn’s to get fabric since we are a one car family & I will be car-less for the next 3 days. I didn’t measure, but I wonder if the girl cut just short of 1/4 yard because I don’t have enough to do the straps! & I made good use of all my fabric (didn’t cut in the middle). Guess I’ll have a pouch until Friday night I can hopefully get back out.
Amber says
Sorry! I just changed to post to tell people to buy a little more fabric.
Jenn K says
I’ve been looking forward to this tutorial, can’t wait to make one for my niece 🙂
Theresa says
such a cute bag! looking forward to this week’s project.
Jessica graziano says
Thank you for taking the time to do this. Even though I have been sewing for awhile I love getting your tips and tricks. I sure have needed them and Im learning some new things. I would love to know where you get all your beautiful fabric.
Amber says
Hobby Lobby, http://www.theribbonretreat.com and http://www.hypernoodle.com are probably my main fabric sources.
Amber says
Ooops-I mean http://www.hypernoodlefabrics.com
diann says
Weird….sometimes this link goes to a fabric site but most times to a whirlpool shower bath ad!
Jessica says
Super excited to try this messenger bag!
Aubrey says
Love this project! Thanks for the tip on cutting on the curve to help with puckering! I definitely needed it!
Sherrie says
MODA is my favorite manufacturer !!! I am going to try the messenger bag. My little granddaughter would love that I think.
Shelley D. says
I love this project and it turned out so darn cute! I would never have thought to use my scissors to turn the strap right side out…..awesome stuff that I am learning. I love that you are doing this, you know teaching me to sew.
Andrea says
This is awesome! I have been sewing for a few years, but I always thought I needed some refreshers on basics. Thanks!
Ashley says
I keep pinning bags to sew and have never actually done one. This will be the push for me to actually make one!
Erica says
Thanks for the reminder about snipping curves before turning the item right side out!
Robyn says
This is such a great series – thanks. I am a self-taught sewer and have been following along to see if I do things correctly. I really appreciate it!
Michele says
You have been more help than you will ever know. I would love to win one of your giveaways as a start to my fabric collection. I have done more sewing the last three weeks than all my life combined thanks to your help. Thanks again and stay terrific 🙂
Stephanie says
I’ve been debating on making myself a bag or a tote! I have some fabric, and might just possibly turn it into a messenger!
Patty says
cute bag, thinking of making another one
Allison P says
The messenger bag is so cute! I’m looking forward to making it.
ANNA FINLAYSON says
My girls are so excited for me to make them their messenger bags!! I finished their matching penguin hooded towels yesterday and they love them!! This is so much fun!
Amber says
YAY!!!
Audrey Scarante says
I loved this tutorial. Thanks!
Dana says
Love the messenger bag!!! Turning and top stitching is what I do for all my cloth diapers!!!
Trasity says
Okay I have a general sewing question completely unrelated to this lesson lol..
I’ve been tackling a pattern for making the nursery accessories for our baby’s room. Currently, I’m working on the crib sheet pattern. I went and bought the amount of fabric the pattern called for, and I’ve washed, dryed, and ironed it how the end of the bolt suggested. Now, I just went and folded the fabric according to the instructions. But, when I lay the pattern on the fabric how it says to, my fabric comes up short by like a half inch..barely. Any idea what I may be doing wrong? Should I just go with it and cut out the pattern? I’m not really sure who else to ask!
Thanks!!
Amber says
Uh oh! I am guessing your fabric just shrunk a bunch and is now too short. I’ve never made a crib sheet so I don’t know for sure how it works but if there are hems or anything around the edges maybe you can make them smaller to compensate? I don’t know-sorry!
Trasity says
All is well. I went ahead and just cut out the fabric even though the pattern was hanging over my selvages just about a half inch. Turned out great! Again, the hubby was so impressed with my work haha. I figured it didn’t matter if it came up a little short since that part would be under the mattress anyway. Either way it was great practice for straight stitching, hemming, and making a casing for using elastic!
Amber says
Oh good!
Laurie says
I have the perfect little girl to gift this cute bag to. Great series!
Diane Collins says
Great instructions. I found it to be very easy to follow and solved some questions. Had never heard of charm packs, jelly rolls, and layer cakes. Learn something new every day!
Andra says
Okay, I’m stumped. (Shocker, I know! Haha!) I’ve made it to the strap insertion. Instructions say to insert the strap between the 2 fabrics. I folded the raw edges in on the pocket fabrics and stitched them together, so there’s no opening now to insert the strap. Where did I go wrong? Thanks!
Amber says
Ooops-you are supposed to insert the straps THEN stitch it closed. Nothing a seam ripper can’t fix. 🙂
Andra says
Oopsie!! Thanks, Amber!
MaryB says
I love your tutorials. I am behind in the lessons but keeping them all so I can catch up. I used to sew a lot for years and years, then stopped when work become too much and spare time was non-existent. I am using your lessons to get back into my sewing. I am really loving it even though I have a less than enthusiastic sewing machine that seems to have a lot of problems. I probably need to take it in for an overhaul. The messenger bag is great. Thanks for all your help.
Amber says
Thanks so much! It makes me feel so good to hear that kind of thing!
Rachel says
Going to try the bag!
joni says
thanks so much for these easy-to-follow tutorials!! 🙂 You make everything seem so easy and not at all intimidating. I’m going to try the cozy headband. 🙂
diana says
Think I will try the messenger bag. Great lesson, keep them coming. Thanks for the giveaway.
Julielorene says
Great lesson. Love the clear pics & the conversational tone that is just like you were beside me showing me how to do things.
Chelsey says
I am nervous about this one, haha, but I’m excited to try!
Amber says
This one is going to be harder than the others probably but be patient and you can do it!
Linda says
I am so excited to start this project. I’ll be starting tonight. 🙂
Amber says
Let me know how it goes! 🙂
Carla says
I can’t wait to try this weeks lesson!
Trasity says
Hey! I cannot wait to start this week’s project..I wanted to make my own small diaper bag for our girl due in 4 weeks!
Valerie says
ooo, I like this bag!
Brenda Melahn says
I have followed along even though I’m a 40 year sewer — this is THE best thing — I envision so many young, new sewers benefiting from your patience and step-by-step instructions. Also, a few tricks for the old dogs :).
Amber says
Thank you! 🙂
Heather says
So excited for this weeks project! Ive actually brrn working on the bag but hasn’t been goin too wel because I added some material (I forget what it is called but its stiff) for more durability but it’s failing me :- Need to tear it apart and start over. I shortened the strap & its going to be a pirse for my 2yo niece!
Amber says
Hope it goes better!
Jana says
I’m so happy with this week’s project suggestions!
I’m going to finally try and make my own handbag, messenger style. I was going to do that for a while, but I’ll try to finally get started.
Thank you!
Amanda Corbet says
I just love this! Thanks for the great instructions ad tutorial! I made two of the messenger bags that will be for my nieces this coming Christmas! Nothing like preparing early!
Amber says
Nice!! I am happy to hear you did it successfully. I always worry that my tutorials won’t make sense to people.
Lorie M says
I am really looking forward to making the mini messenger bag; I too have a bag obsession! I cannot wait to make the bag and give it to two little girls in my life and start their bag “collection” early 🙂
Thank you Amber, I have been learning so much with your lessons and they make sewing much less intimidating!
I have to admit, I did need to look-up what the terms “jelly roll”, “layer cake” and “charm pack” meant…now that I know I think that is what I will use for the first blanket I try because I have trouble picking coordinating fabric and this is a great solution!.
Thanks again 😀
Amber says
I didn’t know what any of those layer cake things were either but MAN are they handy!!!
RW says
I have a serious bag session, too!! I made the min messenger bag and it turned out great!
sandra says
Thank you for this tutorial. I have an obsession with bags and want to make some of my own!
Rosetta says
Can you top stitch a knit skirt
Amber says
Definitely!
Linda says
I have made a ton knit skirts! I Topstitch the outside of the waistband and the hem. Use a ball point or stretch double needle so that the stitching will have stretch to it and will not pop when stressed. You will sew on the right side of the fabric as the thread will make a zig zag on the wrong side. If you do not have a zig zag on the wrong side, you might need to tighten the tension. You will have to stitch by “feel” as you can’t see the raw edge but you want to stitch right on the raw area (knit does not need to be folded up twice as it does not fray). I suggest a practice run first but once you get the hang of it, it’s easy.