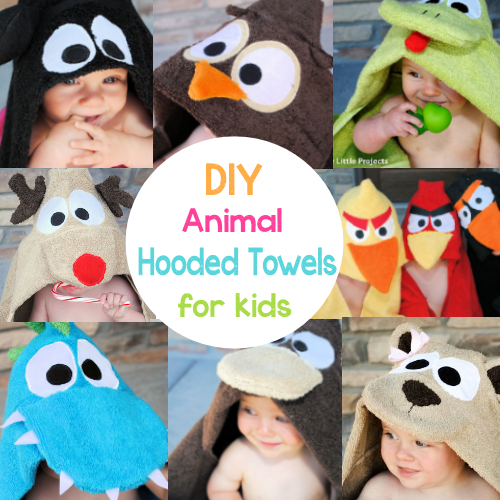
Hooded towels are one of my favorite things to make (which I guess is why I plan to do a monthly hooded towel on this blog). They are perfect for baby, toddler, or preschooler. These particular towels are easy to make, inexpensive and wonderful to use with little ones! Last month we had a frog hooded towel. (And now there are monthly hooded towels. See them all here.)
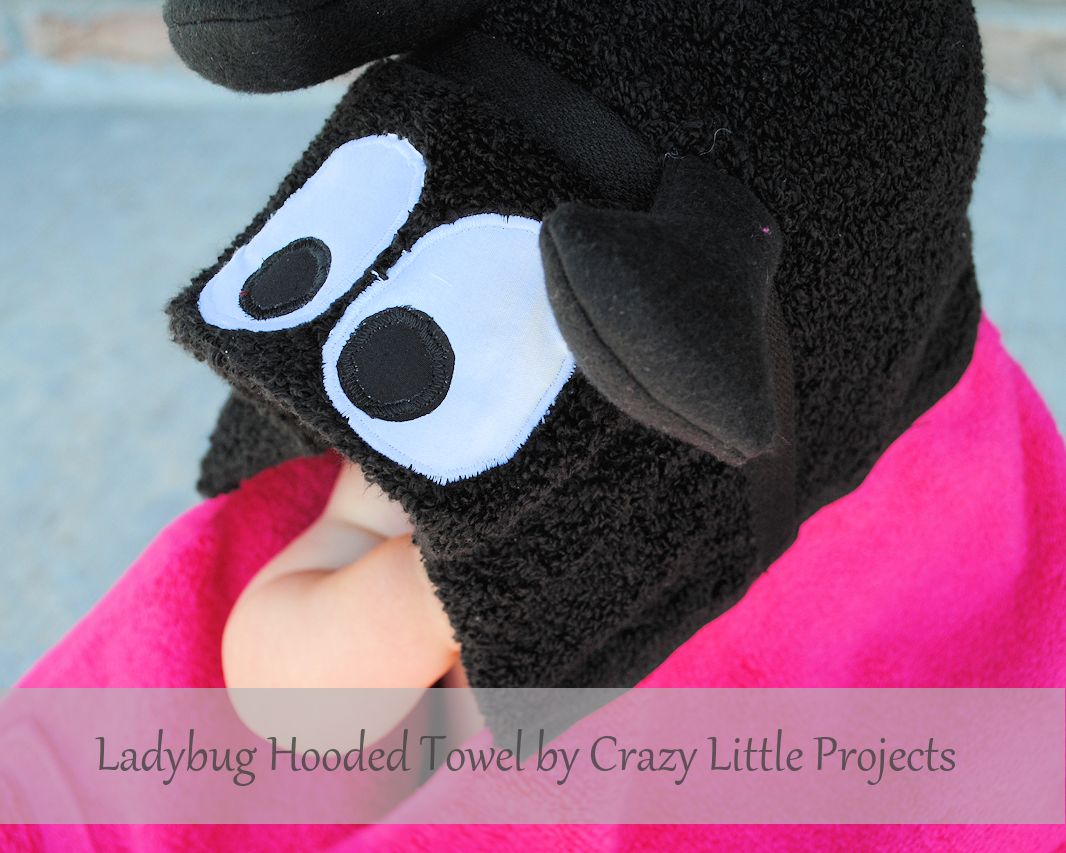
This month I give you…a ladybug hooded towel pattern!


And the view from the back of the towel:

This ladybug hooded towel is really pretty easy to make and they are a huge hit at baby showers! It’s going to cost you around $10 (maybe even less) and take you an hour or so to make it (depending on your sewing experience).
Ladybug Hooded Towel Pattern & Tutorial:
Supplies Needed:
1 regular size bath towel in hot pink or red (I get mine at Target for around $5
1 black hand towel
About 1/4 yard black fabric
Iron on transfer paper
Small amount of cotton stuffing
A tiny bit of white fabric (if you are adding eyes to yours)
Ladybug Towel Pattern Pieces
Instructions:
To see full details on how to assemble the hooded towel, visit this post. Here I will teach you how to make the head:
Start out by cutting your black hand towel in half the hamburger way (meaning you end up with a short and fat half hand towel, not long and skinny).
Fold the top finished edge over about 4 or 5 inches, pin it in place and sew a straight line:


Using the pattern pieces, cut out 4 pieces for the antennae and cut out several spots of whatever size you like. I usually do about 4 spots but you can do as many or as few as you like.
If you are adding eyes to yours, cut those out too. Using your iron on transfer paper, iron them in place where you want them and then do a tight zig zag stitch (applique) around the edges of them to keep them permanently in place.

Sew 2 pieces of the antennae together, turn right side out and stuff.

Now, take your hand towel and position your antennae where you want them and cut a small slit right through the towel to poke them down into. This picture gives you an idea of where to place them:

Stick them through the slits and do a zig zag over them on the underside several times to keep them in place and to close the slits you just made:

Fold your towel in half so that the face and antennae are inside and use a zig zag to sew up the raw edge to form the hood.

Now, using your pink or red towel, place your spots where you want them. Use iron on transfer to iron them in place. Once you have them where you want them, use a tight zig zag (applique) stitch around the edge of the spot to sew them on.


The next step is optional but make the towel easier to wrap around the child.
I add a little pleat to the towel right in the center of the long side. Right where you are going to sew your head on. Fold the towel in to form the pleat and then zig zag it.

Now simply pin you head in place centered on the towel and centered on the pleat and zig zag it in place.

You’re done! I hope it went well.
See more hooded towels:


Anna says
What kind of cotton fabric do you use for the eyes and spots? I have been using fleece and it is thick to sew through on top of the towel.
Amber says
Just regular cotton.
Kim N says
Hi, just want to say Thank You. I just finished two of your hooded towels. One is for my one grand daughter who loves OLAF, your instructions were PERFECT
Luanne says
can you please show the inner part of the hooded towel where the hood and towel body meets?
I wanna see how it is sewn. 🙂 thank you!
Amber says
I’ve got some pictures of that here: http://crazylittleprojects.com/2013/01/hooded-towel-tutorial.html
Danielle says
Just finished my first one! It’s sooooo cute! I can’t wait to give it to my friend for her baby shower. I think I will be making lots more of these in the future 🙂 Thank you so much for the tutorial!
I do have one question – what is the purpose of folding the hood over in the first step?
Thanks!
Amber says
Just makes it so the hood isn’t quite so big. You don’t have to do it if you want a bigger hood.
Kathy says
Love this towel! Finished this one today and my daughter (18 months) was so excited she added a new word to her vocabulary, “ladybug”. Thank you for this great tutorial:)
JUDE says
These towels are so darling. I have a new great grandbaby due any day. She just has to get a ladybug! So cute. How do I get an invite for the candy corn dress blog also? Your projects are just so fun I’d like to try several. Thank you
Amber says
Not sure what you mean about the candy corn dress blog? The one I linked to? Did she make it private or something?
Diana says
Tried to download pattern for antenna for Ladybug and the link took me to the frog tutorial. Am I doing something wrong? Love all the tutorials, have made the frog, monster and bear. Need to make the ladybug.
Amber says
Hmmm, I just checked it and it worked for me? Here’s the link: http://www.mysweetdreamsbaby.com/images/Ladybugpatternpieces.pdf
Jennifer says
I am also having trouble printing the pattern pieces. I keep clicking on your link, but it takes me a “page not found” page. Do you no longer have the pattern pieces available?
Amber says
Sorry, I got that fixed! 🙂
Tracey says
Hi,
My daughter loves these hooded towels and was wondering if you might have a tutorial for a rabbit hooded towel design.
Fab ideas 🙂
Amber says
Coming very soon…. 🙂
Brenda Towne says
Made the ladybug towel for my grandaughter’s 1st birthday. ADORABLE and very EASY to make. I’m making the monkey next. Thanks for posting the instructions.
Amber says
Love it when I hear people are making these!
Jane McLellan says
Thanks very much for the tutorial Amber. Really pleased with the way my ladybug turned out. Wrote about it on my blog. I made the monkey today too.
Renee Byrd says
Can’t wait to make for my grandaughter’s 1st birthday! Very cute and looks quite easy—Thank You for sharing. Looking forward to your monkey and owl.
Amber says
Thanks! The monkey is already up if you want to see it: http://crazylittleprojects.com/2012/06/monkey-hooded-towel.html
Miek says
Ooooohw, how CUTE! And yes, the eyes make it even cuter 🙂
Danielle says
This is so cute! I saw this on the Sundae Scoop linky party.
Charlene@APinchofJoy says
So cute — can’t wait to see all the others you have planned. Thanks so much for sharing on Busy Monday at A Pinch of Joy. Hope to see you again soon!
Julie Marling says
So cute! My BFF was supposed to make me one and send it! Ha! New follower from hop. Your blog design is cute. Who did it? Love for you to follow back when you get a chance 😉
http://naptimeshopper.blogspot.com
Julie @ Naptime Review
Sarah Jenkins says
Thanks so much for linking up on Tuesday’s Tidbits @ Naptime Delights – I’m going to feature this project later today. Don’t forget to link up something new tomorrow! 🙂
Sarah
{http://www.naptimedelights.blogspot.com}
Christine says
You make the COOLEST hooded towels!!!
Thanks for sharing at The DIY Dreamer.. From Dream To Reality!
Cari and Cortnee @ Two Sasters says
Thanks is just adorable!!! New followers:)
Katlyn Larson says
Oh I love this! I wish I had a little girl so I could make the lady bug..Heck I may just have to make it and put my son in it! Haha..
Thanks for this! I found you on The DIY Dreamer! 🙂
Michaela @ coveredinmodpodge.blogspot.com says
Ikes! So cute! I’ve been waiting for this tutorial since I saw your adorable frog towel. Thanks so much!
JewelryRage says
So cute! Awesome post!
Amanda
Jewelry Rage
Lisa says
It’s adorable! What a little cutie showing off the new towel!
Mimi says
I think hooded towels are great. I love that you made a ladybug one! I don’t think I have seen a ladybug hooded towel before. So cute!