I’m so excited for our very first post from one of our new Crazy Little Projects sewing contributors. It’s from Paola at Sweet Julia Boutique, and this one is so great because it could be just perfect for a Christmas gift or birthday gift for kids and won’t take you too much work. It will be great year round really and I know my kids would LOVE it if I made them one of these.
Here’s Paola:
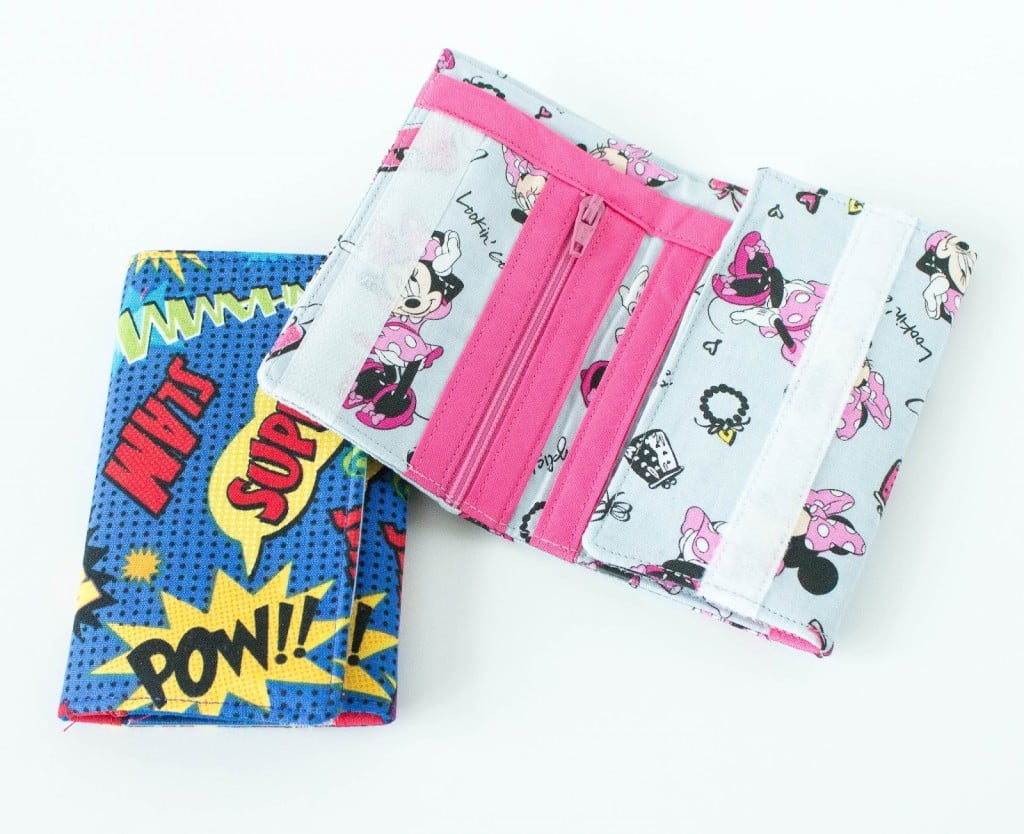
Are your little ones aware they have money in their piggy banks and ready to spend it all? Well, after a brief conversation about personal finances with my son, we agreed he could spend SOME of his money and save the rest, so in preparation for his first official trip to spend his own money, we needed a way for him to safely carry it (and avoid finding money in the wash the next day). So, that’s how The Perfect Little Wallet came about, an easy scrap buster project, make one, make tons, they make great gifts too!
Cute Kid’s Wallet Pattern:
Supplies Needed:
- Fabric Scraps
- Small Piece of Vinyl (at least 3″x5″)
- Pellon Decor Bond (for stability)
- Double Fold Bias Tape
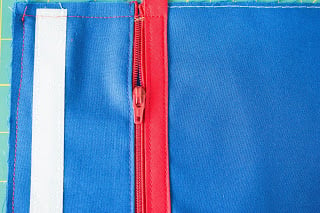
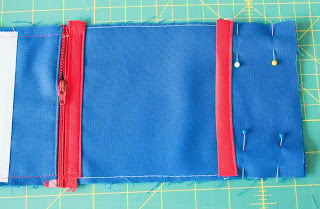
- Zipper
- Velcro
- Wash Away Wonder Tape (my favorite!) or Pins
Cut the Following Wallet Pattern Pieces (W x L)
– For main Wallet:
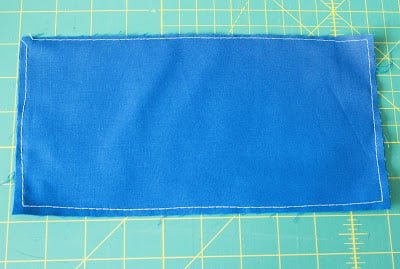
- 1 piece 10″ x 6″ (main)
- 1 piece 10″ x 6″ (lining)
- 1 piece of Decor Bond 9″ x 5″
– For inside:
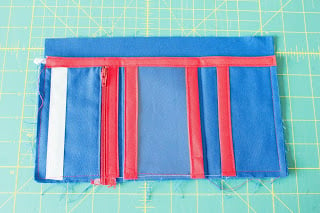
- Main Inside Piece: 2 Pieces: 10″ x 5″
- Left Coin Pocket: 5″ x 5″
- Right Pocket: 2 pieces 2.5″ x 5″
- Clear Vinyl: 3 x 5″
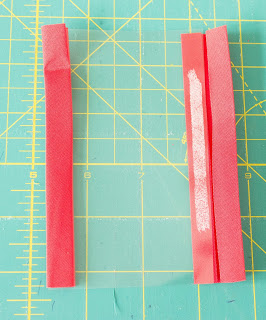
– Double Fold Bias Tape:
- 5 Pieces: 5″
- 1 Piece: 10″
- Velcro: 5″

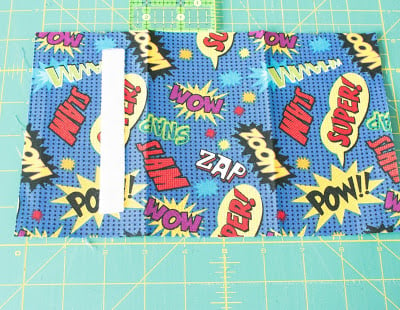
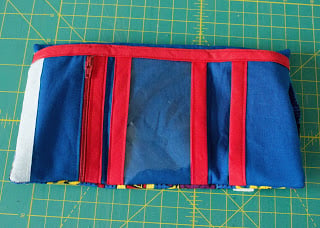
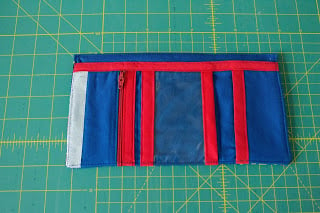
Wallet Sewing Pattern Instructions:


Dawn K says
Perfect wallet for my 7 yo daughter. She picked out the fabrics and I put it together. Fast and easy.
Now I’m thinking ahead to Christmas and this may be little gifts for her classmates. 🙂
Thank you for sharing this great tutorial.
Susan says
The bias tape was too small. Are you sure you didn’t mean extra wide double fold bias tape. Mine barely covered the stitching.
Ally says
Hi, thank you so much for this great tutorial! My boys are excited to have their very own wallets (Pokemon and Paw Patrol). I just had a couple of questions. What is the fifth piece of 5 inch bias tape for? I noticed in one of the pictures there is a piece of bias tape on both sides of the zipper, is this where it should go? If so, how and when should I attach it? Also, did you remove the basting stitches at some point, or just sew over them? Thanks so much for your help!
carol says
What is the seam allowance? For the right pocket piece I cut a 5″ square and folded it. I also used a light weight iron on interface for the inside lining and pockets. Thanks so much for such a super great pattern. I’m sure the three GrandGirls are going to love theirs…all different.
Amber says
1/4 inch
Elaine says
Can you tell me what size of a zipper for the kid’s wallet? Thanks in advance !!
Amber says
At least a 5 inch, but you can cut others down to size as needed.
Prislee says
So cute & functional! Thank you for the tutorial, will definitely be on my to do list.
Sandra :) says
I decided a few days ago that wallets would be a great thing to make for the kids this year (ages 3 – 8) for Christmas – this design is different than the one I usually use – it has a few more features, but still looks nice and simple 🙂 I like it, and will try it it out. Thank you for the tutorial and the inspiration (I even have that superhero fabric, hehe) 🙂