Guess what? The holidays are coming! Are you going to make any handmade gifts? If so, I am going to be offering ideas in the weeks to come.
Today I bring you a perfect holiday gift idea. It’s pretty easy, inexpensive and fun for kids of all ages. It’s a coloring book and crayon holder. A kid’s very own portfolio if you will:
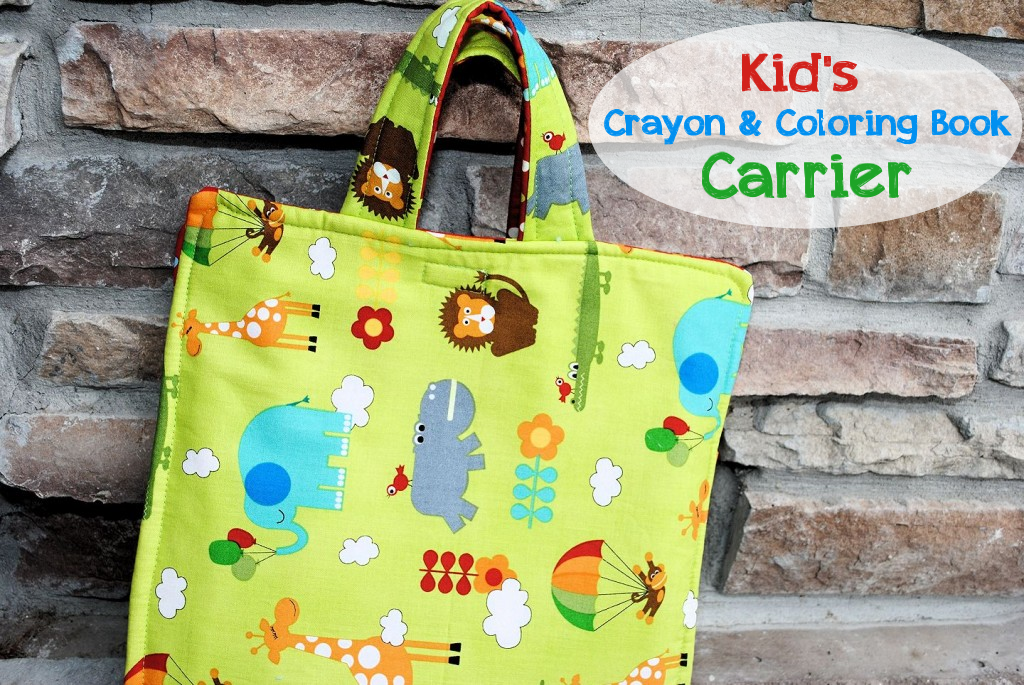
It holds crayons or markers or colored pencils on one side:

And coloring books or stickers or paper on the other:

And folds up nice and has handles so little ones can carry it wherever they are going. Great for church, airplane or car trips or anywhere out and about.
OK, so let’s make it.
What You Need:
1/2 yard of main fabric
1/2 yard of coordinating fabric
1/2 yard of felt (any color)
Small piece of Velcro
Kid’s Coloring Book and Crayon Carrier Tutorial:
Let’s start out with the straps. You need to cut 2 pieces from your main fabric and 2 pieces from your coordinating, each about 12 inches by 2 1/4 inches. Also cut two of the same size from your felt.
Put right sides of your two fabrics together and the piece of felt outside them. Stitch down each side of the strap, leaving both ends open:


Turn them right side out, press them flat and top stitch along each side:

That’s it! Your straps are done. Set them aside for later.
Now, cut a large piece from each of your fabrics-14 1/2″ by 22 1/2.” Also cut one of these pieces out of your felt. These will be your main body of the carrier.
Now you need to make the pockets or compartments for the carrier. First you need to decide: is this going to hold crayons, markers or colored pencils, because your dimensions will be slightly different depending on what you choose.
For markers or colored pencils cut a piece of your main fabric that is 14 1/2″ by 11.”
For crayons cut a piece of your main fabric that is 14 1/2″ by 8.” (Because crayons are shorter and we don’t want them to get lost down in the pocket.)
Take this piece of fabric you just cut and fold it in half with right sides together and sew just across the long side. Turn it right side out so it should look like this: (press it nice and flat with your iron)

Fold your large piece of coordinating fabric in half to find the center. Mark that with a pin or something so you know where it is. Now, place this piece that you just created above so that is lines up almost exactly with the center. Give it maybe about 1 centimeter of breathing room. Sew along the top and bottom edge (the raw edges) to hold in place. Now, sew straight lines down the pocket about 1 inch apart to form the spots for the crayons or markers:

Now we need to make the pockets for the other side. I made 2 pockets for mine. The first pcoket you will make out of the main fabric. Cut a piece that is about 14 1/2″ by 10 1/2.” Fold under and press both of the long sides of this piece. On the left side of the fabric (when looking at the fabric head on), fold it under not once, but twice. Sew a straight stitch down both of those sides:

Now do the same thing with a piece of the coordinating fabric, but use these dimensions instead: 14 1/2″ by 8 1/2.”
With both of those pieces of fabric hemmed on each of the two long sides, place them where you want them on your carrier. Put the main fabric one on the bottom with the right edge right about at the center of your carrier. Layer the coordinating one on top of that so that the right edges line up perfectly and there is about 2 inches of space between the left edges.

Stitch those in place along the top and the bottom-just to hold them for now.
Now, your inside piece is ready, so let’s attach it to the outside. Place your inside piece with it’s right side touching the right side of your large main fabric piece. Put the large piece of felt on the outside. Grab your straps and put them in place on the two outside edges of the carrier with the facing inwards. As in, you can’t see them, just the ends of them right now. See their stubby little ends in this picture:

Here’s what it looks like on the other side where your felt is. In my case I had to piece 2 pieces of felt together because I didn’t have a piece big enough. Yours will just be one big piece.

Starting at the bottom somewhere, sew all the way around, leaving about a 4-5 inch opening to turn it right side out. Then turn it right side out. It will come out sort of rumply, so iron it nice and flat and smooth. Then top stitch all the way around the bag. This will close your opening and help the whole bag to lay smooth.
I like to have my corners be a little bit rounded:

This is what it should look like when laid out flat:

Now, sew a straight line right down the center of the carrier, again, just to help keep everything in place and also to help it fold in the center.

Last step-sew a piece of Velcro on each side right below the handles:

You’re done! It will make a great gift for someone! Want other handmade gift ideas for the holidays? I will be featuring quite a few, so be sure to visit me! Crazy Little Projects
This post was originally posted at The Ribbon Retreat.


Liz says
Hi Amber – made this for my 3 year old grandson & a year later he’s still using it. Plan to make some more soon. Thanks so much for sharing this .
Amber says
So glad!
Amanda L. Nordstrom says
Never mind, I’m really dumb. This is what I get for staying up late to create! I misread your instructions, my apologies!
Amanda L. Nordstrom says
Hi, thanks for this tutorial! I just happened to notice you said to fold the pocket fabric in half right sides together. Did you mean wrong sides together? Thanks. 🙂
Jean Gilbert says
Thank you so much for this idea.I have not done it quite the same ,but the idea is well and truly yours.I can only say we are privileged that you have taken the time to show all your patterns. So we ALL should be immensely grateful, I certainly am.A massive thank you.
Amber says
Thank you for your sweet words! 🙂
Joan says
Hi! Amber, I just made this for my Grandson for his 6th birthday. I put a colouring book inside one pocket and stickers and the other side I put a sketch pad, larger markers on the other side which I made to be 1 1/4″larger. Thanks so much for this wonderful tutorial, it turned out so cute and he enjoyed it the best out of all the gifts. Will be great for going traveling and just being at home!
Your tutorial was easy to follow and I will be making 2 more of them for another Grandson and Granddaughter!
Joan
Amber says
That’s such a perfect gift!
Sherry S says
So cute! Do you have the outside dimensions of the portfolio when it is closed? Will it hold a full size coloring book? Thanks for the great tutorial.
Chandra says
Hi Amber! Thank you for this great project! Could I use extra firm fusible interfacing in place of the felt? Thanks again!
Amber says
Yes you could.
Sheri says
Can this bag fit coloring books?
Amber says
Yes, it should!
Debbie Sis says
Thanks for the great idea and tutorial. I used quilted fabric for the main piece for the carrier and machine embroidered a crayon design on the front. Then used crayon print cotton fabric for the inside pocket that holds crayons. It was fun to make and give as a gift.
Adri says
I’ve shared this page on my blog hope that’s ok 🙂
Adri says
thanks so much for the great tutorial. I used this to make my nieces some for Christmas last year and they liked them a lot 🙂
Alison says
Hi Amber. I love this! Do you give permission for it to be sold online in small quantities?
Amber says
Yep!
Mommy to M,C&S says
Hi. I’m making two of these for my younger kids and I am wondering if there are washable. Or do they need to be wiped clean. I’m using cotton materials for everything and felt for the batting.
Wonderful idea! Thanks so much for the great tutorial!
Amber says
They are washable
Tricia Gonzalez-Heimbigner says
Hi Amber, Love this tutorial on the color crayon totes. But I am having difficulty printing the instructions. It keeps say cannot print due to internal issue with the tutorial. Can you please tell me where else I might find it to print. Would greatly appreciated the help. Tricia
Amber says
Sorry! I didn’t make it printable. That’s probably why.
Chrissy says
BTW, if you have a video of how to make this, it would be super helpful! Thanks.
Chrissy says
Have a hard time following the instructions, after the straps it talks about the 14 1/2 x 22 1/2 piece then the pocket then it says “take this piece of fabric you just sewed and fold it in half with right sides together…” so it seems like a step was skipped because I was never told to sew anything. Was I supposed to sew the main body piece or the pocket piece?
Amber says
You’re right! It should have said CUT not sewed. I just changed it. Thanks for the heads up. I meant fold the piece that will be your pocket for crayons in half with right sides together and sew it together.
Chrissy says
Sew it how? A border all the way around? Just the sides and top? With what seam allowance,? I sewed it how I thought and it came out too short, so now I have to take the stitches out and redo it.
Amber says
You can see in the instructions for this I explain-sew JUST the long edge of that piece. I don’t worry about seam allowances but usually leave a 1/2 inch seam.
Darth Straw says
Love your website. I don’t have children yet but lots of little friends!! So many cute ideas and very adorable!! Keep up the good work!! Question about the felt. I have come across a lot of different kinds of felt. I am familiar with felt but not enough to know what kind of felt is safe for projects like this or for quilting. Can you give me any tips of what to stay away from and which types that are better quality?
Thanks so much
Darth Straw
Amber says
You know, since I wrote this I have changed my mind. I would recommend using fusible fleece instead of felt. It’s way better to work with!
Littleelvismonkey says
Thanks for a great tute! Really pleased how mine turned out! Made one for my craft-loving nephew’s 5th birthday – hopefully it’ll be a big hit!
Joy says
Thanks so much for sharing this awesome project. My 4YO son decided he wanted to help me make one for his little sister’s birthday next week and we gt it finished in just a few hours, and it turned out wonderfully. Thanks!
Amber says
Oh that’s so sweet of him!
JulieCC says
I just made this but there are a few steps and info missing. You don’t mention seam allowances, so I winged it. You also forgot about sewing the bottoms of the crayon/pencil and book pockets. Thankfully I realized that and did so before I stitched it altogether.
I used fusible fleece which was helpful. I also basted in the handles (you don’t mention how far apart to place them) and the ribbon I used instead of Velcro. Also, it really helps to trim the corners and the seam allowances (especially the felt/batting/fleece) before turning out.
Here’s mine:
http://pinterest.com/pin/192528952792707528/
Amber says
Sorry, I am not a big details person and I don’t worry about things like seam allowances. 🙂 I know, not the best practice. Yours turned out cute.
Medbie says
This is adorable! I wish I sewed better so that I could make this! This is my favorite thing on your blog so far! =D
Monique says
I love this carrier. I’m making one for my niece as a gift and I’m sure I will be making more. Thanks for the great tutorial.
Lynnette says
Thanks for this! Instructions we’re easy to follow. I used leftover pieces of fabric I had from other projects to try it out. Only took a couple of hours – I’m not a great sewer! Now I’m going to make a few more for Christmas gifts for my daughter’s friends! Love it!
Amber says
Good to hear!
Leigh Ann says
Thanks so much for this!
Abbey says
I think this is pretty cool! Your instructions seem very well organized and simple. And now I believe I have found inspiration for Christmas gifts for my god children!! Only need to find the time.
Charlene@A Pinch of Joy says
Very cute — and useful! Like the idea of being able to corral the crayons in the pocket instead of a box that dumps out at the most inoppurtune time! Thanks so much for sharing on Busy Monday!
Sara - My Merry Messy Life says
Love this, Amber! And such a great tutorial with gorgeous pics to go along with it. Thanks for sharing at Hookin On Hump Day!
Erica Deuel says
I love this!!! I’ll def be making some! Thank you!!!
Mel says
very cute! My babies would love one stopping by from keep calm and link up
Pam Fields says
What a terrific tutorial. I am pinning for future stitching for gifts. I love getting this before Christmas. 🙂 I saw your link Little Becky Homecky.
Denise says
Very cute! Is the felt being used like batting?
Thank you!
Amber says
Yes, just to give it some thickness. Really you could use batting or lining if you preferred.
Kris says
I found problems with this pattern. Once I put the crayons in the slots, sewn as directed, the sides bunched up. Seems no space was allowed for this…..very disappointing.
Jill @ Create.Craft.Love. says
This would make a great Christmas present!! Cute!!