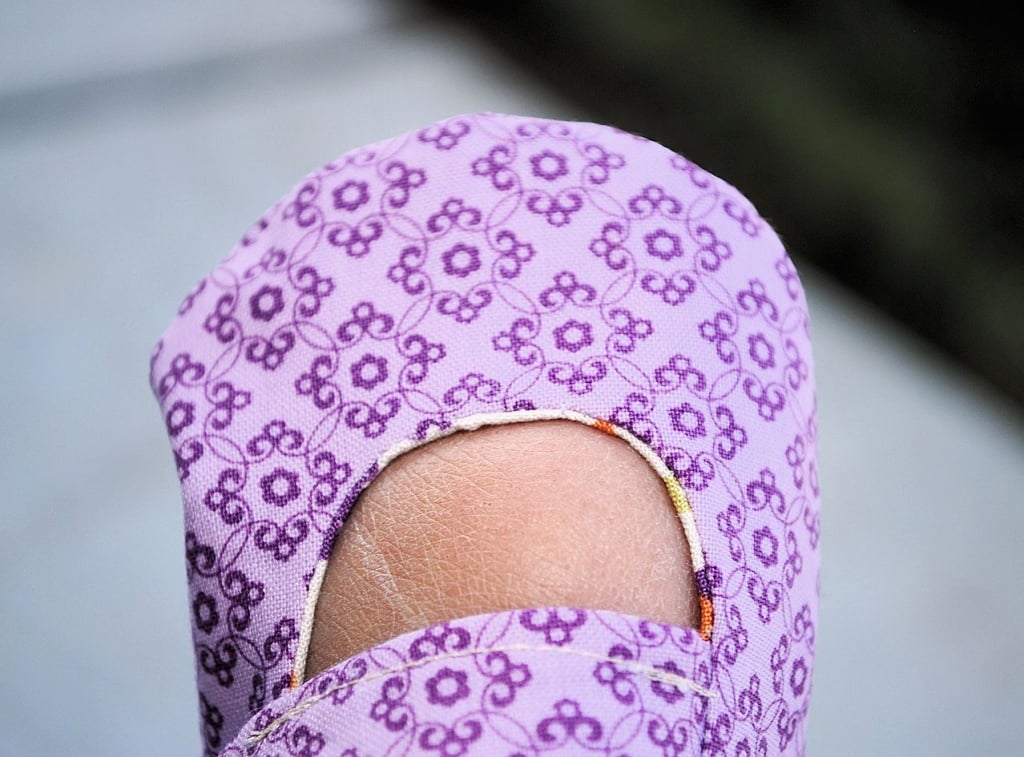
What adorable little baby girl dress is complete without a pair of matching Mary Jane baby style shoes? Plus, these are just so much fun to make!
When I first sewed a pair of these little baby shoes I couldn’t get them out of my mind and even dreamed about them all night. They are just too cute. I gotta say though, they are so tiny that they can be a little tricky to sew.
When I tried them on my 15 month old (ahem!) little BOY (hey, someone’s gotta model them right?) he fell in love too and didn’t want to take them off. Silly boy. Guess I need to come up with a little boy shoe that I can make for him.
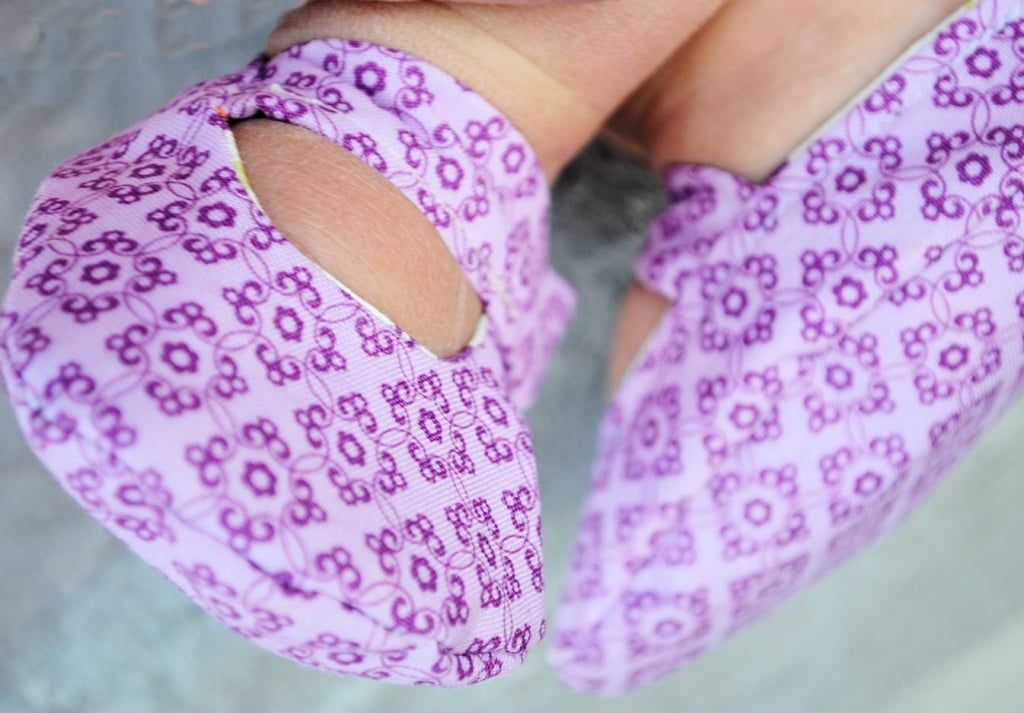
I used a pattern to make these but tweaked it and created my own version which I will now give to you.
Want to make a pair for your little darling?
What You Need:
2 coordinating fabrics (small amount of both)
Fusible interfacing-very lightweight
Small pieces of Velcro
Mary Jane Baby Shoes Pattern Pieces: 0-6 months or 6-12 months
Mary Jane Baby Girl Shoes Pattern Tutorial:
Using the pattern pieces above, cut out your pieces.
You will want to cut 2 U shapes and 2 soles from your main fabric and 2 U shapes and 2 soles from your accent. Also, 2 U shapes and 2 soles from the iron on lining. Also cut 2 straps from the main fabric and the lining.
The first step is to iron the lining to the back of your main fabric on all of the pieces.
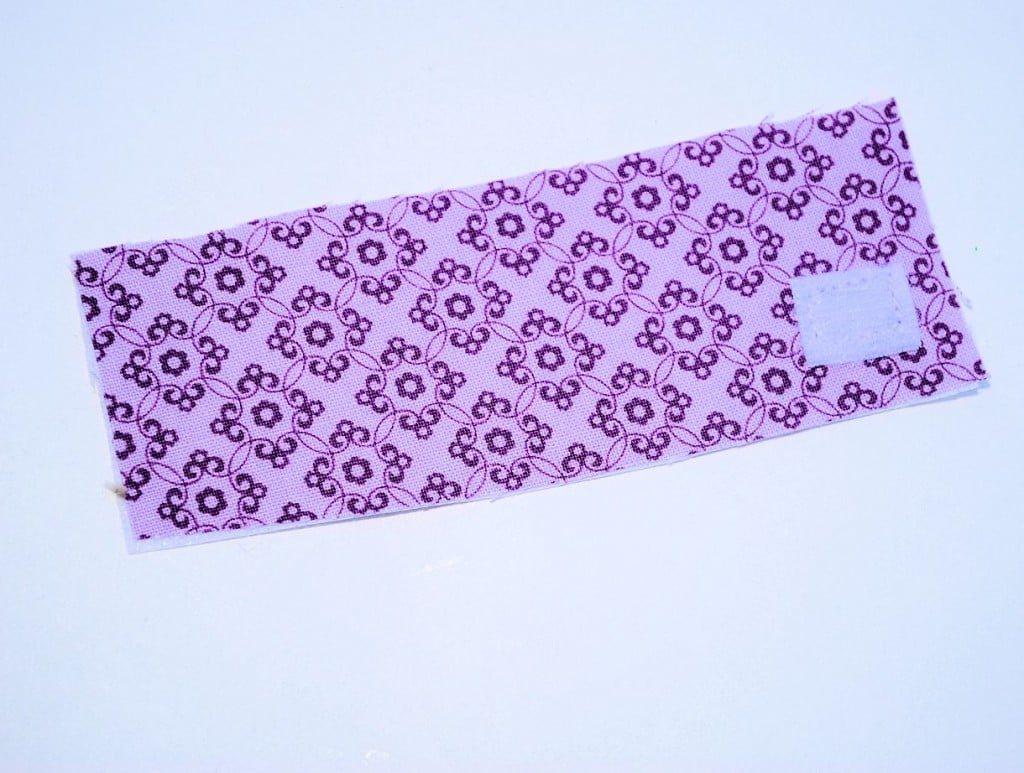
Then, we are going start by making the straps. Place one small piece of velcro on one end of the strap, close to the edge:
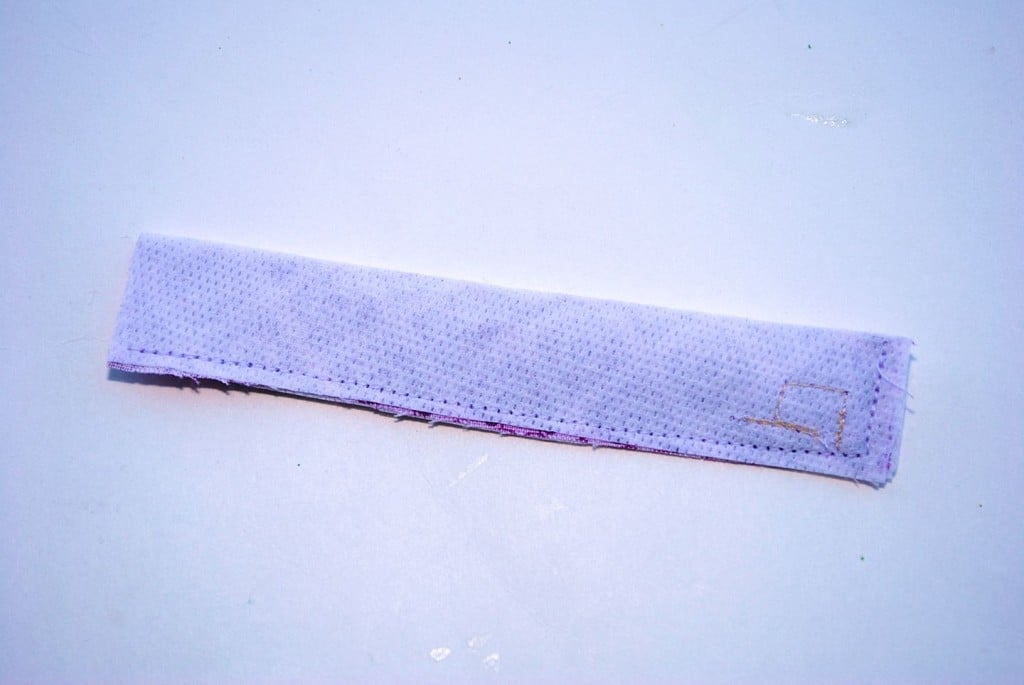
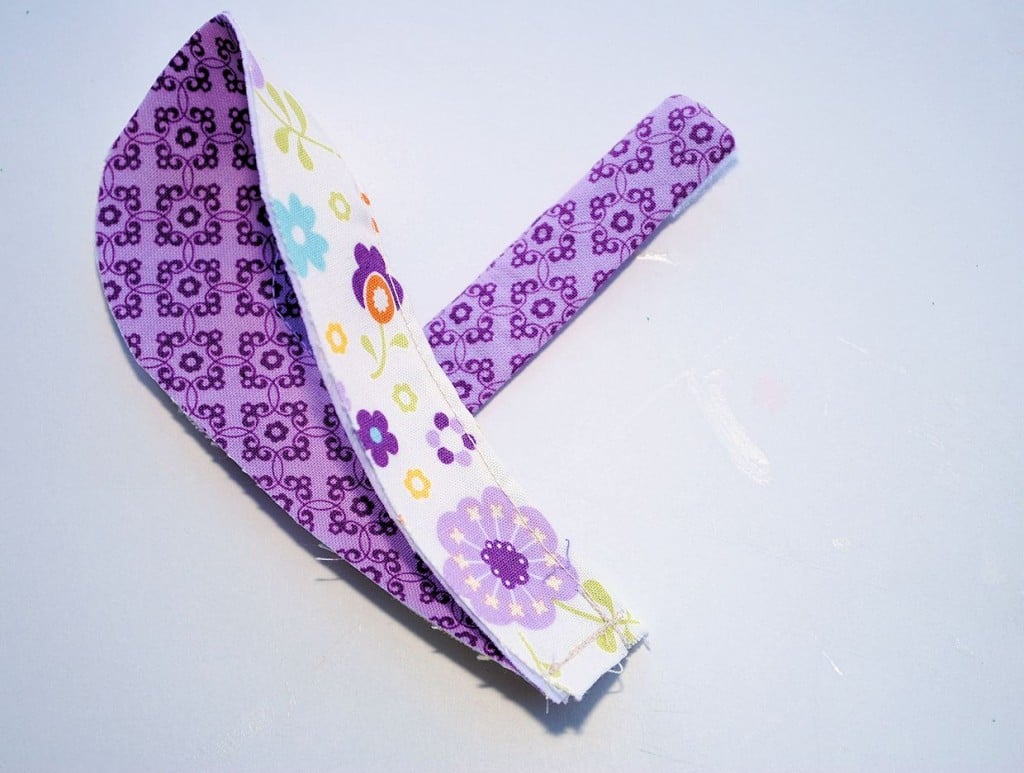
Sew the Velcro in place. Then fold the strap in half with right sides touching and sew down the short end near the velcro and then down the long side:
Turn the strap right side out (I am telling you, this will be the hardest part of making this shoe because that little bugger is so tiny. It’s hard to turn!) and press it nice and flat. Do this with both straps.
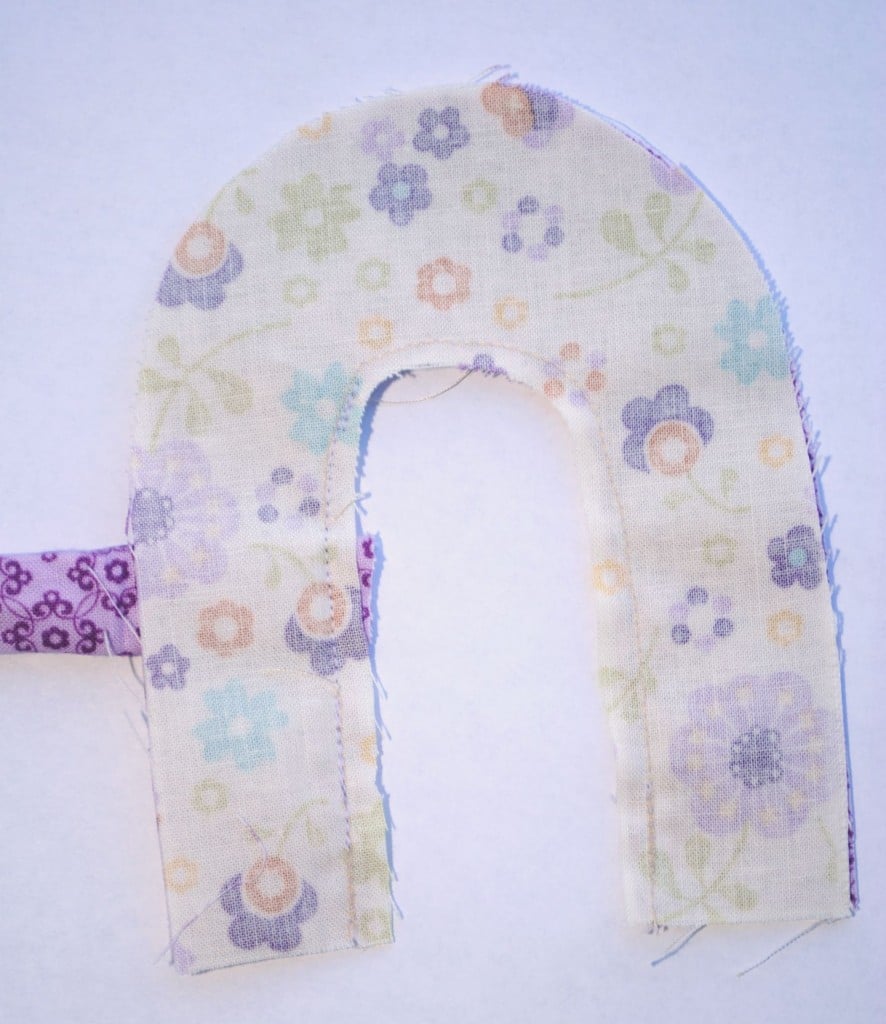
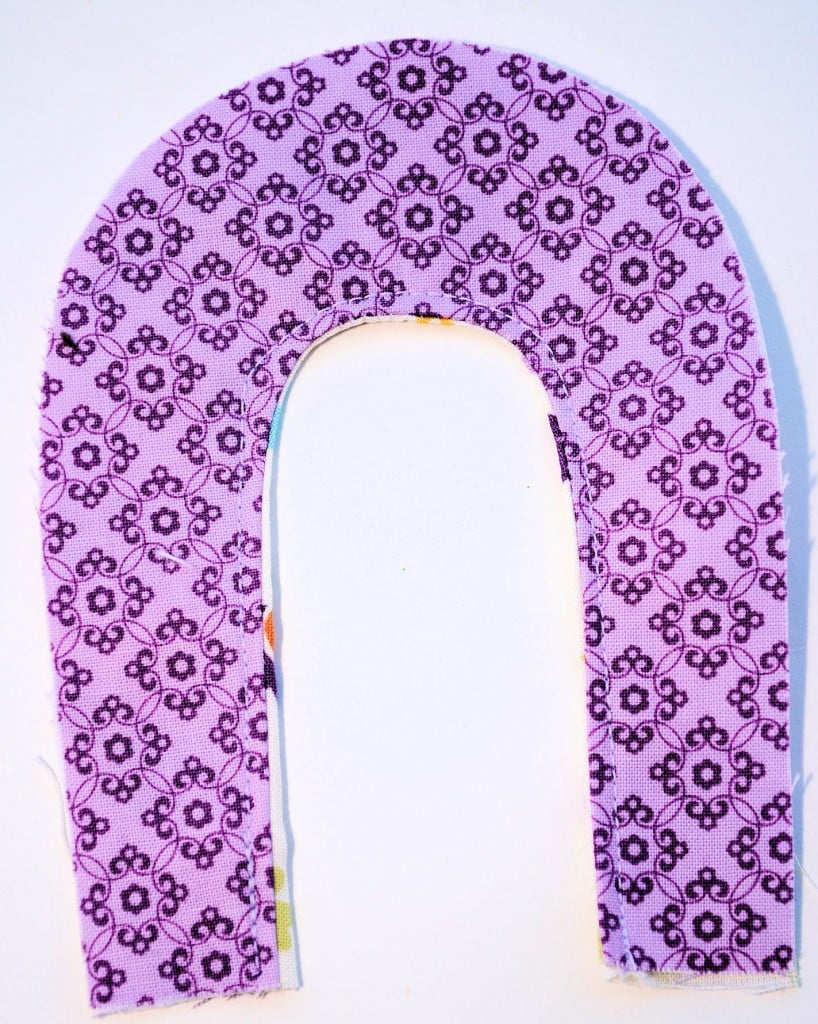
With your U shapes, take 1 of each fabric and place them with right sides together. Insert the strap into the U like this:
And sew around the inner part of the U.
Now, turn your fabric right side out and press it very smooth and flat (you’ll have to fight with the fabric a little to get it all to lay really smooth). And…yours should have the strap sticking out. Totally forgot to sew the strap in place on this one. Had to go back and do it.
Now, top stitch around the inside of the U.
Next, pull the right sides together at the back of the shoes and sew:
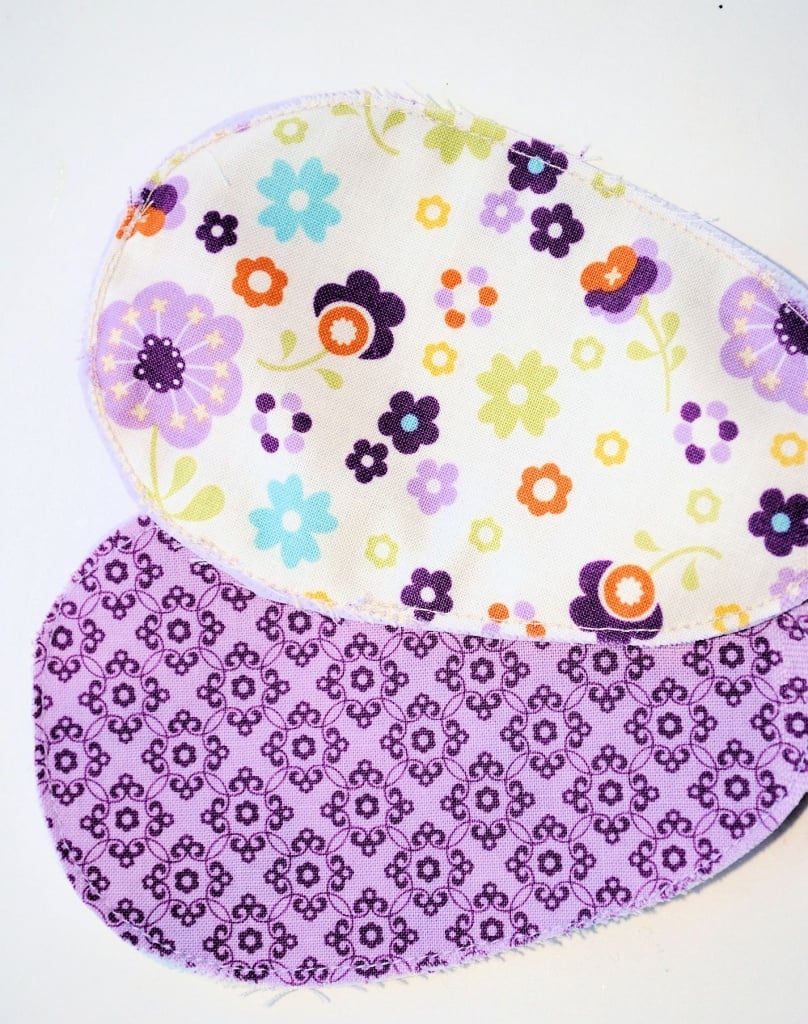
Sew your soles around the very edge so that the main fabric shows on the top and the coordinating on the bottom (with lining ironed on in between). This will just keep the soles together while you work with them.
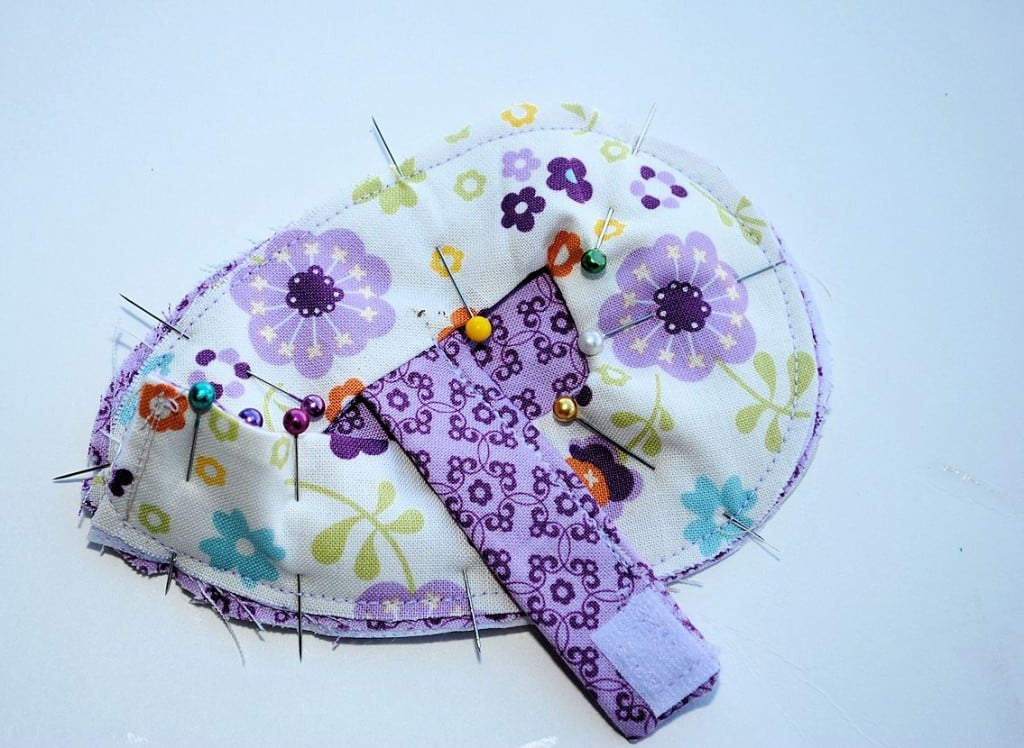
Now grab your top part of the shoe (the U piece) and pin it to the sole with right sides together:
Sew all the way around the shoe. Watch out-those pins are SHARP! I always stab myself doing this. Always. Maybe you will have better luck.
Now, turn the whole thing right side out and all that is left to do is sew your other piece of Velcro in place on the outside.
Adorable yes?
Don’t you just want to kiss that little foot? Love it. Don’t forget to make a matching dress.
This post was originally posted at The Ribbon Retreat.




Tricia Hubert says
I’ve found that when you are trying to turn the straps right side out, once you have gotten the end turned a bit, use a chopstick with a blunt end to first push some of the fabric up into the turned part and then push up and twist the chopstick with one hand, while pulling down the turned fabric with the other hand.
CheriAnn says
Thank you so much!!! You have a way of teaching that Is find very easy to understand!! I appreciate you taking the time to share & teach👻 Your an awesome person!!!!
Amber says
Thank you! 🙂
Elaine says
This pattern is adorable! I’m trying today! I’ve made tones of bibs for my expected granddaughter & this would be an added bonus! I hope it goes well.
Catherine L Halliday says
Hi thank you for your very detailed tutorial and great pictures, I have some baby shoe patterns, buts I’m really grateful for this. I don’t know if this will help others as I’m more of a knitter than sewer but here goes, knitting pattern baby feet measurement, only the length I’m afraid, new born 2 1/2″. birth to 3 months 3″. 3to 6 months 4 I/2″. 6 to 9 months 5 to 5 1/2″. and don’t forget you can always measure the length and width .
On the subject of the shoe strap, you can buy on Amazon folding elastic, its really soft comes lots of colours and its about 1/2″ wide, you can use this instead, and the problem one or two are having with the back seam if they just add an extra 1/4″ to the length on each side, this will give a 1/4″ extra on the seam, iron the seam open and press flat and sew a piece of the elastic or bias tape on the inside only.
I would just like to say if people are not happy with your very time consuming efforts they don’t have to look, and I might add keep there comments to themselves.
Kind regards Catherine. UK
Amber says
Thanks for your help!
AM says
Hardest thing I have sewn so far!
Terina says
The straps are not near the size they look in the picture or same shape? Also the step right after that does not make sense at all. You say sew the inner u then you say turn it right side out and so the inside…for one I cant turn it right side out and I just did the inner u….so I am really confused. It looks like both pictures our the inside part of the u also just one is wrong side one is right side.
Terina says
I meant sew on the so lol and the last part where I say the right and wrong side in the pictures both look like you sewed the inner u the smaller part of the u.
Amber says
Yes, you sew the inner U and then get them both facing right side out. It’s tricky and you will need your iron to help get everything laying right.
Roberta says
Several of the relies wanted to know about the seam allowance. You said 1/2 inch but still did not tell them if it needed to be added to the pattern or if it is already in the pattern.
Amber says
Already in the pattern.
Brittany says
What are the measurements for these? I want to make them for my newborn.
Amber says
There is a pattern to print.
Sydney says
Cool but one question what would the size be for a 12 year old
Amber says
I don’t think you would make these for a 12 year old. They are soft baby shoes.
hazel says
Hi Amber, this tutorial so so easy, can’t wait to do my first pair for my grandbaby, she has long , narrow feet and everything so far just fall off , these should stay on!, thanks!
Sachie says
I couldn’ get the straps to cooperate. Turning it inside out… yeah… di not happen for me.
Amber says
The other option is to use ribbon for the straps so you don’t have to turn them.
Amanda says
Though I haven’t tried it with velcro yet.. I found it easy to just skip it. Instead, I turned it inside out and added a button hole to the strap. Then I just sewed a cute button onto the shoe. Maybe that’ll be easier to start with.
Louise says
Hi Amber, thank you for taking the time to make such an awesome tutorial! It’s my first time making baby clothes and they are so cute and small! Are the seam allowances included in the pattern or should I add my own before I cut them out?
Amber says
1/2 inch
Jan says
So, does the seam allowance need to be added? I just started to make a pair today. I don’t know any babies for test subjects.
You can avoid the open seam at the heel, by, once sewing the inner lining to the upper, by ironing this seam as flat as you can at the heel and then joining both sides of the upper together and sewing across, being careful to match up the seam line between lining and upper as close as possible.
Iru says
Hi, I’m new to making baby shoes. I noticed how nice and smooth your shoes are but mine has always turned very wonky and not so smooth. Please let me know how I can improve and make beautiful shoes such as yours.
Amber says
Iron as much as possible
Amber says
Hi.. I just came across your little shoes and would love to make for my 4 month old little girl. I am trying to pull up the link but all it gives me is a blank page. Is there another way to get the pattern. Thank you.
Amber says
Are you on a computer? It’s a pdf file so you will need to be able to open one of those
Sheena says
The Pattern of 6-12 months did not fit to my baby’s foot .. please help. 🙁 thanks
Amber says
Too big or too small?
Sheena says
The pattern of 6-12months doesn’t fit to my lil girl..My lil girl age is 11 months .. but still thank you for the Free pattern.
Amber says
Too big or too small?
dolores says
hi there ,
im irish and love little project to do, just had my first grandaughter, and would love to know how to make some things like this for her,
just wondering how to get pattern s for some of you stuff, would be very grateful if you could help im new on pinterest, so im only starting to follow some, ,
Your sincerely dolores
Amber says
The pattern for this one is listed up above. You click a link and it will open as a pdf.
debbie reynolds says
thank you for the pattern; i made a pair to match the dress and they are so adorable. instead of using a strap with velcro, i used rounded elastic, just enough to attach the sides. email me if you want a picture and put “Liberty’s Dress” in the subject area. thanks again!
kathleen babbitt says
I need to make these little shoes soon! they are so cute!
Katie says
Awe, those are so cute! Thanks for posting them.
Connie says
Hi Amber, These are so adorable thanks for sharing. I’m added you as a g+ friend and I’m following on Pinterest. Thanks for sharing.
Connie says
Hi Amber, I just popped over from 733, where I saw these adorable shoes. So cute. My Son is expecting in April, that gives me plenty of time to work on the project.
I added you as a g+ friend and I’m following on pinterest. Thanks and Happy New Year.
Cherry says
Amber why do the straps look so much longer in the pictures? The strap on the pattern sheet looks so short.
Amber says
They’re just a couple inches long…pretty tiny.
Cherry says
I finally got one shoe made and I see what you mean. They are the right length, the shoe is so tiny. I have to figure out another way to make the straps. The little strap that you have to turn inside out is impossible to do. I am thinking about using some kind of ribbon. They are really cute. Thanks for sharing your pattern
Marie Danneels says
Thank you su much for your patterns and the tutorial. I am very happy with it.
Terri says
EASIEST TUTORIAL EVER!!!!!
mitfam says
You know, I have to congratulate you and thank you for taking the time and the care to SHARE this pattern FOR FREE!! I am at this moment “sewing and crafting” my own “designs” and I think I can appreciate just how much effort goes into sewing and unpicking and pinning and trimming and tweaking AND then you take photographs and explain everything and post the successful end results for us all, “gratis” These delicious little shoes are far from being just “so so” and your “how to” was indicitive I think of your warm, fun and sharing character. So I applaud you and want you to know that I totally appreciate your gift to me. Thank you.
Amber says
You know what? This means a lot. Sewing tutorials are a ton of work, so to have a reader really appreciate it and say thanks means a lot.
Renita Merkson says
Hi Amber,
I was wondering do you cut the strap on the fold it seems so short. I’ve cut out the pattern pieces but don’t want to start until I find out about the strap. Amber you rock!!! these are beautiful for a beautiful baby girl…
Thanks
Amber says
Did you print at 100%? It should be the correct size if you did.
Stacey says
I looove these shoes i’ve made a few pairs, but i would like to point out that the “newborn” size isn’t just tiny its more like Doll size. my finished pair are maybe 2″ long, or maybe my babies just have big feet :S thanks for the free tutorial deffinately going to keep making these (just a itte bigger)
Amber says
Be sure that you printed the pattern at 100% size. I have made them and put them on baby feet so they definitely are sized right as long as you print it right.
Barbara says
Shoes are very cute but you fail to mention when attaching the strap, whether the Velcro should be up or down! Had to tear that seam out because mine were facing the wrong way! Also, I had to widen the strap pattern considerably to accommodate for Velcro & seam and to be able to turn!!
Also, very important, that back seam that you say to “just sew “to hold back together while attaching the top part of shoe, you forgot to mention that seam is VERY IMPORTANT because if not matched up correctly with rest of shoe, the whole thing is a bust!!!! There should be a seam width mentioned so the top of shoe will fit correctly to bottom of shoe. This is one of those “learn as you go” tutorials. But I got thru it and the shoe is just so so!!
Becky S. says
Thanks!!! OMG are soo adorable!! i have a new born boy and he have some problems whit her fit, so he can´t use a regaluar shoe i love these!! thanks for share your pattern!
Tamra says
these are so cute expecting my second grandchild, its a girl would love to make these to match her coming home outfit . Stupid question am not sure but what iron on lining is, Look it up at joann cloth store and nothing comes up. Please help big day is coming soon, not much time left.
Amber says
That should be fusible interfacing. I need to change the wording. Sorry!!
SaraBeth says
These are super cute. I think if you made them in a blue or red your little boy could totally pull them off.
Sarabeth
Life of an Agnostic Sunday School Teacher
Kayla says
Ilove these shoes. I’m a mommy of a new little beautiful girl. I don’t have a sewing machine. Any tips on sewing these by hand. I’ve recently become DIY crazy!THANKS!
Amber says
I guess you’d just do the same thing, it will just be more slow going. Luckily they aren’t huge though so they won’t take too long!
Debbie says
Just made my first shoe!! It turned out so CUTE!! Thanks for the tutorial!
Question is the inside of the shoe supposed to have the raw edge showing?
Or should it be a seam? Did I sew it incorrectly? Thanks!!
Amber says
No, it’s a raw seam. You have it right. I wish there was a way to do it without that seam but there’s no practical way to avoid it.
Kristin says
I LOVE this tutorial! Easy to follow. I made the mistake of making two left feet also! It helps to make a practice pair first. Anyway, trouble I’m having is the 6-12 months size is too small for my 8 month old. I’m enlarging by 15% so hopefully that will be good enough, but I’m just wondering if you already have larger patterns for bigger sizes? I’d hate to make a whole 2nd pair and have it still not fit. Baby’s foot fits inside the 115%, but barely. 120% looks too big. Just not sure. Any help you can give would be great! Thanks Again – I love your projects. 🙂
Amber says
I haven’t made it any larger because I didn’t figure that kids over 12 months were likely to wear this, but sizing it up is probably a good idea.
Emily Jones says
Holy moly, you were not kidding about the straps being the hardest part! I found that using a chopstick and a pair of tweezers, very carefully, helped a little. Your tutorial was so easy to follow. Thank you so much for sharing! I just started sewing about a month ago. I have a baby girl due in about 2 months and I wish I had more time to make more baby things! I just finished the shoes and now I’m starting on the matching dress. Thanks again. I love all the projects you have posted!
-Emily
Allyssa says
How do you know how big to make the U? My daughter is 5 months and wearing a size 1
Amber says
I have the pattern on there for you. 🙂
jasmine says
Very cute and easy one I will stitch it for my baby
sandra says
It must be me because nobody else has mentioned it. But the first part where the strap has just been sewn on and we’ve turned put fabrics back to back and sewn round the inner part of the ‘U’……….it says turn in the right way and press………….HOW can we turn it in the right way when the centre of the U is sewn………..its not possible??
Amber says
It is possible you just have to maneuver it very carefully. It should just be a U shape, you haven’t done anything more than that have you? You just have to work with the fabric and press a little as you go and soon it will work!
sandra says
Hi, thanks for your reply……..it was ME lol. After spending hours on it and even asking hubby if he could turn it (he could’nt either), then i went onto my craft site and consulted members for ages lol, i was adamant it couldn’t be done once the centre of the ‘U’ had been sewn together…………in the end someone did me a video showing me how to do it…………if somebody had of just said that i had to turn the ‘legs’ upwards, then i would’ve probably got it lol………..
Terina says
I need to see the video obviously! I am stuck now :/ again. Those straps had me stuck first for 2 days and I made a million of them.
Heather says
Where do you get iron on lining? I could only find interfacing.
Amber says
Uh sorry. Bad wording on my part. Interfacing is what I mean. 🙂
Sam says
Thanks for sharing this pattern. These shoes are great and the pics make it easy to follow.
amanda says
these are great! i just made two pair for my friend who’s expecting a baby.
one little tip: make sure you put the strap on the opposite side for the second shoe. the first time i made these, i accidentally made two identical shoes – both with a strap on the left side. just wanted to spare someone else the same mistake 🙂
otherwise, this was a very useful tutorial and an easy project – even for a beginner like me 🙂
thanks so much for this post!!!
Amber says
I’ve made that mistake before too. 🙂
Becky says
I just learned this recently and it’s changed my life…take a piece of yarn or a skinny strip of fabric and sew it into the casing. Sew one end shut first, being sure to sew over the yarn, then sew along the side, yarn tucked inside,making sure you don’t sew over the yarn again. When you get finished sewing the side, hold onto the yarn sticking out of the unsewn side and push the fabric over the yarn until you get it completely right side out. If you are making a casing that doesn’t need to be sewn shut, just cut off the entire end where the yarn was sewn in (so you need to accommodate for cutting this when cutting out your fabric & add an extra 1/2 in or so). If you do need it sewn shut, like for these adorable little shoes, just snip off the yarn that is sticking out, getting as close to the fabric as possible without cutting it. If you use a yarn that coordinates with your fabric it won’t even be noticeable. Hope that makes sense! Love, love, love this pattern by the way and many other things on your site!! 🙂
Amber says
Ohhhhhh! That sounds amazing. I am going to try it and may have to show my readers! Thank you.
Rachel says
Great idea! I started making Bow Ties for my little guy, and it requires a lot of turning of little pieces. Going to try this next time… so long as I remember haha!
Jen says
Thanks for this cute tutorial. Have you ever added any elastic in the back? If so, how did you do it? Also, have you made any bigger sizes yet?
Thanks!
Amber says
No and No but I should!!!
Rachel says
I’m going to try making a bigger size. Wish me luck!
Amber says
Let me know how it goes!
Rachel says
I cut the fabric. I bought HeatnBond in medium and ultrahold – which should I use? Thanks!
Amber says
Either one probably is fine.
Rachel says
I’m almost finished – I just have to sew the top to the bottom – and I noticed that you top-stitched the straps… I missed that step… the strap are already sewn into the tops, though. Oops!
Amanda says
I’m fairly new to sewing, I’ve only tackled pillows and tote bags before but these were so easy. Of course the hardest part were the straps so in my frustration I scapped the straps and used elastic. I tacked little red flowers on each side of the elastic and they turned out super cute! I made the first pair a bit too small so they went to my newborn niece but my second pair fit perfect for my 4 month old. Your tutorial was excellent! I would have never been able to make these with a store bought pattern. My daughter & neice are little fashionistas now and everyone loves the shoes! Thank you so much!
Amber says
Oh glad to hear it because those little shoes can be a little tricky to sew!
AnnMarie says
Was wondering if you have a pattern to make these “slippers” for bigger girls and mommies? Thanks!
Amber says
Not yet but I will put that on my idea list.
Sue says
Hello! These look lovely and I thought I would try them out tomorrow. As there is no inch or cm scale/square to show if the pdf file is correct in size, could anyone tell me if the strap for the 6-12 size is 3″ ( apx 7½ cm)?. Some pdf patterns I have downloaded have a 1″ square that actually is more like 1 3/4″.
Hope I get an answer. Happy first advent.
Sue
Amber says
It should be true if you print it at 100%
Jenny says
Any ideas on how to enlarge the pattern to fit a toddler? She hates normal slippers but LOVES her shoes like this so I would like to try to make her a fleece pair but I am pretty sure I would mess up enlarging!
Amber says
Sorry I haven’t responded. I need to figure it out myself. Have you already tried?
Kathleen Winfrey says
I’d like to make like this for my friends baby boy. She just gave birth the other day. Thanks for sharing this! You make things easy! 🙂
Alexis @ we like to learn as we go says
Wow these are adorable! I need to make some for my 4 month old! I’m pinning this!
Marie says
Sooooo sweet!
Ashley Suzanne says
These are such a great addition to the dress!
I am coming over from a linky party and I would love for you to come over and check out my Wool Dryer Ball Tutorial!!
Have a Good Day!
Ashley Suzanne
Christine says
LOVE IT!!!!!!! Can you make me a pair? 🙂
Thanks so much for sharing this at The DIY Dreamer… From Dream To Reality!
Charlene@A Pinch of Joy says
Adorable! I’d want one to match every outfit! You do an amazing tutorial! Pinned! Thanks for sharing on Busy Monday.
jennifer says
Hey! I’m new to sewing and embroidery- just bought my 1st sewing and embroidery machine. so excited! I bought several of ‘these’ shoe patterns b/c ‘they’ say they are for beginner sewers BUT I have had so much trouble reading ‘their’ instructions- even the lady where i bought my machine said they are advanced. So GLAD I came across your tutorial. I may actually be able to make these now:) Your instructions seem much easier. At least I hope I can make them, they are so cute!
Amber says
That’s fantastic! I hope they go well. I have to say, I am an experienced sewer and these are not the easiest thing to make, so don’t get frustrated. They don’t take much fabric so you can try a few times if needed. Also, stick around! I am going to be doing a Learn To Sew Series in the New Year with prizes and tutorials each week and a huge prize/project contest at the end. Getting very excited for that!
Janelle says
If you pin with the pointy end in to the middle of the shoes, you might get fewer finger pricks!
So excited to make these for my girl–no shoes will stay on her tiny heels, even at 9 months. I think these will do the trick! Thank you!
Amber says
Aha! See, now you are smart. Next time I will try facing the pins inward.
Cynthia D St.Claire says
I was going to say the same thing pins in towards the middle instead and remove them before the needle runs over them. I love the projects!
Sara - My Merry Messy Life says
Those are precious!! Great job, Amber, with beautiful pictures and and excellent tutorial. Thanks so much for sharing at Hookin On Hump Day!
Christina @ The DIY Mommy says
Thanks for sharing this adorable tutorial!
Ginny says
Very cute. I love the main fabric with the contrast lining.
Jocelyn says
These are super cute! I have a little girl and I might try making some for her. 🙂
Jill @ Create.Craft.Love. says
Eek! Love the matching shoes! =)
nsncy says
I have bought patterns trying to make these shoes, they always seem so complicated. Yours is the best and it was FREE!
LeeAnne says
Very cute! What are the measurements for the straps? Thanks!!
Amber says
Whoops! Those are on the pattern now. 🙂
Sophie says
Hello, I love this pattern, but it still isn’t showing the strap measurement when I try and download it? Can you write it in a comment please? Many Thanks x
Amber says
The strap is on the pdf pattern?
Maria Augustine says
What is the seam allowance? Looks like 1/4 or maybe 1/8th?
Amber says
Yes, shoot for 1/4 if you can.