It’s time for another bag because you can never have too many bags right? Do you ever need just a small bag that you can throw just a few things in? Phone, keys, wallet, maybe a list or two? I am calling this my Just the Essentials bag. It’s a perfect small tote bag with a couple of zipper compartments and fits just enough:
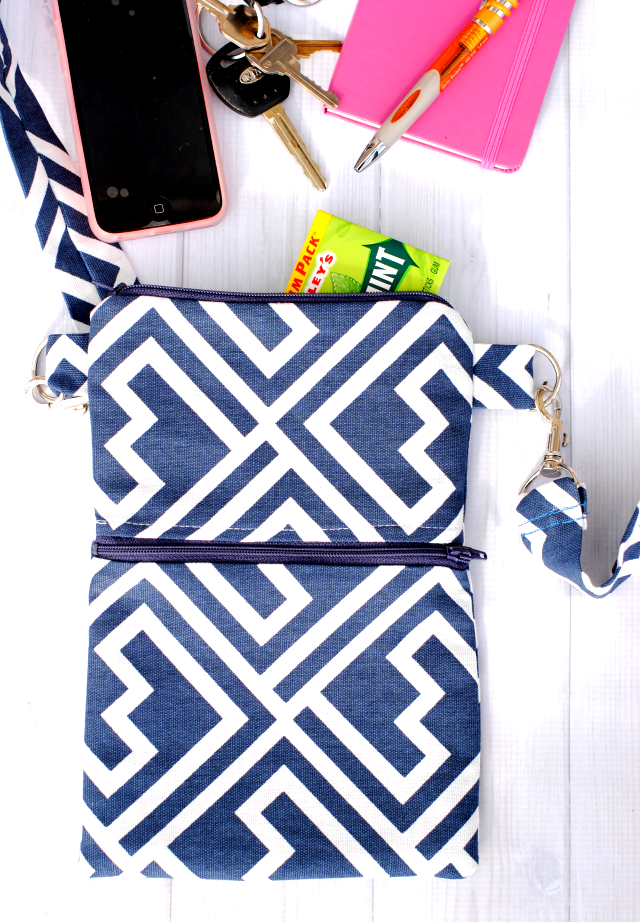
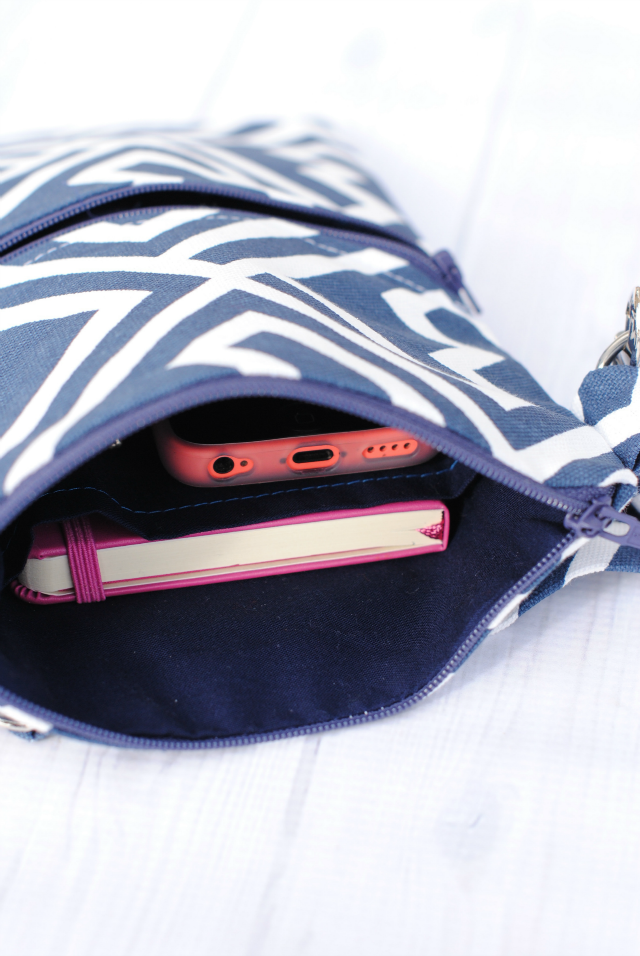
It’s got a main compartment with a pocket inside:
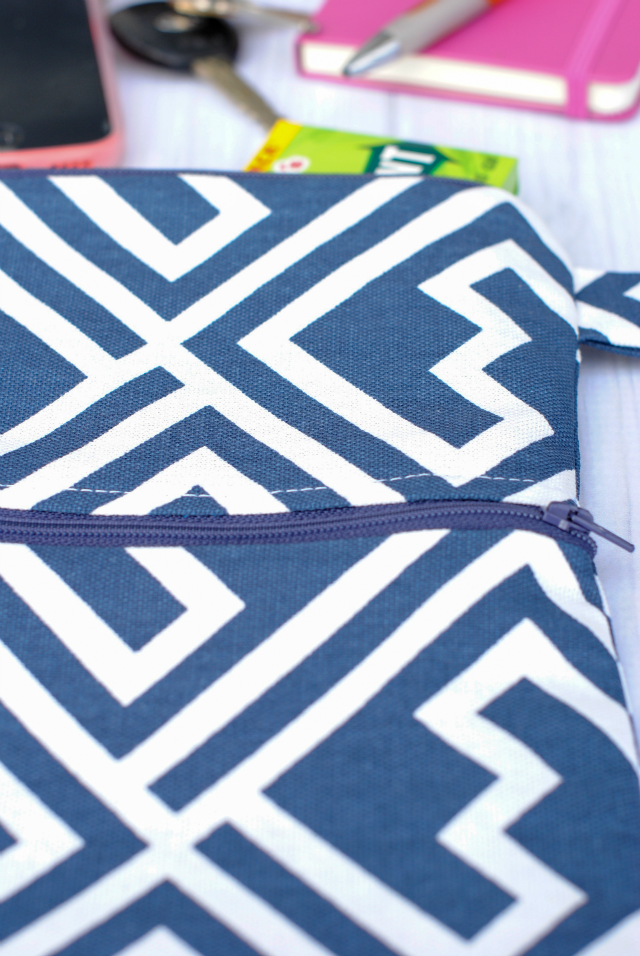
And a zipper pocket on the front as well:
Just the Essentials Small Tote Bag Pattern:
Supplies Needed:
- 1/3 yard each of two coordinating fabrics
- 2 7 inch zippers
- 2 one inch D rings
- 2 swivel hook clasps (or any type of clasp found in the hardware part of your sewing store)
From your main fabric cut:
- One 7 3/4″ by 11″ piece (this will be the main back piece on the outside)
- One 6 3/4″ by 7 3/4″ piece (bottom of pocket part)
- One 4 1/2″ by 7 3/4″ piece (top of pocket part)
- Two 4″ by 2 1/2 or 3″ pieces (for the tabs to attach strap)
- One 44″ by 3″ piece (for the strap)
From your inner fabric cut:
- Two 7 3/4″ by 11″ piece
- One 6 3/4″ by 7 3/4″ piece (referred to as lining in the instructions)
- One 4 1/2″ by 7 3/4″ piece (referred to as lining in the instructions)
- One 18″ by 7 3/4″ piece (for inner pocket)
Instructions:
Let’s make the strap first. With your long piece (44 inches by 3 inches ) fold it so that right sides are together and sew up the long side. Turn right side out and press so that the seam is on the back.
Grab your clasps. Fold the end of your strap over the clasp and tuck the end under (like a hem) and sew in place. Do this with both ends of your strap. Set the strap aside.
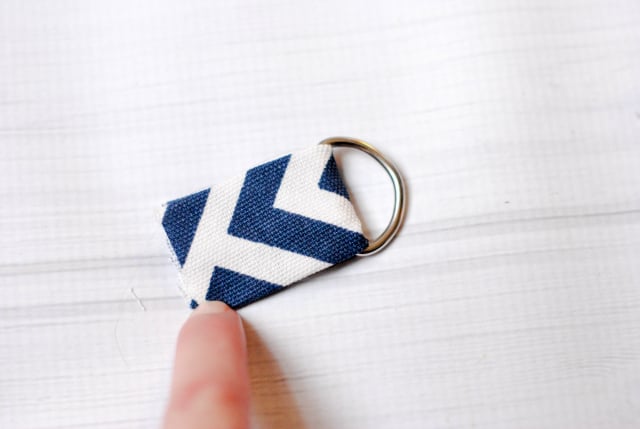
Now grab your two short and narrow pieces (4 inches by 3 inches ). Fold them with right sides together and sew up the long side and turn right side out. Press so that the seam is at the back. These will be for your D rings but you aren’t going to use them yet, so set them aside for now.
Pocket: To make an inner pocket for your bag get your piece that is 18″ by 7 3/4.” Fold it in half to make it 9″ by almost 7 3/4″ and press. Sew a straight stitch through the folded edge. Set this aside.
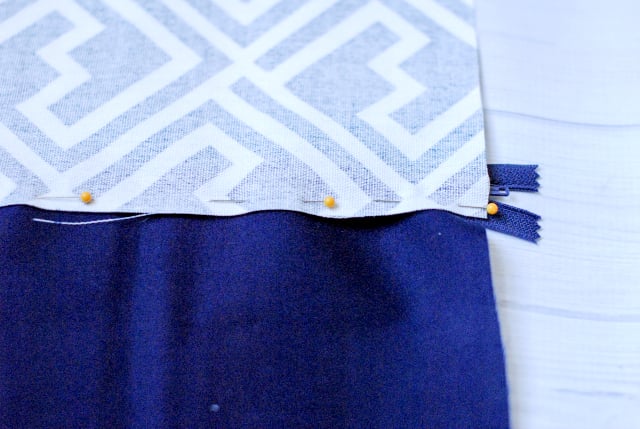
Let’s get your bag pieces that are 6 3/4 inches by 7 3/4 inches and 4 1/2 inches by 7 3/4 inches. We need to insert the middle of the bag zipper here, so get one of your zippers ready. With your lining pieces fold the top of each under about 1/2 inch and press.
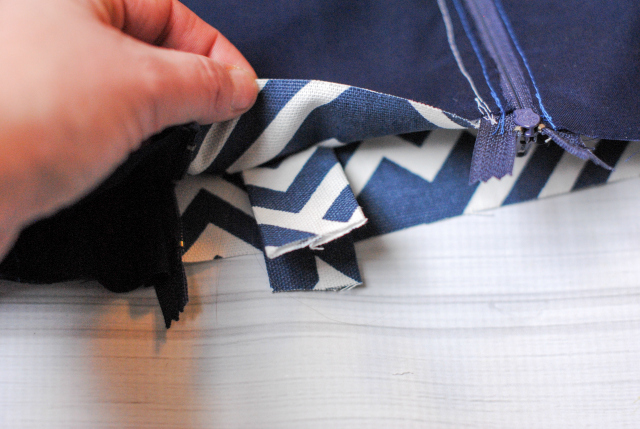
Take your larger pieces. You are going to sandwich the zipper between them (with right sides together) so that the main fabric is going up, the bottom fabric is going down and the zipper is in the middle with the right side of the zipper facing the main fabric. *The part that you just folded under and pressed needs to go along the zipper with the folded under edge facing up.
Look carefully at this image to make sure you have it lined up right:
Using your zipper foot sew along the edge of the zipper (the side of the zipper that is closer to the bottom of this picture). For this step and all zipper sewing in this tutorial, sew a little ways, then put your needle down and then slide your zipper pull out of the way and continue sewing. This will prevent you from having to sew around the pull.
Now you need to do the same thing with the other side of your zipper. Get the fabric lined up the same way and do it again. Again make sure you use the folded under edge of the lining fabric as the edge you sew on the zipper and make sure you place it so that the folded under edge is up, against the zipper.
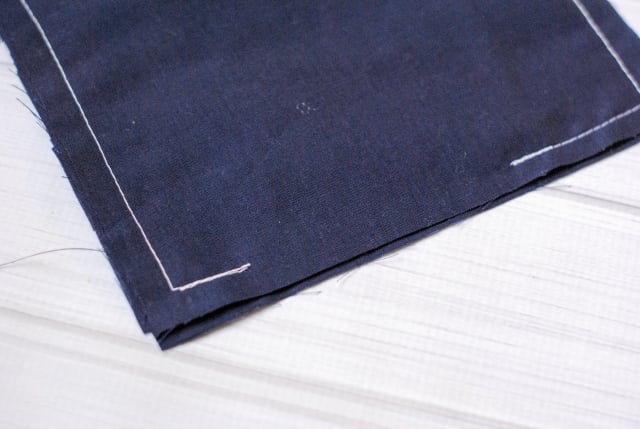
When you are finished, press it all flat and it should look like this:

Now get your other zipper ready along with your larger pieces 7 3/4 inches by 11 inches. You are going to do a similar thing to what you just did, but slightly different.
Sandwich the zipper between the two fabrics again, but this time you will have both of them on the same side of the zipper. So (look closely again at the image below), the zipper is facing up so that it faces the main fabric and the bottom fabric is under the zipper. I am now going to sew the part of the zipper that is shown in the top of this photo:
It should look like this on the other side:
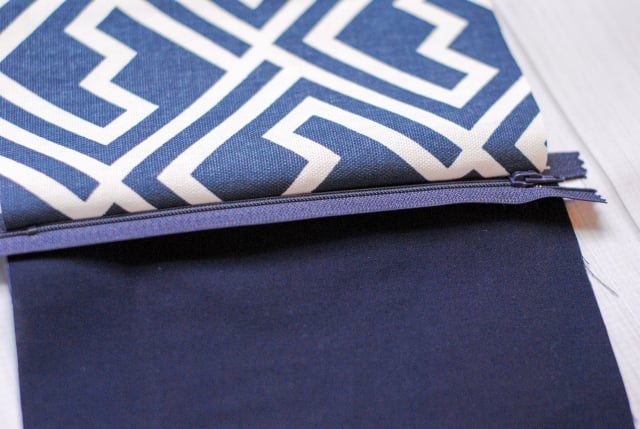
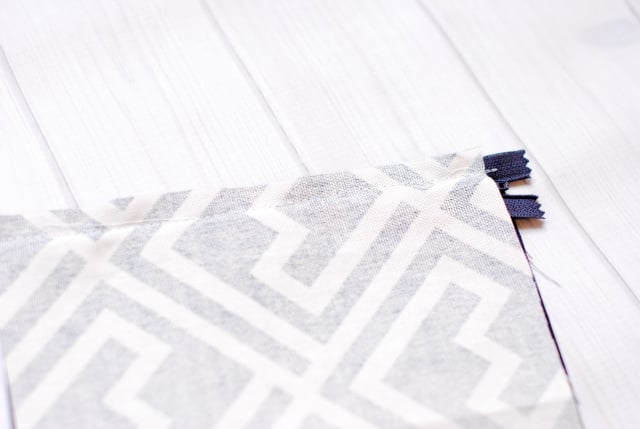
Do that to both sides of the zipper.
Now separate each side of the bag so that you have same fabrics together. So the inner fabric together and the other fabric together with right sides facing. Make sure the zipper at the top of the bag is about half way unzipped.
Place your pocket piece between your inner fabric pieces with the bottom of it flush with the bottom edges of the bag.
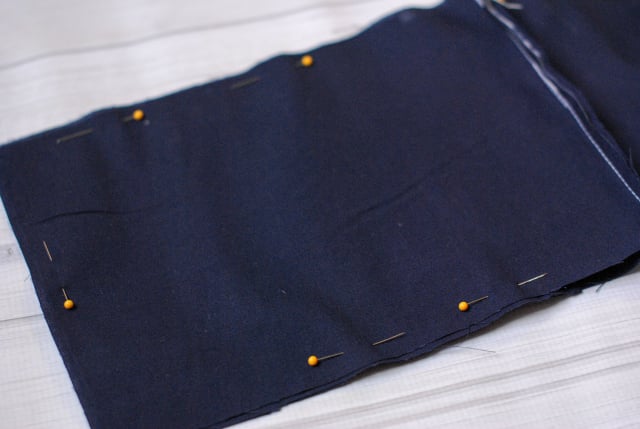
On your outer fabric you need to sandwich the little D ring straps inside right near the top like this: (so that the D rings are inside and the two ends of the strap hang out the edge and will get sewn through.
You will now sew around the outside of the bag. Leave a small opening for turning at the bottom center of your inner fabric.
Also, don’t sew through your zippers or you will break a needle. Sew right up to it, stop, knot, move your needle and begin again.
Now reach through your opening and turn the main fabric right side out. Fold the opening in the inner fabric inward and sew it closed.
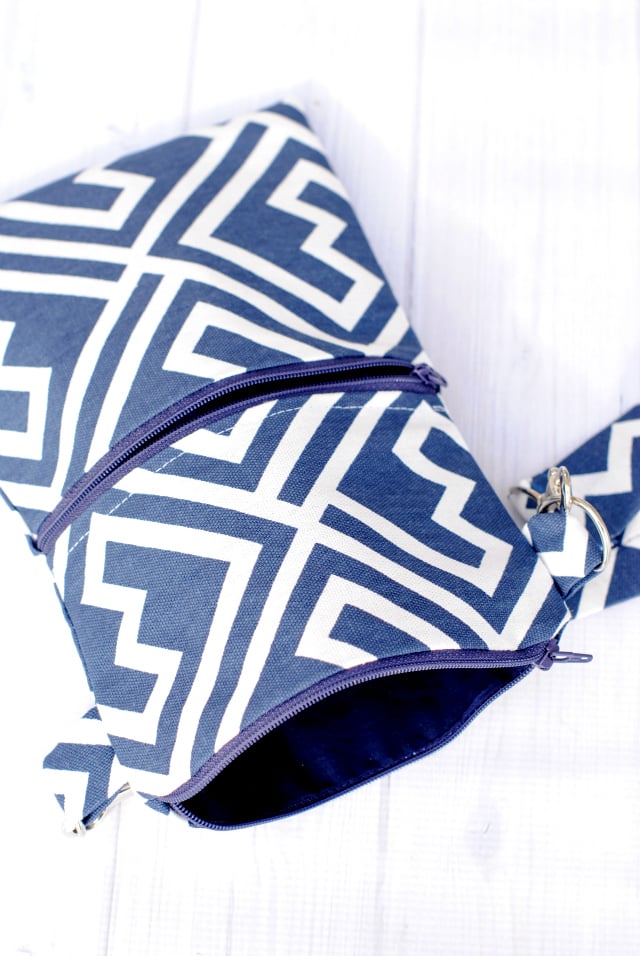
Tuck the inner part into the outer part and make sure you have everything all smooth, corners pressed out and nice.
Press flat.
Hook your strap onto your D rings and you are set.
It’s cute and fun isn’t it?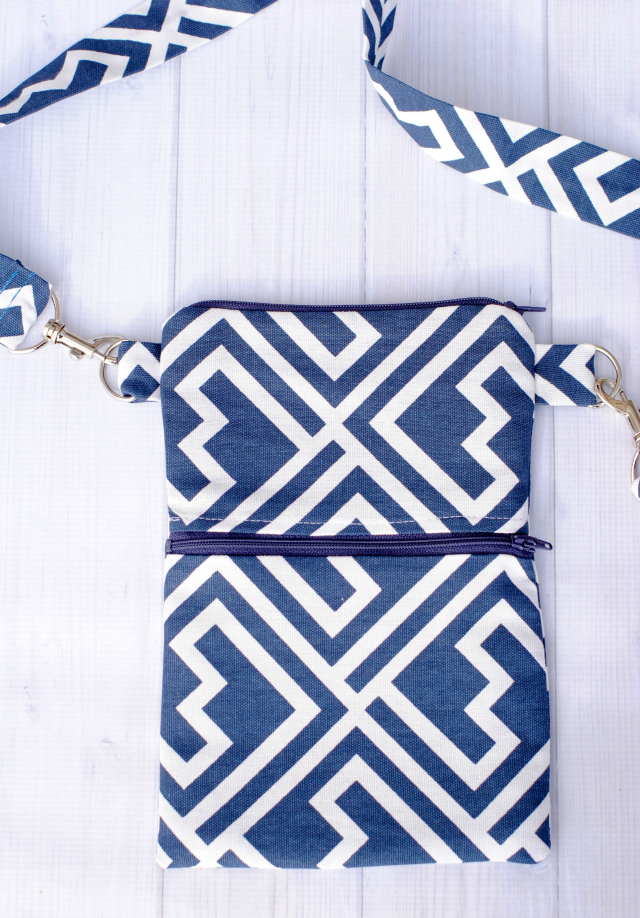
You Might Also Like:


Andrea says
Hi! Question. Do I stitch the 18″ piece together wrong or right side together. And do I stitch the raw edge or the sides? I am sorry I am quite confused. Likely of my own doing.
Niki T says
I love this little bag! So fun to make in different sizes. Thank you for the free pattern. It’s fun to make these in different sizes.
Jayne says
I wish I would have read through all the comments before I started this project. The instructions don’t make sense at all. I used to be a technical writer and know how instructions should be written – step by step with clear explanation for each component in the project. Is there a top and bottom? Changing the name of the lining/inner fabric is confusing. The zipper installation was a joke. I couldn’t tell from the pictures or the written word how it was supposed to go. I gave up on the top zipper and just put in a snap. Also my lining fabric had a right side and a wrong side. There was no help given for that scenario. It looks like the lining in the photo had no right or wrong side. My pocket turned out WRONG!
I would NOT recommend this project to a beginner or novice sewing crafter. I had to fake my way through it. It turned out OK but I wish it had taken about an hour rather than 5.
Amber says
Sorry you struggled. I’m NOT a technical writer, just someone who shares projects to readers FREE on the internet and I made this years ago so it’s hard for me to remember all the details.
Tara says
Hi! Where did you get that fabric from? I love it so much!
Amber says
I think it was from Hobby Lobby but it was years ago.
Lisa says
Wow I must say this I’m getting so confused with this pattern, I’ve made so many bags but I’m lost, I’ve just read through comments and one has stated same problem about the second zipper section ‘ now do the same on the other side’? So I’m guessing that, that is the other section we’ve just completed, I’m going to try again as I really like the style, you stated how many of each of the lining to do but not mentioned the out fabric. My next email will be to say I’ve accomplished it! 😉
Anne O'Hara says
I am so glad to read that I have not been the only one who is having trouble understanding the instructions….like this paragraph about installing the front pocket with zipper:
Take your larger pieces. You are going to sandwich the zipper between them (with right sides together) so that the main fabric is going up, the bottom fabric is going down and the zipper is in the middle with the right side of the zipper facing the main fabric. *The part that you just folded under and pressed needs to go along the zipper with the folded under edge facing up.
Look carefully at this image to make sure you have it lined up right:
Looking at the image does not help me at all. I sew lots of bags and I am baffled. When you say “main fabric” are you meaning the exterior fabric? and when you say, “bottom fabric is going down” does that mean the wrong side of fabric?
This has been very confusing. I would love some clarity so I don’t have to stitch and then tear it out to start over.
Any help will be appreciated!
Anne
Marilyn says
Anne, did you get help with this bag? I’m stuck too. It is a very cute bag and I’d love to know how to put it together!
Amber says
Sorry guys-I think I need to remake this bag. It’s been so long that I can’t remember and it’s hard to help!
Jessica je says
Mine turned out fantastic! I’m so happy with it! Thanks for the pattern & the idea!
Ava says
What level difficulty is this bag? I am a beginner and know I can’t do this yet, but like to get an idea when I might be able to because it’s so darn cute!
Amber says
This one is tricky. I’d start with the easy tote or mini messenger.
Kim says
I am an accomplished seamstress but I am having trouble understanding the front pocket directions and I think it’s just me. I have not noticed any comments about trouble with this part of the construction. Has anyone else had this problem? Amber this is such a cute pattern and I want to try it to replace a similar bag that is starting to wear out. Thank you for sharing your creativity! 🙂
McKenna says
I love this but is there any way you could make a tutorial for a mini one of these? To attach your keys to.
Jamie Rath says
Hi, Are all the measurements right now? I am thinking of using this as a project for a sewing class so just wanted to make sure before I tried it with several kids.
Lydia says
Hi, I really love your site and think on the whole your tutorials are really good. I am having some trouble though. I got the front pocket piece done and went on to the next step. I understand the first part of installing the second zipper. From there I am really confused. You mention doing the same thing to the other side, but you only have one piece that size cut from the outer fabric. Is there supposed to be two? Then, how do you get the inner pocket to line up with the lining? Finally, how and when do you attach the front pocket piece? I think I did it wrong. I am confused as to how you lined up the pieces when you attached them all together. Sorry to be a bother. Again, I really like your blog and think you do a great job.
Amber says
The do the same thing with the other side part should be with the piece that goes on the top part of the bag. You are sewing the pocket in place and the lining is totally separate. The inner pocket piece should be getting sewn in place while you are doing your zipper. Sorry-this may not make sense! It’s so hard to explain sewing through writing.
Kaeleigh says
Hi! I have just discovered your website and I love all of your tutorials! I am excited to make this but I am having trouble with how to layout the pattern pieces, I am working with a one-directional print and don’t know how to position the pieces so they will end up the right way? Thanks!
Amber says
You will need to just make sure that you have a little more fabric and cut out all of the pieces so that they are facing the same way on the fabric. Mine was directional too so you should be fine.
Avery says
How much seam allowance did you have?
Amber says
1/2 inch.
Kyla says
Hi! On the 18 x 7 3/4 part, where you say to fold it in half, then sew down the folded edge. You say it should be 9 x 4? So do we fold it in half twice? Or should it be folded to be 9 x 7 3/4?
Amber says
Man I tell you, I made a bunch of typos when I wrote this tutorial! I fixed that. It should just be 9 by 7 3/4 when folded.
Kyla says
Thank you so much! I did eventually figure it out and I am so proud of my first bag! Thanks for the pattern!
carol says
What type of fabric do you recommend for outer and linner parts of this bag. Thanks
Amber says
I used a heavier fabric-like a canvas
Mary says
Hi Amber,
I am trying to make this bag and just confused on how to make the pocket. You said in the materials for it to be 18″ by 7 3/4″ and then in the instructions you said 11″ by 7 3/4″. Also you said to fold it in half so it’s 9″ and then fold it in half again so it’s almost 4″. When I tried this the pocket is just really wide and short. So I don’t understand on how to make the pocket. I hope that you understand and that you can get back to me soon.
Amber says
Shoot-I think that 4″ was a typo. It should just be 9 by 7 3/4 once you fold it.
Lily says
Hi Amber,
I have been on your blog lately and I love it. I am totally obsessed with these bags that you have made! I am just confused on how you sew the first zipper on. I understand the second zipper but I am confused on the first zipper especially on the folded edge and how the fabrics go together. Do you think that you could explain it further, take some more pictures that you could post or send, or even a small video on it?
Thanks,
Lily
Alpha Carina says
Hi Amber,
I admire you for your creativeness. I love this bag! I hope that I can make this one, too.
By the way, what kind of sewing machine you used for this bag? Is a small portable sewing machine will do?
Thanks!
Amber says
Sure, any sewing machine should work. I use a Janome.
mona says
Hi
Don’t stop doing bags. Just LOVE it!!!!
Amber says
Deal!
Evangeline says
Hi, I had problems with this pattern… One of the zippers ended up going the opposite way. It says “now do the same thing with the other side of the zipper…” twice in the directions, but it doesn’t say which pieces/sizes to use, so I just skipped to the next step and came back to it with what pieces I had left.
Thanks for the idea, though! Other than that and having to recut a lining piece (because I was confused which zipper to sew it to) it was fun 🙂 Live and learn I guess
Robin says
I am having a rough time with the pocket details. The dimensions to not seem correct. Should it be 9″ ×7 3/4″? Then all edges would be stitched into the sides seams.
Thank you.
Amber says
Yes, sorry. I have had a heck of a time getting the right dimensions on this tutorial.
Robin says
Thank you very much. It is coming out great. I have enjoyed making a number of your bags.
S Keeler says
Where is the version c correct dimensions? Confused.
Amber says
I think I have it all fixed now. Sorry about that!
Olinda says
Hey!, LOVE the bag so cute! Can’t wait to finish it! I am just having a few issues getting lost in certain parts.
“Pocket: To make an inner pocket for your bag get your piece that is 18″ by 11.” Fold it in half to make it 9″ by 11″ and press. Sew a straight stitch through the folded edge. Set this aside.
For the pocket part. I am using 1 sided fabric so im trying to figure out if I should straight stitch with right sides together or wrong.
Now for this part I am confused by the dimensions given and also whether it is all 4 pieces from the main fabric and lining or just from the lining or main fabrics.
“Let’s get your bag pieces that are 6 and 3/4 inches by 11 inches and 4 1/2 inches by 11 inches. We need to insert the middle of the bag zipper here, so get one of your zippers ready. With your lining pieces fold the top of each under about 1/2 inch and press.”
Amber says
Gosh! I made some major typos in that! I am SO sorry! I have just gone back through and I *think* I have it all fixed. Will you let me know if you run into other problems?
Sallie says
Hi, ive just spent ages cutting out all the pieces of fabric and your instruction measurements are not the same :-(….ive read in the comments that you’ve sorted it out but its still not right……just thought you should know.
Amber says
Thanks! I *think* I have it all fixed now. Sorry about that!
Dorcas Holley says
Im having difficulty making the tote. What size pieces go on the bottom and top of the first zipper? What pieces go to the top zipper? Ive only sewn for 50 yrs and this is the first time Ive had this much trouble. LOL
Dorcas…………………
Amber says
Oh my word! I made some MAJOR mistakes in the cutting instructions! I am SO sorry! Those should be fixed now.
Dorcas Holley says
Thanks for fixing the sizes, I think I can put it together now.
Ali says
I’m so excited to make this…so cute!! I’m just a little hung up on the measurements for the pieces that are on the part of the bag with the zipper in the middle. Shouldn’t it be something like 6 3/4″H x 7-3/4″ W and 4-1/2″H x 7-3/4″W? The 11″ measurement on those two just isn’t making sense to me and I want to make sure before I cut! Thank you!! Can’t wait to use this at Disney next week!!
Amber says
Oh my word! YES! I made some major typos in those instructions. That is fixed now. Thank you!
Katharyn says
Sorry, Amber, it doesn’t appear fixed to me? I’m not sure if I’m looking at an older version of the Web site or something, but it’s still displaying 6 3/4 × 11 when I read it.
Sorry!
Katharyn says
No, I was definitely looking at an old version! I’ve shut that page because this one is better. Thank you so much for fixing it!
Thank you for this tutorial, it’s just what I need for work and it’s inspiring me to give zips a go! 🙂
Steph says
Hello…I love your little bag. I have the bag almost finished and thought I should mention that your deminsions for the 6 3/4, 4 1/2, and the 18 inches pieces have a width listed as 11 inches. However, I found that deminsion should be 7 3/4 inches to be the same as the back piece of 7 3/4 width X 11 inches long.
Katharyn says
Thank you!
I’ve been very confused as I had already cut the pieces out and after much confusion decided that 7 3/4 must be the width and 11 the length of the back, so thank you for confirming the conclusion I’ve just come to. 🙂
nellie1951 says
I love making small projects ,and bags is one I really enjoy wallets thats another one I can use to make for myself and give to my friends as gifts
Anne says
Cute bag!! I’ve got a Craft Gossip post scheduled for later this morning that links to your tutorial:
http://sewing.craftgossip.com/tutorial-just-the-essentials-small-tote/2015/01/13/
–Anne
Amber says
Oh great! Thanks! I was just thinking yesterday that I would go submit it. Now I don’t have to! 🙂
Diane says
Now that was awesome.
Renske says
I accomplished my goals this week! I’m so happy!!
Joined the Facebook group, love to read how everybody is doing.
Pat Barger says
Is there some way I can print the picture and the directions for items without having to print 25 pages?
Amber says
Copy and paste the part you want into a word document, then print.
kathy says
Can’t wait to get started .where do you get all your ideas from?
Amber says
I feel like the more you create the more the ideas start to flow. I just keep a long list of ideas and add to it as they come.
mary kay says
go to the bottom of the page and look for “PRINT FRIENDLY” it reduces to just 12 pages.
Coco says
Love your bag ! I did accomplish this weeks goals!! YAY 🙂
Patricia S says
Cute! perfect little necessity bag! I bet my tablet would even fit in it! And I love the fabric you used!
I’m working on my goal for the week but unfortunately a snow day has thrown a wrench in my organizing plan for the week. :/ It’s almost impossible to get rid of anything with my little pack rat watching over me. LOL
Amber says
I hear you on that!
Kathleen says
This is really cute! I’m tempted to try it, even though it has zippers! I have a couple questions though. Your instructions have some empty parentheses where I believe some measurements should go? Also, did you use regular cotton fabric for the outer fabric or home dec fabric? Lastly, what are the approximate finished measurements of this bag. I’m guessing 6 inches wide by ?
Thanks for the tutorial 🙂
Amber says
Oh shoot! I will fix that!!! And yes, it is about 6 and a half or 7 inches wide.
Mary Lou Bowler says
Hi! I am wondering what the finished size of this little Essential Small Tote bag is.
By the way…I am a mom of 4 boys(men now) as well! Life was a blur, but I wouldn’t have missed raising them for the world. We now have 4 granddaughters and 2 grandsons.
Amber says
Fun! I can’t wait for granddaughters! Finished size is about 7 inches by 10 or so.
Beverly says
I just LOVE your blog!! You have so many cute ideas and the tutorials are great. Keep up the great work!!!