What’s the Project? Need a great holiday craft project? This tutorial on how to make a Christmas wreath will have you making a beautiful DIY Christmas wreath that’s perfect to fit your taste, looks great on your door, and is fun to make!
Ever since I started blogging, making things has become more of a task rather than a fun pastime and while I love blogging, recently I’ve realized that I’ve taken a little bit of the fun of crafting out of it.
So, when a friend recently mentioned that she was going to head to the craft store, grab some supplies and craft for fun, I felt inspired to do the same.
I gathered supplies to make a DIY Christmas wreath and figured I’d play around with them and see what I came up with. So this afternoon I put on a good cheesy Thanksgiving movie (it’s not quite time for Christmas movies yet!) and played around with supplies and made a wreath.
And I admit, I’m thrilled with the results. So let me show you how to make a Christmas wreath so you can make one of these yourself if you’d like to!

I just love how it turned out! All I really had was a semi-vision for this and a bunch of supplies so I just sat and played until I had something I loved!

You could totally tweak this to be whatever you want. You can use any colors, any type of ornaments or accents. Make this what you would like! But have fun making it!
How to Make a Christmas Wreath:
Here’s a peek at the supplies I used to make this little beauty:
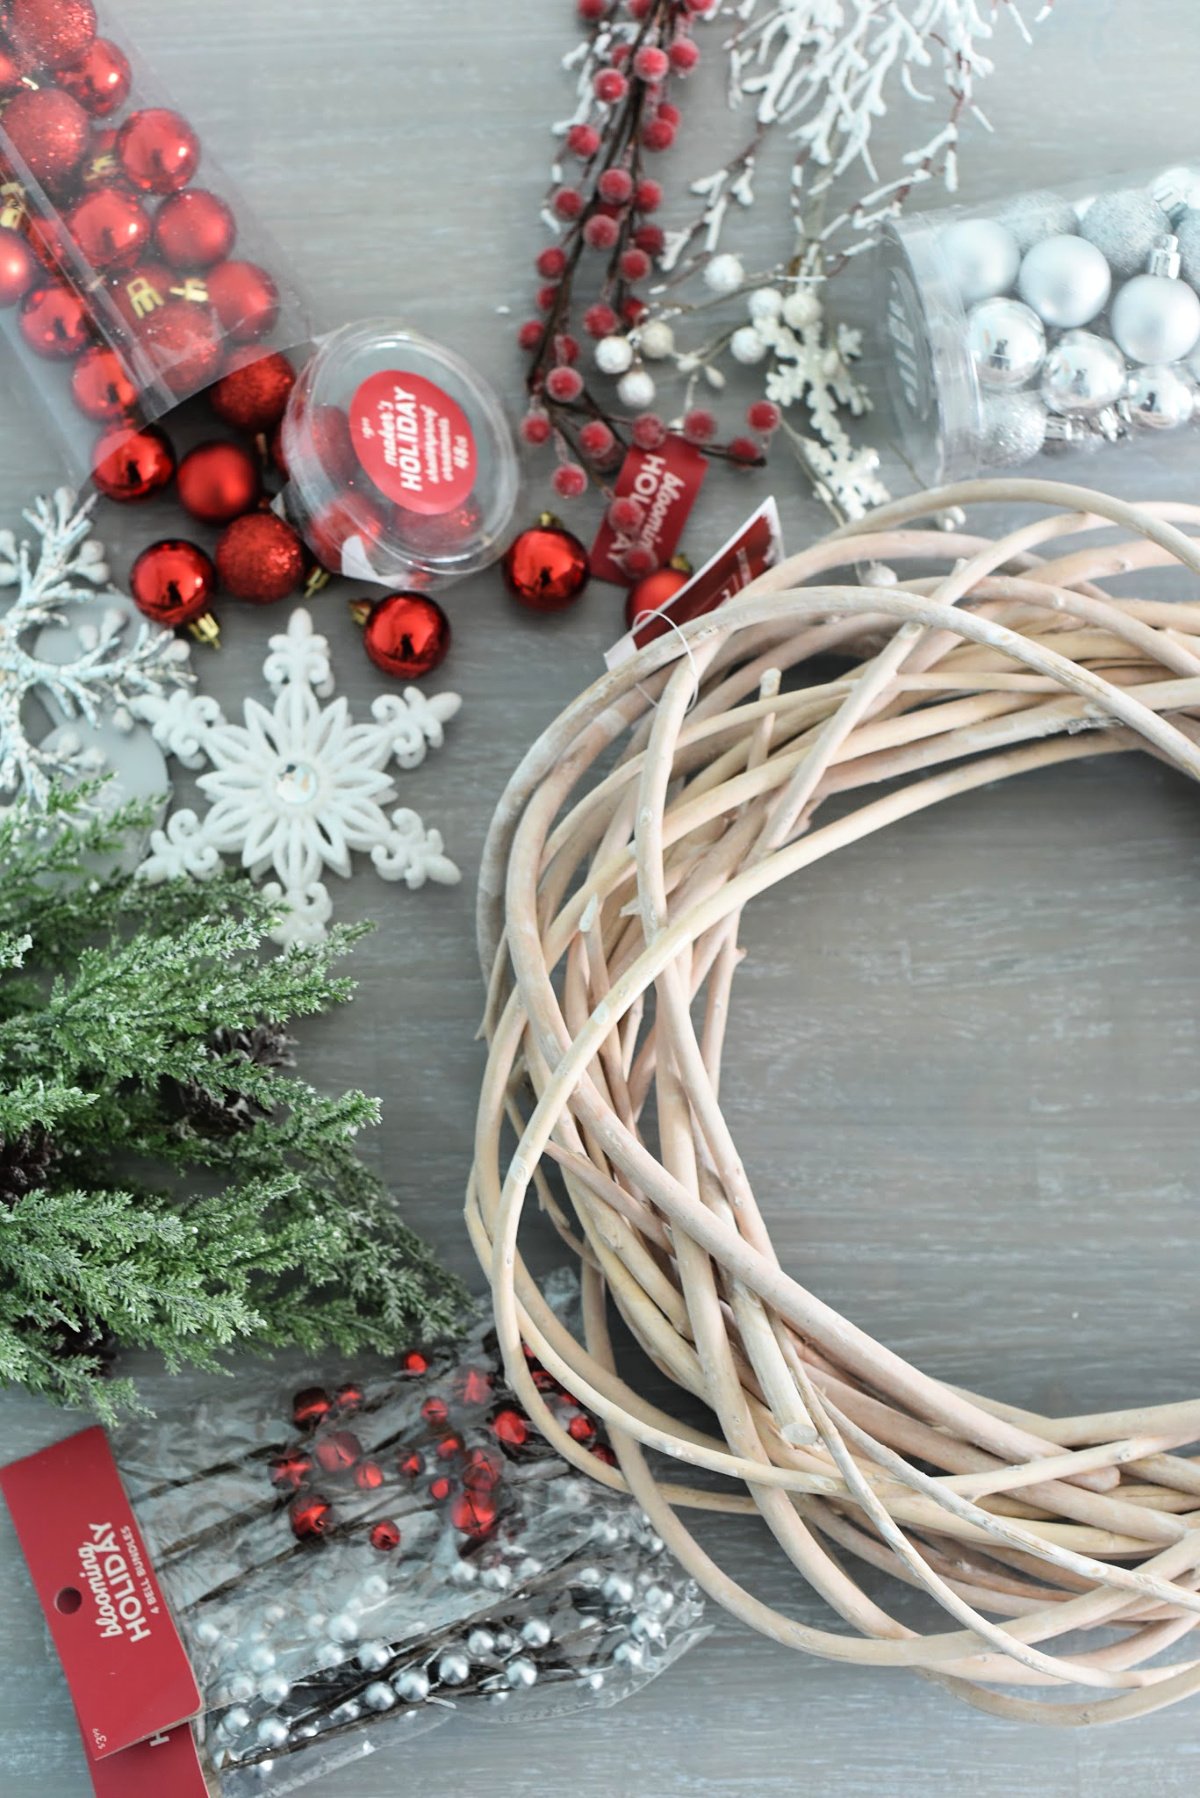
Now, you can gather whatever you want to make yours, but here’s a look at what I used.
Supplies Needed: (affiliate links)
I should mention that I got most of my supplies at Joann. The wreath form though I could only find on Amazon at the link mentioned.
- Weeping Willow Wreath Form (I used a 15 inch one but any size will work)
- Snowflake Ornaments
- Ball Ornaments (I used red and silver, use any color you’d like)
- Greenery
- Red berries
- White snow accents
- Silver accents
- Wire cutters
- Hot glue gun and hot glue
- Ribbon to hang it with
Wreath Making Instructions:
Start out by cutting pieces of your greenery up and sticking them throughout the wreath in some places. Then add other accents from there.
Figure out where on your Christmas wreath you would like to put your main ornaments (like my snowflake ones).
Once you have a general feel for where you want things placed, begin hot gluing them in place.
Then, begin adding your ball ornaments. Be careful here to make sure you get a good balance in what you are doing. You don’t want to totally overdo it but you want to make sure it looks fairly full. Make sure you’ve got greenery and berries and other accents showing through here and there.
As you make your wreath, continually take a step back and look at it to see where it might need more of something and add it in as needed.
When you feel like you’ve got it how you want it, add your ribbon to the top so that you can hang it.

I hope you loved learning how to make a Christmas wreath like mine and enjoy making one of your own!
You Might Also Like:

Pin It:


Haley says
This Christmas wreath is gorgeous.
Amber says
Thank you! 🙂
Kelsey says
What a lovely design Amber! very inspiring.
Amber says
Thanks! 🙂