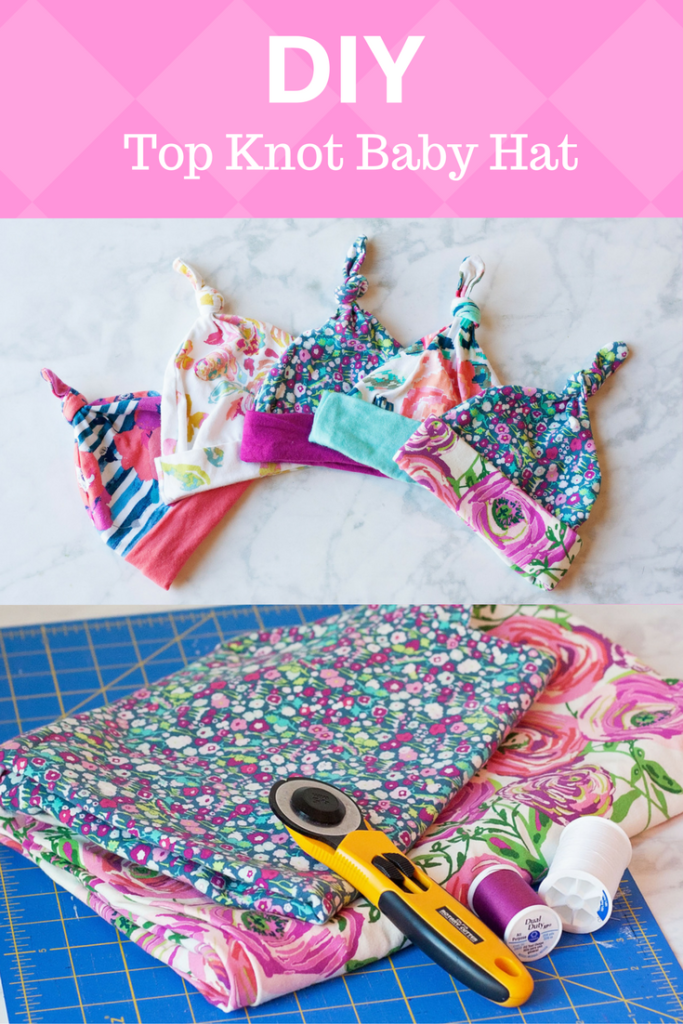
What’s the Project? This topknot baby hat pattern is not only easy to sew, but it also makes the cutest little hat for your little ones! A great baby gift and a great beginner sewing project all rolled into one.
I am super excited today that we have Kim from the sewing blog Sweet Red Poppy here guest posting again and I am SURE you are going to love this tutorial! Hold on to your hats, we’ve got a baby hat tutorial (see what I did there?). It’s a DIY Knit Baby Hat pattern with a cute little top knot and I love it! 
Here’s Kim!
I’m so excited to share this quick and easy sewing tutorial with you! Knit baby hats are one of my all-time favorite things to sew for baby showers. They come together quickly and they require a minimal amount of fabric. Plus, they’re as practical as they are cute! The pattern used in this tutorial is a size 0-6 months.
Start by downloading and printing your pattern pieces here!

DIY Baby Hat Pattern
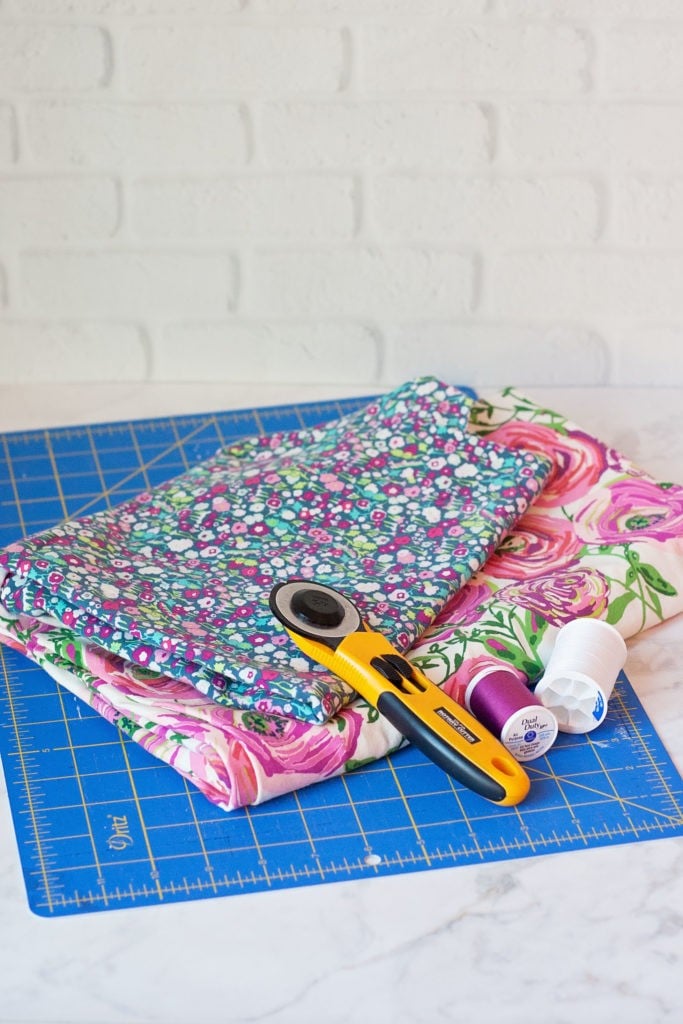
Supplies
- 1/4 yard each of two coordinating knit fabrics Fabric must have at least 25% stretch, I used Art Gallery knits because they contain Lycra and they have great recovery.
- matching thread
- Top Knot Baby Hat Pattern See link above the instructions.
Instructions
- Cut out hat band 12″ x 5″.
- Cut out pattern pieces with the greatest amount of stretch going horizontally across each piece. You will end up with a total of three pieces.
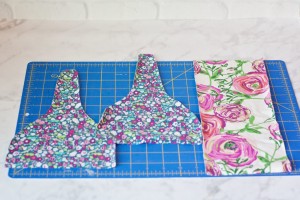
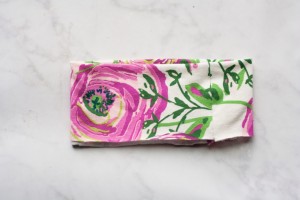
- Place both hat pieces right sides together. Pin the hat pieces in place along the perimeter so that they don’t shift while you are sewing them together.
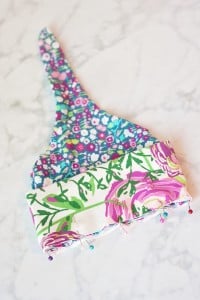
- Using a 3/8ths-inch seam allowance, start at the bottom and sew up and around the top knot and down to the other side. You may need to put your needle in the down position and lift your presser foot to rotate the fabric at the top of the point. Make sure to leave the straight bottom unsewn until the following step. Turn hat piece right side out.
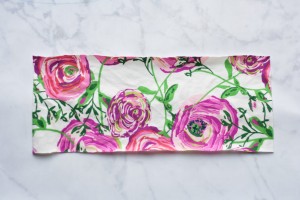
- Fold the contrasting knit band in half with right sides together. Align the two short edges and sew a straight line to close the opening.
- Fold cuff with wrong sides together aligning the raw edges.
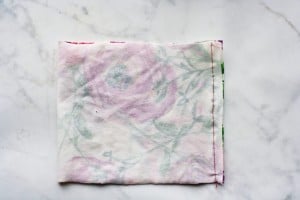
- Align the raw edges of the cuff to the raw edge of the hat with the cuff on the outside of the hat.
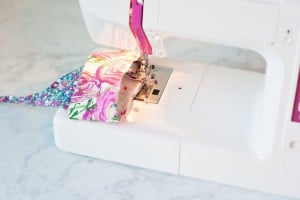
- Use plenty of pins to evenly distribute the cuff around the hat. The cuff should be slightly smaller than the hat and will require you to stretch it ever so gently to fit. Using a stretch stitch or a narrow zig-zag stitch sew around the entire hat.
- Using a hot iron, press the seam upwards using plenty of steam. Fold the cuff up 1 1/2 inches and tie a knot at the top of the hat.
My advice is to cut out multiple hats and sew them in an assembly line to make the most of your time and to build a stash of baby shower gifts to keep on hand.
Enjoy!

Are you on Instagram? I love making new sewing friends! You can find me HERE, stop by and say hello!
I hope you love making this cute baby hat pattern!
You Might Also Like:


Emily says
I made some of these and love them!!! My question is, is there a pattern To make the next size up?
Amber says
I think Sweet Red Poppy has bigger sizes on her site if you go there. She’s got great stuff!
Carole Tonn says
I am trying to get the pattern to make these adorable hats, but the link is broken. Can you please send me the pattern. My 11 year old daughter really wants to make one.
Amber says
I just fixed that. Sorry about that!
claudia shine says
love these little hats….but where to get fabric when you only want to make a variety of patterns for a grandbaby?? The quality fabrics appear to only be sold in one yard amounts or if half yard the price is exhorbitant. Suggestions, please.
Amber says
At any fabric store you should be able to get them to cut however much you want.
Jordy says
Try using shirts that are particularly soft and somewhat stretchy jersey material. I have a few that have a small hole or stain but enough good fabric that I could make a hat. That is what I am going to try this week! I love recycling clothes and this seems like a great project for that since it requires relatively small amounts of fabric.
Marj says
I quickly made up 6 if these from 1/2 metre of t-shirt fabric (cats in bow ties) and they turned out so stink’in cute! I made the first one then assembly-lined the rest. I also made a small change to one – got rid of the top knot & made a couple of round ears to sew into the side seam. Thanks for the free pattern.
Amber says
Cute idea!
Lil Betty says
This is a cute pattern but the measurements are way off. The instructions call for two 1/4 yard pieces of jersey fabric which is a 9 inch strip. After pre-washing, drying and ironing there’s about an inch of shrinkage leaving approximately 8 inches of fabric to work with. But the pattern is 10 inches tall!! Buy yourself 1/3 yard pieces of jersey as you’ll actually get a hat that looks like the ones in the picture. I made it work but overall I was very disappointed with this tutorial.
Georgie says
I could be wrong, but perhaps what was meant by a quarter yard was a fat quarter which measure 18″ wide.
Mary Edel says
These are too cute. I am attempting this weekend. Where did you get that beautiful flower fabric? Thank you for sharing.
Kate says
I made 4 of these hats at the Pinner’s Conference in Salt Lake in 2017. They were so easy and so very cute! My son and his wife had a Gender Reveal Party and I had two hats in my purse; one for a boy and one for a girl. After they revealed that the baby was a girl, I pulled the girlish hat out and gave it to my daughter-in-law! The hat had a navy blue band with a coral/pink print. They loved it! My daughter-in-law reminded me that those were their wedding colors. It was perfect!
Amber says
So fun!
Kate says
To add to the story that I told about the baby hats. My daughter-in-law had the baby in March and put the hat on her in the hospital. The nurses that came around loved the hat. It was perfect!
Lyndi Wells says
Do you have a pattern for 6-12 mths or 12- 18 mths? It would be cute on older babies as well.
Lolly Rock says
Oh yes the little hats would be so sweet on older baby’s. I just found you and would love to make on or 2 for my nice who is 6 mons old.
Thank you
Lolly Rock
Kathi says
I was just going to ask that same question, a hat for an older baby……
Melissa says
These are so cute and easy. I can’t wait to make these for some new little babies.
Tibeca says
Little baby things are always so sweet. <3
Amber says
I agree!
Carina says
Merci beaucoup, c’est trop chou, je suis ravie de ce partage, you rock, this is gorgeous 🙂
Lee Orlian says
These hats are the cutest! It is so easy and I’m really excited about this project. Thank you for sharing!
Rosemary Biju says
i really love this and am gonna fit it in my head.
Claudia Mott says
I read how to do this, I am learning about material that stregics in different directions, I found this is a hat I can do, so with 4 binds of material, I will sit down cut out a lot, and bands, sew them to gather and have hats for the K, through nursery boys and girls a hat to keep them warm….thank you so much
Gloria Holcombe says
I love the cap and so precious for a little one!!
Deliz says
Gracias!!
Deliz says
Muchas gracias por el patron y las instrucciones, gracias, gracias!
Margie says
Thank you so much. These are so cute!
Amber says
Thank you! Glad you like them!
Shelley StClair says
awww thank you so much for this tutorial and a free pattern.. I am going to make up a bunch thank you.. 🙂