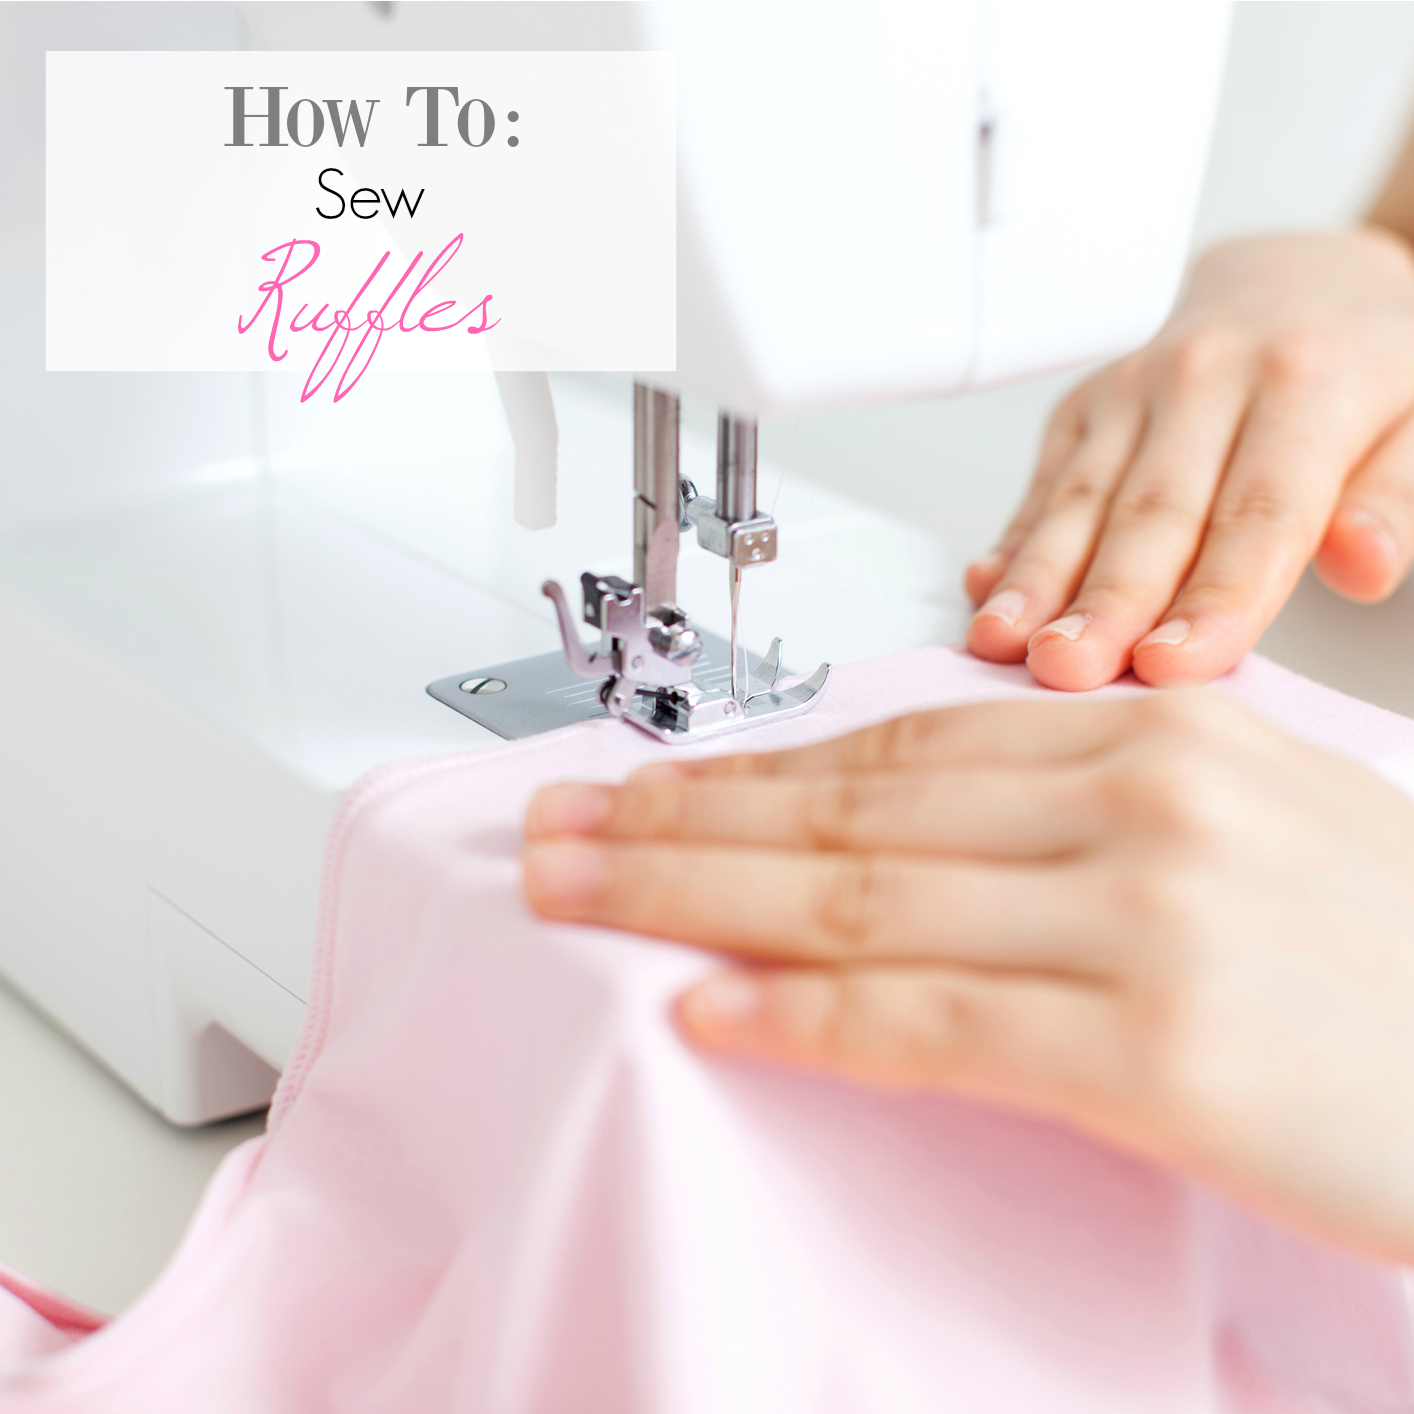
What’s the Project: Learn how to sew ruffles in sewing with this easy to follow, step by step tutorial. It also includes some projects you can try to get practice sewing ruffles.
When I was a little girl I didn’t want a thing to do with anything ruffly or anything pink. (I grew up with 4 brothers-there wasn’t much girliness in my house.) I think those repressed feelings or my childhood are coming out now because these days I LOVE anything pink and these ruffles are fun.
So, today, for Lesson #5 of our Learn to Sew series, let me teach you how to sew ruffles. Then you can add them to anything.
Now, let’s sew some ruffles!
Learn to Sew: How to Sew Ruffles:
Making ruffles that you can add to a skirt or an apron or a cute tote bag is not too difficult.
Start out by preparing your fabric. You will need to cut it to the length indicated on whatever pattern you are using. Usually, you are also probably going to be asked to hem your fabric before you create the ruffle. Get all of that done before you do the next steps.
With your fabric ready, run a long basting stitch along the top edge of your fabric. DO NOT back stitch to knot your thread. Leave the threads long and hanging on either end. Now run a second baste stitch (again, don’t knot) just below the first one you did. Again, leave your threads long.

Now, grab hold of the top two threads. Leave the back two threads hanging.
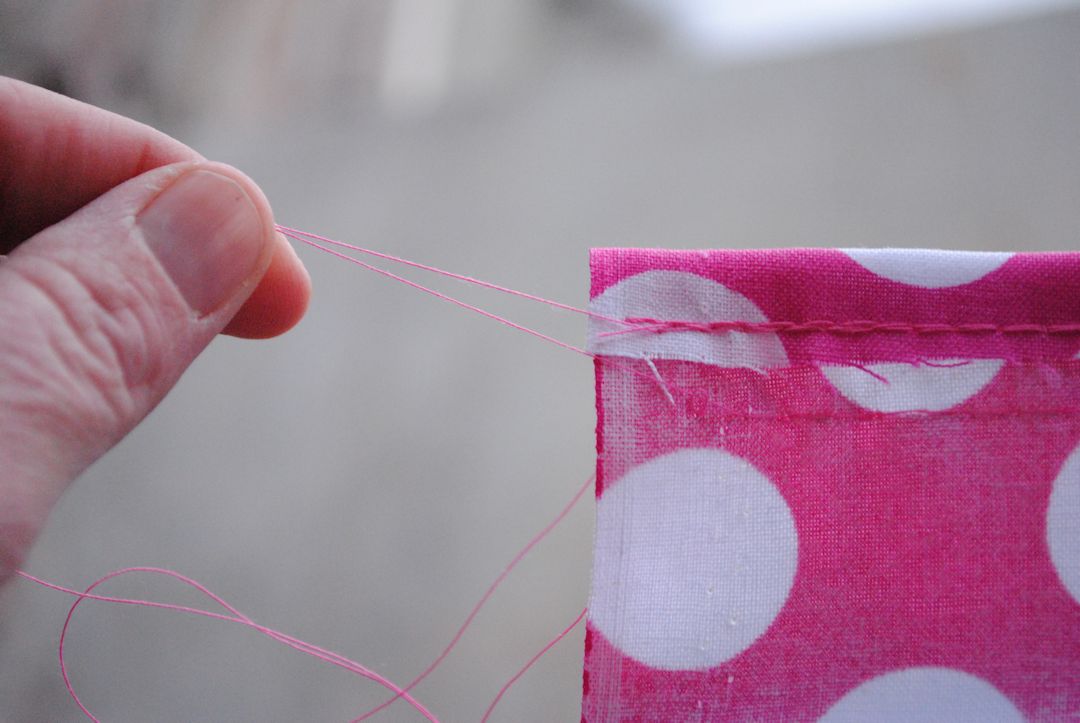
Now you will gently tug your threads and slide your fabric down them. Do this very gently-you don’t want to break your thread.
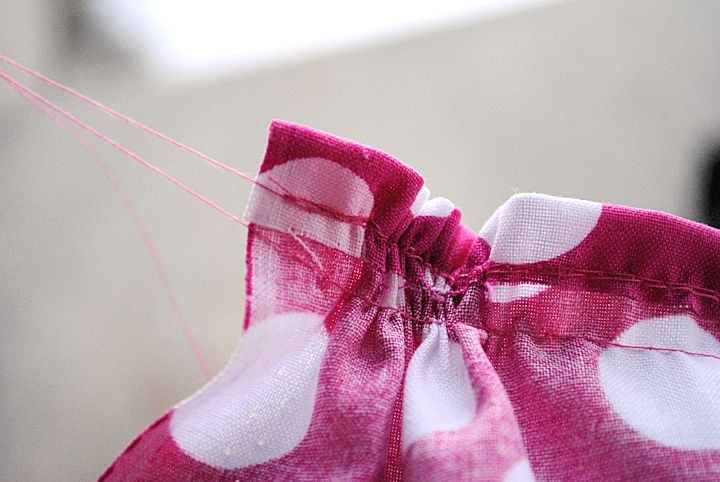
Keep doing this, sliding your fabric further down and evening it out as you go so that in the end it looks like this:
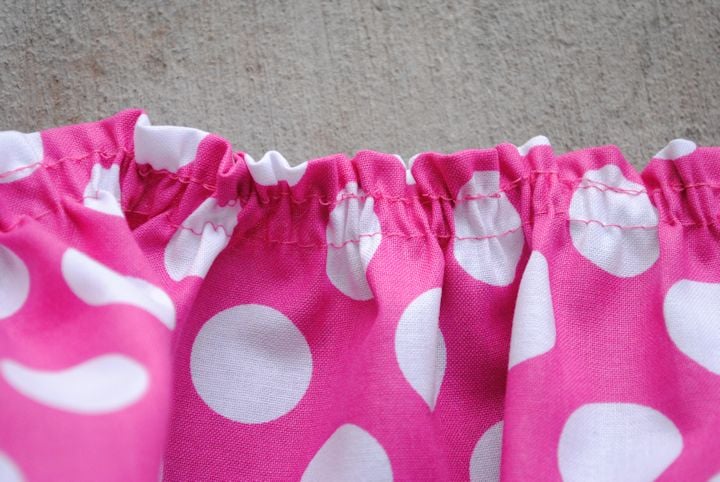
The more you slide the fabric the more ruffle you are going to have. Soon, you will have a cute little ruffle. Just even out the ruffling as needed and you are done. 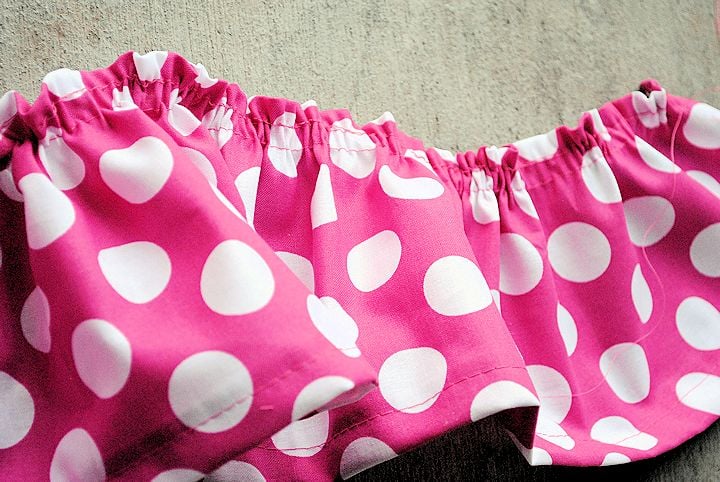
Now, often your pattern is going to want you to form a loop with the ruffle you just made. To do this you will simply make sure that you have your ruffle at the length indicated on your pattern (to adjust just slide the fabric on the thread to make it longer or shorter) and then put the ends of your fabric together with right sides touching and sew along the edges (this time with a regular straight stitch.)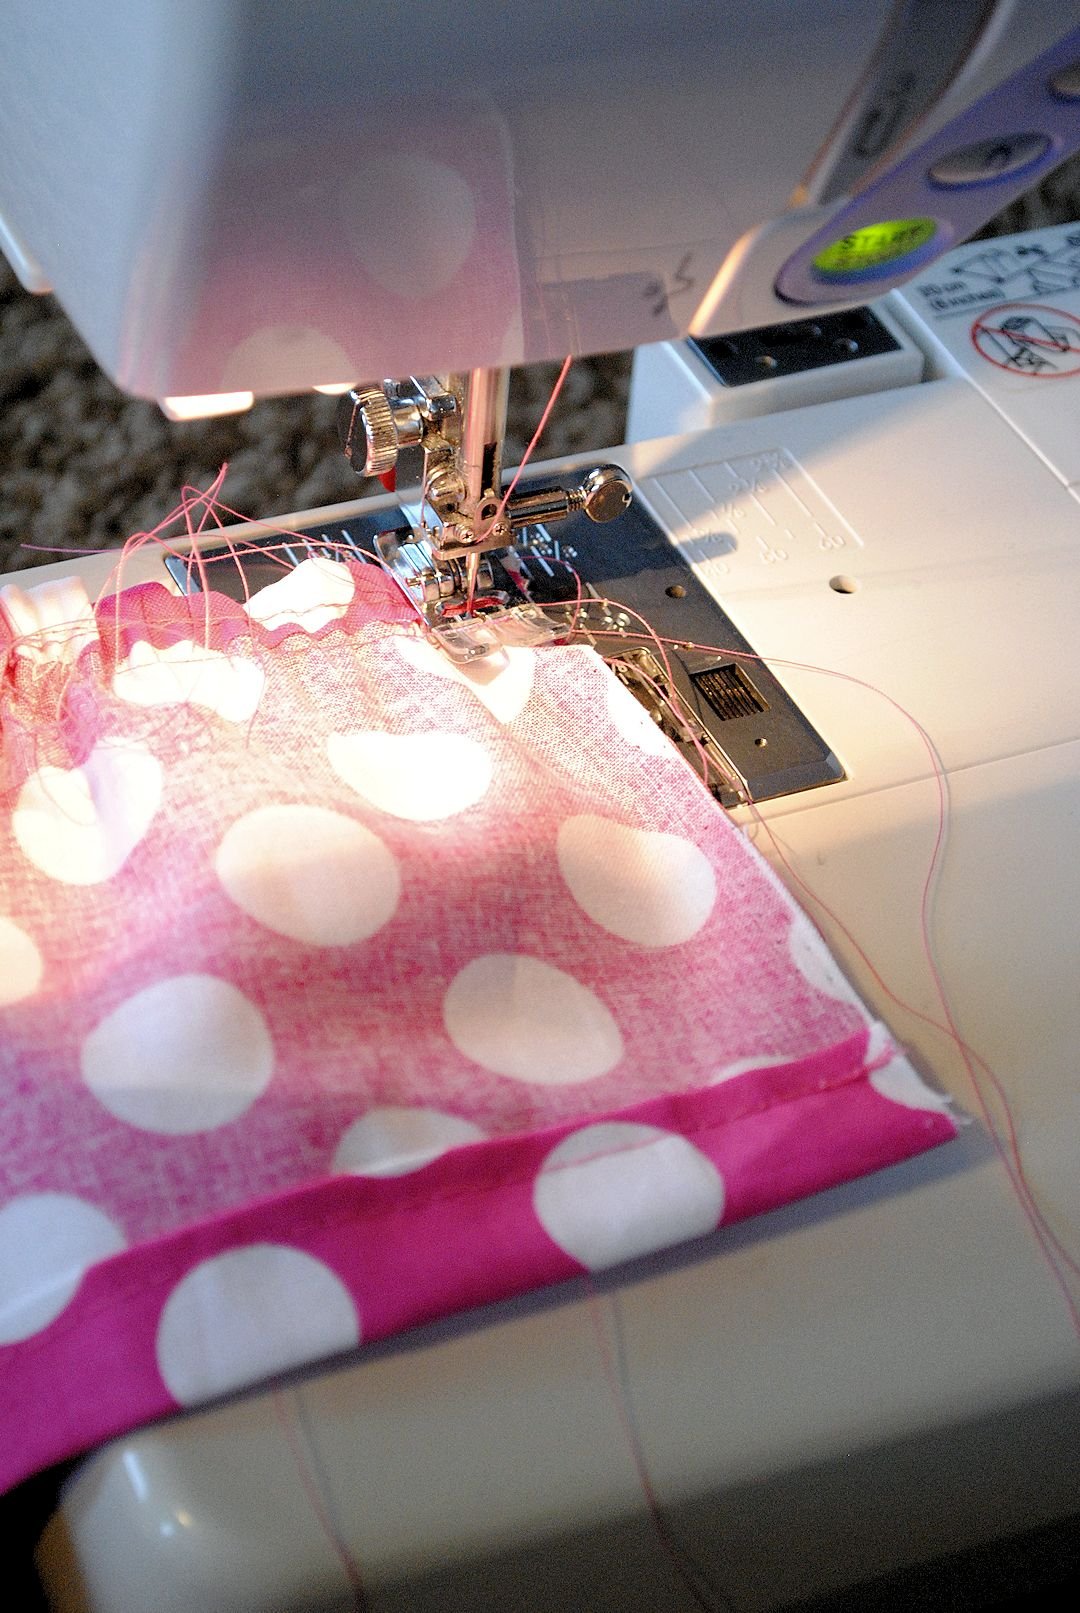
Now that you know how to sew ruffles, let’s add those ruffles to something!
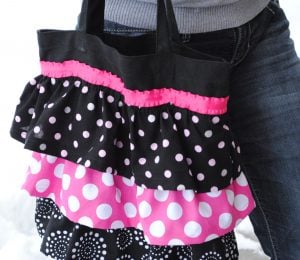
So, if you want to keep it simple this week, I recommend this Ruffle Tote Bag. It’s pretty easy and turns out adorable!
If you want to try something else with ruffles that’s totally fine too!
Then move on to Lesson #6: How to Sew a Zipper.


Teresa says
Thank you. I just needed a refresher. I was pretty sure I knew how to do it and I wanted to call my mom and ask her but if I had called her at this hour I’m sure I would have “ruffled” some feathers. Lol
Amber says
Glad to help!
Bobbie Polozeck says
I am making a Christmas tree skirt and want a ruffle around the bottom. Since it is curved I think the ruffle should be cut on the bias. But I don’t have any idea how to calculate the amount if fabric I would need. Can you help? The skirt is 6 yards 8 inches. Around. I want the ruffle about 6 inches wide after hemming appreciate any help you could givve.
Amber says
I have to admit that’s a little beyond me too! Maybe I could ask on my Facebook page and see if anyone can help you?
Anys says
Thank you, your tips are brilliant and make me easy to make a ruffles.
horan says
cute i wanna try to make a skater skirt
Di says
Your blog is so clear and helpful. I’m new to using a sewing machine and love your step by step teaching. Thank you
Amber says
Thank you!!!
Destiny says
Thanks! Very helpful!
Mary Jane says
2 questions:
“Now, grab hold of the top two threads. Leave the back two threads hanging.”
By “back,” do you mean the 2 threads at the BOTTOM (the 2nd seam)? This is what it looks like in the picture, but I was thinking the top 2 threads of each seam.
Also, once the ruffle is completed, do we sew another seam (catching the ruffles with the needle), then pull out the basting threads?
I hope these questions make sense. Thank you so much!
Amber says
Yes, I meant bottom. 🙂 Once the ruffle is complete you can sew it in place on the bag and that will hold the ruffle.
Shannon says
Thank you ruffles are easier than I thought! My niece will love the bag.
sandra says
Thank you for the tutorial. I love aprons!
Karis says
It went great! Turned out super cute!
Lorie M says
I have not started my bag yet, still waiting on my fabric order to arrive, but the ruffles do make me nervous. I am looking forward to testing out, I’m hoping to make 3 matching bags for my sister, my Mom and myself for an upcoming vacation.
Thanks again Amber for all your work with these tutorials, I am LOVING them 🙂
Cris says
I’m behind this week since I had family in town for a b-day celebration. I think I am leaning towards the tote bag because I could totally give it to my aunt for her upcoming birthday. Thank you for such fun and informative lessons!!
Rachel says
Can’t wait to practice!
Uta says
Thanks for this great tutorial. It was very helpful.
Hugs, Uta
Sarah McKenna says
In all honesty I didn’t do this assignment, but that’s b/c I can ruffle in my sleep thanks to Jade. 🙂
ami says
apron for my toddler – awesome, thanks!
Mahala Hunter says
Thanks for the giveaway!!!! Making a quilt is on my list of things to learn this year. Thank you for inspiring us to sew more. 🙂
Ashley says
I’ve been wanting to make an apron for awhile now – thanks for the tutorial!
Joni says
Thanks for all the awesome tutorials… You’re instilling more and more confidence into us each week! 🙂
Michelle says
Love these lessons!
Kim H says
I made the apron and it was a fun thing to do, despite the time needed (you were right!). I learned a lot of lessons along the way the hard way, but it was satisfying to know I could make something like this. Thanks again for all these tutorials!
Amber says
Oh love hearing that someone did the apron!
Gudrun Yr Asgeirsdottir says
So cute both of the projects, ill have a problem choosing
Amber says
Do both! 🙂
Sherry says
Can’t wait to make the ruffle bag for my daughter!
Leslie says
The ruffle tote bag was so easy to make, and it will make a great gift! Thank you for so many great lessons!
Emily Shelley says
Love both of these projects! I am going to do both. Thank you for another great lesson.
Julielorene says
Very cute!
Sherrie says
Thanks so much for another great lesson !
Allison P says
I always thought gathering the ruffle would be the hard part–instead it’s the super looooong hem! I’m seriously considering a serger so I can do a rolled hem if I make too many more ruffles!
Trasity says
I’m working on adding some ruffles to a pair of boy’s outgrown jeans for our due-any-day-now baby girl!
Jess says
Thanks so much…from a newbie sewer! 🙂
Bev Weis says
These are good skills you’re teaching in your series.
Also, thanks for the sponsor & the giveaway opp.
Montse says
I absolutely love your blog and the way you explain everything!!! Makes it so easy for us to learn!!! Loved the Science Fair and Northern Lights 🙂
Janet says
Thank youuu!!!