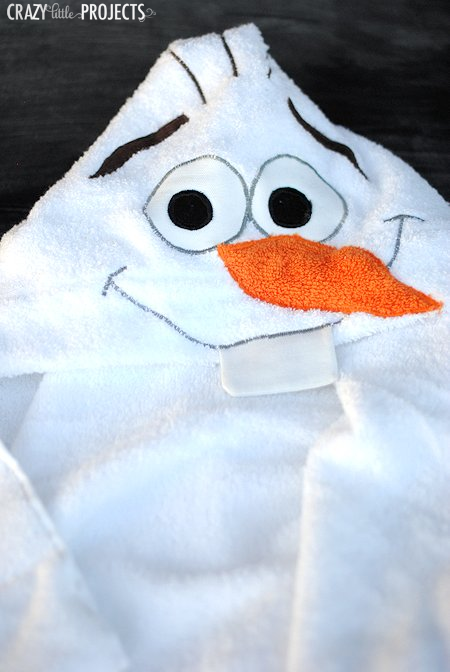
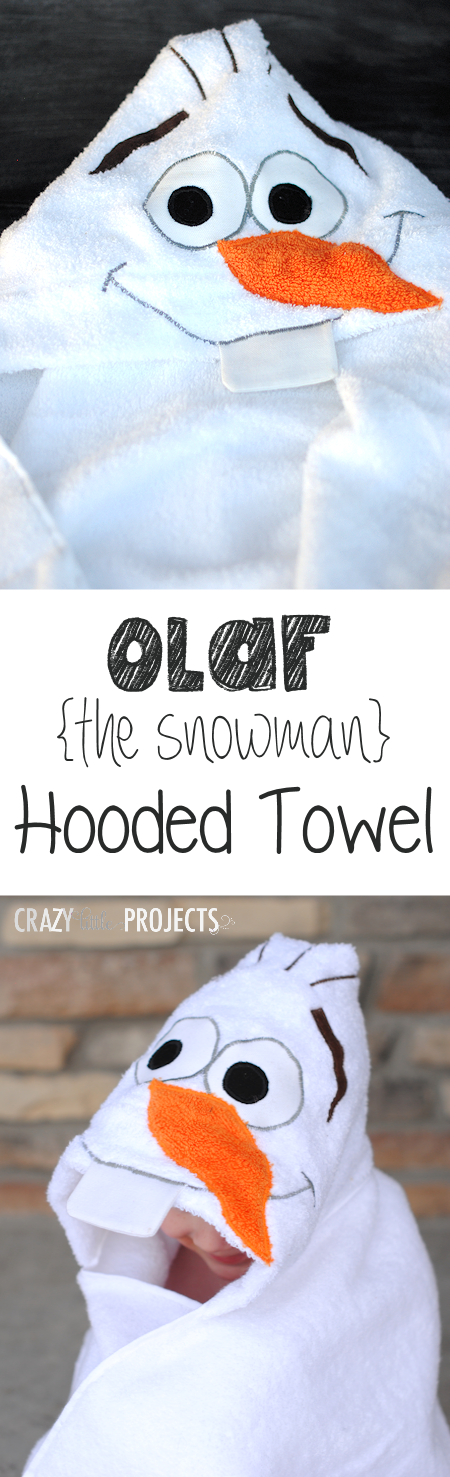
What’s the Project? This cute snowman hooded towel is made to look like everyone’s favorite snowman, Olaf! Such a cute kid’s hooded towel to make. Something the kids are sure to love!
If you are like us-and I suspect that many of you are-you love this little guy. He’s cute, he’s crazy, he makes you laugh and he likes warm hugs.
And now you can turn him into a towel! (I’m my two-year old’s favorite person right now for making this.) It’s my Olaf the Snowman Hooded Towel!
I kind of love how he turned out and I kind of love that my two-year-old is so excited by him.
Want to make him? You can do this!
Olaf the Snowman Hooded Towel Tutorial:
Supplies Needed:
- White bath towel
- White hand towel (you will only use half)
- Small amounts of white, black, brown and orange fabric
- Small amount of paper backed fusible adhesive such as Heat n Bond
- Olaf Hooded Towel Pattern Pieces
Instructions:
If you are new here, let me tell you that I do a hooded towel each month. So rather than teaching you to make the towel part over and over, I will refer you to the basic hooded towel tutorial for that. For this, I will teach you to make Olaf’s face and then you can go from there.
Start out by cutting your hand towel in half horizontally and folding under the finished edge about 2 inches. (See hooded towel tutorial for pics of this.)
You will create the face on the underside of that hand towel-the part that is smooth with no folded under part.
Cut out your face pieces. You’ll cut two eyes from white, two eyeballs from black, two teeth pieces from white, an orange nose and brown eyebrows.
Cut the same pieces out of Heat n Bond except for the teeth. You don’t need it for those.
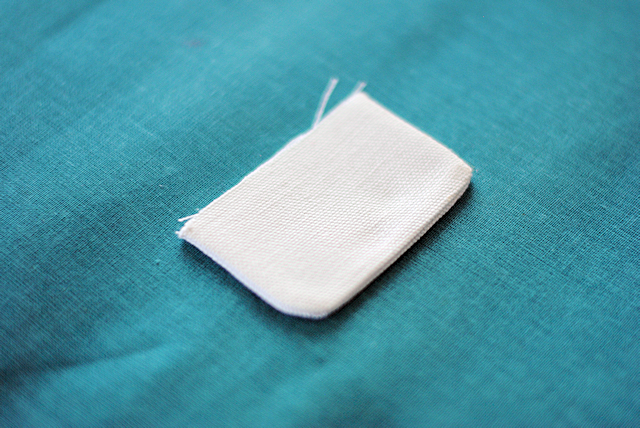
Grab both pieces of your teeth and sew around the two sides and bottom. Turn them right side out and press them flat:
Set that aside. Now, iron the Heat n Bond to the back of your face pieces. Then place your piece where you want them on the towel and iron them on. I recommend doing the eyebrows pretty high above the eyes and angled upward a lot. Looks more Olaf like:
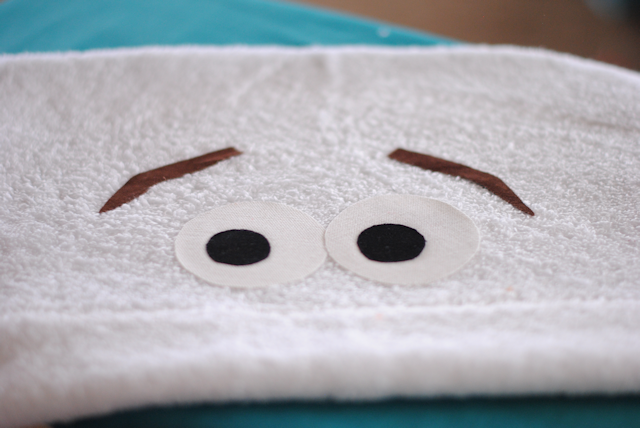
Applique (tight zigzag stitch) around all of the pieces. **You’ll use black thread for the eyeballs and brown for the eyebrows but be sure to use gray thread for the eyeballs.
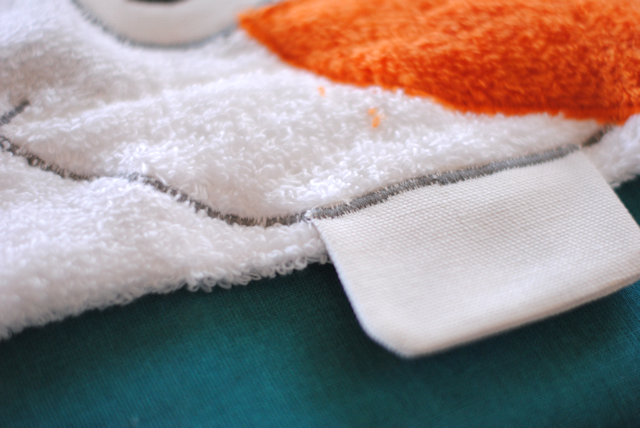
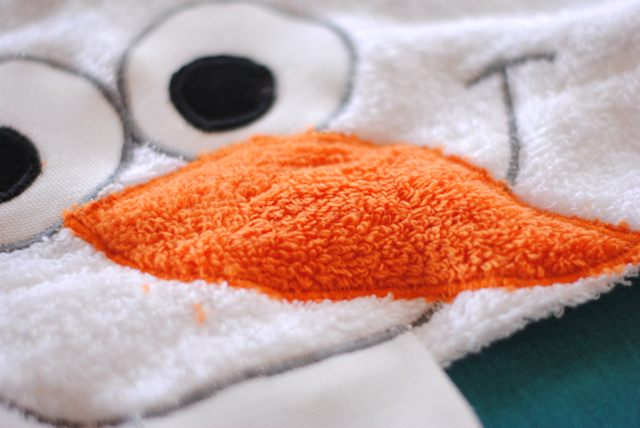
Next, grab your teeth again and place them down near the bottom of the face and pin them where you want them. You will now use that applique stitch again with gray thread to create the mouth. I did this by starting at the center of the teeth and going outwards to create his smile. I recommend drawing it on lightly first with a pencil or washable marker so that you have a guide for where you are sewing. (Ignore the fact that the nose is already on in my pic. I just forgot to grab a picture of the mouth before I added the nose.)
Now add your nose the same way-pin it in place and applique it on. You’ll see that I used orange towel. I did that simply because that’s what I had on hand. Any orange fabric will do.
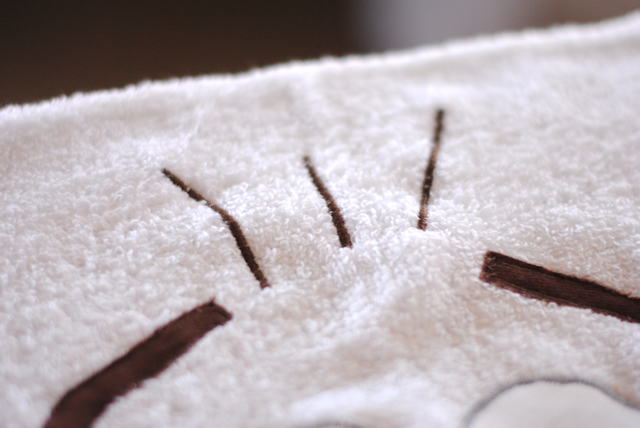
Now use your applique stitch again to add some hairs up near his eyebrows. I used brown thread for this:
Now follow the rest of the hooded towel tutorial to add your face to the towel and you’ve got one, cute, happy, Olaf the Snowman hooded towel:
You Might Also Like:

Pin It:


Daniela at Sewing For A Living says
I am definitely doing this for my baby girl! So cute!
Marvelyn T says
I’ve made my own baby hooded towels before, but this was such a neat change. Made this as a gift for a 5 year old who was having a Frozen themed birthday and it was so well received. Great directions and the pdf print out was perfect. I am sure I’ll be making more towels soon!
kay says
Absolutely LOVE this Olaf towel and have had fun making it. Thankyou for sharing and for your easy to follow directions
Ranmita says
Hi I’ll like to sew some olaf for my friends’ children. But I would like to know the mesures of the towels you use and if you use the same mesures for babies and children
Amber says
Any size towel will work. I promise. 🙂 And yes, they work for babies till about 7 years old.
Ranmita says
Thank you. I’ll try this weekend andlet you know
ranmita says
I did it!!!! the hood is big for a 1 year old baby I need to try with other dimensions. I hope you don’t mind if I mention you and your blog in my blog
Sarah says
Thanks so much for this! I was able to make one for a friend of mine’s sister as a Christmas gift. She loved it! I even got an offer from someone else to make one for their kid! Thanks again! 🙂
Mandy says
Cant seem to download Olafs face pieces, is there any other way? Your hooded towels are amaazing
love what you do!
Amber says
Email me and I can send them to you
Lindsay says
I just made this lady night for my niece for Christmas and plan to make the reindeer tonight (Plus another Olaf and reindeer foru own kids). I was wondering if you ever thought about making these into hooded blankets? Fleece would be nice and warm for a blanket! I was trying to figure out measurement. Any suggestions?
Amber says
Oh that would be cool. I would just do the same size for the hood and then make the blanket any size you want!
cheryl says
Did you pre-wash towels and fabric first? (Especially the orange)
Amber says
I don’t and it’s been fine.
Danelle says
Can you not have so many cute ideas?! I am using many of them for Christmas gifts this year. When I first read the towel tutorial I was a little confused but once I had the towel in front of me it all made sense. I’m making the olaf one now and I’ve already made two minions. Thank you!!!
Lara says
Hi, love your towels. Just made the shark for my sister’s new baby and it turned out well! So cute. I have a question regarding the Heat N Bond though. I tried the one that you iron on without the sticky back but the pieces wouldn’t stay put while sewing. I switched to the sticky backed one and it works great except now my needle gets sticky and my thread keeps breaking. Driving me crazy. Is there something else I can try? Thanks!
Amber says
I have heard that you can get a needle lubricant that will help.
Danelle says
I used fabri-tac because I bought the wrong heat and bond and it worked great.
Kim Martin says
Love your hooded towels! Just thought I would add a tip. If you put tear away stabilizer under your stitching (over the towel) on the areas you are stitching only the aplique (hair, mouth, etc) you will only have to stitch once and it won’t sink into the terry cloth.
sandy says
I can’t get the pattern to open, either.
Laura says
This is adorable and I just got everything to make 2. One for a gift and one for my daughter for christmas…I can’t seem to get the pattern to open though 🙁
Lara says
This is my first towel project and I loved it! I made it for my 5 year old son and he loved it. I already have requests for more. I had the hardest time getting the hood attached with so many towel layers though. Just wondering if you or anyone else has tried cutting the bottom edge of the hood off and then sewing onto towel to make it easier to get the needle through so many layers. I might try that on the next one. I have a fairly good Jenome machine but the thick edge of the towels are too much once layered a few times. Thoughts?
Amber says
I know. I’ve wondered if people struggle with that part. It can be tough. If you just layer one on top of the other though you should be going just through 2 layers for most of it.
Tiffany says
I fell in love with your towels at Christmas and made the angry birds, the minions, and the duck for my boys (angry birds), my niece and nephew (minions), and my sisters niece (duck). It was my first year doing all DIY gifts and as soon as I saw these, I had to try them. Your directions were great! Much better than others I had found. And there are so many!!!! I’m going to be making more of them this Christmas. My niece is CRAZY about frozen. I’m currently working on making her Elsa’s capes to play with. For older kids, you could use bath sheets instead of bath towels. (I accidently got a bath sheet for the black angry bird for my oldest, who is 5, and it worked great!) Thanks for the ideas. It’s helping me to try to think things up on my own. Keep them coming!!!
Amber says
Wow!! You’re busy. I love it!!
Lauren Everson says
OH. MY. GOODNESS!!!! I absolutely love how adorable this Olaf towel is! I’m new to your blog but very excited to see your other hoodie towels. One a month – your kids must love it!
Amber says
Thanks!!!
Bobbie says
Did you just use white cotton fabric for eyes and teeth?
Amber says
Yes
stephanie says
How would you adapt this for the hood to fit an 8 year old? My daughter would be so nuts about this!
Amber says
Some of my readers just don’t cut the hand towel in half so that the hood is larger.
Deejay says
I can’t get the pattern for Olaf’s face to open 🙁
Grammy D says
Same here!
April says
I love this. If I don’t get it don’t for a homeschool project (my daughter is 12 but LOVES Frozen), I have a friend that has smaller kids and she’s craftier than I am lol. I’m sharing with her. Thanks for the sweet idea!
NonnaLinda says
Hi – I wish I could send you the photo of my 3 yr old grandson Peter, wearing his Olaf hooded towel. I used your pattern and made one for him, and one for my 3 yr old granddaughter Natalie. We had celebrated N’s birthday the week before with a costume party for all of us, using “Frozen” as the theme (it was so much fun!) but I wanted to make them something to remember the party by. Peter loves his! Natalie refuses to use her towel. Why, you ask? It’s simple: at the costume party, Peter dressed up as the snowman, Olaf, while Natalie was Princess Ana. Maybe the Princess towel is in her future… thank you for posting your ideas! I look brilliant (made the car tote thing too for them for Christmas) and I get to sew for them. Love it!
Amber says
Oh that’s so fun to hear! Thanks for letting me know!
Sheila says
Thank you so much for this and the other patterns. I had made our granddaughter dress-up capes that represent characters in the movie, but had no clue what to make the grandson. I giggled all the while sewing Olaf.
Amber says
Did he love it?!
Sheila says
Yes he Loved it
Sheila says
Yes he Loved it
Jennifer Davidson says
I LOVE your hooded towels!!! I have made a bunch for my own two kiddos….and now I’ll need to add Olaf to my list!! Thank you for all your great ideas….can we expect an Anna and Elsa next? 🙂 🙂
Amber says
I figured the princess one could work for Anna and Elsa
Marty Hardy says
I love this thank you so much for sharing. I want to make some for my grandkids birthday in two weeks. I don’t seem to be able to get the pattern pieces for the face. Would it be possible to email them to me? I know it is a lot to ask I sure would appreciate it.
Thank you Marty
Amber says
I think it is working now?
VickiT says
Another super cute towel! Thank you.
Logan says
This is adorable!! I’m going to make one for sure, my kids would be in heaven. Thanks for the fun tutorial!
Lauralynn Hollister says
Always look forward to your next inspiration, this is one I will have to try also. Just to cute.
Lorraine says
I tried one of your hood towels for my Great Grandson and he looked so adorable I am going to have to make another. Just one question how did you keep your towel from snagging while sewing?
Amber says
I haven’t ever had that problem? Where is it snagging?
Jo Bailey says
I love this and can’t wait to make some for the grandkids.
But I can’t seem to get the pattern pieces for his face. When I download
it nothing shows up.
Amber says
I think I got it fixed. Let me know if it still won’t work for you.
lorel says
I love your towels and have made several!! Is there a magic combination to open the link for the pattern pieces??
Amber says
I think I got it fixed.
Grammy D says
I can not see the PDF either. I have printed the Teddy Bear, but Olaf patter pieces do not appear.
Amber says
I am not sure why some readers have problems with this one? I have reuploaded it a bunch of times and just can’t find anything wrong with it. Here is a direct link if that helps: http://cf.crazylittleprojects.com/wp-content/uploads/2014/01/Olafhoodedtowelpatternpieces1.pdf
Tina says
This is great one to try. I have made a few of your towels for gifts and they are so well received. Everyone wants one, even the adults!
Crystal says
Super adorable!! I love it!! Pinned it 🙂
Deby at So Sew Easy says
I LOVE your hooded towels collection Amber. I’m pinning this one now, to add to all the others in my collection
Emily @ My Love for Words says
This is adorable!! We’ve been watching Frozen clips on youtube practically nonstop (I’m not sure who enjoys them more, me or the kids), and I’m planning a Frozen themed b-day for my daughter. I’m going to try to make one of these as a gift for her (or maybe party favors?). So cute! Thanks so much for sharing.