Because I can’t stop sewing all things baby, I’ve got another baby sewing tutorial for you today. At least this one’s blue, not pink. Although it could easily be any color you wanted. Here’s my Shark Baby Robe Tutorial!
 It’s a baby hooded shark robe! This is a project that I’ve had in my brain for a looooong time and finally did. I’ve never made a baby robe before, so it was a little tricky to figure out, but I think he turned out pretty cute, don’t you?
I’m going to warn you that this project is slightly more difficult than many of the sewing tutorials that I do. Probably just an intermediate sewing level, but harder than the hooded towels. I just don’t want anyone freaking out partway through.
Also, you could make this robe into anything-doesn’t have to be a shark. I have lots of hooded towels patterns and any of them could be made into this robe, so go crazy. See all the hooded towel options here.
Baby Shark Robe Tutorial:
Supplies Needed:
1 yard of terry cloth (you probably will use less than the full yard)
Small amounts of white and black fabric
Small amounts of white terry
Small amounts of Heat n Bond
**This pattern fits 0-12 months**
Instructions:
Cut out your pieces using the cutting guide above. I know someone is going to ask-so, let’s talk about how to make this a different size (I am showing you how to make a 0-12 month size).
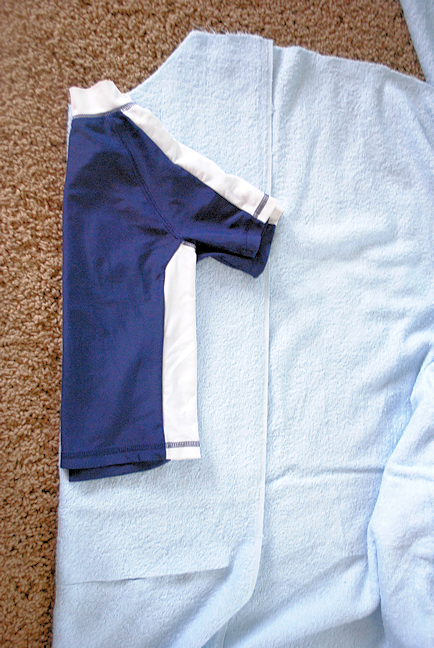
If you want to change the size, lay a shirt in the size you want your robe to be on top of your fabric on the fold. Use this as a guide to cut out a back piece, being generous in the allowances on the side. As in, add a few inches to the edges of the shirt when cutting and at least 6-10 inches in the length. Then use your back piece to figure out your front two pieces. Make them basically the same, just a couple of inches wider so they can overlap in the front. You can also size up the sleeves and belt and hood as needed:
Now that we’ve got it cut out, let’s get started.
First thing’s first, let’s get the shark head made. I am not going to go into full, step by step detail here. Instead I am going to refer you to my Shark Hooded Towel tutorial because you are going to make this head exactly the same. Use our piece from the cutting guide that is 16″ x 14″ and when using my hooded towel tutorial refer to that piece when I talk about using the hand towel. Do exactly what I say in that tutorial until you have created your head.
Set your cute little head aside.
With your back piece on the bottom, place your front pieces on top of it and pin it at the shoulders and down the sides:
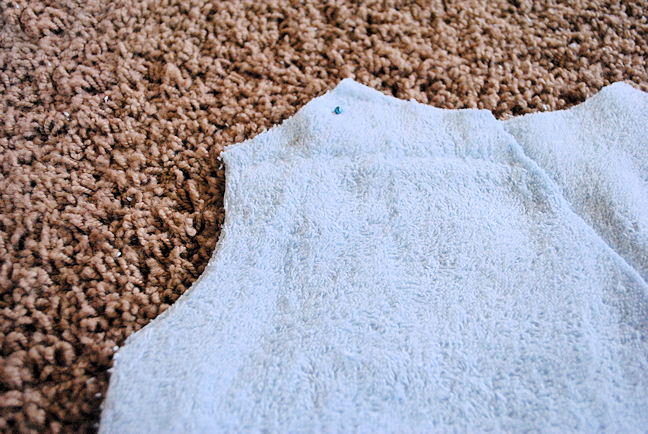
Sew down each side of the robe and across the two shoulders.
Now let’s attach the head. With the right side of the head facing the right side of the robe, begin pinning the head in place starting at the center of the neck and working your way out to each side: (One note-if the head is significantly larger than your neck hole, go back and resew along the back of the hood to make it more narrow. Take it in an inch or two as needed.)

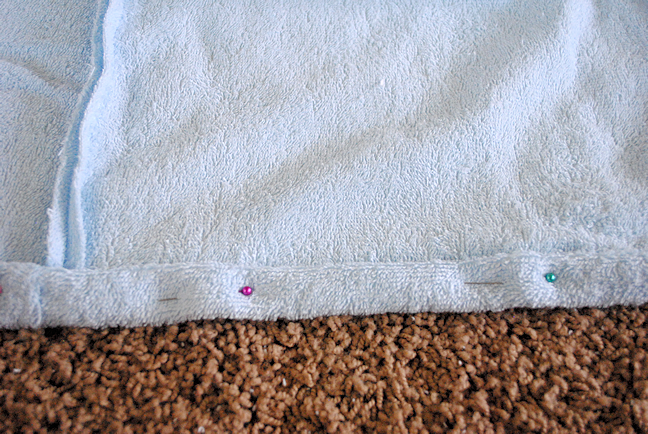
Now, let’s hem the bottom of the robe all the way across:
And up the each side. I hemmed just the bottom edges of the hood to make it a smooth transition from hood to side seams: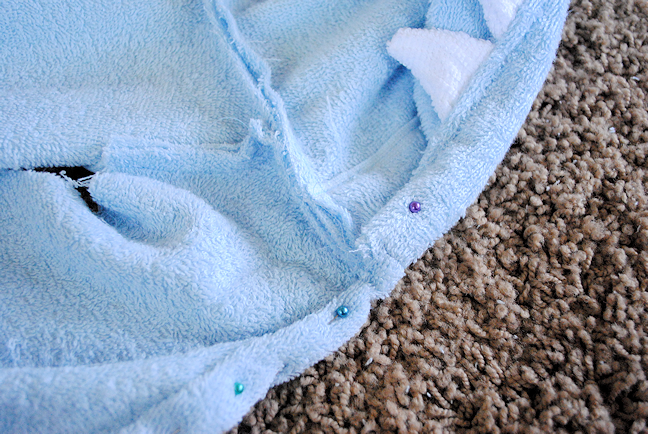
Now all that is left is the sleeves. Take each sleeve and, beginning at the top of the sleeve opening, pin it in place all the way around (of course making sure that right sides are together.) Once it is pinned sew all the way around the arm opening and then sew down the arm of the sleeve to sew it together.
Hem the ends of the sleeve. I think they look cute rolled on the bottom.
One last thing-if you were not using a serger to sew this, you might want to finish all of your raw edges with a nice zigzag stitch. That will give it a cleaner look.


Trista Schafer says
What type of fabric did you use for the white/black part of the eyes? Or what types of fabric do you find work best for these?
Thanks!
Amber says
I typically use just a regular cotton with fusible backing.
Kayla says
I love this idea. I have just started to sew so it’s a bit to hard for me. (I’m 11) I really want to make it for my little cousin. Hope it works;)
Linda says
This is a very good pattern. I can make this for the older children by using their long sleeve shirts and just add the size of their length that they want. Very good and I will be using this as a Christmas Present. Can always use a hat pattern from the children’s hat that I have made. Just regular hood for the older children. Thank you for this pattern that you gave us.
Elizabeth says
Do you have a pattern for this that would fit a bigger boy? Perhaps 3T or even 4T so he could grow into it?
Amber says
I don’t, but you could get a robe pattern at the store and turn it into a shark?
Cancer Rising says
It is just adorable! I wish I had the time, guess I’ll have to outsource this project to grandma LOL.
I love your blog btw. I’ll have to visit a couple of your sponsors 😉
Amanda says
This is SO cute! I just wish I had a little boy (or a shark loving girl) to make this for!
I would love it if you would link up at Martha Mondays, open now through Wednesday night!
http://www.watchoutmartha.net/2013/10/martha-mondays-link-up-party-features_13.html
~Amanda
http://www.watchoutmartha.net
Katie says
Stop the cuteness! Seriously, I think I might need to tackle this and just make it gender neutral and if we find out we are having a girl I’ll just add a little pink bow on it! 🙂
Kelley says
Amber, this is ADORABLE! I love it!!
valerie says
Love this! Just had my first grand baby and will save this to make as he gets bigger!!
Sarah @ Bombshell Bling says
Seriously, this is one of my favorite things you have ever done. It. Is. AMAZING! Cutest cutest cutest!!!! SEE YOU TOMORROW!!!!! 🙂
Debbie Ann says
This is adorable, and I can’t wait to try it