

When I saw this Riley Blake fabric at The Ribbon Retreat I absolutely fell in love and knew I needed to make something out of it. I stared at it for a couple of seconds and then it hit me-baby girl dress with lots of layers and ruffles. Because, you know, with 4 little boys I have tons of need for baby girl dresses.
This dress is similar to the 4th of July dress and Candy Corn dresses that I have done, but adds in a few more layers and slightly different straps. I love, love, love how it turned out! I think it’s my favorite baby dress yet.
I know you want to make one of your own!
And…there’s matching shoes! Click here for that pattern

What You Need:
3 coordinating fabrics (amount will depend on size of dress you are making-if you are making a baby/toddler size you can probably get away with about 1/2 yard of each. If you are going bigger than that, get more like 1 yard of each.)
Small amount of lining fabric (in coordinating color)
2 Buttons
Baby Dress Pattern Pieces: Infant (about 3-6 months size) or Toddler (about 12 month size)
Tiered Ruffled Baby Girls Dress Tutorial:
First of all, print off the pattern pieces (above). If you need a different size I recommend finding a dress that fits your child currently and use it as a template to create this dress. Simply create a pattern just like the ones I have given you, but size it up to fit your child. I will be adding pattern sizes down the road.
With those pattern pieces, fold your main fabric in half, place the pattern piece on the fold and cut. You will have one piece of the front and one of the back. You then need to do the same with the lining fabric so that you end up with 4 total pieces of cut fabric to create the top of your dress.
Now, grab the front piece of your dress and the front piece of the lining. Put right sides together and sew all the way around except across the bottom. Do the same with the back pieces. Turn right side out and iron them nice and flat.
With those 2 pieces that you just created, again, put right sides together and sew together on the sides. Turn the whole thing right side out.
The only other thing you need to do to complete your top is to sew your buttons in. Hand stitch the button in place on each strap and create a button hold on the dress bodice for the button to go through. And you’re done with the top! By the way, turns out I need some serious practice at sewing button holes.

To make the body you need to cut 3 long strips of fabric-one of each of your 3 fabrics.
You need to know how long you want your dress to be and then make your strips accordingly.
For the toddler size dress my strips are about 4 inches wide. For the infant do more like 3 inches wide.
To determine the length, first measure your bodice width. (The toddler one is 10.5.”) Then use the following chart to figure out length:
Chart for the layered ruffles:
***When I say width here, please measure your bodice piece width and then double it. So that the width I am referring to is the width of the front and the back piece together.
Layer 1: 1.5 x the width of your bodice
Layer 2: 2 x the width of your bodice
Layer 3: 3 x the width of your bodice
Take your first strip, fold it in half and sew the ends together:
 Then run a basting stitch along the top end, leaving the thread hanging nice and long at the end. (Do not knot the thread at the start or the finish.)
Gently pull one of the threads to create a gather in your fabric.
 Pull and gather until it is the width of your bodice.
Insert the bodice of the dress into the gathered ruffle that you just created so that right sides are touching. Stitch all the way around the dress to sew the ruffle to the bodice top.

Now do the same with layers two and three, stitching them into place on the layer above them.
On the bottom layer sew a hem:

Turn everything right side out:

And gawk at its cuteness for a minute or two. Don’t you love it?
This post was originally posted at The Ribbon Retreat.
You’ve just found another prize in the Sew Crazy Monthly Challenge Scavenger Hunt:
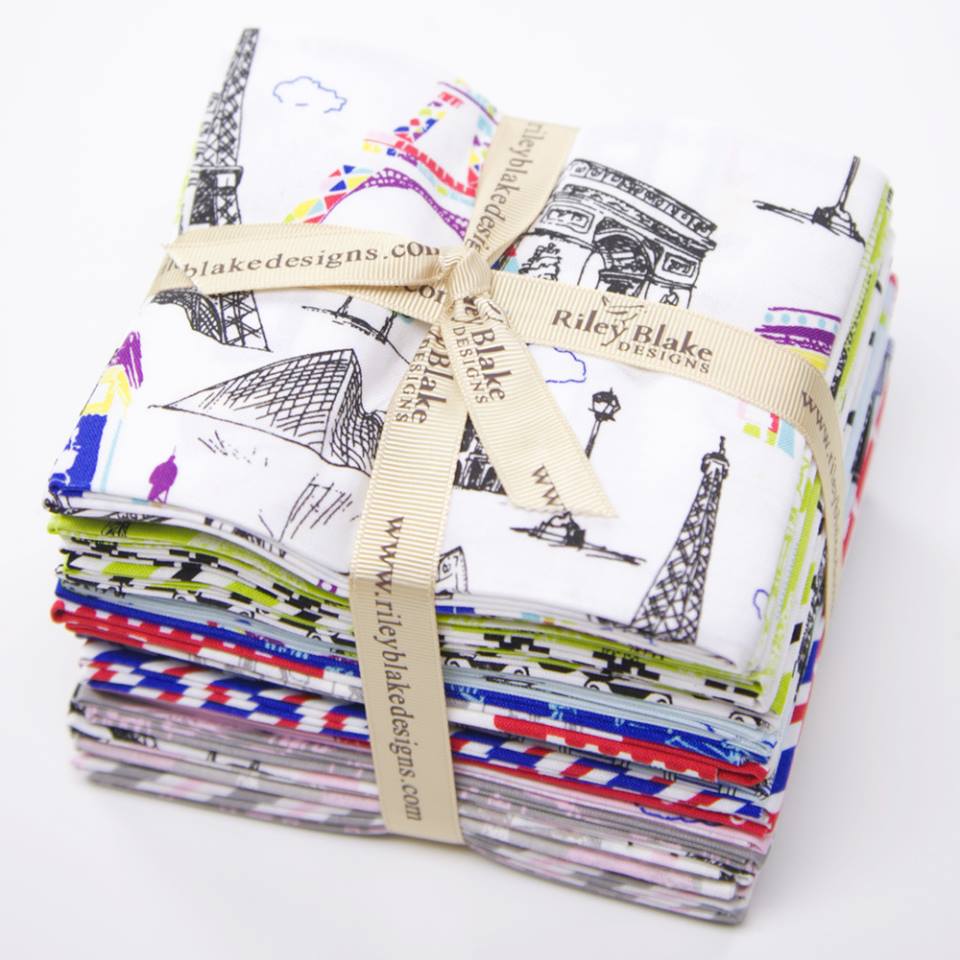
1 Person will win a Pepe in Paris Fat Quarter Bundle from Riley Blake Designs:
Enter to Win It Here:
a Rafflecopter giveaway
And here’s another clue for the next prize pack:
If it’s bags that float your boat,
Try this purple chevron tote!


Bettina says
Hello, this is such a cute dress, I have already bought all the supplies and I can’t wait to start sewing! Have you included seam allowence in your template? If yes, how much is it? Thanks!
Amber says
I’m so bad about including those but I usually use about 1/2″
Rosemary says
The link to the pattern doesn’t work. How can I get a copy of this darling dress pattern?
Amber says
Which one are you needing? I just checked and both should be working but I can email you one if you need me to. 🙂
Jo Anne says
Have you posted any more pattern sizes for the tiered ruffled dress. My petite 2-Year-old granddaughter lives cross country from me so do not have access to her other dresses and want it to be a surprise for her mom also.
Anna Pacheco says
The infant dress is cute. I think if I make it, I will put a spin on it and do a layering effect on the ruffles, so each would have it’s own hem.
Anja says
Thanks for the pattern of this lovely dress! I made a (my first one after 3 boys) dress for my granddaughter with it!
Kelbe Lawson says
Amber,
When you say:
“To determine the length, first measure your bodice width. (The toddler one is 10.5.”) Then use the following chart to figure out length:”
Are you referring to the length of the strips that will create your ruffle (since you’ll be pulling it to create the ruffle). For example my toddler dress bodice is 23″ there for the length of the strips should be as follows:
L1-34.5″
L2-46″
L3-69″
with each strip being about 4″wide taking away seem allowance I’m thinking my skirt part of my dress will be about 10-11 inches long.
Thanks …just needed clearing up. This is my first dress…so far the bodice turned out great!
Kelbe
Amber says
Yep!
Kasha says
I just wanted to thank you for the inspiration and guidance into how long each layer needed to be. Using your calculations, I made a rainbow one for my 7 year old that she adores! Thank you so much!
Rachel L. says
I’d love to see this in a 2T or 3T pattern!
Nora Charles says
I love the dress pattern. Just wondering what size seam allowance did you use? Thanks!
Amber says
1/2″
Kay Rosier says
I can’t wait to start on this dress!! I am fairly new to sewing, so, I’m not sure I understand all the directions on how to measure the body of the dress, but, I’m going to give it a try:)
Dawn Binder says
You are kidding, right?? I can’t pick just one!!!!
Colleen says
Oh my gosh, how do I pick just one? I actually love this tiered ruffle dress. I’ve made two for my daughter and they’re just darling!
Angie says
I love your hooded towels tutorial! Definitely want to start making these!
Rachel says
I love the shoes, the one’s I’m currently working on. I can make them and embellish them to switch up the “look” of the shoes! So adorable!! This is the only one SO FAR that I have done (working on) – BUT there are many on my to-do list. You have a fantastic variety for both genders and a variety of age groups! Thank you so much for sharing your talent with us!
Crystal S says
The crayon and coloring book carrier!!! I made one for my 3 year old niece, she adores it! I also made one for my 10 year old niece with black fabric that is more preteen with scribbled hearts and words like “Boyfriend” and “rockstar” she keeps her sketch pads and colored pencils in it.
Nichol says
Love the hooded towels.
Hinahon says
I love the Duck Hooded Towel. I have no kids but I’d love to modify this to make something for myself cause I just LOVE duckies ^^
Diana says
The hooded towels, I have made 4 or 5 already. Love the variety.
loretta says
So many great gift ideas for the littles in my family. I’m loving the scavenger hunt!
Carly says
These would make perfect Easter dresses for my two littlest girls. I can’t wait to start picking fabrics!
Amy says
So many I want to try, but I think the messenger bag is my favorite.
Melissa says
I love many of the projects but my favorite has to be the heart shaped oven mitts. I’m planning an entire kitchen linen set because of it. Even though it’s past Valentine’s I’ll be using Valentine’s fabric, I cook with love so it works. 🙂 I’ll be making both the oven mitts, some towels, hot pads (we have contact paper on ugly rental counters), and an apron. Thanks! 🙂
Royce says
the messenger bag,
Elizabeth Dye says
So far, I like the shoes for a little boy and all the girl dresses (but I see hooded towels I need to check out after this!
tracey says
love the Messenger Bags, but if i had little ones…holy cow those hooded towels are cute!
Megan Jevne says
All your projects are great but I’d say the hooded towels. Perfect for my very tall 2 year old since the toddler ones just aren’t big enough anymore.
Tari McDonald says
I love the sleeping bag tutorial- my boys would get a kick out of having one!
janene says
My fave project is a series of projects really. I’m loving the monthly challenges. 🙂
Rebecca says
I like the piping tutorial 🙂
brandi says
Love the fabric!
Courtney Brown says
I can’t choose just one! I could spend hours looking through and choosing them!
Maddison says
i like all of these projects
Laurie says
too many to choose from
Molly says
I love the maxi skirt tutorial. Ready for spring to be here!
Adrienne says
My favorite Crazy Little Projects would have to be the sleeping bag. It’s really difficult to find cute sleeping bags in the store.
Deborah South says
I think I might find all the clues.
Katelyn says
What an adorable idea for all your extra odds from pillows and curtains!
Sandy Lasher says
You have many fun projects, would love to make this cute dress, or any in you 25 fun thing to do with 25 fat quarters!
Brandy says
The messenger bag.
Amy says
Love the reusable snack bags… Perfect way to marry sewing and sustainability.
A says
I love this tutorial-it is my favorite!!!
umaesew says
Lots of lovely projects, especially the messenger bag. Thank you for the giveaway.
Garilyn says
Easy baby blanket
Kristen says
I just started following and doing the #sewcrazychallenge this year, so I still have a lot to explore and try. But so far, I have made a hooded towel, a pillow with applique, and an oven mitt! I’m thinking about either a girl’s dress or the cross body tote bag next! …And of course March is almost here so, I can’t wait to see what the next challenge will be!
Rhonda says
I have fabric ready to make the messenger bag.
Sarah says
I love the tote bag tutorials. I can’t wait to finish my project backlog and start on one!
Lisa Smith says
Cute dress.
Sandra says
I love pretty muvh everything on your site
Patti McAvoy says
Too many to choose from, love all your projects and the fabrics!
Kate D says
The 25 projects for beginning sewers have been very helpful!
Sarah says
I love all the little girl dresses and skirts. I found the three tiered skirt while searching for this and can’t to make it for my daughter.
Lisa says
I have two older boys so I will have to make them the sleeping bag. For my three girls the three tiered skirt looks like a simple project as well as this ruffled dress.
Katharine says
Zipper pouch
Dita says
I really like the mini book tote! It just looks prefect for scriptures!
Nicki says
All of them!!! No way I could choose just one …
Chris A. says
This little 3-tiered dress is my favorite project
Susan says
Love the messenger bags. The mini one and the bigger ones.
Erin says
So far, my favorite projects are burp cloths and bibs – things that make usable, but still personal, baby gifts. 🙂
Erica Ralston says
I love this. I need someone to have a girl quick. I am a little afraid to size something though
Heather says
Very girly! Love.
Lydia Che Lee says
The sew for home pillows!
Kelley Camp says
So far the heart-shaped potholders have been my favorite!
Prerna Kapoor says
Love the beaded bracelets.
Eileen Mueller says
I like the hooded towels
Brittany Duso says
My favorite project is the towel animals! They are adorable and my todders LOVE them!
Nikki says
I love all the projects. Two of my face are the Mini Tote (Scripture Tote) and the Messenger Bag
Holly says
hooded towels are so cute!
Rebecca Brewer says
The mini messenger bag and any of the hooded towels.
Angelia L. says
We don’t have any small children in the family at the moment but I really do love the hooded towels. Hopefully I will have grandchildren someday so I can make some.
Michelle Jimmerson says
I really love the sleeping bag!!!
Stephanie Kallio says
Love the minion hooded towel!
Shelley says
Favorite project? That is super tough. The one I’ve made the most is the maxi skirt! Love all the GREAT ideas!
Melissa M says
I am not sure that I have a favorite. There are so many that I am putting on my to do list!
Kathy McLaughlin says
I love the matching shoes
Dezi A says
Well I’ve been dreaming about your salted caramel cupcake ever since I saw it- so we’ll go with that. 🙂
Linda says
Hi, love the Lion Hooded Towel project>it is just the perfect gift for Baby Showers>love it!
Thanks so for the fun+giveaway!
Cindy says
I love the hooded towels, messenger bag and zippered pouches
Mandy says
I love all of your creative hooded towels! They are all SEW adorable!
Lisa H says
My favorite is the first project I did from this site…the mini messengar bag! I made it for my neice and she loves it.
Molly says
My favorite so far is the messenger bag. I do love the pencil pouch and diaper and wipes too!!
Laura says
Hooded towels are a winner (so much better than store-bought ones!).
Ashley says
I love ALL the projects on Crazy Little Projects, but the lion hooded towel project was just so adorable and perfect for my nephew.
Stefanie says
Love this might have to make one soon.
Karen says
Favorite Project? Hmmmmm…everything? Your projects are not intimidating and I like that.
Gina S. says
Love the messenger bag
Keniesa B says
I think the hooded towels are my fave. Olaf May be my favorite, but so hard to choose.
Sharon Geyer says
You have so many wonderful projects on your blog, it is hard to choose. All of them!
shirley tener says
I love the crown towel..
carolyn says
i love all the 25 things to do with a fat quarter.
dianne says
I don’t have one yet…but all your projects seem do-able…very excited!
Cheryl says
The Love pillow (sooo cute!) and the messenger bag!
Kim M says
I love your messenger bag tutorial (although I’ve never tried my hand at making a bag!).
Adrienne says
I have a little girl who loves dresses! She’s going to need several of these!
Erin Montequin says
Hooded towels… The best idea ever for wet kids!
Elizabeth Johnson says
My favorites are the baby dresses!
DeAnn Oliekan says
This cute dress is my favorite!
Lara says
Love your hooded towels!
Sherry S says
I like your messenger bag tutorial. I think that is one of my favorites.
Jenny Kingcome says
Oh dear. This scavenger hunt is certainly making my list of future projects a lot longer! Thanks for all the top tips.
Kathleen Lambert says
I’m anxious to try the Sleeping bag pattern for my grandson and Girl’s Tiered Ruffle Dress for my granddaughter. By the way such a fun contest. Love the scavenger hunt theme.
Kaylee says
I think I’m going to make a camera strap next.
DeborahGun says
I love the messenger bag.
Gail says
I like all the clothes for toddler girls, especially if they have ruffles.
Sara Garcia says
The hooded towels are so cute. They are on the to do list.
Debby says
Purple and little girls. What could be sweeter.
Megan B says
Yiesh, so many to choose from! Messenger bag, hooded towels, anything that involved sewing and fabric…
april says
i made this dress for my 5 month old…so cute!
Janai Ayala says
I love so many of your projects! I only found your blog a month or two ago so I’m not sure of my favorite yet but I can’t wait to make this dress with some cute baby shoes!
Chelle Chapman says
I’m gonna have to say THIS post, the Girls Tiered Ruffle Dress is hands down my fave! Back when I found you it was THIS post you were sharing & I made this dress & sent it to my Gran baby in Germany!! I tried to get as close to these colors also as my DD is a purple hound!! Thanks for this FUN giveaway/hunt!!
Naomi Hargrave says
Next on my list to make!
Holly says
You have so many cute ideas! I love getting your emails in my inbox to see what the next one is. I love your hooded towels and the messenger bag.
Geni Pickens says
The hooded towels are really cute, but I like all your little projects so it’s hard to pick just one!!
Christy Condin says
I love all of your projects!! The only one I have made (so far) is the grey and pink bag!!
Nikita says
Sleeping bag project… but really it is so HARD to choose..I love so many.
Mippy/Sabrina says
I am a new fan to your page (Riley Blake sent me) I am also new to sewing so I haven’t tried any of your projects yet. I would say one of my favorite project that is yours would be: THe MEssenger BAg and tutorial 🙂
Shannon says
Sleeping bag!
Tiffany Hoskinson says
my fave so far is the hooded towels- they are always a hit as gifts!
Sharon Williams says
I love the messenger bag! I really like a lot tho 🙂 and you tutorials are so great to follow!!! Thanks for all the time and extra stuff you put into it!!!
Amanda daws says
Fat quarters make putting together a coordinated finished product soooo easy
Kelli says
The hooded towels. I have yet to make one, but I really need to get on that.
Brenda Weikel says
The sleeping bag is my favorite project on this blog so far. The three tiered dress would be a big hit with a little girl I know, however.
Hotpinkthread aKa Heather Browne says
Really, just want us to pick one favorite, ok, purple chevron tote!
Cindy Dahlgren says
Other than girls dresses, when I have no girls to sew for, I love your hooded towels!
Crystal Bender says
I love those shoes
Michelle says
the sleeping bags were really cool!
Cheryl L says
Just can’t decide–so many good ideas!
Jane says
Love the hooded towels. I have such fond memories of them, but of course they were all store bought.
Beverly Killebrew says
The cross body tote bag!
Meghan Mack says
My favorite project(s) are all your hooded towels! I have made several (with the minion being a favorite of those) and can’t wait to try more!
Amanda says
I’m learning so much from your tutorials!
Thank you
JoBeth says
Hard to pick. Love the book bag, the baby blanket and the hooded towels
Katrina Boot says
I love the diapers and wipes case. Such a practical go-to gift.
Gay lynn says
The hooded towels 🙂
Dawn Hoover says
My favorite sewing project was the pin tuck pouch.
Diane says
It’s so hard to pick just one. I have made so many credit card holders as gifts. I have made a bunch of the burp cloths from diapers for shower gifts. I love the diaper and wipe carriers. Just to name a few. Your newsletter is my favorite. I can’t wait to see what ‘s coming next.
Elizabeth says
I like the sleeping bag
Terry says
I am a fan for sure!
Danielle Johnson says
I like the ruffle bag!
Ramona M. says
I love the hooded towels and the sleeping bag.
Tina Nichols says
I love the hooded towels
Penny Gail says
I so wish i could have another baby. I guess I’ll just have to start making gifts everyone else!
Lisa Wiesman says
Love this dress!
Penny says
Really? you are going to make me pick ONE favorite? Awe, come on, I like too many of them!
Katie Kobus says
I haven’t had a chance to try any projects because of my machine, but I’m excited to try some of the baby projects!
Erin M says
I haven’t done many projects yet but I made the messenger bag from last month and I already have 2 people asking for one! So I guess that’s my favorite. 🙂
mary frtisch says
Santa tote–great for Christmas gifts!!
CC says
Absolutely adorable!
Margaret R says
I love the hooded towels.
Amanda says
My favorites so far are this little dress and the adorable matching shoes.
Lacy says
Love this!
Jen Kriv says
I loved 2 projects, the colouring book / crayon holder and the backpack. Had so much fun doing them.
Sophie says
I haven’t made one yet, but I love the messenger bag tutorial. I usually only buy fabrics when they’re on sale so I’m waiting to get the perfect combination before I start. Can’t wait to do that one!
Hayley says
The messenger bag is the one I keep coming back to
tiffani says
I love the confidence that comes with sewing a sleeping bag primarily because that freaks me out!!!
Robin says
love, Love, LOVE it!!
Kellie says
Hands down the hooded towels!
Torrie says
You have such a great collection of projects. I’d have to say the scripture tote is my favorite b/c I’ve done it twice now and loved the finished product both times.
Emilee k. says
Love the animal baby towels!
Dianne says
My grandchildren would love the sleeping bag. I think I will try it.
Kelly says
Love the messenger bag!
Tracy says
My favorite project would be the Milky Way cookies, I really want to try them.
Emily says
I would have to say that so far my favorite project on Crazy Little Projects is the learn to applique project. It really did teach me how to applique and now I LOVE it!
Krista says
Olaf the snowman hooded towel is my favorite so far!
Denyse Wilkins says
I haven’t done them all but I did love how my daughter’s hooded towel came out!
Tammy says
I am looking forward to making the pj pants for my grandson..
Carrie says
Right now it is the Olaf the Snowman Hooded Towel
Patricia S says
I can’t seem to pick one favorite project…I don’t even think I’ve seen them all yet. Just when I think I have seen them…I discover another. 🙂
KERRY says
ooooo I love this. Can’t wait to make it
Candias Chalker says
I love, love, love the hooded towels…made the monster one for my nephew and grand baby!!
Jenn S. says
I love the hooded bath towels! Can’t wait to be settled into our new house and have a sewing room!
Katherine says
Maybe this is a present for my niece waiting to be made!
Corina says
My faves are the ruffled purse, the baby burp cloths, and the pajama pants. As you can tell those are from your learn to sew series. I’m making my way to your second series which is purchased and waiting for me!
Marlene says
My favorites are the Hooded Bath Towels
Catherine says
love the messenger bag!!
Jenn says
The messenger bag is one of my faves 🙂 I’ve made three and will be making more 🙂
Lorri says
great idea for my grand nieces 2 birthday in may!
Jessica says
Hooded towels
Kelly says
my daughter came over as I was looking at this post and has decided I am making 2 of these dresses, she even went down to the sewing room, pulled out her bin of fabric and chose the materials she wanted for each dress. And yes my 4 year old has a whole bin of fabric that she has picked out over the years, Riley Blake is one of her favorites 🙂
Brenda Maxwell says
This dress is adorable – I wish I had a little girl to make it for.
Tami Perry says
So far is has been the totes, especially the cross over body tote.
Anne Marie says
My favorite is the sleeping bag.
AnnieG says
I cannot wait to try this for my baby girl this summer!
Denise Jeffus says
Can you make this into a top by deleting one of the ruffles? I need a cute top to go
With shorts for my granddaughter
Sharon says
My fav is the baby girl peasant dress- its how I found the site!
Lynsie backstrom says
I need to have a baby girl!
Marina says
too bad my baby is not baby anymore. Like the pattern a lot!
Laura Braho says
Love this fabric!
Arika says
wow that is a hard question…of those I’ve tried I like the layered skirt – the coloring book case was good too…I just had a few screw ups that make it harder to love this time! The shoes were cute but I couldn’t get them right…so many more that I want to try too!
Katie says
You’re many hooded towels!
Katy says
I love the Easy Baby Blanket!
Kara says
need to change this up and make it for my bigger girl!
Maria says
Favorite project (you ask all the hard questions!)… ok the one I am looking most forward to trying is the hooded towel. My daugher’s from Pottery Barn are all completely destroyed (of course 2 of the 4 we’ve had for nearly 8 years, so I shouldn’t complain) and we need some more.
Carla says
My favorite is the sleeping bag.
Shannon says
My favorite have been the hoodie towels.
Heather says
I love all of your projects! I have made lots of hooded towels, a maxi skirt and bags.
Dawn Spruill says
Now all I need is a granddaughter!
Kim H says
I loved your Learn to Sew lessons and projects. Probably my favorite (and best known for) are the hooded towels. I’ve since branched out and made my own creatures.
Hannah Elkington says
I really want to make the book tote bag for my sister, it’s on my list when I finish the Feb challenge!
Autum says
I like the easy baby blanket and pajama pants tutorial.
Pauline Gudas says
The messenger bag
Leslie says
My favorite project is not one project, but a series of projects! The Learn to Sew series from last year! I have learned so much, and the projects are good reference for when I just want to practice some skills. Thanks!
Nannette Elizabeth Nielsen says
For future granddaughters 🙂
TONYA says
My niece wool love this dress!
Wendi says
I am really liking the oven mitts. They’re hard but it’s fun!
Amanda Davis says
Fat quarters rule!!! Love the three tier dress.
Rebekah L. says
The first thing that comes to mind are your hooded towels, they are too stinking cute.
deja says
My favorite is the hooded towels!!! They make great gifts for all my kids friends!!!
Jen S. says
I am pretty excited about making a messenger bag from the blog. I had a lot of fun making the oven mitt–it gave me exposure to bias tape and was a quick, easy, fun project that gave me almost instant satisfaction (unlike the quilt and special occasion dress I’ve been working on for forever).
Nikolette B says
My favorite project is the sleeping bag. I would love to try to tackle a project that big for my kids
Brenda Carpenter says
Adorable! I love this site.
Christine Crawford says
So cute! wishing i had a daughter!
Kristen says
I have made so many hooded towels from your tutorial! Love it!
Alana says
My favorite project so far is the bag I made 🙂
Rebecca F. says
I like the mini book tote bag. It’s on my list of things to sew.
Kristina Smith says
I adore this dress!! So many ideas on your blog!!
Leah says
I have learned to sew with you. I’m going to try hooded towels for birthday gifts for my kids. Hopefully, they are as cute as hours!
Sarah J says
You have so many great ideas– but I’m anxious to try the 5 minute flowers you posted recently.
Renee says
My very favorite project that I’ve done with you is the beach bag. But I’ve also done this dress and it turned out soooo cute.
Colleen Garner says
I love all your projects, you have inspired me to sew with your learning to sew projects, Thank you so much for all you do.
Randi says
I love this dress, the shoes and the skirt! Its so much easier to make clothes for my little girl than buy them, since she grows out of them so fast. Thanks for the ideas!
Melissa says
I can’t wait to make this for my youngest!
Elizabeth says
oops, sorry…I meant to say the maxi skirt!
Amanda G. says
I love all of the projects! but my favorite one is the book tote!
Heather says
I love the sleeping bag, but I don’t know if I could choose a fav!
Elizabeth says
My favorite project that I really want to try is your double layer square circle skirt!
Shermi says
I don’t have a favorite project, but I really like the hooded towels.
Shawn Benson says
My favorite that I have made is the kids Messenger Bag! Love it and easy to follow!!! 🙂
Carole M says
favourite? don’t make me pick. I’ve pinned so many things from your site. I just wish I had more time to take a bunch of them on! I do like the pencil case because I actually made that one 🙂
S Gibson says
Thanks for the tutorial. Now to find the fabric for it.
Kim T says
I’m really liking this little dress. Could very well be my favorite project.
Jamie Praslicka says
OH I have been looking for something like this for Easter Dresses!
polly says
omg thank you for the measurements, I wasn’t sure how much wider/longer to go for the ruffles. I am making ruffled dresses for my 9 yr old granddaughter and this was so very helpful.. thanks again
Jo says
Do you have a pajama tutorial?
Amber says
Yes I do: http://crazylittleprojects.com/2013/01/pajamas-tutorial.html
Mary Jane says
I would like to make this, but not sure how to do it to fit my almost 20 month old granddaughter! Any chance of you making a pattern for this size or could you tell me in details how to do it, if it’s not too much trouble? Thank you so much!
Amber says
The easiest thing to do would be to use one of her dresses that she owns as a guide if possible. Try to adjust the top part of the pattern to match the top of one of her dresses and then work from there.
Lucille St Pierre says
Thanks for the tutorial….turned out great….made shoes and a headband to match!
Amber says
Ah! Love to hear that!
Erin Squires says
Hi there – I am currently trying to make this dress – it’s super cute! However, I’m having some issues with the instructions for the layers. Maybe I’m not reading it correctly.
But, you say the length of the first layer should be 1.5x the width of the dress. We are then instructed to fold it in half – when you do this it is then too small (even before ruffle-ing) because it wasn’t even twice the width, which I would think would need to me the minimum to create a skirt piece that fits the bodice, and that leaves no room for ruffle-ing. Like I said, perhaps I’ve read it wrong. If so, please help! 🙂 Thanks so much. I really want to make this for my little girl. Erin
Amber says
Oh I can see how that would be VERY confusing. I need to fix the wording on that. I mean 1.5 times the width of the dress if you were to measure it all the way around in a circle. So really, the width times 2 and then 1.5 times it. Does that make sense?
Erin Squires says
Yes! That makes much more sense. Thanks so much! On to finish the dress….
diane tucker says
Hi, I just tried to print your sewing instructions from crazylittleprojects.com and it would not print. It prints everythng to the right of the instructions. I love the litlle ruffled tierd dress and was able to print the bodice back and front but not the actual instructions. I highlighted them and hit print but it printed like 18 pages of stuff.
Can you help?
Thanks. Love this project!
Amber says
Try copying and pasting the text into a word document maybe?
Jennifer Vanderslice says
Hi Amber,
What seam allowances do you use on this dress? It doesn’t appear to be the standard 5/8″.
Thanks,
Amber says
About 1/2 inch.
Ashley Suzanne says
Really adorable!
I am coming over from a linky party and I would love for you to come over and check out my Wool Dryer Ball Tutorial!!
Have a Good Day!
Ashley Suzanne
Jill @ Create.Craft.Love. says
So cute! I just love the lavendar fabrics! Thanks for linking up to the Pomp Party! Hope to see you back next week!
Vanessa @ See Vanessa Craft says
Super cute!! Thanks so much for linking up to Do Something Crafty Friday!
Winnie says
It’s a gorgeous dress
Lovely patterns and beautiful colors
Krista says
I love it! Very cute.
Joyce mosby says
such a cute tute! I am bookmarking it.
Nancy at maddalee says
Hi Amber, what very adorable little dress! My only grandchild is a little baby boy, or I would for sure be entering the giveaway.
Have a good day, Nancy
Jowyn Jenson says
Love this tutorial and the dress is gorgeous!
Patti says
I made a pattern like this for my daughter when she was 5 years old and sewed several of these dresses, one was gingham and the other from sewing scraps. Glad to see a pattern for a baby, I have a new niece and 2 more on the way.
Katherine Ochsenfarth says
I love this dress! My little girl will turn 1 this weekend and would look so cute in the dress!
Michele says
I would love to win this dress for my Niece. The colors and pattern are great! If I had a sewing machine life would be so much easier 😉
Christine says
I want it!!!! Can you make an adult version for me to wear? 🙂
Thanks so much for sharing this at The DIY Dreamer.. From Dream To Reality!
jen says
i would love to win! it’s so cute!
Michele says
I am going to try and make one for a 6 going on 7 yr. Old little girl. Wish me luck! Any tips?
Jamie @Roubinek Reality says
I made one of these in a sewing class not too long ago! So cute!! I would love to win one of these for my baby girl! 🙂