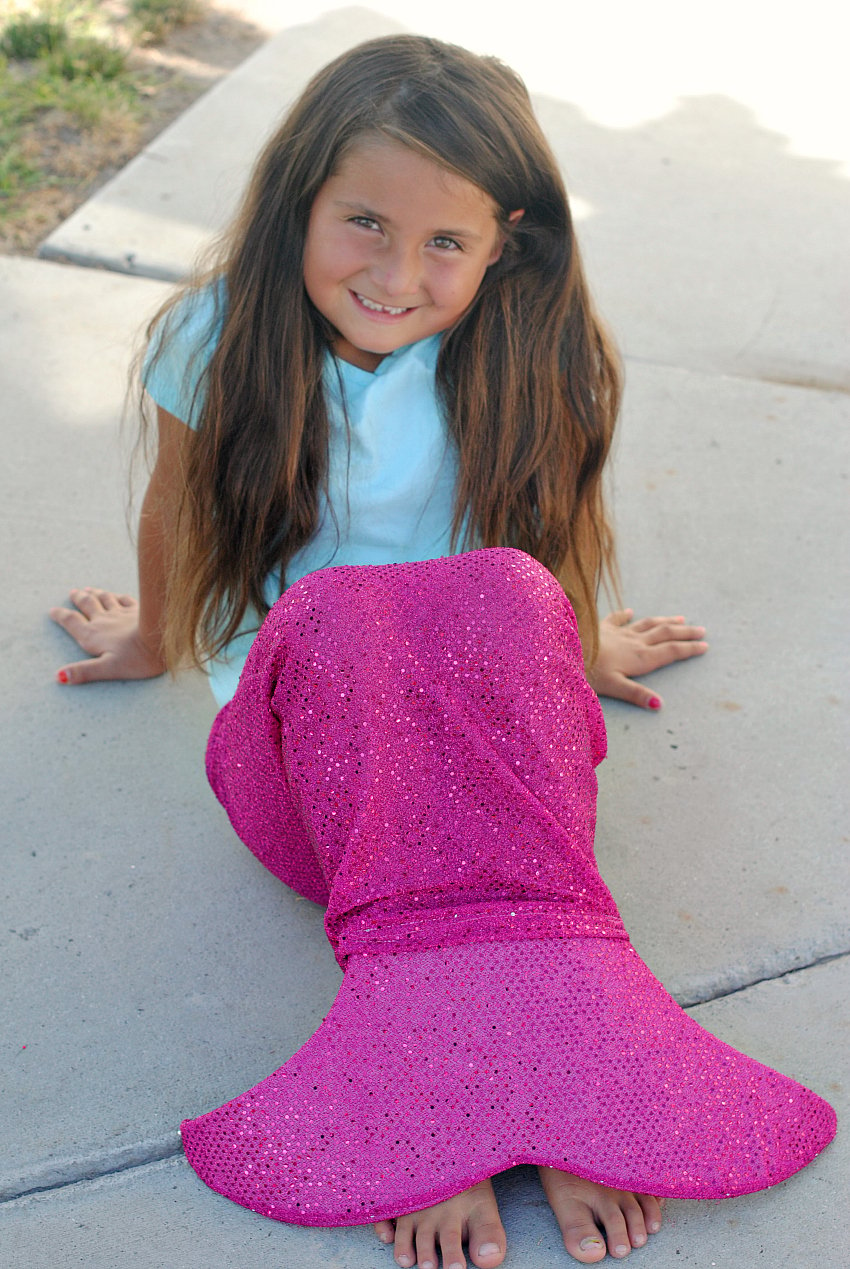
What’s the Project? This cute mermaid tail pattern for kids is fun to sew and fun for the kids to wear. With a spot in the back to allow their feet to move so that they can walk while wearing it, this mermaid tail is lots of fun for dress up!
Over and over this summer I’ve had little girl’s mermaid tails on my mind.
I’ve seen some at the pool, I’ve seen some towels, I’ve seen them on the internet, so when two little girls in my life were wanting one, I decided to give it a go and make some mermaid tails! And now that I know how, I can teach you!
They are really easy to make. The first one took a little work to figure out how I wanted to do it, but by the second, it took about 20 minutes to sew is all!
It’s a pretty easy project and something the little girls will love! Here’s a fun mermaid tail pattern for you!
I should mention a couple of things.
First-one of these little girls actually wanted a dolphin tail, so the silver one is a dolphin tail. 🙂 So these could be mermaid tail patterns or dolphin tails.
Second-I am fully aware that these are not necessarily considered safe in the pool. I made these ones intending for them to be used at home. (You can do with yours what you want.) So don’t go crazy in the comments telling me I am evil for making these. NOT that I’ve ever had crazy commenters… 😉
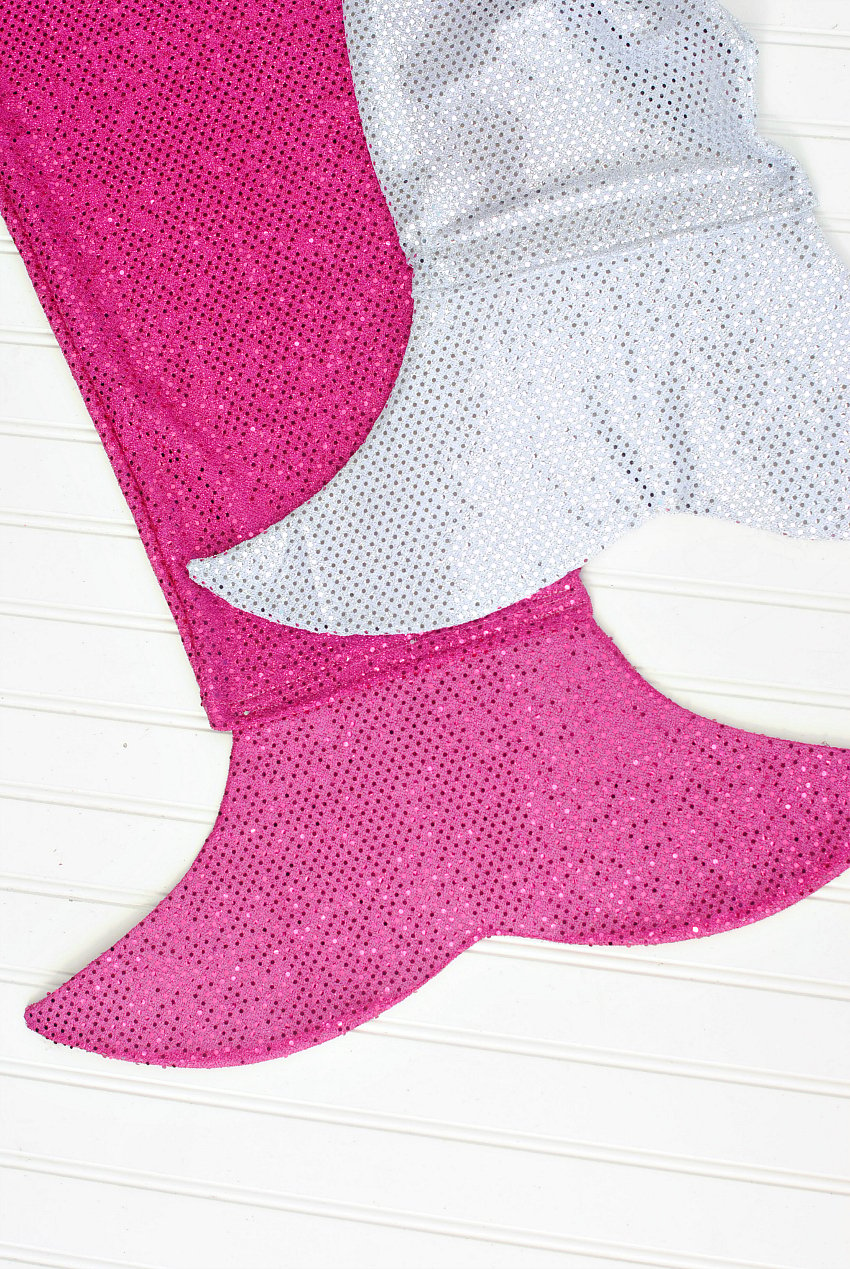
I seriously kind of love how these came out! I mean, hot pink and sparkly? How can you go wrong?
Are you ready to try making one?
Free Mermaid Tail Pattern & Tutorial:
Please read about measuring and figuring out your sizing BEFORE shopping for fabric because how much you buy will vary by your sizing for this.
Supplies Needed:
- 1 1/2 or 2 yards of stretchy, shiny fabric (This will vary based on size. I was making tails that were about 32 inches long. If you are making it longer, get more fabric.)
- 1/2 yard of stiff interfacing (the stiffest you can find)
- 1 yard of elastic
- Mermaid Tail Pattern Piece
Sewing Instructions:
Before you begin, and really even before you shop for fabric, you will want to measure your little girl if possible. Here is what to measure:
- Waist
- Knees (with them together)
- Ankles (with them together)
- Waist to floor
You’ll use these measurements for your guide while sewing.
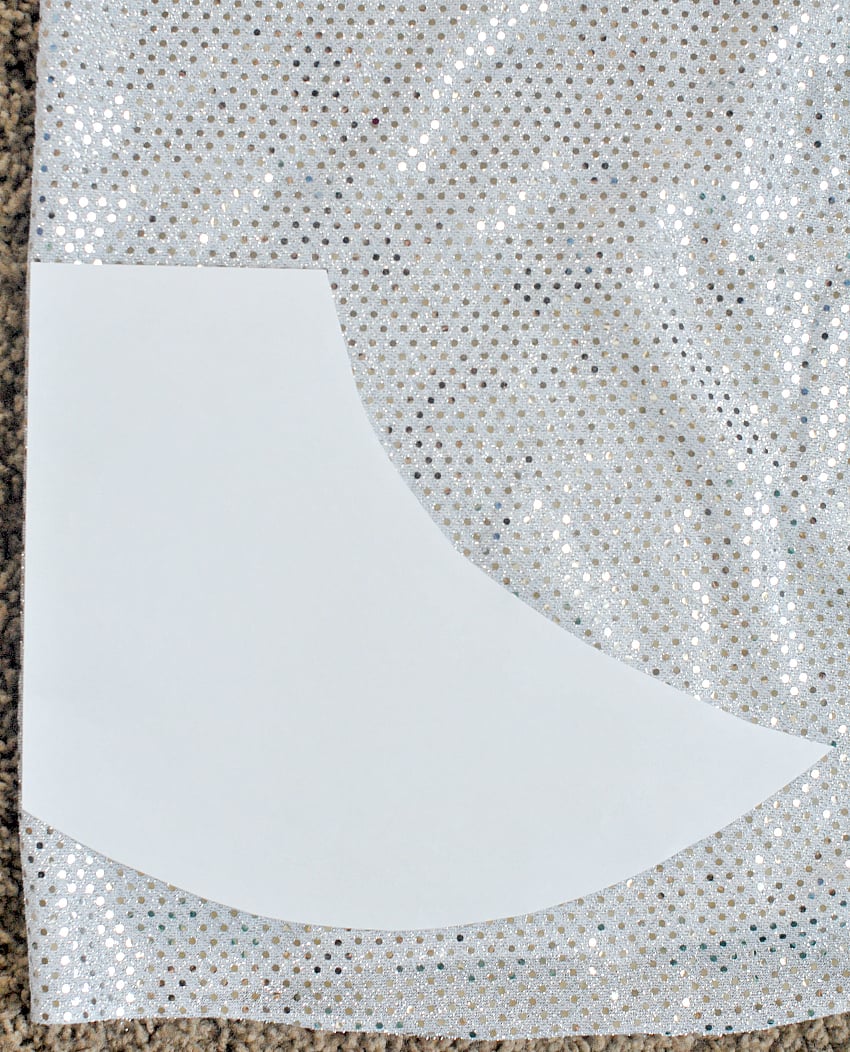
Now, print your pattern piece and cut it out.
Fold your interfacing in half and place the pattern piece on the fold and cut out one piece from your interfacing to make the tail.
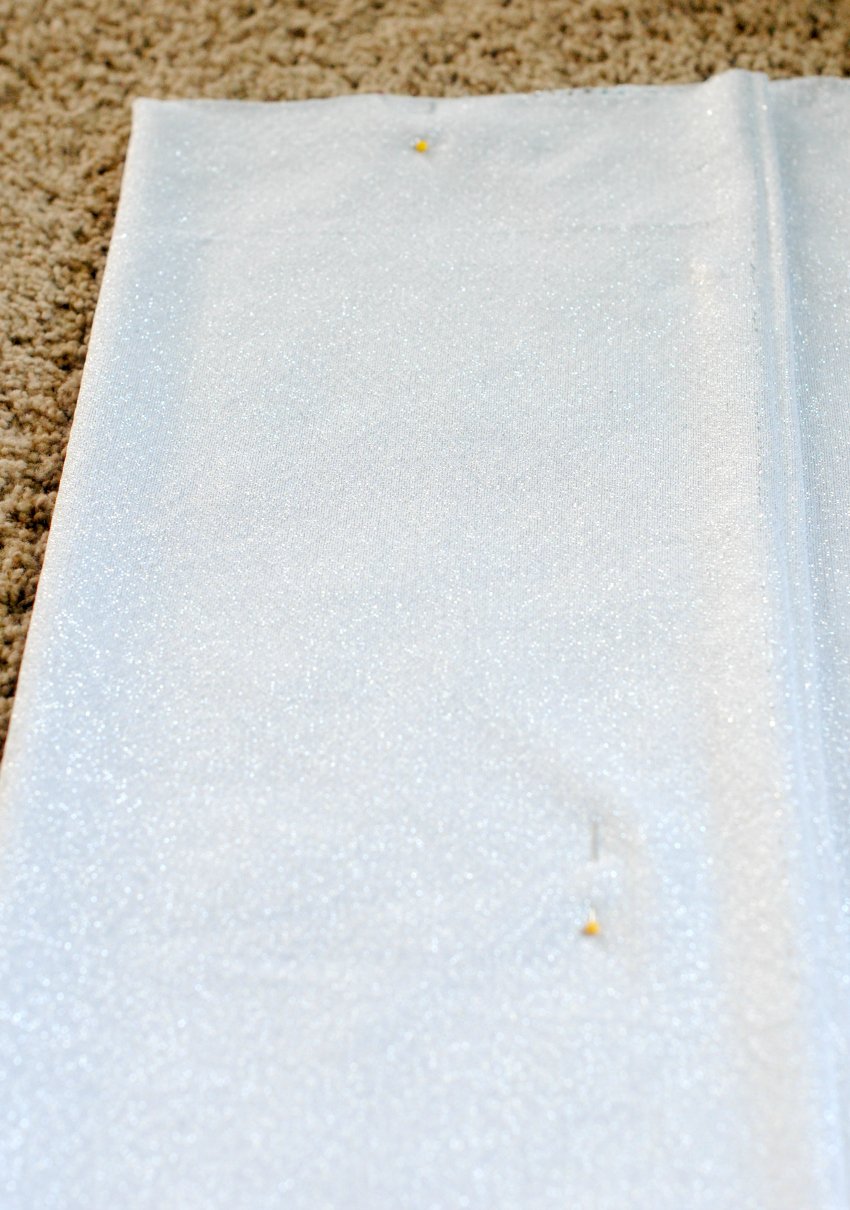
Now fold your fabric in half and cut 2 of the tails from your fabric using your interfacing as your pattern. BUT, make sure to cut it about an inch bigger all the way around to allow for seam allowances once you sew:
Now put your two tail pieces right sides together and sew around the sides, leaving the flat top part open.
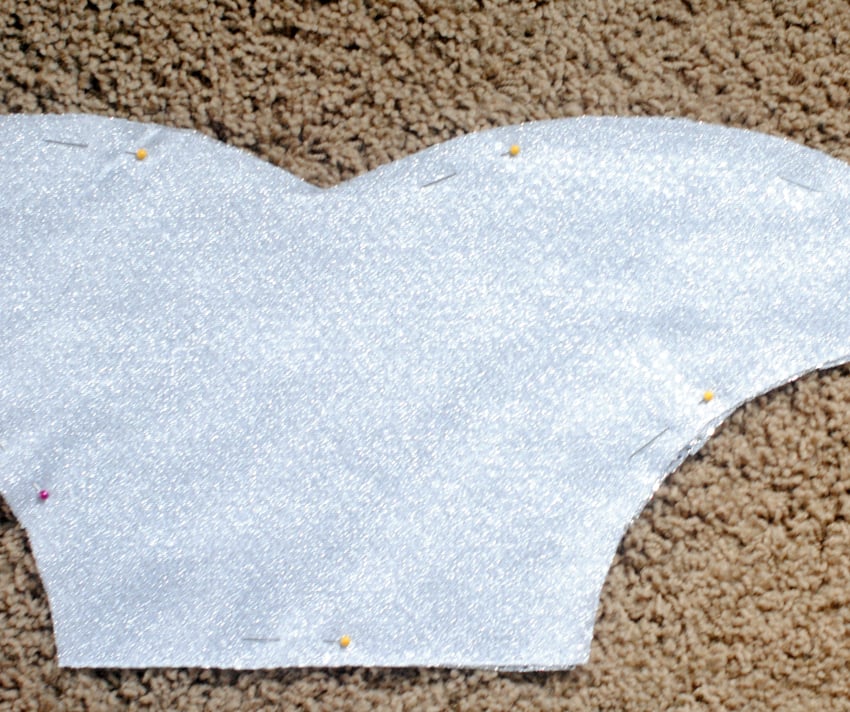
Then turn it right side out and slide your interfacing down in.
Set this aside.
Now, here’s where you will need your measurements.
Fold your fabric in half lengthwise, being careful of how you use your fabric and remembering that you still have to cut two of these full body pieces.
Measure your fabric from the top using your waist to floor measurement. Add about 4 inches to this to allow for hemming. Cut the fabric here.
Using your waist measurement, (let’s assume it’s 30 inches), add 2-3 inches to that measurement to allow for your elastic casing. So now let’s assume we are at 32 inches. Divide that number in half, because your fabric is folded, and we’ve got 16. I will then mark my fabric at the top at 16 inches for the top width.
Do the same with your knee and ankle measurements and mark those with a pin as well. This should give you a nice tapered (imaginary) cutting line if you go from waist to ankles. Mark the ankles at the bottom of your fabric.
Now, cut the line from the waist to the ankles.
Do this twice-so that you have a front piece and a back piece.
Place right sides together on your front and back pieces and sew them together down both sides.
Keeping it inside out, now hem the bottom (1-inch hem).
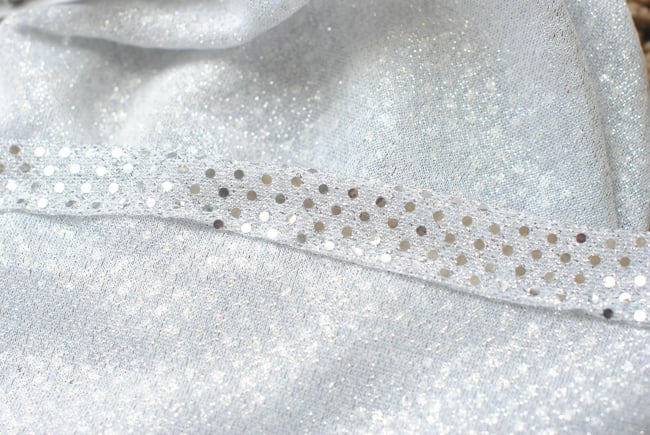
Still with it inside out, at the top, you’ll create a casing for elastic by folding it under 1 inch and then folding it under again 1 inch.
Sew around this but leave one spot open-about 1-2 inches.
Cut your elastic the actual measurement of the waist minus about 1 inch or so.
Using a large safety pin, thread the elastic through the casing you made.
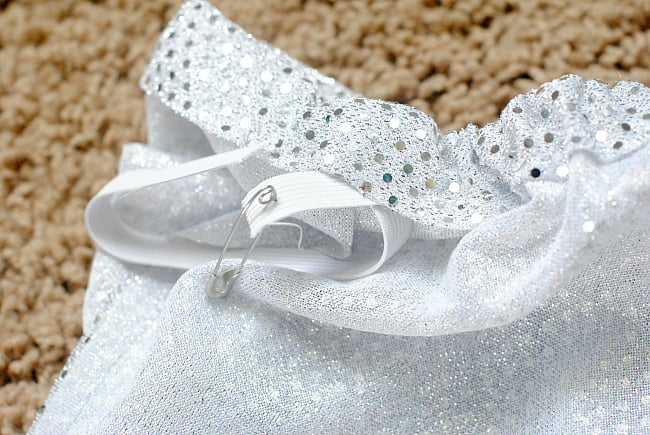
Bring it all the way around and sew the elastic together to form a loop. Then sew your opening closed.
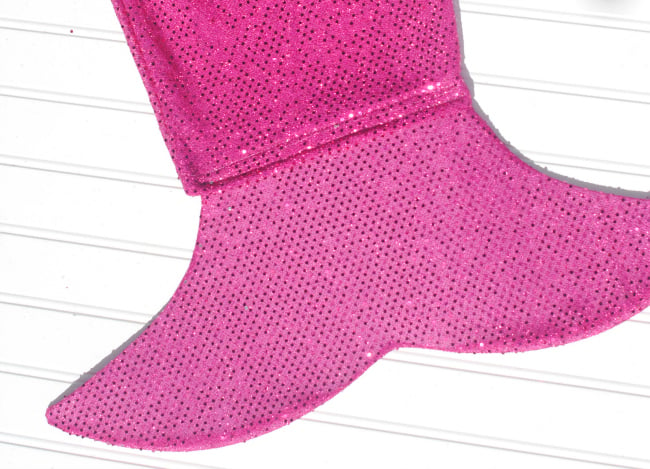
Now all you need to do is sew your tail to the body. To do this, slide the tail into the front bottom part of the tail and sew it in place just to the FRONT part of your body. I did this in two places, about an inch apart, to make it secure. Now the little feet will be able to come out the back with the little flipper in front.
And that’s it! Happy mermaiding! I hope you love this mermaid tail pattern!
You Might Also Like:


Pin It:


Jessica Beeman says
I’m having trouble wrapping my head around these instructions but I seem to be the only one. For the waist, knee measurements etc…I am going all the way around but are these measurements meant to be cut in half? So if my 2 year old has a 20 inch waist…then the measurement at the top should maybe be half that…10 plus 2 for the casing. then halved cause the fabric is cut in half. Otherwise I end up with half a mermaid tail that actually goes all the way around her. It’ll be a saggy mess if I cut another piece of fabric this giant, so I think these measurements should be halved before they are halved, yes? (Besides the length.
Jessica Beeman says
I meant “cause the fabric is folded in half”
Erin Short says
This is awesome. And way safer than what we did as kids in the late 70s early 80s. We would put the diving pool rings around our ankles to be mermaids.
Amber says
Haha wow! Glad you like the pattern!
Valerie says
All I can say is thank you for throwing this out there in your instructions “fold your fabric in half lengthwise being careful of how you use your fabric because you have another…” because I almost just wasted a ton of fabric and cost myself another trip to the fabric store… so thanks for that😘
Amber says
O good I’m glad you didn’t have to make another trip!
Marilyn says
Can you please design a regular fish tail blanket for a boy/? I’m tired of making sharks, like 5.
Amber says
Honestly you could probably make it similar to this, just not with sparkly fabric? 🙂
notyomama says
cool
Cindy says
Your tutorial is great! Any chance you can send a picture of your daughter standing. My daughter wants to have a better idea of what it will look like when she walks in the Halloween parade before she decides if this is the costume she wants me to make. Thanks!!!!
Amber says
Sorry! This isn’t actually my daughter but a friend’s daughter and I gave it to her over a year ago so I don’t know if she even still has it.
Elaina King says
My daughter has been begging me for one of these! I love this one – the shiny and stretchy fabric is perfect! Thanks so much for posting these step-by-step instructions for us. I’m going to try to have my daughter help me make this on her pink hello kitty sewing machine we got last year! Thanks again!
Ian G says
Great idea!
Do they take long to make? (of is that like asking how long is a piece of string.. )
ideally we’d love to give to have one ready by halloween, but that’s only a couple weeks out… any tips?
Amber says
No, they take under an hour.
Christine Hall says
Great post! Perfect instructions to get the very popular mermaid tail. Thanks for sharing!
silk fabric says
That s a beautiful dress. Can you tell me about how many yards of fabric you used?
Amber says
It’s going to depend a little bit on how big your kiddo is, but should be between 1 yard to 1 1/2 yards.
Jennifer says
Awesome! My teenage daughter wants a mermaid tail blanket and now I might be more inclined to make one! 😉 Though her younger brother will want a shark tail if I do. *hehe*
Joan says
these are really cute, I was going to make a blanket one for my Granddaughter so would I still be able to use this pattern and just make it smaller, using a towel?
Amber says
I would make it quite a bit bigger if you want a towel. I think maybe that is a tutorial I should do soon too!
Joan says
I would love it, it you would make a tutorial for us on a mermaid blanket or towel, I am just making the Hello Kitty hooded towel that you made, for my Granddaughter’s 3rd birthday.
Love all your tutorials, they are so clear and easy to understand and love all the pictures you add for us visual learners.
Thanks again. I will be watching for it.
Joan Gray
Chantee says
Hi There,
I love these….so cute! Can she walk in it? I was going to sew up some mermaid tails for my daughters mermaid party next month but want the girls to be able to walk in it.
Amber says
Yes, you can walk, with tiny baby steps. 🙂 There’s a foot opening in the back.