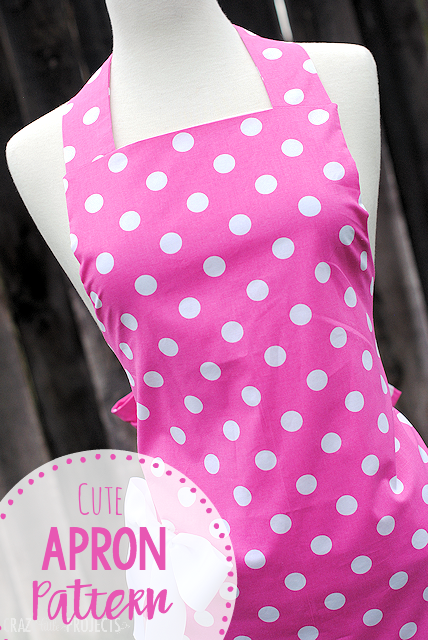
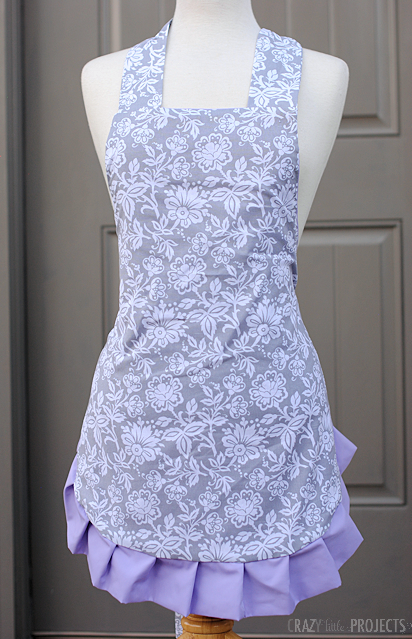
What’s the Project? Use this cute apron pattern to sew an easy but fun apron to wear in the kitchen. A little ruffle on the bottom and add a bow on the side if you want and you’ve got the cutest apron on the block!
There are two things that I just can’t sew enough of-bags and aprons! I have like 12 aprons but I just keep making more! I guess it works well because I also love to bake.
Today I am giving you a new favorite! Try this cute apron pattern for yourself, a friend or size it down for a little girl! (And also-pink polkadots!!! Another favorite of mine.)
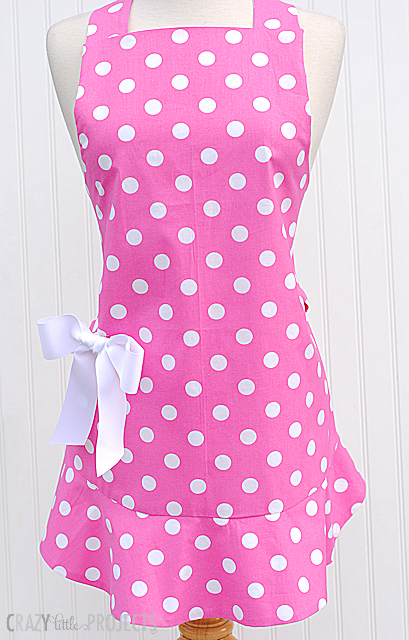
It’s even got a cute, simple ruffle around the bottom:
Now, want to make one of these cute aprons? They are pretty simple if you have basic sewing skills. Nothing too tricky here.
Let’s do it!
Cute Apron Pattern
Supplies
- 1 yard each of two coordinating fabrics One for your main fabric and one to go on the back
- wide ribbon for the bow
Instructions
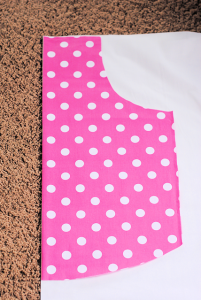
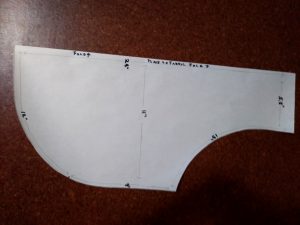
Cutting Guide
- To cut out your apron, fold your fabric. This is what your apron is going to look like when it is cut.

- Here are the measurements:-Across the top of the chest it should be 11 inches-From the chest to the bottom of the apron it should be 24 inches-The curve at the very bottom is also 24 inches-The bottom of the armpits is 13 inches from the top (that’s measuring around the curve)You need to cut all of this from your main fabric and your back fabric.
- Be sure that you are halving several of these measurements when you cut because the fabric is folded. So the neck and the bottom curve need to be halved in your mind as you are cutting so that when you unfold it they measure the full size.
- Also, remember that aprons are very forgiving. Your pattern doesn’t have to be exact and it will still look great! A reader emailed me this guide and said I could share it with you.

- Cut 2 pieces that are 38″ x 5″ for the straps from your main fabric.
- Cut 1 piece that is 21″ x 5″ for the neck from your main fabric.
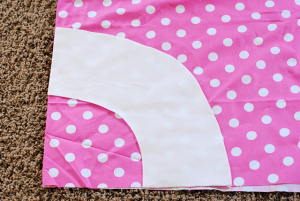
- For the ruffle, you need to cut a half circle. To do this, fold your fabric and cut a quarter circle on the fold so that when you unfold it you will have a half circle. I cut this piece 6 inches wide. The center cut of your circle need to be at least 24″ when unfolded-so 12″ when folded like this image. Again, this number will be forgiving, it just needs to be a least that long.

Sewing Guide
- Let’s start by making the straps and the neck. Fold the fabric lengthwise with right sides together and sew up the long side and for the strap, one of the short sides. I like to angle that short side on my straps (as seen in the picture below), but that is optional. Turn them right side out and press them flat:
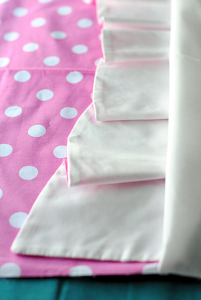
- Grab your two ruffle pieces-front and back-and sew them together so that right sides are touching. You will sew down one short side and across the bottom of the circle. Don’t sew up the other short side yet.
- Take your two large apron pieces. Lay your main fabric piece out with the right side facing up. Begin to pin the ruffle around the bottom edge *beginning one-half inch in from the edge. You need this extra space with no ruffle in order for it to turn right at the end.
- The right side of your ruffle should be down, touching the right side of your apron. Also, as you add the ruffle, also pin the back of your fabric on top so that you are creating a sandwich-main fabric, ruffle, back fabric with all of the right sides facing in.
- You want raw edges together here-so the raw edge of the ruffle along the bottom of the apron. As you go it’s going to fold in on itself a little. This is perfectly fine.
- As you near the end and can tell where your ruffle will end you will have excess ruffle. Cut it off about 1 inch more than you need, then fold that extra inward on itself and sew it shut. Finish off your pinning of the ruffle in place. Sew that in place.
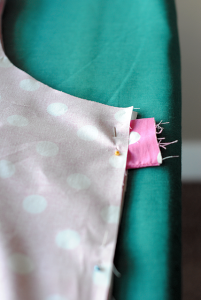
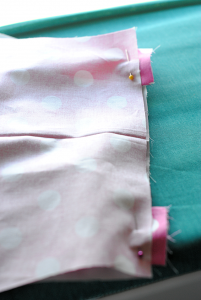
- Now, pin the straps in place on either side of the apron about 1 inch below the bottom of the armpit curves. The straps will go inside the apron sandwich you are creating with just a little excess sticking out.
- Place your neck strap at the top of the apron near the outer edges but with about 1/2 inch space on either side. The strap will be inside the apron with the ends sticking out.
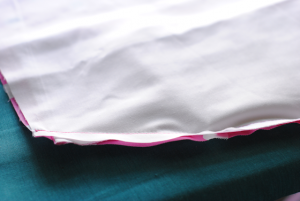
- Now sew it all the way around leaving about a 4 inch opening down near the bottom on one side so that you can turn it right side out.
- Turn it right side out and press it flat. Sew the opening shut.
- Hand stitch on a cute bow and you’re done!


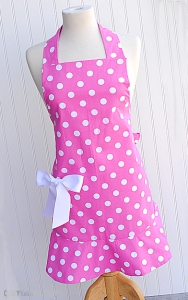
I seriously love this guy! Isn’t it cute? 
Now bake up something great!
You Might Also Like:

Pin Me:


Kate Hawkins says
I just love this site. I found it through pintrest. There are so many cute ideas and different projects to make I am so excited!
Sue says
This is totally darling and I would love to make it, but I was hoping for a .pdf pattern, or measurements to make one. I don’t see any (sorry, doesn’t mean they aren’t there…I just can’t seem to find them). Can you point me in the right direction? Funny thing is, in searching through my fabric, I found some extra that I thought would make a cute apron, so I went looking for a pattern…Your pink polka dot fabric is EXACTLY what I planned to use!! 🙂
Amber says
Oh I love pink polka dot! I am sorry though, I don’t have an actual printable pattern, which I realize would be helpful. I just don’t have the skill to actually put that together for an online platform.
Jane says
May I offer a suggestion to very beginning sewers? Dollar Tree sells polyester aprons for little girls, and fit ages approximately 4 – 8. I bought a couple of these to use as a pattern. For the ties at the waist and top, I used 3/16″ ribbons. You can use the ties on the Dollar Tree apron to measure the length of yours. Their aprons measure 15″ w by 20″ l and, if needed, you can add or subtract inches when you cut out your apron. I also used fat quarters as my fabric; they measure 18″ x 22″ so almost nothing is wasted, and they only cost .97 at Walmart…great for practice. Turn in the raw edges and stitch, hand-sew the ribbon ties on, and you’ve got an adorable apron. Takes less than 30 minutes to make. Wish I could show you some pictures of mine. Trust me…after the first one you won’t want to stop!
Kat says
Do you have a video of this tutorial?
Amber says
Sorry-I made this years ago before video tutorials were much of a thing. 🙂
Tamera Prutsma says
I made this apron today and I LOVE it! Thanks for the tutorial. I didn’t understand some of your instructions, especially the part about the ruffle so I just gathered a strip of fabric and sewed it on. Also, your measurements were a little unclear but I stumbled my way through it and got it finished. Thanks for sharing this project and I’m so pleased with the result! Now that I know how to do it, I want to make them to give as gifts!
Evangeline says
This is a beautiful apron! Do you have instructions on how to add a pocket or two on the front of it? I love the pink polka dots!
Amber says
You could do a pocket like I do inside bags sometimes-like on this tutorial: https://crazylittleprojects.com/messenger-bag-tutorial/
Treasure says
I feel silly asking this, but am I right in surmising that most pieces should be cut in both the main fabric and the accent fabric?
Amber says
The front and back pieces yes, but the ruffle and straps just from one.
Kathy Stone says
Such a cute apron. Made this last week and had difficulty with your instruction for the flounce….It would help if you could show the back of the apron.
Found one exactly like it on Houzz which did have a back view which was a big help.
Javeriya says
Turned out really cute! Bags are my favourite things to sew all the time too.
Tanya says
This is a very cute apron. A few things that I’d say after making it – keep in mind I’m still a beginner, so some of this may be obvious to a more seasoned seamstress :).
On the ruffle, the inside circle around should be 24in/12in, not the radius. oops. It was fine, just a little more gathered than the picture. Also, mine turned out very long. I’m now thinking “chest to the bottom” means from the very top to the bottom and not under the armpit to the bottom. Again, still learning out to read instructions, I suppose. But, otherwise, very cute. I’m definitely adding a pocket when I make it next time.
Rebecca Zehr says
Would love this tutorial in .pdf format so that I can print it out on fewer than the 28 pages it takes to print the entire page. Do you have it available that way? Thanks!!
Amber says
Sorry, I need to figure out how to do that! Maybe you could just copy and paste the text into a word document and then print for now?
Patricia J Wood says
Is there a place where I could obtain a paper pattern. Thank You.
Michele says
Can this be a reversible apron? What would you have to do differently? It is an adorable apron!
Amber says
Yes! It works perfectly as a reversible.
Ellen says
Love it! I’m going to add pockets to the front though.
Amber says
Yes, I have done it with pockets and it’s really cute!
Lorena says
totally sweet apron! I love it very much, I am so inspired to make one for each of my sweet girls and a non-girlie one for my lil baker boy too. Thank you for sharing. oh and those are some really amazing fabric choices, love love love.
Bethany L. says
Could you tell me the width measurement, for the wider part of the apron? Making this for a present for my future sisters in-law’s bridal shower. (And probably another for myself.) Thanks.
Amber says
I actually gave this apron away so I can’t measure it but I would guess about 20 inches wide at the bottom
Bea Strope says
How do I get the patterns for the 7 aprons?
Amber says
Not sure what you mean?
Lynn Emfinger says
Love doing. All this. So happy to have found you !!!
Anna Brake says
Yes, pics of the back would be useful and greatly appreciated 🙂
Heather says
Is there a paper pattern that can be printed?
Amber says
No, it would be too huge. Sorry!!
kris says
Is there a picture of the back? I want to see how the back looks!
Jane Buie says
Can you please show a photo of the back of this apron? Thank you! It’s really cute!
Amber says
Oh I don’t have any pics of it but I will try to get some and add them.
Rachael says
Such a cute apron. I love anything with polka dots. And bows!! I’m really interested in participating in the Sew Your Style contest but the link keeps showing its invalid. Is there another way I can find it?
Amber says
It is working now!
Sherri Howell says
This is too sweet!