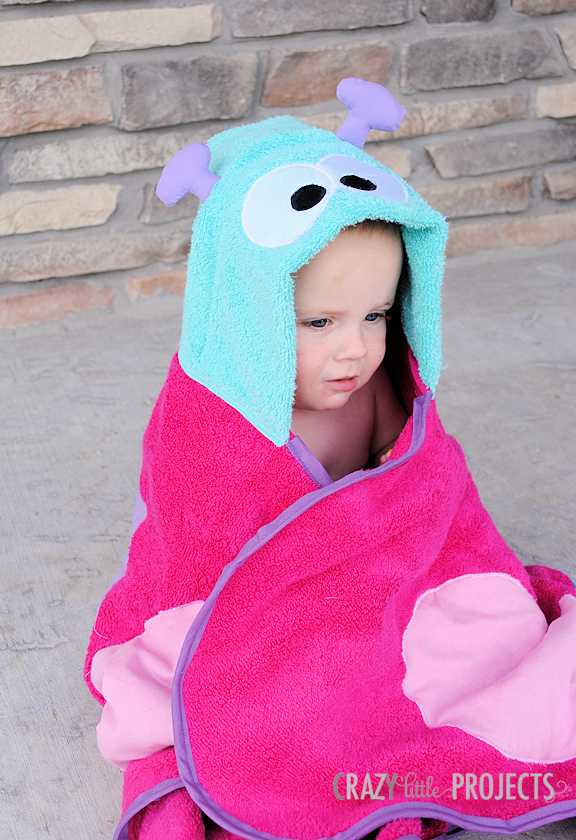
I was brainstorming summer themed hooded towels and thought up a couple of fun ones. Who doesn’t love seeing butterflies in the summer? This one turned out pretty great I think! (Don’t forget to check out my monthly hooded towels.)

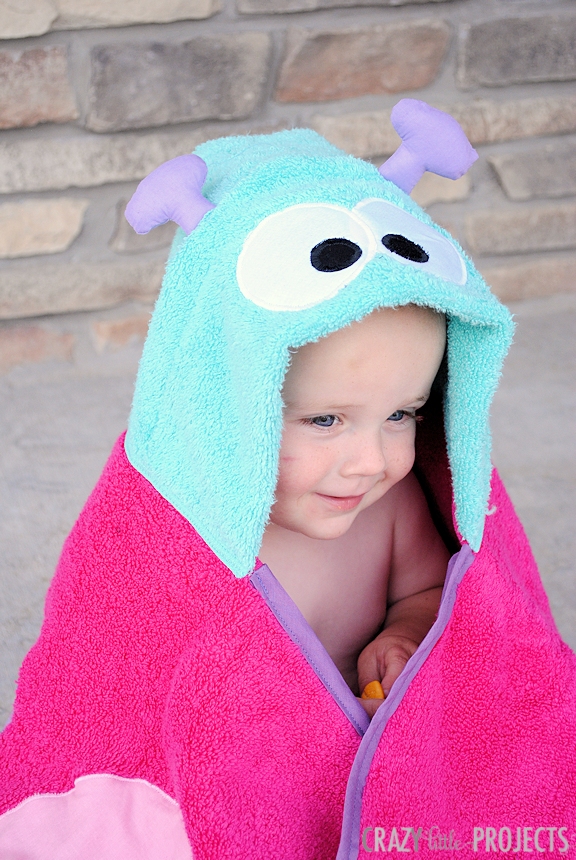

She’s pretty cute right? Want to make one of your own? Let me teach you!
Butterfly Hooded Towel Tutorial:
Supplies Needed:
1 bath towel in your choice of color (I get my towels at Target typically because they have bold, bright colors)
1 hand towel in contrasting color of your choice (you will only use half of this)
Small amounts of fabric in white, black and accent colors to match your towels (I used pink, turquoise and purple)
Heat ‘n’ Bond
Cotton Stuffing (just a little bit)
Bias tape (Extra Wide Double Fold) in coordinating color
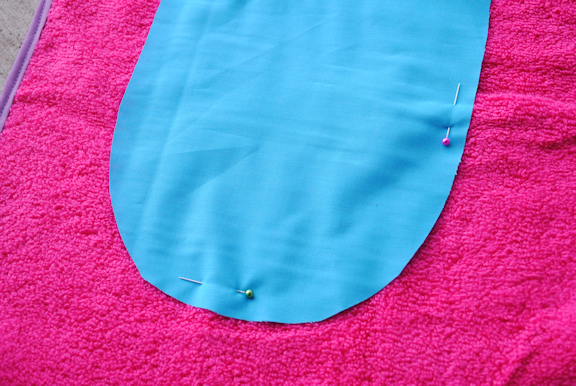
Butterfly Hooded Towel Pattern Pieces
Instructions:
I will teach you to create the face of your butterfly and the wings for this towel. If you would like to see how I put it all together I have a basic hooded towel post here.
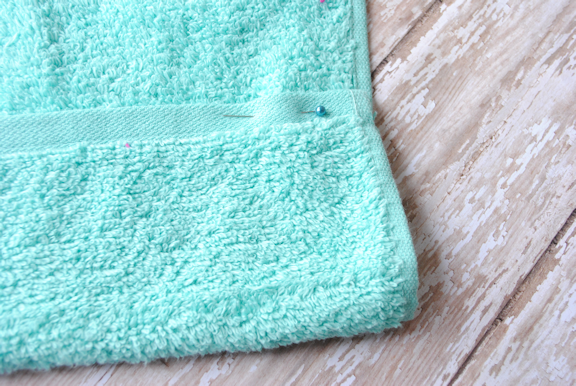
Start out by cutting your hand towel in half horizontally (so that it is short and fat, not long and skinny). Fold under the finished edge about 3-4 inches and pin it in place. Then stitch it in place:
Now cut out your eyes using the pattern pieces. Cut 2 white, 2 black and heat ‘n’ bond to go on the back of each of them. Adhere the heat ‘n’ bond to the backs of them and peel off the backing. Then position your eyes where you want them on your towel and iron them in place:
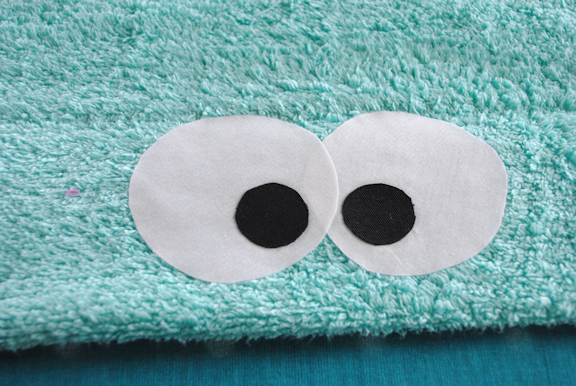
Next, applique (tight zigzag stitch) around the eyes (both the black and the white parts).
Now cut out your antennae. You’ll need 4 pieces.
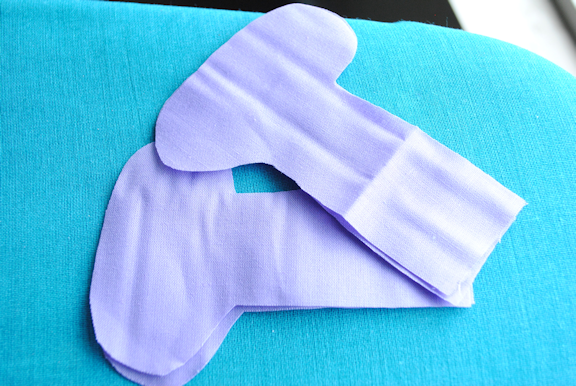
Sew around the antennae leaving the bottoms open. Turn them right side out and stuff them with some stuffing.
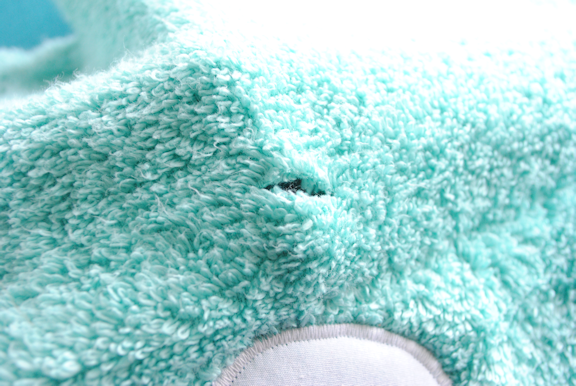
Now cut a slit in your towel right where you want your antennae:
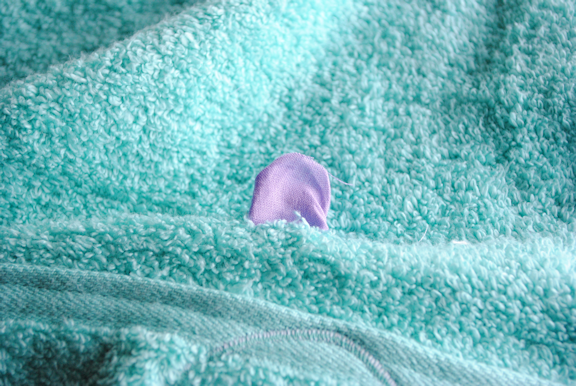
Slide your antenna into the slit so that it looks like this on the underside:
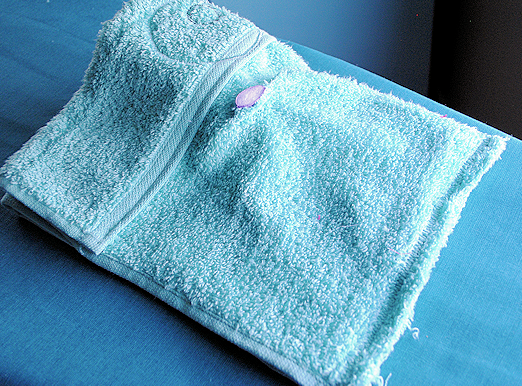
Stitch across the opening to close it and hold the antennae in place. Snip off any excess fabric on the bottom.
Now, to create the hood, fold the face in on itself and stitch up the raw edge. I do a zigzag stitch here.
Now turn your towel to look like this:
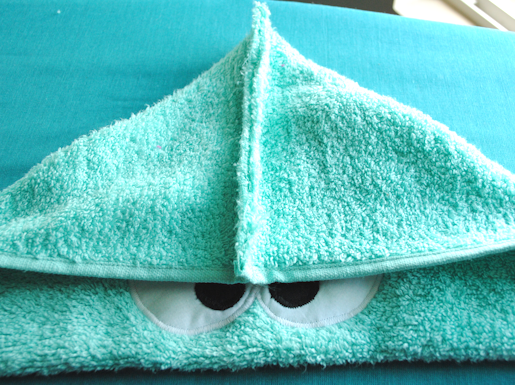
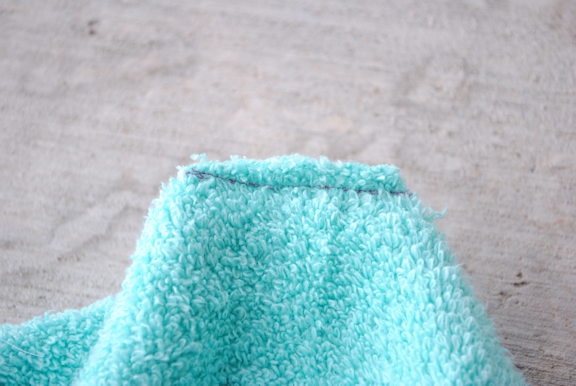
Then sew a straight line across that triangle tip and snip it off:
You can now attach your hood to your towel. You can do this by just centering it and zigzagging it on or you can do it the fancy way I describe here.
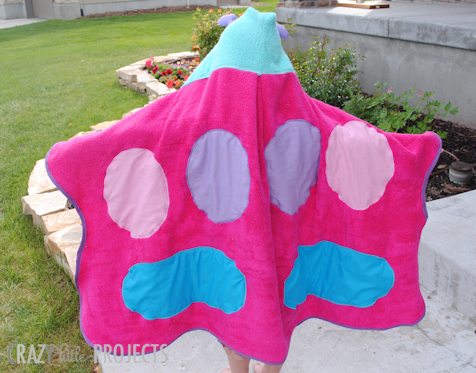
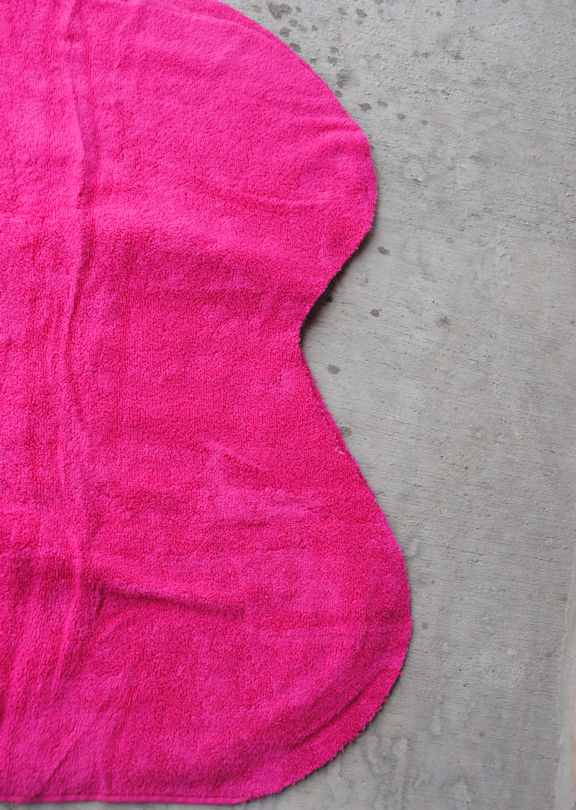
With your head in place you need to make the bottom look like a butterfly. First I cut the edges of the towel to look like wings:
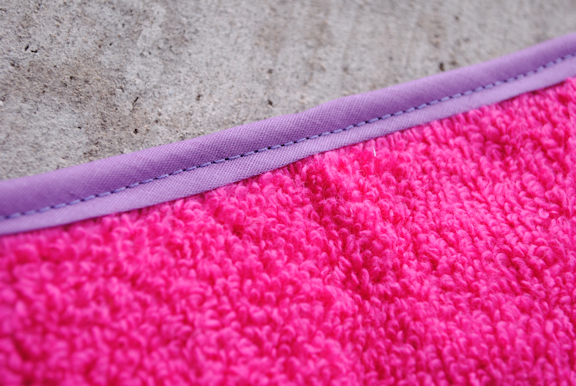
To keep those edges from fraying I edged them with bias tape:
Then I cut out some fun shapes and created a pattern on the back. You can design them any way you want to. Pin them in place and then applique all the way around them:
 And that’s it! You’re done!
Follow me on Pinterest to see all of the hooded towel as they come out each month! There’s even a special board just for them:


Ruth says
Could you please tell me the dimensions of the bath towels and hand towels you use?
Amber says
Just a normal size bath towel from Target is what I use. Any size at all works.
Ruth says
Sorry, I live in New Zealand and it looks like our hand towels here are a whole lot smaller than yours.
Anne Wever says
Sooo cute!! I’ve linked to you tutorial on Craft Gossip (sewing section):
http://sewing.craftgossip.com/tutorial-butterfly-hooded-towel/2013/07/28/
–Anne
Amber says
Thank you!!! 🙂
Ross says
Esta hermosa, me ha encantado, la felicito y el baby está bello. Gracias por compartir el tutorial.
Saludos.
Emily says
This is the cutest character towel hoodie that I’ve seen all summer. Thanks for sharing. Pinned!
Lalitha says
It is just beautiful.Thanks for the tutorial.I just love it.
Stacey says
It is absolutely darling!
Sheila Perl says
Your butterfly hooded towel is wonderful! I can’t wait to make it 🙂