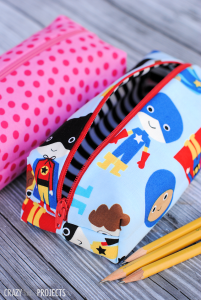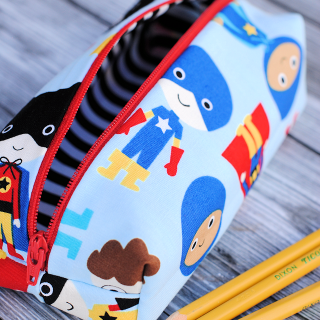
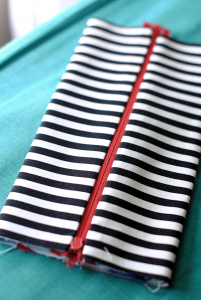
DIY Pencil Case Pattern
This cute pencil case pattern is easy to sew and makes a great bag to carry school supplies in.
Supplies
- 1/4 yard Fabric #1
- 1/4 yard Fabric #2
- 1 Zipper 9 inches long (or go longer if you want a bigger bag and adjust the other measurements accordingly)
Instructions
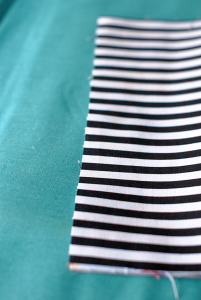
- Cut your fabric into rectangles that are 9.5″ x 5.5.” You will need 2 from each fabric,
- Get your zipper ready. Place 1 piece of your inner fabric in front of you and lay the zipper on it with the top of the zipper facing up.
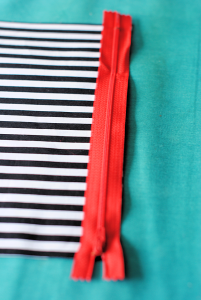
- Then place 1 piece of your outer fabric on top of that with the right side down. Pin along the zipper.
- Stitch along the zipper edge. When you get close to where the zipper pull is, stop sewing, knot your thread and move the zipper pull out of your way by unzipping it. Then continue sewing to the end.
- Do the same thing on the other side of the zipper. You can see that I have my inner piece below the zipper and then I will add my outer piece on top but facing down.
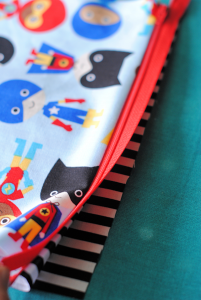
- Sew again along the zipper (but on the other side this time).
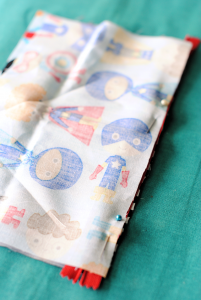
- Take your fabric and lay it so that the right sides of the main fabric are touching and the inner fabric is sandwiching it (with right sides out).
- Sew along the long, raw edge at the bottom.
- Fold it so that the zipper is in the center. Make sure your layers inside are laying smooth and not on top of each other.
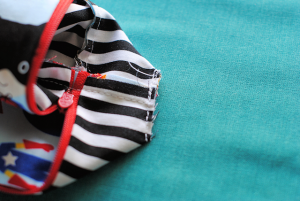
- Unzip the zipper halfway. Sew each of the short ends. You will sew through the ends of the zipper. Just make sure that it is pulled together as you sew through it.
- Now you are going to do box corners. To do this, grab one of your four corners and pinch it to form a triangle with the raw seam going right down the center of your triangle. Sew along the tip of this and then snip off the end. Do this on all 4 corners, making sure that you keep them each even.
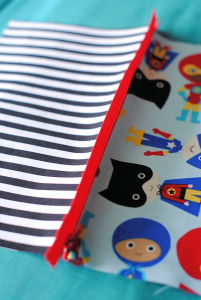
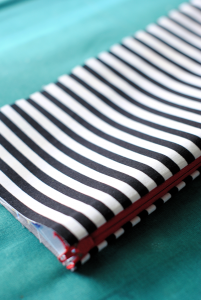
- Pull it all right side out and you’ve got a fun little pencil bag!