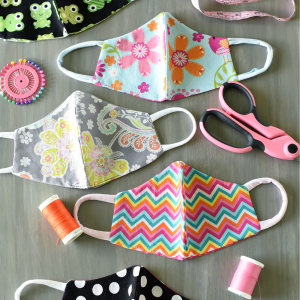
Face Mask Patterns
These easy face mask patterns are quick to sew and work great for faces of all sizes.
Supplies
- 1/4 yard each of 2 coordinating fabrics (you’ll only need a little bit of this actually and can get several masks out of each fabric, but you’re not going to want to go as small as an eighth or some sizes might not work)
- Knit fabric to use as elastic (or if you prefer elastic grab that-I just love using the knit and I will explain this process below)
- thread
- pipe cleaner (optional-for if you want wire in the nose. See details for how to do this at the bottom of the post.)
Instructions
- I used a very small seam allowance for this. About 1/4″ is ideal.Cut out your face mask pattern.With your fabric folded, cut 2 pieces from each of your fabrics, for a total of 4 pieces. Each fabric should have 2 pieces that are a mirror image.
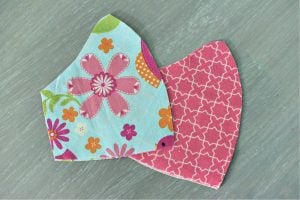
- Place the fabrics right sides together of each of the matching fabrics and sew down the rounded middle part (this is the nose section) of both from top to bottom, knotting when you start and finish.

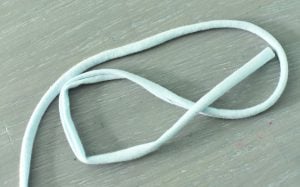
- To make your elastic if you are using knit fabric, cut a strip that is about 1 to 1.5 inches tall and as long as the width of your fabric with the stretchiest direction going the width of the fabric (so it’s stretchy along the really long side and less stretchy on the short, 1-inch side).Once it’s cut, pull the fabric and it will fold in on itself. Here’s a tutorial for this if you’d like more help.
- *Just a note, you can absolutely use elastic instead if you’d like. I just feel like this knit fabric method is really soft on the ears which is a plus.Cut 2 strips of your knit elastic. The length will vary by size:Cut 4.5 inches for size 1Cut 5.5 inches for size 2Cut 6 inches for sizes 3-5
- Now, place your front of the mask and your back of the mask together with right sides facing in.Pin the top of the nose in place.Place your elastic on either side with the ends meeting with the edge of the mask and the rest forming a half-circle. Make sure it’s not twisted. Pin this in place on both sides of the mask.
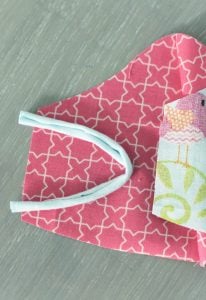
- Here's a peek at it:
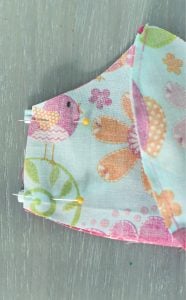
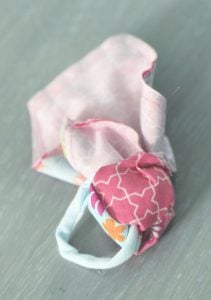
- Starting at the bottom of the mask, sew all the way around the mask leaving a 1-2 inch opening at the end so that you can turn it.Turn it right side out and push all of the corners out. If you want to try it on and make sure it fits well, now is the time. If needed you can always tweak a bit before you sew it shut.
- Optional Wire Nose: I’ve already had several readers ask about adding in wire for the nose. I did experiment with this and it went well. For me, the mask fit well enough that I didn’t feel like I needed it, but again, face sizes and shapes vary so much that it’s a valid option to improve your fit.Here’s how: Lay a pipe cleaner along the top edge of your mask and match it to the size from side to side and cut it just the right length. Before you sew your mask shut, insert it and pin it in place along the top edge. I then just top stitched to keep the pipe cleaner in place and it worked great!Fold the fabric of the opening in on itself and sew the opening closed.