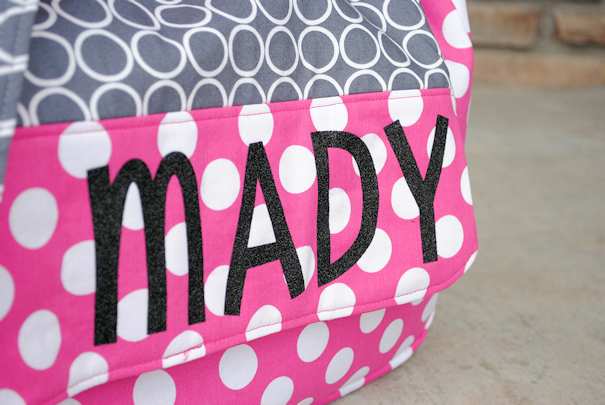
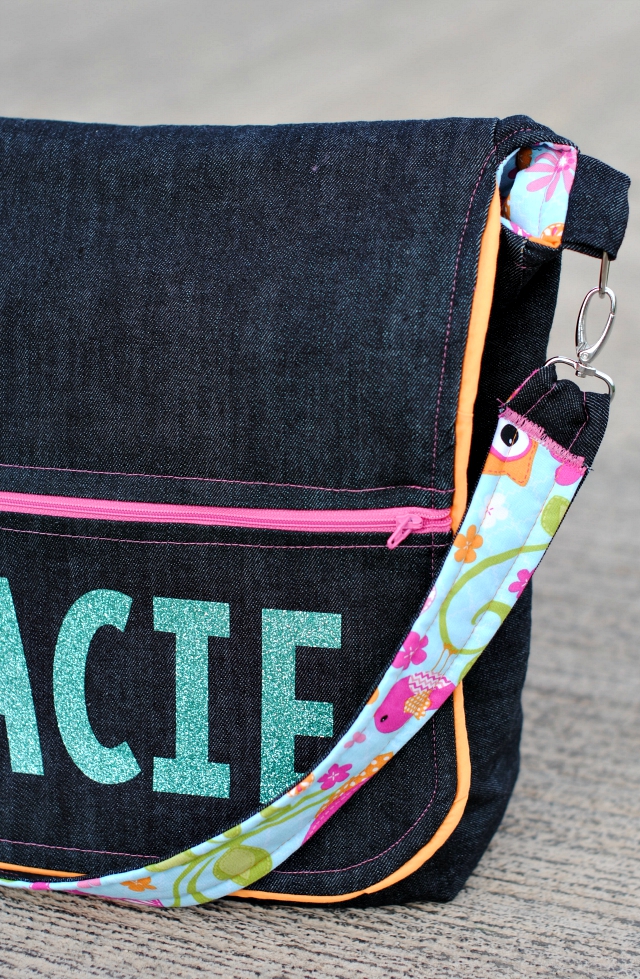
What’s the Project? This kid’s messenger bag pattern makes a perfect bag to carry all those school books in or it works great for dance or as an overnight bag for the kids. It’s so cute and can be personalized with the kid’s name and accented with a favorite fabric. A great pattern to sew!
Every time back to school rolls around again I get the itch to make a new bag!
Last year I made the Laptop Bag and before that I made the original Messenger Bag. This year the bag I made is not for me. I was thinking more preteens and teenagers when I made this bag.
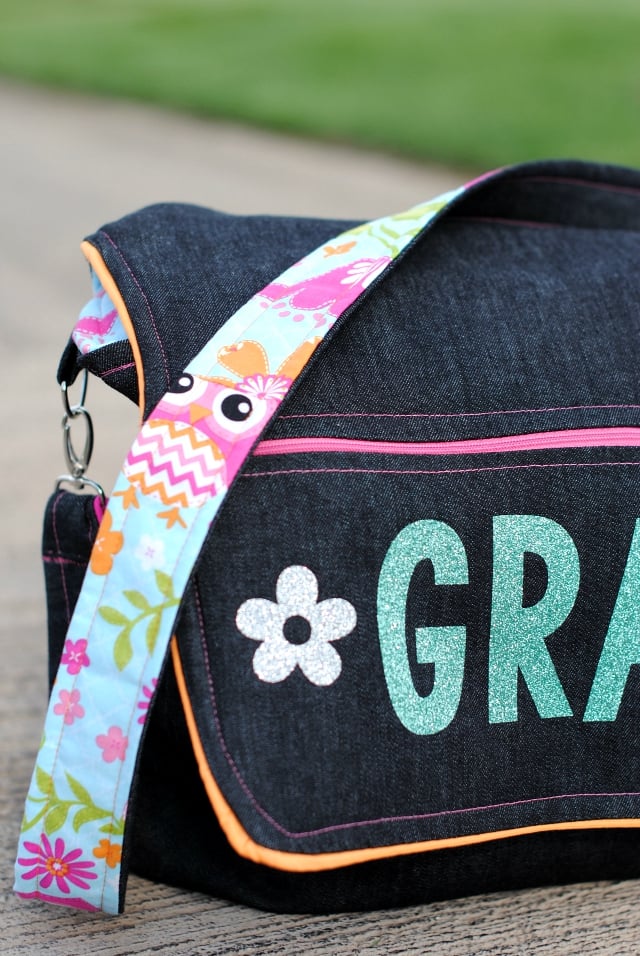
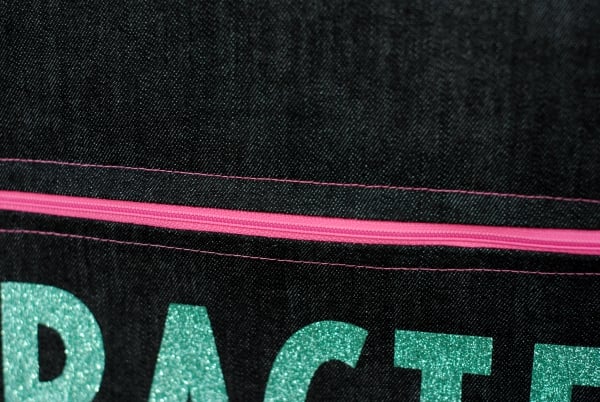
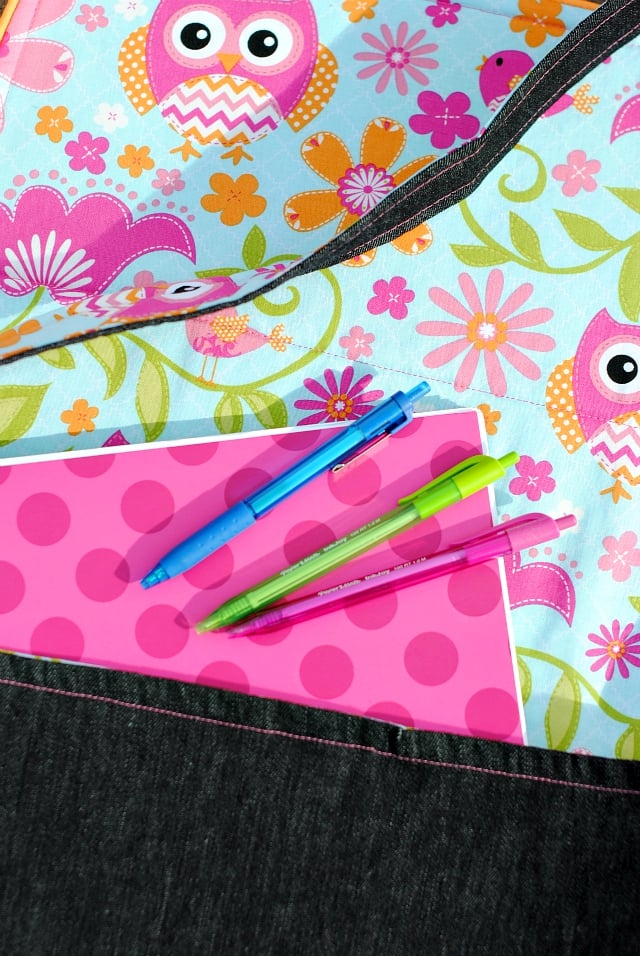
It’s perfect for school. It’s got a fun zipper across the front that works as a little pencil bag and it’s very large and room-lots of room for books and binders. This kid’s messenger bag pattern is one of my favorite’s ever!
It’s made very similarly to the original messenger bag with just a few fun twists.
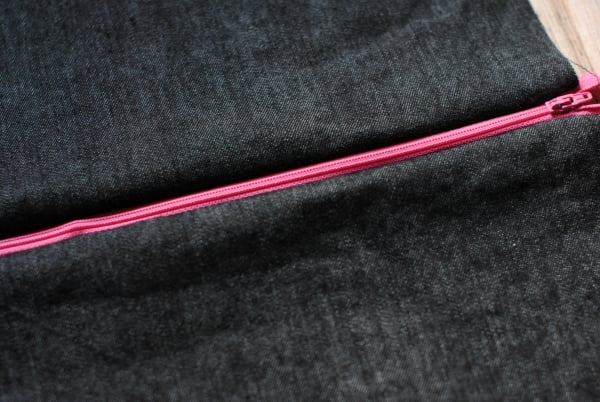
The front has a fun little pocket:
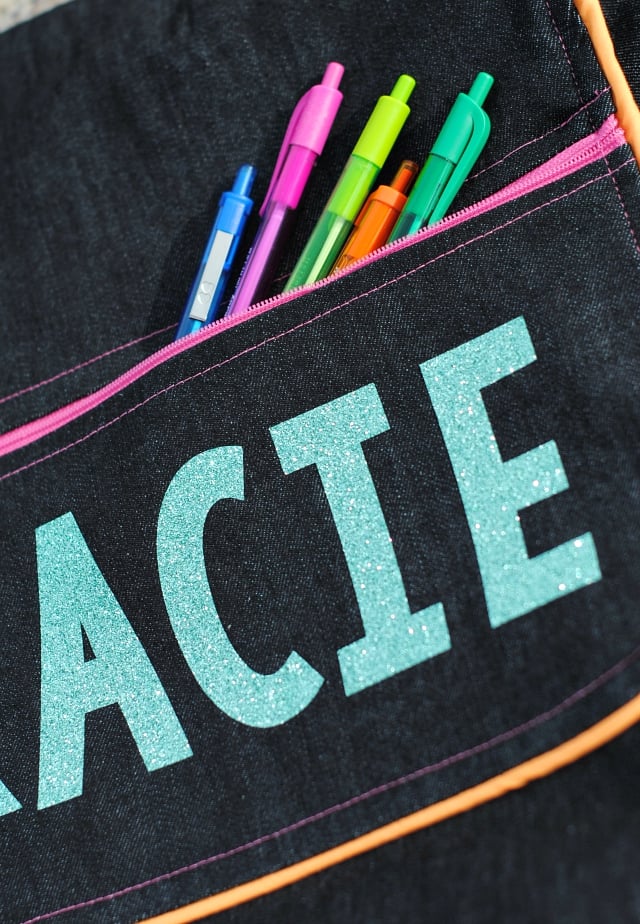
And I personalized mine with sparkly glitter vinyl! (That’s of course optional.)
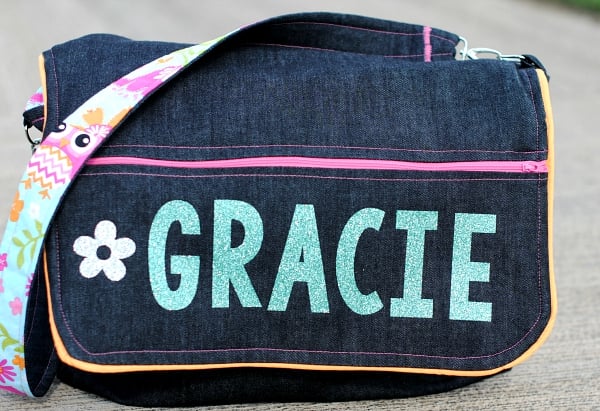
It’s got a fun strap that is removable and it’s large and roomy:

School Bag Pattern:
Supplies Needed:
- 1 yard of two coordinating fabrics. I used denim for the outside and a cotton on the inside. Choose whatever you prefer.
- 1 16 inch zipper
- 1 yard fusible fleece
- 2 D rings
- 2 clasps
- 42 inches or so of Piping (optional) If you want to make your own, here is a tutorial
- Heat transfer vinyl (optional) I get mine here and I love the sparkly stuff! (Affiliate link)
Cutting Instructions:
From your outer fabric cut:
- 1 piece that is 16 inches wide by 15 inches long
- 1 piece that is 16 inches wide by 26 inches long
- 1 piece that is 4 inches by 48 inches
- 1 piece that is 3 inches wide by 38 inches
- 2 pieces that are 3 inches by 3 inches
From your inner fabric cut:
- 1 piece that is 16 inches wide by 15 inches long
- 1 piece that is 16 inches wide by 26 inches long
- 1 piece that is 4 inches by 48 inches
- 1 piece that is 3 inches wide by 38 inches
From fusible fleece cut:
- 1 piece that is 16 inches wide by 15 inches long
- 1 piece that is 16 inches wide by 26 inches long
- 1 piece that is 4 inches by 48 inches
- 1 piece that is 3 inches wide by 38 inches
Sewing Instructions:
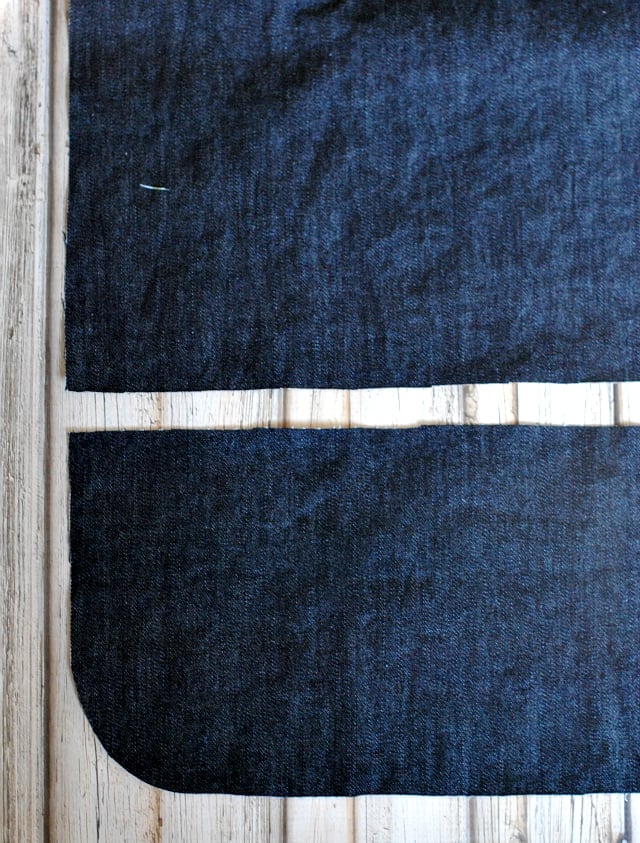
Grab your piece that is 26 inches long. Round off the top and bottom corners. (Round out just the bottom corners of your 15-inch piece as well.) Then cut the bottom 7 inches off of one end of your 26-inch piece:
Now get your zipper and place it face down on the edge of your now 19 inch piece-the piece shown in the top of the picture above on the edge that you just cut:
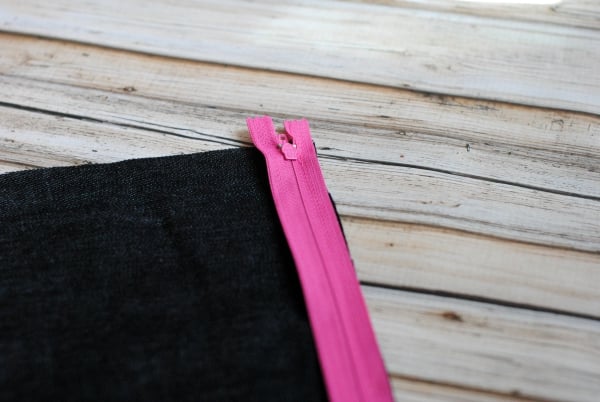
Pin it and then sew it in place. Now get your 7 inch piece (bottom of the image up above) and sew the other side of the zipper to the recently cut edge of that piece. It should look like this after you sew it in place:
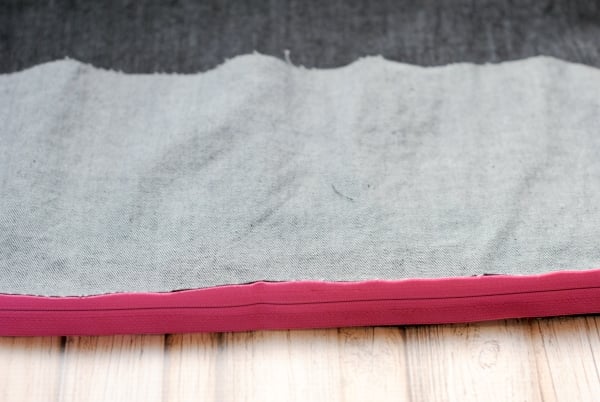
And like this on the other side. Go ahead and press it flat and top stitch JUST on the bottom of this right along the zipper to keep it nice and smooth and pretty:
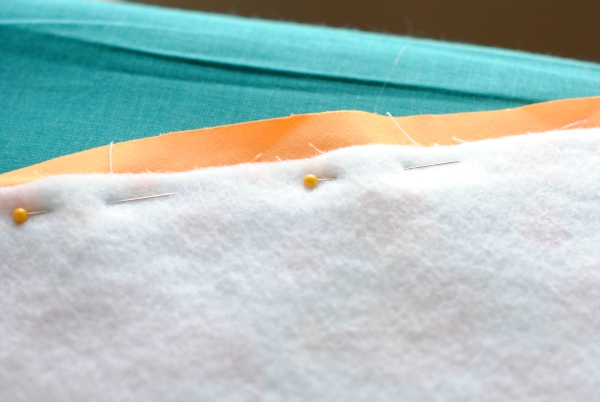
OK, get your inner pieces of fabric and your fusible fleece and iron the fusible fleece to the back of your inner fabrics. Round out the corners on all 4 corners of your 26 inch piece and just the bottom corners of your 15 inch piece.
Now get your inner fabric piece that is 16 inches by 15 inches and your inner piece that is 4 inches by 48 inches. Beginning at the top corner of your 16 by 15 inch piece, begin pinning the 48 inch piece to it with right sides together:
Pin it all the way around. You may have excess on your 48 inch piece-just cut this off once it’s in place.
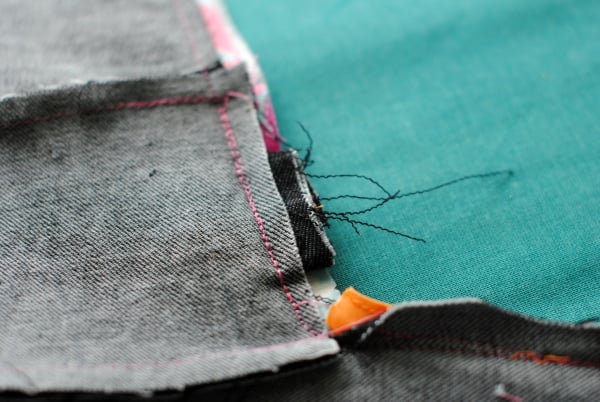
Sew around this. Now get your 26 inch piece and start at the bottom center and make sure it is centered on the part in the picture above. Pin it in place around the other edge of the 4 by 48 inch piece, again with right sides together.
Now do the same thing that you just did to the outer pieces of your bag.
Grab your 3 by 3 pieces and fold them in half with right sides together. Sew up the one raw edge and turn right side out. Press flat with the seam in the center of the back. Slide one of your D rings though each.
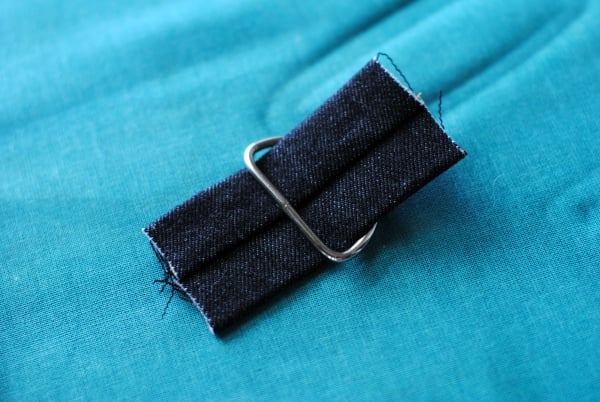
When you sew this into your back you will fold it like this:
Set those aside.
Now, turn your INNER pieces of your bag we sewed a few minutes ago right side out, leave your OUTER pieces inside out. Stuff the inner pieces down into the outer.
If you are choosing to do the piping, now’s the big moment. Note-this part is tricky. If you are a beginner you might want to skip the piping.
Place the piping along the edge of your top flap of the bag all the way around. The piping part should be towards the inside with the edge on the outside of the bag matching up with the raw edges of the flap. Try to make sure the piping is very even along the edge of the bag. The corners will be a little tricky. It will be bunched up around the corners now, but when you turn it right side out it will all work out. Pin it in place all the way around the flap and then stitch it in place. Be very careful to keep your sewing even around this. I use my zipper foot to get nice and close to the actual piping for this:
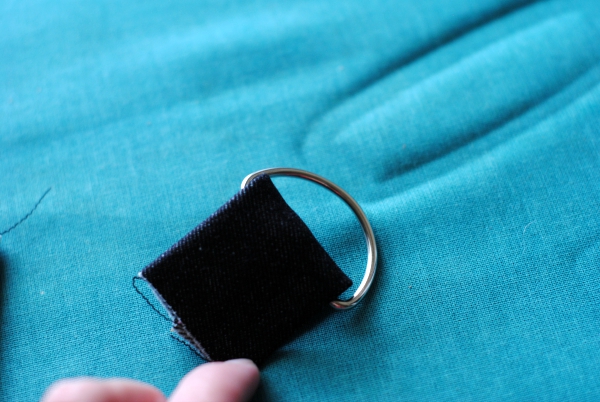
Now, make sure that your zipper is most of the way open on the flap. Pin your inner and outer bag in place all the way around the large opening. Tuck the little tabs with the D rings in to each side of the bag with the D ring inside and the edge of the tabs lining up with the edge of the bag:
Sew all the way around the opening. This will include the flap if you didn’t do the piping. If you did do the piping the flap will already be sewn, so just do the rest. (If this part is tricky-there’s a video of this step Here’s a video showing the process. This is the same process for about 5-6 tutorials on my site, so I’m showing it with the mini messenger bag in the video but it works the same for all of these different tutorials.
Pull the bag right side out by pulling everything through the zipper opening. Tuck the inner bag into the outer and get everything tucked in nicely. Press it all in place.
Top stitch the flap now just above the zipper. This will make sort of a pencil bag on the flap of the bag. (Note though that the inside of this has raw edges and isn’t pretty. Still functional though!)
Also, top stitch around the flap and opening of the bag (the whole part that you sewed a few minutes ago) just to keep everything in place nicely.
Now we need to make the strap.
Sew your long 3 inch by 38 inches together on each long side with right sides together. Turn right side out. Top stitch up both long sides.
Grab your clasps and stick the end of the end of your strap through one. Fold it over and zig zag the end:
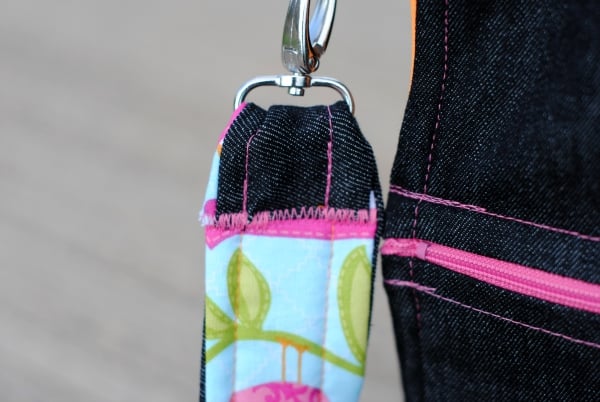
Do this to the other side and then attach the clasps to your D rings.
Now your bag is done!
Unless you want to personalize it. To do this, follow the steps on this tutorial:
And now you’re done! I hope you enjoy!
Hoping you love this kid’s messenger bag as much as I do!
You Might Also Like:
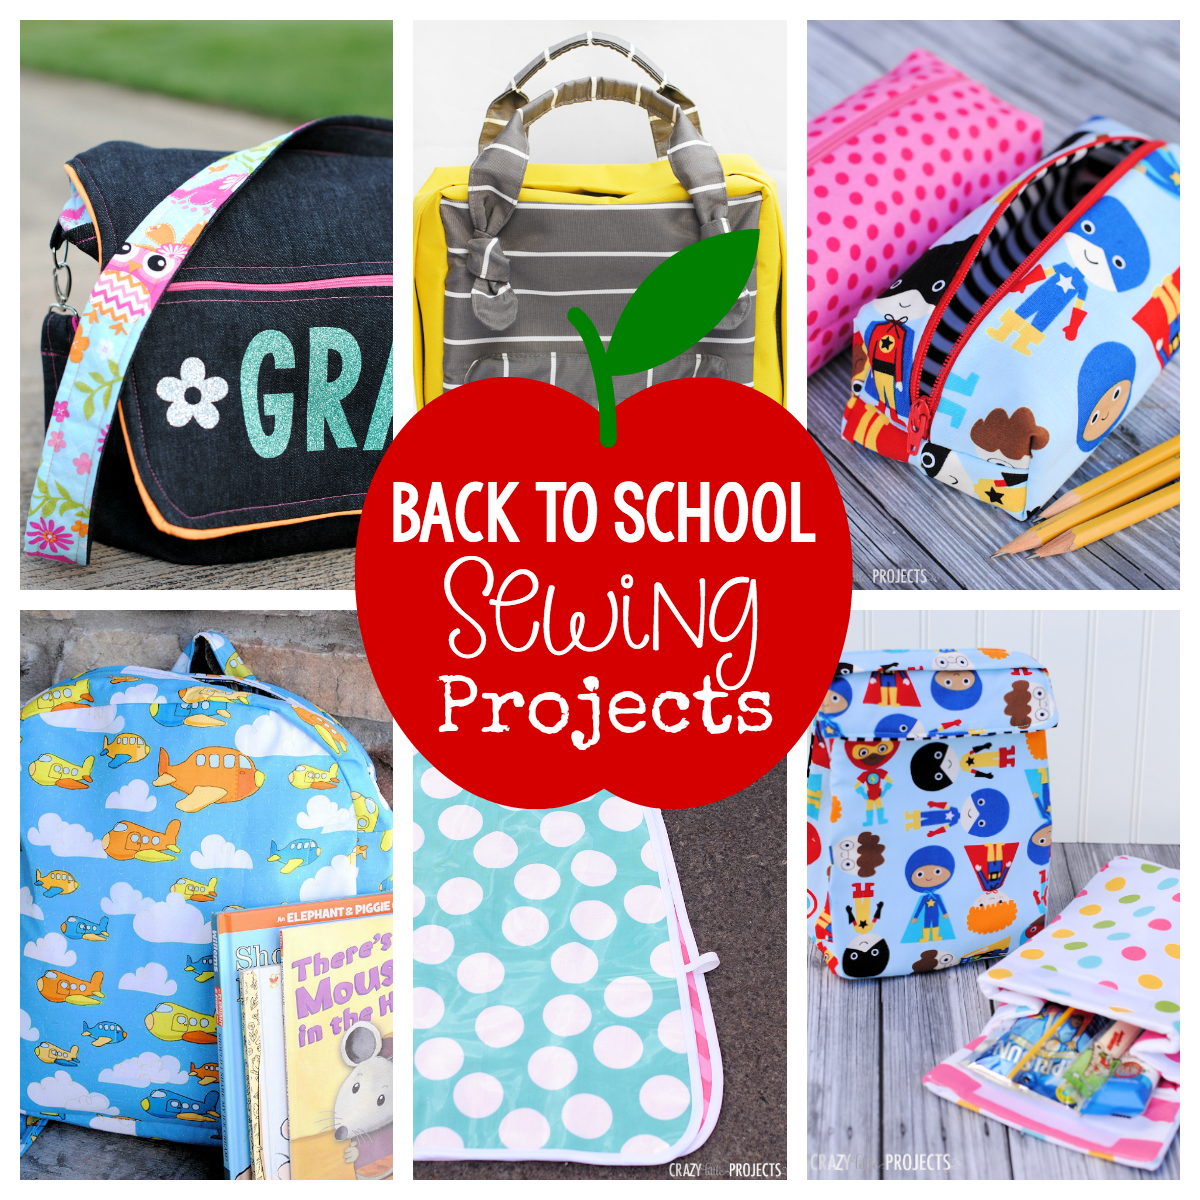
Back to School Sewing Projects:


Marisa says
Hi, I was looking to make this but the link for pattern isn’t clickable
Amber says
There’s a cutting guide that will give you the dimensions to cut.
Emilie says
Just made this bag. Others have pointed these notes out, too: the front panel (15 in. x 16 in.) is too high/tall and makes the flap only cover half of the bag; the zipper doesn’t have an inner lining, so you’d be putting items in right next to the fleece; my fusible fleece was also wretched and I put some interfacing in between in order to get layers to stick.
That said, we are using the bag as a baby bag and my husband doesn’t mind the extra depth. If it were for my kindergartener, that would be a different problem!
Sharing in case others are looking for suggestions or modification suggestions.
Moriah Jones says
I am fairly new and it is not horribly difficult. Allow yourself 6 hours to complete it
Moriah Jones says
I just made this bag yesterday as a first run thru to iron out the kinks for my daughter’s future school bag.
It is an awesome bag, but I just want to add some things that are not in the tutorial:
1. When doing the zipper pocket on the front, depending on how you will do your zipper, will will need to account for the excess fabric or lack there of
2. The top of the bag is short and doesnt go all the way to the bottom when folded over.
All in all, I like this bag and added slip pockets to the back.
Moriah says
Many things I noticed were not mentioned in this turorial:
1. There is no lining for the zip pocket and it was too late when I noticed that when you unzip the pocket, all you see is fleece
2. When you are sewing on the zipper, you have to accommodate for the extra outer fabric or lack there of, depending on how you do your zippers
3. My messenger bag is not small like it is in all these pictures and the front flap is way to short to go all the way to the bottom on the front
Chantal says
Hi Amber
This is a gorgeous bag i just love it.
Is there anywhere i can print out the pattern from as here in South Africa im really battling with videos ect , and i prefer to print the pattern and then work from there?
Thank you so much
Kind Regards
Chantal
María de Orozco says
only genius!!! And with 4 boys…give me the recipe! Thanks from Argentina. Bless you and family.
Nieshang says
Thank you
Sumi says
Is this project suitable for beginners? I have never sewed but am looking for a starting project.
Amber says
It’s definitely on the harder side.
Meegan says
What size D rings do you use? How wide is the strap when finished, I’m guessing around 2.5″? I’m trying to figure out if I can add an adjustable slide buckle to the strap.
Thank you!
mckenzie bailey says
Will it be roomy enough to fit 10 classes
Amber says
Probably?
Daisy says
That’s an awesome bag very well
Soozcat says
Thanks for offering this tutorial!
Would you happen to have approximate dimensions (height, width, depth) for this finished bag? Your photos are great, and the fact that you describe the bag as “large and roomy” is a bit helpful, but I’m not getting a sense of its overall size.
Amber says
It will be about 15 by 14 inches and about 3 inches deep.
Soozcat says
Thanks so much!
ChasingHorsesTheEnglish11YearOld says
is that large enough to hold an A4 folder? I need one for school
Eliabeth says
Love, Love, Love!!!!1 one question though – as I was making this bag for my daughter yesterday i found that i needed to add two more pieces of fabric for the pocket. one to match the outside 7″ piece which i matched wrong side to wrong side. and then one to put on the inside of the pocket (top side of fleece that was ironed onto the inside). Now when you unzip you have right sides of fabric on both sides of the inside of the pocket. I also top stitched the top side of my zipper through all layers after my bag was complete. Are these pieces/steps that others have found they needed to add?
Kara says
Awesome although the pictures dont match up to the steps
Libba says
Small be making these as Xmas presents ,looks a great bag.
kari says
i want to make this jean messanger bag and wanted to know what kind of fusible fleece you used. the one i use is insane as it always has like a layer of fibers that keep coming off and driving me nuts but yours looks like its smooth and wont do that. when you make patterns, its so helpful to tell everything that you use for us that are just starting out . there is just so many choices of fabrics, interfacings, etc out there , its really hard to know what to use. the wrong one can ruin a really expensive fabric and a great pattern.
thanks…
kari
Amber says
The stuff I got came from Hobby Lobby. I don’t have a brand on it or anything.
Marcia says
Love the bag and the fabric choise. It looks great. XOXo
Paddy says
I’ve been using the messenger bag I made from your previous pattern, but the lack of a pocket on the outside was driving me crazy, so I had a go at making one of these bags today (took me about 6 hours, including a break for lunch).
I didn’t use the fleece (can’t get that locally), and I added a lining to the zipped pocket (leaving a gap in the flap for turning) – it came out brilliantly! 😀
Lesley says
Why do you have to use the fleece? Is it to make the bag stronger? Thanks
Amber says
Yes, it’s optional, it just makes the bag nicer.
Spartacus says
What do you mean by “nicer”? Nicer as in stronger and more durable, or nicer as in makes it feel softer or something
Amber says
Yes, I meant stronger, more durable.
Liliana says
Bellisimo !!!!! Felicitaciones