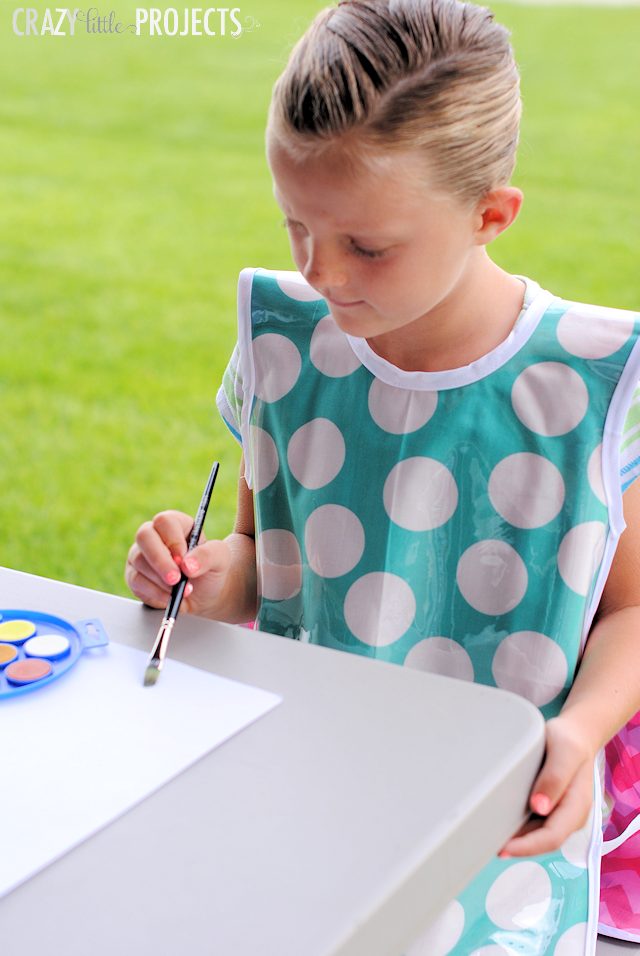
What’s the Project? Use this easy art smock pattern to make a great smock to cover your kids, toddlers or preschools while they paint and do art projects. Turns out so cute and they will love wearing it to paint!
With back to school happening this month for so many of us, I’ve got another fun back to school sewing tutorial for you!
This one’s good for back to school or just for fun at home if you have little ones who love to paint or do art projects. It will keep them nice and clean and they will look cute while they work! It’s an easy Kid’s Art Smock Pattern:

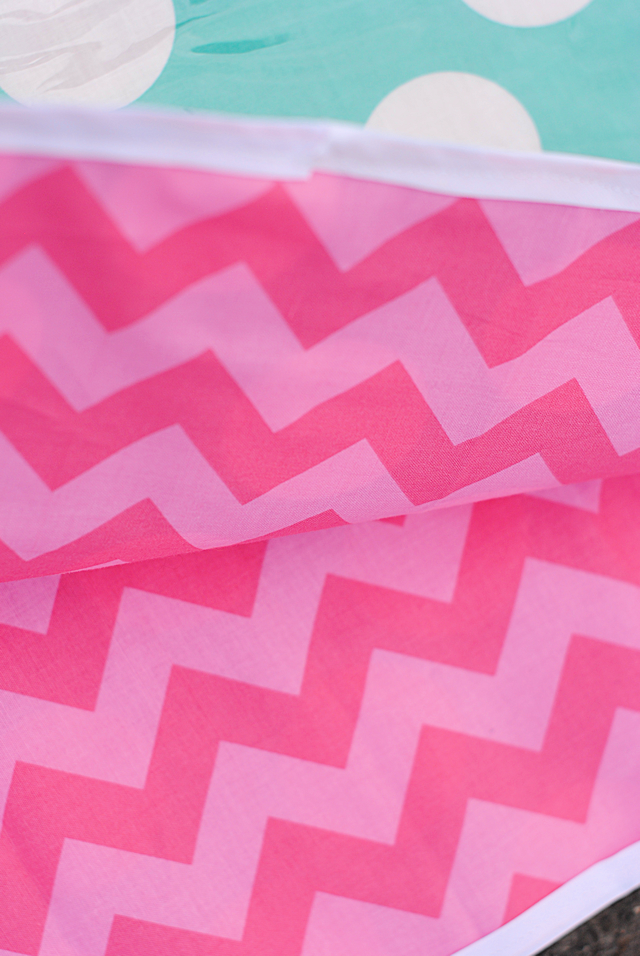
I am thrilled with how this kid’s art smock turned out. In fact, I chose this cute fabric to make it even though I have 4 little boys and it’s very girly and when they saw it they got excited and wanted to wear it too. Whoops! Should have used boy fabric, but I couldn’t pass up this cute girly polka dot and chevron.
Lucky for me I have a cute little friend who was happy to wear this!
Kid’s Art Smock Pattern:
Supplies Needed:
- 1 yard each of 2 coordinating fabrics (you will have leftover-but leftover is fun!) Mine is from The Ribbon Retreat
- Small pieces of 1/2 inch elastic
- 2 packs of extra wide double fold bias tape
- 1 yard of clear vinyl (in the home decor section at my fabric store)
Art Smock Sewing Instructions:
To cut this out the first thing you need to do is fold your fabric right. You need to fold it in half vertically and then horizontally as well. So, start by folding it vertically, then bring the top of the fabric down so that there is a fold there as well:
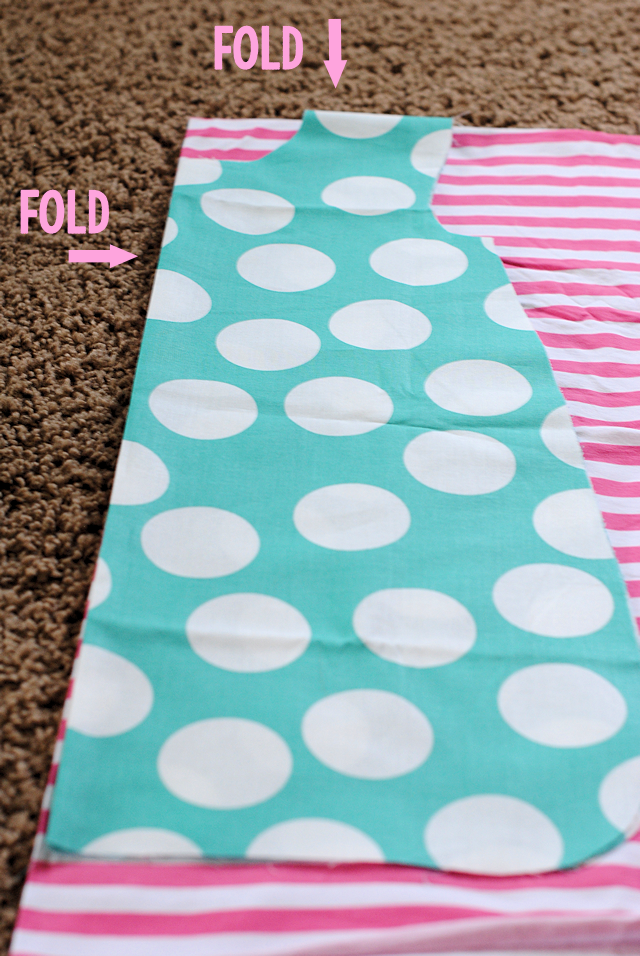
You will cut with the fabric like that. To cut it out, follow my visual guide, with these measurements:
The width at the widest part of the bottom is 18 inches across (so 9 inches when folded for a total of 18 inches when unfolded.)
The length from shoulder to bottom is 24 inches.
The neck hole circle begins 3 inches down from the shoulders.
The arm holes start at the shoulders and the bottom of them is 6 inches down.
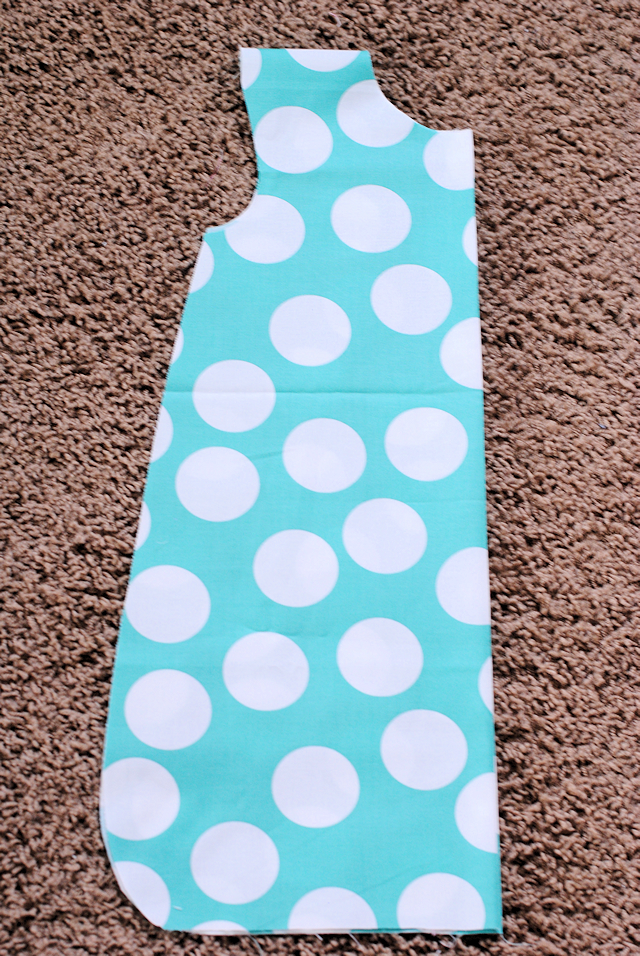
You’ll need to cut 1 of these and then 1 more of your coordinating fabric AND one from your vinyl.
Layer all 3 layers so that the two fabrics are back to back with wrong sides together and then vinyl is on top of your main fabric.
Trim the edges to make sure that they match up perfectly.
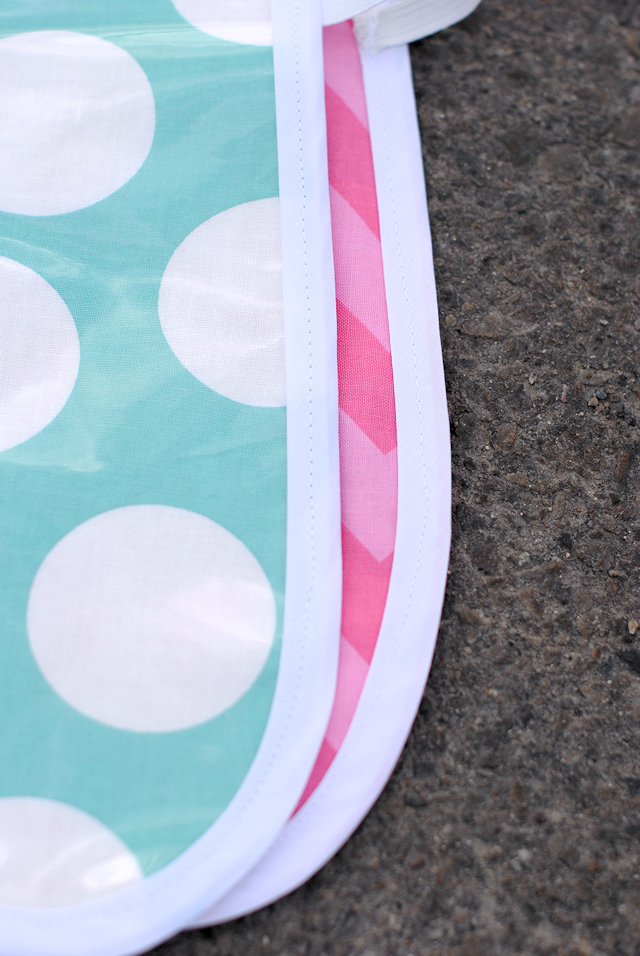
Pin your bias tape all the way around the outer edge of the smock and then sew it in place: (At the sharp curves in the arm pits I stopped, cut the bias tape and began again rather than trying to go around the corners.)
Once you have gone all the way around, you’ll need to cut a slit from the neck hole down the back about 5 inches. Grab your bias tape and line this as well:

Across the bottom of the slit sew back and forth a few times to reinforce it.
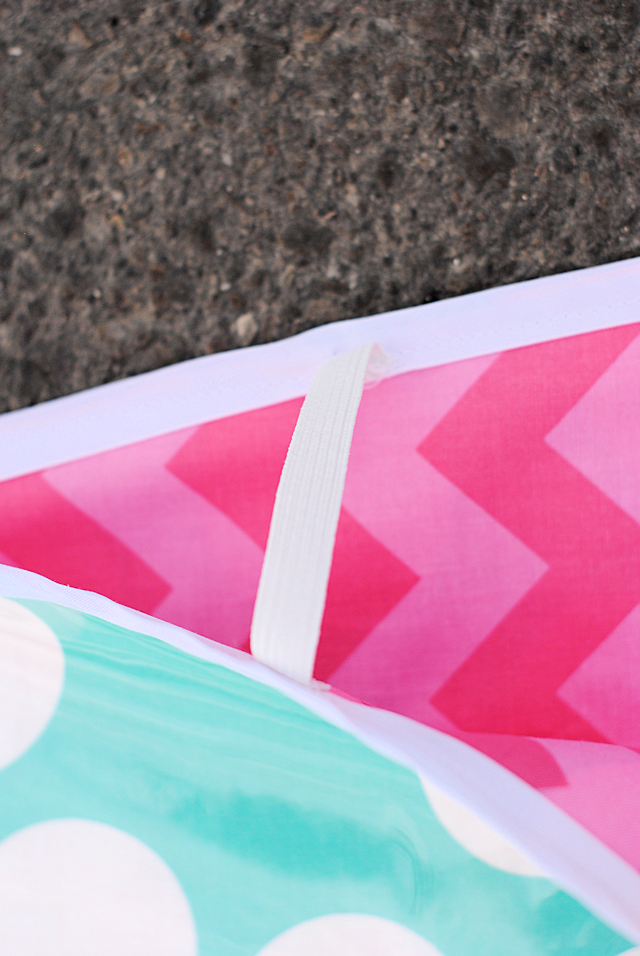
Then, cut your elastic into 2 pieces that are each 4 inches long.
Sew it to the underside of your smock on the front and the back like this:
And that’s it!
If you want, it can be reversible:
You could even add vinyl to the other side of this kid’s art smock as well to make it truly reversible.
You might also like:


Lusanne says
What is the length of the shoulders, is this pattern for a 3-4yrs?
Amber says
The child in the image is about 8-9. It might be big on a 3-4 year old so you could size it down or just let it be big.
Vicki Johnson says
Is it free to sign up? I just purchased a sewing machine for my soon to be 10 year okd granddaughter abd am looking for easy projects for her to sew while she becomes more familiar with sewing and operating a machine.
Amber says
Yep!
Marsha Burk says
The holiday table covers make a good material to make the craft smocks out of then you don’t need the vinyl. Just two sides and bias tape. I love your projects keep them coming I have two little grandchildren thank you
Mary says
The width at the bottom seems way to wide for the rest of the smock. When opened that would be 36 inches. Am I not figuring right?
Amber says
18 inches total, so 9 inches when folded.
Craftymom says
The finished size is 18 in.
You cut 9 inches.
Shelley says
How and where do I get the pattern for the body of the smock I always have a hard time finding the actual patterns to print off and use 🙁
Thank you for your help..
Shelley
Josiane says
Great project!
I was wondering if you can tell what gauge of vinyl you used for this?
Thanks!
Amber says
I’m not sure! Sorry!
Kendra says
You have some cute things on here. I got a sewing machine for Christmas and I do not know anything about sewing. I love your tutorials, it makes me so excited to start learning. I will keep you posted of how I do.. Lol…thanks again and Happy New Year..
Linda says
Looks like a great project for what I need. I need to make this for a toddler 2yrs. old. Any ideas on how to measure for a little tyke?
Thanks,
Linda
Amber says
Just size it down a tiny bit!
Linda Jeter says
I have been looking for a smock pattern to make in Christmas fabric and or holiday fabric for my seven granddaughters,,,what a clever idea!! Should I make an everyday smock, I would use the laminated fabric…
elaine says
I did not see where to download a pattern. Is there one?
Amber says
It’s too large to give you a physical pattern-I have given you the dimensions to cut.
Crystal says
So super cute!! Love it!!
Cliffa Wareing says
Great Idea. There is also another product out there that is an iron on vinyl. I have used this in bread bowls. It works well and can be just wiped off like the vinyl in your supply list.
Amber says
That would be perfect!
Toni says
I would love one in an adult size! Very cute!
Shelley says
For the art smock how and where do I get the printable pattern please???
Thank you
Shelley StClair says
I am wanting to know how and where do I get the printable pattern for this art smock please