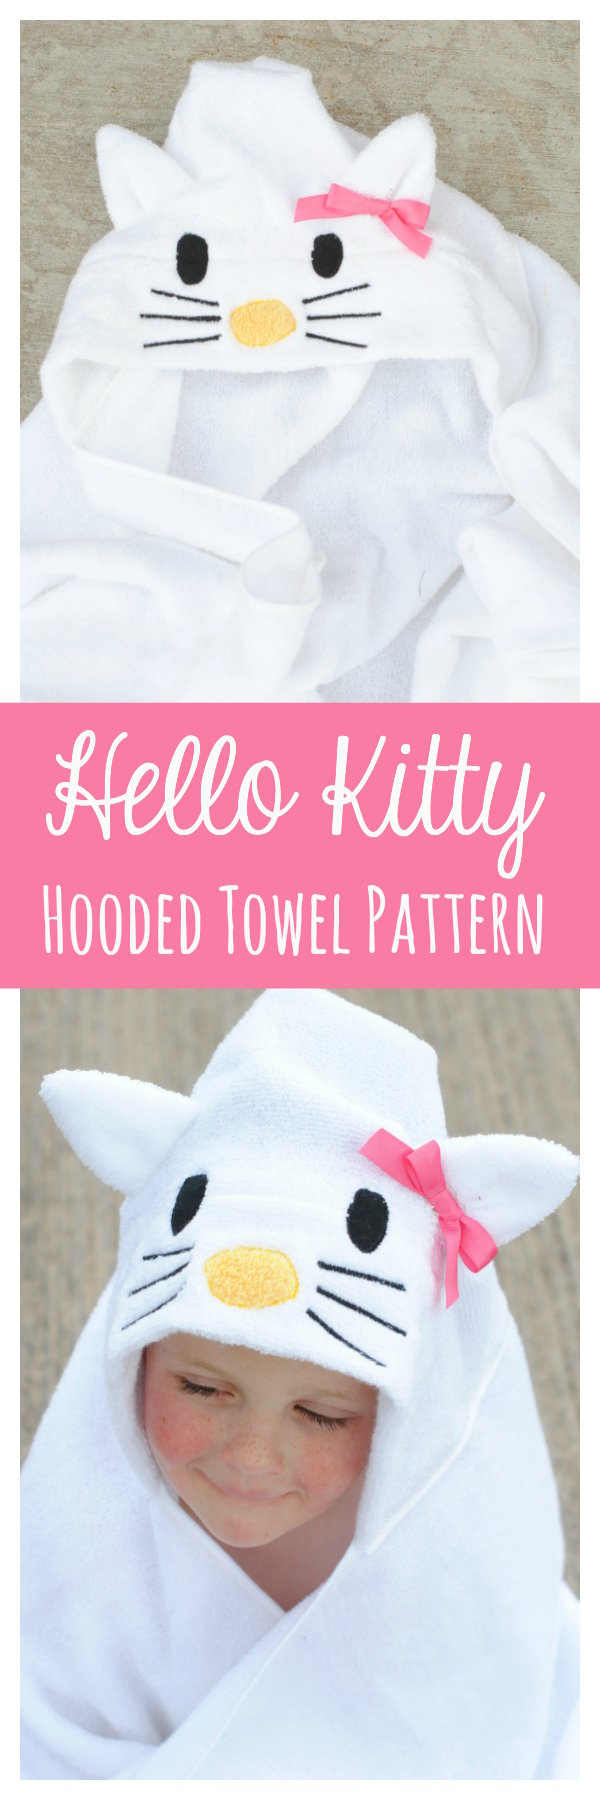
This hooded towel is probably my most popular request from readers, so I hope I make at least a few people happy with this! I admit that making a Hello Kitty hooded towel seemed daunting to me at first. But in the end this towel was super easy to make and I LOVE how it turned out. I give you a Hello Kitty Hooded Towel Tutorial:
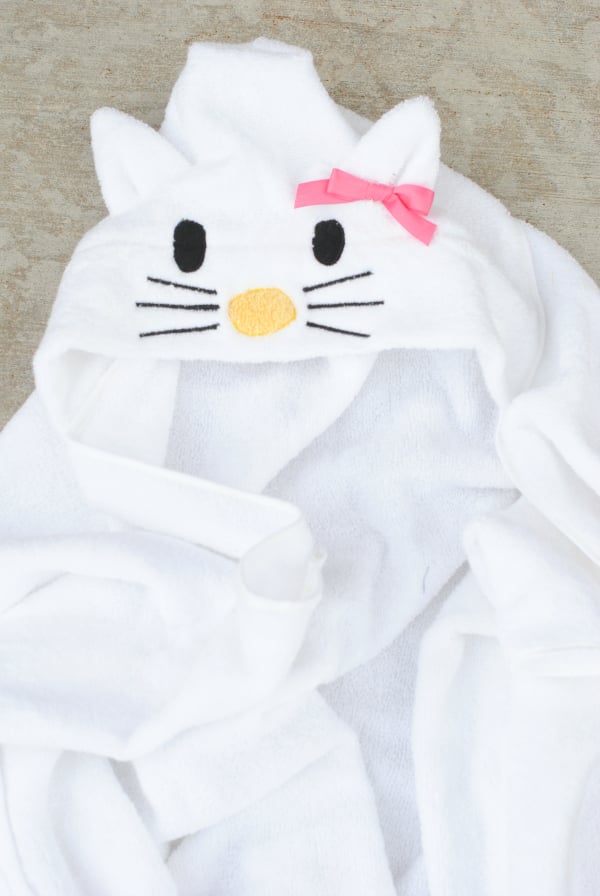
Your little girl will love this! (And yes, I did make my little boy model this. What are you supposed to do when you have no little girls handy and you are in a time crunch?!) It will look even cuter on your GIRL!
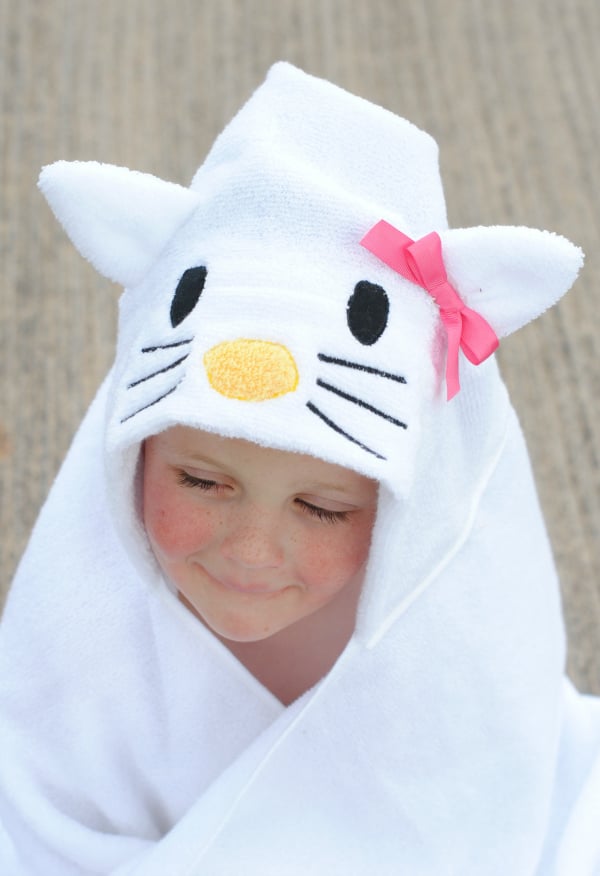
Hello Kitty Hooded Towel Tutorial:
Supplies Needed:
- White Bath Towel
- White Hand Towel
- Small amounts of black and yellow fabric
- Pink Ribbon
- Small amounts of paper backed iron on adhesive like Heat n Bond
- Hello Kitty Hooded Towel Pattern
Instructions:
As always with my hooded towel tutorials, this tutorial will be simply how to make the Hello Kitty face. To make the full hooded towel I refer you to this post that teaches you to make a basic hooded towel.
Cut your hand towel in half horizontally.
Fold under the selvaged (uncut) edge about 3-4 inches and sew it in place. This just make the towel a little smaller on little one’s head.
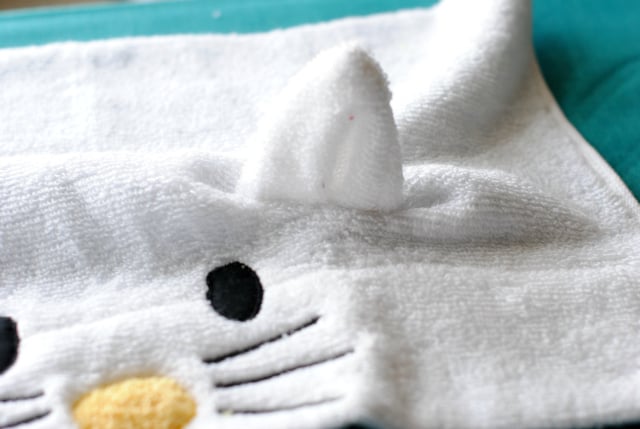
Cut 4 pieces for the ears. Place two together, sew around the edges leaving the bottom open and turn right side out.
Cut out eye pieces and nose from your black and yellow fabric. Cut matching pieces from your Heat n Bond.
Place all face pieces on the hand towel and decide where you want them positioned. Iron the eyes and nose in place.
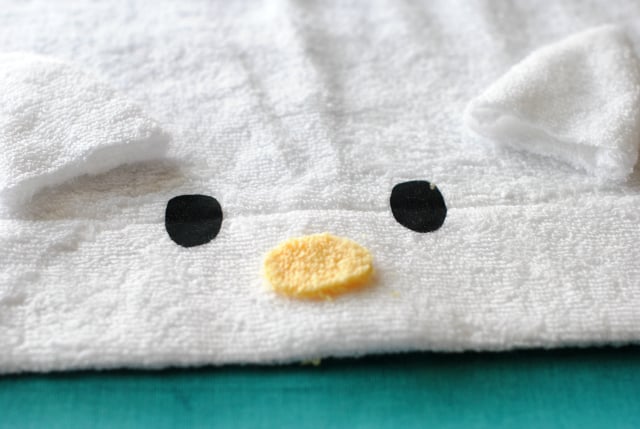
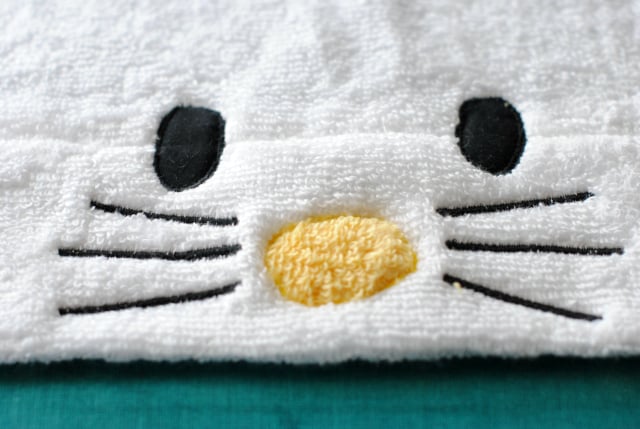
Now using an appliqué stitch (tight zigzag), stitch around the eyes and nose. Then create 3 whiskers going out from the nose. To do these sew forward several inches with your zigzag and then back over top of that.
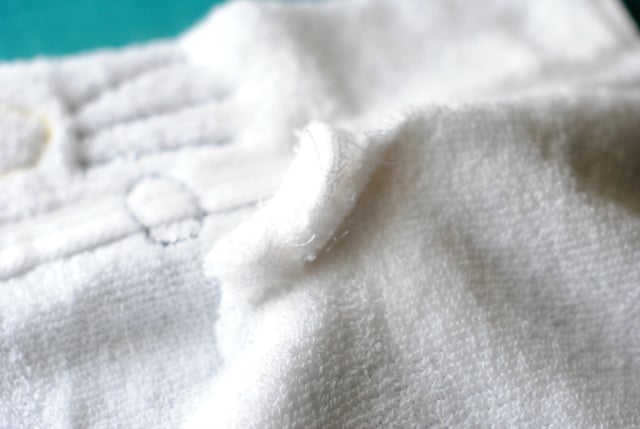
Cut a slit about 1 inch long in each of the spots where you want the ears.
Stuff an ear down into each hole. On the underside sew the hole closed catching the ear and both sides of the hole. (So yes, you are going to be sewing through all kinds of bulk here, so be careful.)
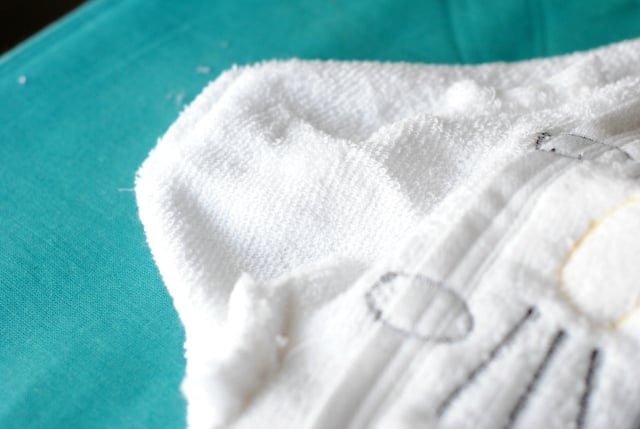
Now your face is done. Fold it in on itself and stitch up the back with a zigzag:

Then fold it like this and sew across the top and snip it off:
Add the head to the towel using this tutorial and you are set!
You Might Also Like:


Amy says
I love these towels! They have become very popular in my family, as new baby gifts, and gifts for the new big brother or sis. I’ve made the monster and duck twice, the shark, and working on Hello Kitty now. Thank you for sharing your talents!
Bev says
Would this fit an older child?
Amber says
It’s good till about 8 or so
Kathryn Schoenrock says
I wondered if you would mind if i borrow your idea for the hooded bath towel and sewing contract? I am looking into teaching a sewing class at a local fabric store for beginners, then follow up with an intermediate. I have also been sewing for a long time and have a passion for it. I love your ideas and attitude to approaching the end goal. You can’t give up because every one of us still makes mistakes all the time. It isn’t surgery. Nobody is going to die if our stitches are not perfect.
Thanks
Kathryn
Amber says
Go for it!
Lyra says
I love them all!! I want to make one by myself for my little one 🙂
Which size of bath towel and hand towel do you use usally?
Amber says
Just whatever I get. I buy mine at Target.
Gweny says
That is adorable but then so are all of your towels. I have made two so far one dragon and the mickey one. I was wondering if you would think about any characters from Paw Patrol? My grandson is crazy in love with that show. Blessings, Gweny
Amber says
I don’t know Paw Patrol. I will have ro look into it.
Gweny says
Ok thank you. It’s on nick jr.
Lynnae Clark says
I adore your hooded towels. do you happen to have it in a fdt format or what ever they call it. where I can print it out. plus your child looks perfect showing off your little kitty towel.. I love the freckles… so so adorable!
Amber says
Just click the link to pattern pieces