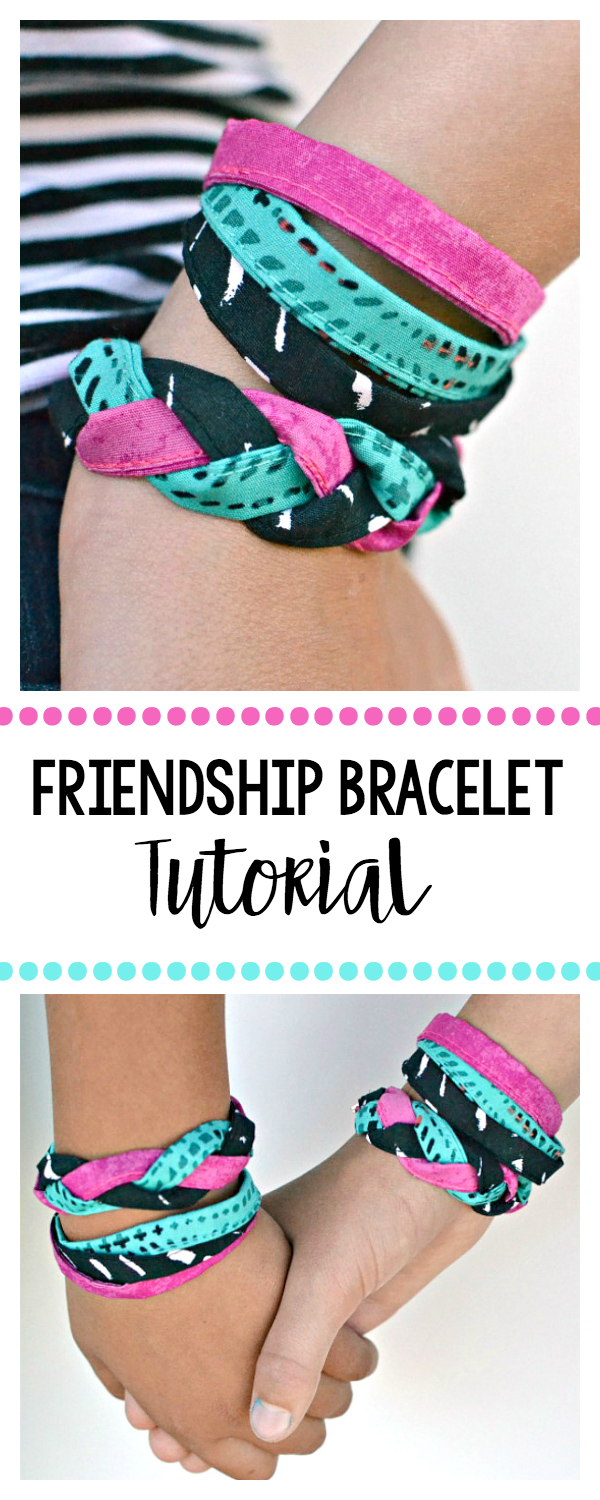
At this very moment I am sitting in a hotel in San Francisco on a girl’s trip with my friend. We’ve laughed, we’ve talked and talked, we’ve eaten way too much and we’ve walked what feels like 123,000 miles. And it’s been a blast. There’s nothing quite like a good friend is there? Today we have a fun way to celebrate friendship. Your daughters or granddaughters will love this! We have Karly from Paisley Roots here today with an easy to make Friendship Bracelet Tutorial!
Here’s Karly:
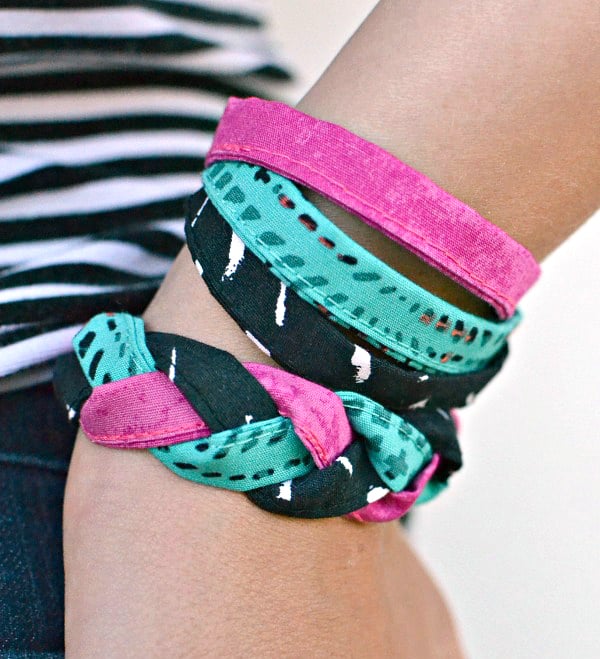
Hey! It’s Karly from Paisley Roots and I’m sharing a really fun tutorial today: Friendship Bracelets! My girls make and share charms with their best friends all the time and this one is so easy to get them involved. One of the best parts? It only takes a few scraps of fabric to make!
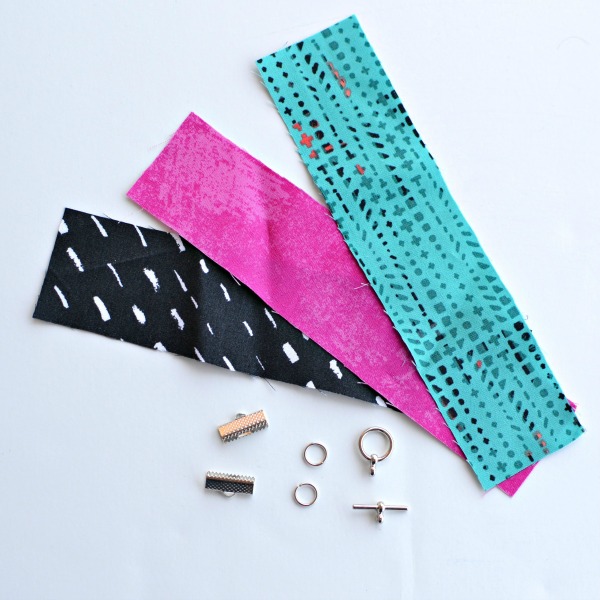
Supplies Needed:
-
Scrap Fabric
-
Matching Thread
-
2 Ribbon Ends
-
2 Jump Rings
-
1 Toggle Clasp or Lobster Clasp
Tools Needed:
-
Iron
-
Pliers
-
Bias Tape Maker 18mm (optional)
Instructions:
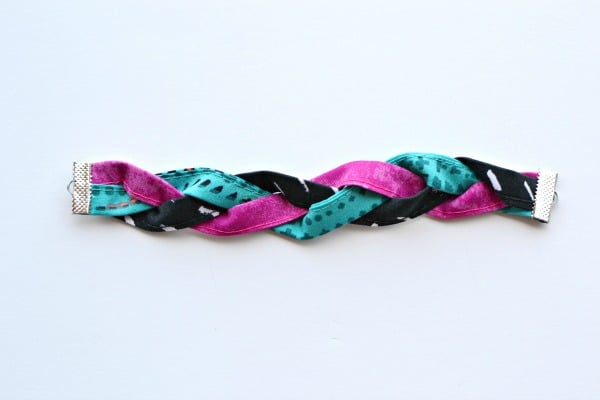
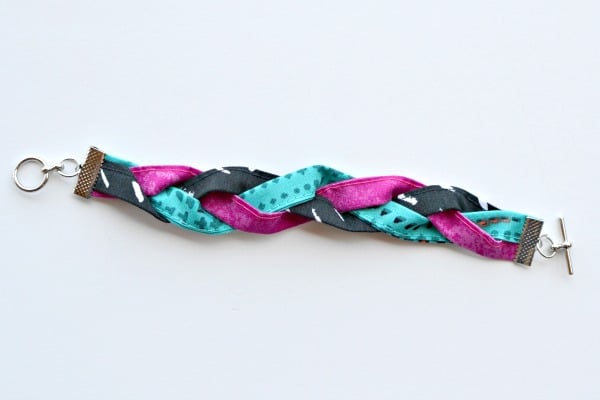
Braided Bias Tape Bracelet
Cut 3 strips:
-
Child – 1.5″ (4cm) by 6.5″ (16.5cm)
-
Adult – 1.5″ (4cm) by 7.25″ (18.5cm)
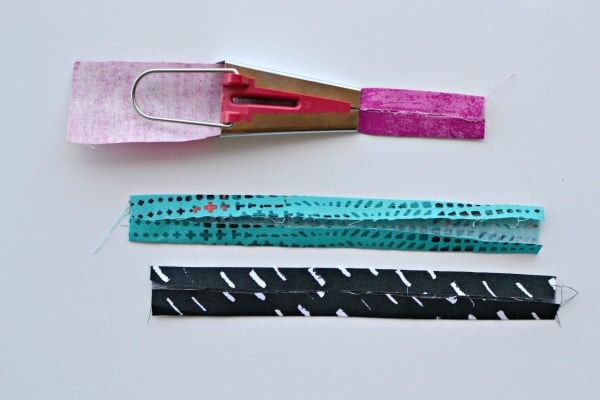
Run the 3 strands through the Bias tape maker, ironing as you go.
If you don’t have a Bias Tape Maker, fold the sides lengthwise, towards the wrong side having them meet in the middle.
Set the strand aside and repeat with the other two strands.
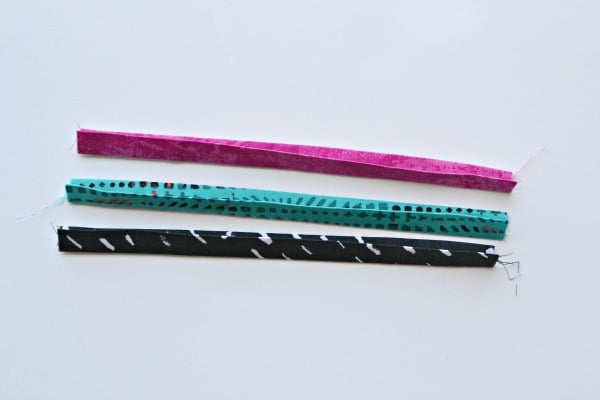
Fold the bias tape strip over again wrong sides together, enclosing both hems on the inside.
Iron the strip, set aside and repeat with the other two strands.
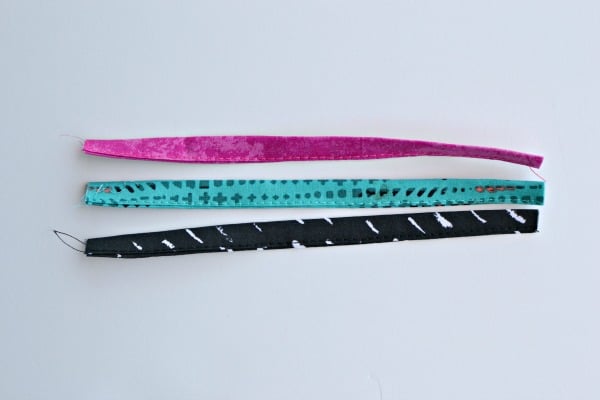
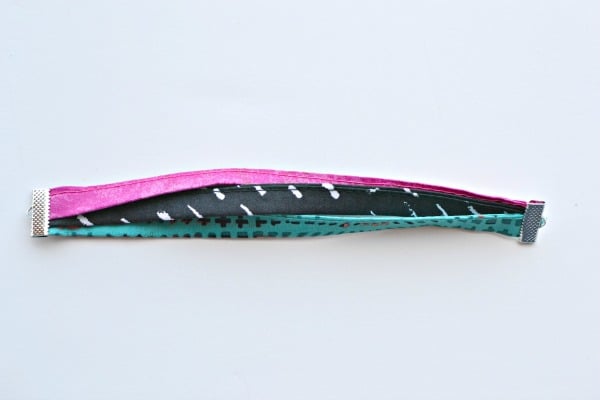
Sew the strands along the open edge.
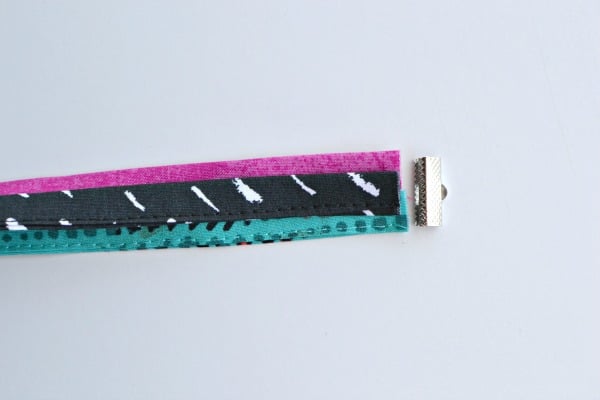
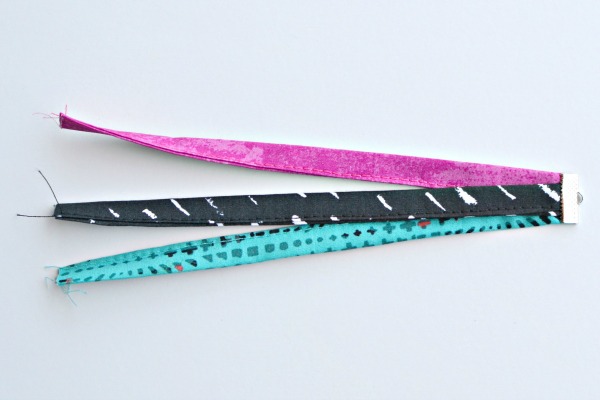
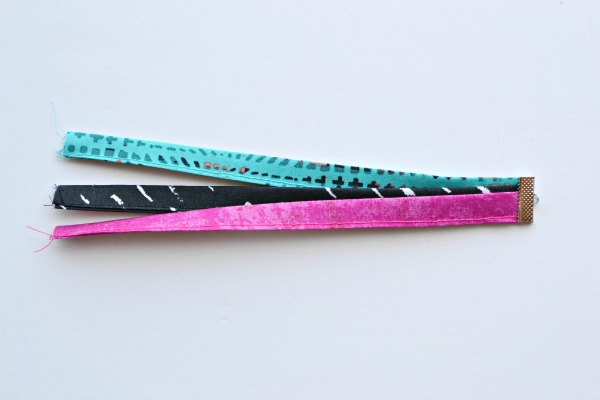
Align the 3 strands, one on top in the middle and the other two slightly off center.
Place strands in a ribbon end and using the Pliers, press the Ribbon End in place.
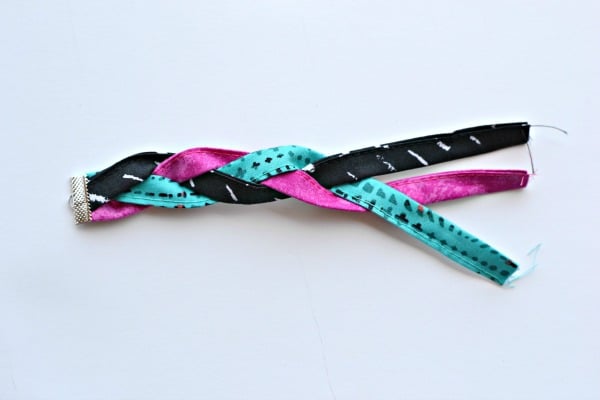
Braid your strands loosely together until you get to the other end.
Align strands so one is in the center and the other two slightly off center.
Place that end in a Ribbon End and use the Pliers to clamp it down in place.

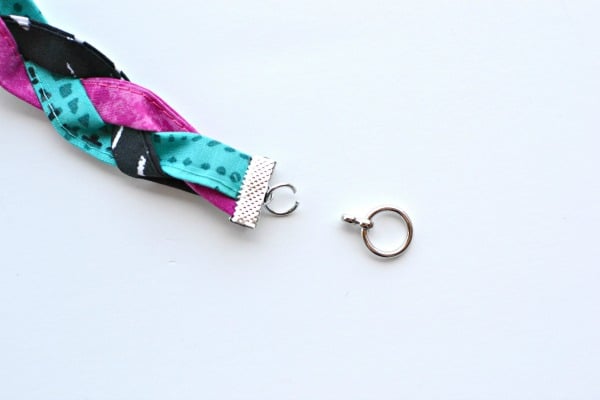
Grab a Jump Ring and slightly open it.
Place it on the Ribbon End.

Place one side of the Toggle Clasp to the Jump Ring.
Close the Jump Ring.
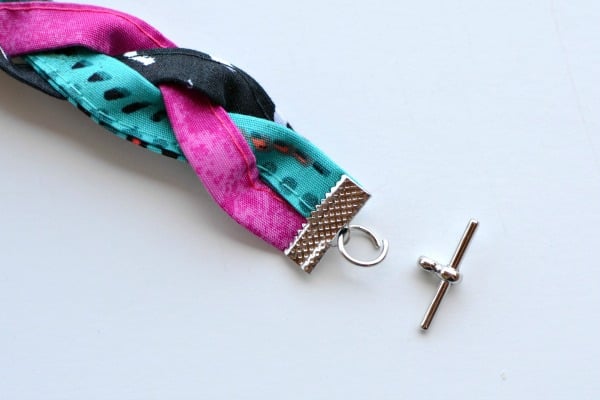
Repeat with the other side with another Jump Ring and the opposite side of the Toggle Clasp.
3 Strands Friendship Bracelet:
Cut 3 Strips:
-
Child – 1.5″ (4cm) by 6.25″ (16cm)
-
Adult – 1.5″ (4cm) by 7″ (18cm)
Align the strips so each is slightly off center to the last one.
Place ends in a Ribbon End and use the Pliers to clamp in place.
Place ends in a Ribbon End and use the Pliers to clamp in place.
For the other end, place the strip that was on top onto the bottom and the bottom strip on to the top.
Leave the middle strip in the middle.
Align the Ribbon End on the strips and clamp closed.
Repeat the steps with the Jumper Rings and Toggle Clasps.


Sheila Perl says
What size ribbon clamps, jump rings and closures did you use to make these adorable bracelets?
Karly Nelson says
For the braided bracelet I used size 3/4″ Ribbon Clamps and size 6mm Jump Rings. For the 3 strand bracelet I used size 1/2″ Ribbon Clamp and the same 6mm Jump Rings. For the closures I used a mix. Some had Toggle Clasps (turned out to be the easiest for my girls) and I also used Lobster Clasps and just the Jump Ring on the other end. Hope this helps! <3
jeanine says
I love these!!! What a fun idea for scraps!
Brenda F-O says
This is a genius activity for young people that might even work w/ hot glue or fabric adhesive so everyone can work independently w/o the sewing machine, or maybe even with some basic hand stitching. Mahalo for sharing very clear instructions.
Karly Nelson says
Thank you! You are so right! It would be super easy to hand sew or use a glue gun! Thank you for pointing that out!
Sheila Perl says
Oh, wow, how clever and cute! I can’t wait to make one or six, I have some pretty Christmas bias scraps, too short to make anything with but too long to throw out! ☺