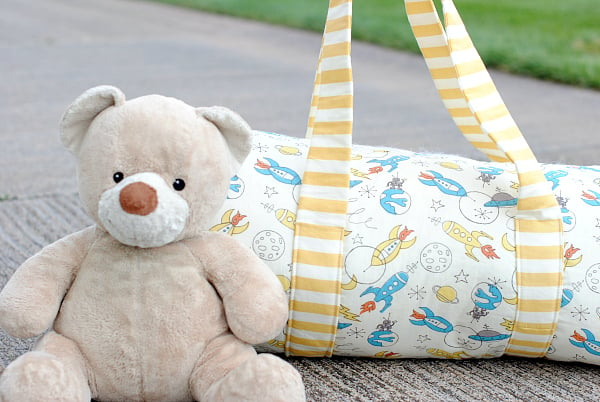
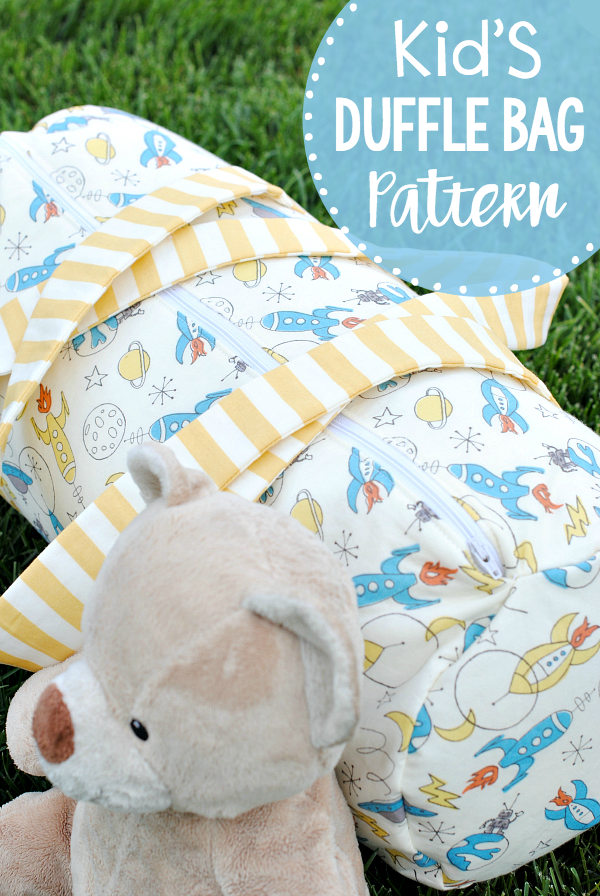
What’s the Project? Use this cute kid’s duffle bag pattern to make a bag that the kids can carry on overnighters to Grandma’s or to dance class or wherever they are going. Easy to follow tutorial and it turns out so cute!
I am a horrible mom and let me tell you why.
I made this cute kids duffle bag and now all of my kids want to be the one to keep it! And because of that, I will probably give it away to a friend so that we don’t have fighting over it.
They don’t like that idea.
But at least I can be confident that it was a good project-they like it! So here’s a kid’s duffle bag pattern for you. (So maybe you can be a horrible mom too?)
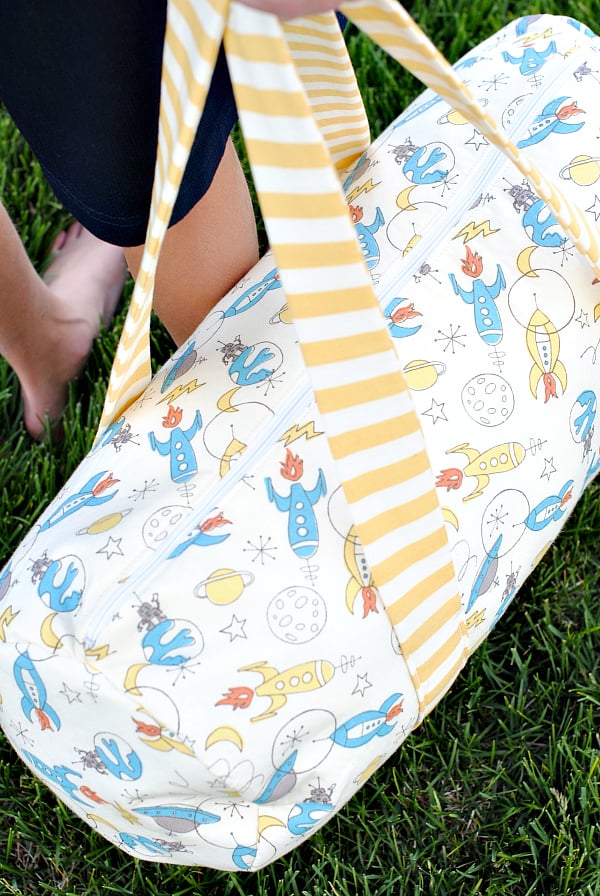
It’s kid-sized and perfect for taking on an overnight trip to Grandmas or you could even use it to store soccer or dance gear.

Pretty fun right?
Kid’s Duffle Bag Pattern & Tutorial:
Supplies Needed:
- 1 yard each of 2 coordinating fabrics (I got mine at Stitch Stash Diva)
- 1/4 yard of a complimentary fabric for the straps
- 1 yard of fusible fleece interfacing
- 20-inch zipper
- Circle Pattern Piece (Just a note-the diameter of the circle is 8.75 inches. I couldn’t fit this all on a page, so the edges of the circle are cut off. Still cut a full circle, just filling in that spot where it is slightly cut off. It’s just a tiny bit cut off so you should be fine to just eyeball it.)
Cutting Guide:
- Cut 2 circles from each of your main fabrics
- Cut 1 piece from each of your main fabrics that is 20 inches wide by 27.5 inches long
- Cut 2 circles and one 20 x 27.5 piece from your fusible fleece
- Cut 1 long piece that is 4 inches wide by 120 inches long. Obviously, you won’t be able to do this all in one cut and will need to piece this together. It will depend on how wide your fabric is, but you will probably need 3 pieces all pieced together to create this long piece. Cut fusible fleece for this as well.
Duffle Bag Sewing Instructions:
Iron your fusible interfacing pieces to the back of your outer bag fabric and your straps.
Fold your straps in half the long way and sew up the long (very long) side. Turn right side out and press flat.
Grab your large outer piece and your strap. Lay your long strap piece on the bag starting from the center of the fabric. Guide the fabric up and loop it around the form handles, back down across the center of the bag and up the other side the form the handle and then have it meet back where you started. So it forms a big oval and you have straps on either end. The length of the actual handle on each side should be about 30 inches from where the strap fabric leaves the main fabric and then rejoins it. Pin all of this in place.
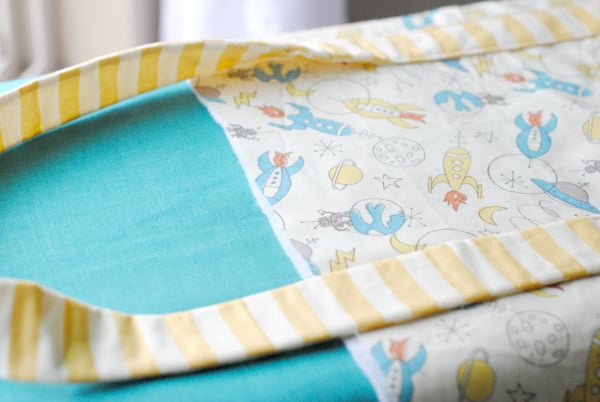
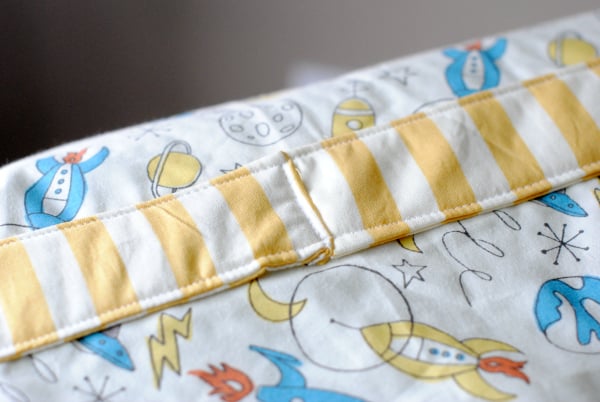
Starting about 5 inches from the top of the bag, sew the strap in place on either side of the strap. Do this for both straps leaving that 5 inches or so on either end that is not sewn in place. (This just allows the straps to drop to the side of the bag and not be sewn clear up to where the zipper will be.) In the spot where your oval that you created with the straps began and ended you will need to fold the fabric over and sew it in place so that the raw edges aren’t showing:
Now we are ready to insert the zipper, so grab it and both of your large pieces of fabric.
Before I start to describe how to do this, let me say that there is more description and more pictures of this process on this post here if you end up confused and need more.
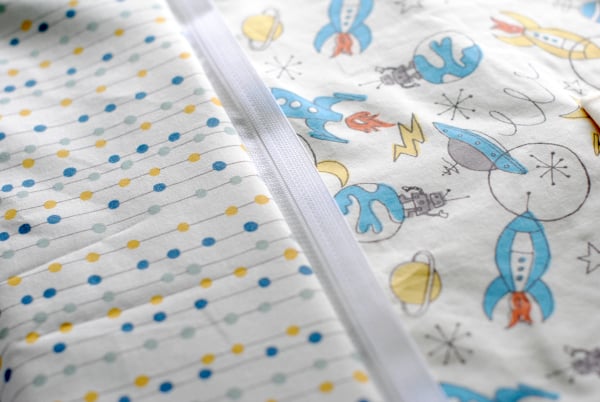
Place your zipper between your two fabrics so that it is face down on the outer fabric and is sandwiched between the two with right sides together. You will then stitch the length of the zipper. Try to keep your stitching close to the actual zipper but not too close. Keep it steady and even. You will need to move the zipper pull out of your way as you go. Just stop, move it out of your way and continue on.
Also, be sure that your strap is tucked inward and out of your way.
Look at these two pictures. This one shows the process from the outside:

Then, once I have stitched and if I open the fabric, it looks like this. See that the zipper is facing down on my main fabric (the rockets).
Now I am going to do the same thing on the other end of my fabrics. Sandwich them between the other side of the zipper-the part that is not sewn yet-with the zipper facing down on my main fabric.

When you have completed this step, you will have a big loop of fabric. Basically like a duffel but without the ends on it yet.
Press the fabric around your zipper to make sure it is laying very flat. You can even top stitch along either side of the zipper to keep it really nice.
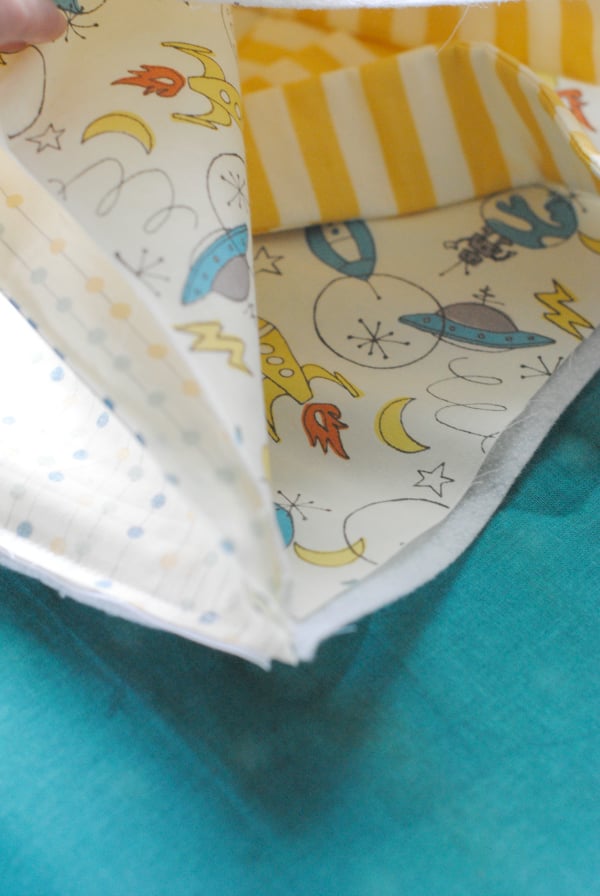
Now, all we need to do is stitch the circle pieces to each end. Separate your bag so that the inner and outer pieces are separate and not on top of each other. Grab your circle and pin it in place like this on one end. This is ONLY being pinned to my outer fabric, not my inner. My inner fabric is out of the way for now.
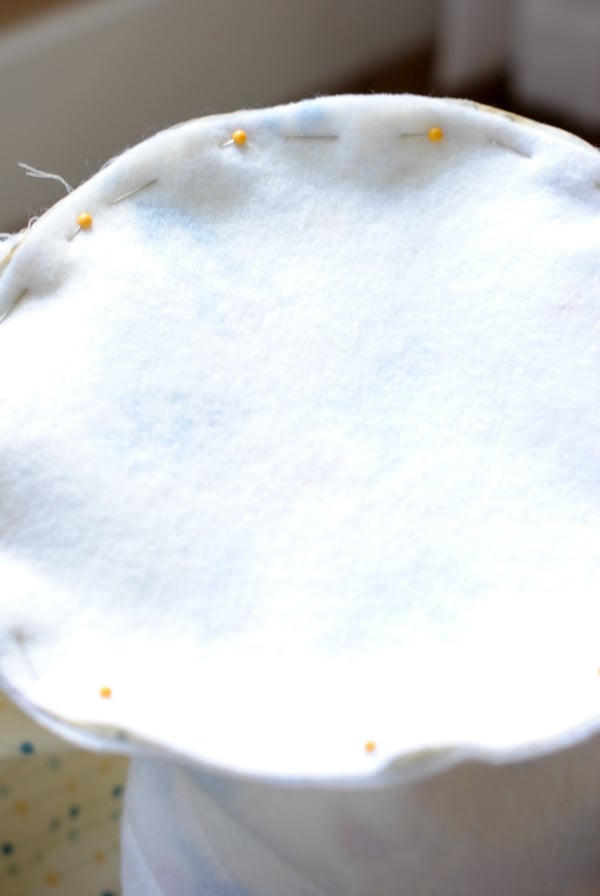
Sew around this part. Just be careful at the place that it meets the zipper. Sew through the zipper area but make sure you don’t have the zipper pull in the way and that you don’t break a needle by sewing right on the zipper.
Do this for all 4 circles-each on one end of the bag. On the last circle, leave an opening at the bottom about 4 inches big.
Turn everything right side out through that opening, then sew it closed.
Push the inner part of the bag down into the outer and press everything nice and flat and pretty.
Then head to Grandma’s!
I hope you love sewing this cute duffle bag pattern!
You Might Also Like:
Pin It:


Christina says
I can’t see where to download the pattern:( Anyway you can email the link to me?? I would very much appreciate your help!
Thank you
Christina from Ontario, Canada 🇨🇦
Amber says
Here’s where you can find the pattern piece for the ends: https://crazylittleprojects.com/wp-content/uploads/2015/05/CirclePatternPiece.pdf
And then the rest is just measurements.
Jeri says
It is a great bag and you should just make one for each of your kids instead of giving the one you made in the first place away. All of my grandsons want one and they are ages 5 to 20.
I love your creations.
Amber says
That’s wonderful! Glad your grandsons like them!
Bobby Jo says
I’m almost finished with the duffle bag for a little 10 year girl. I used a denim with pink and blue flowers. The iron on fusible interfacing didn’t adhere. So I lined the lining to the interfacing and the denim and did a random quilt pattern. It came out very cute. I’ll finish it tomorrow, can’t wait to see it. Pattern is very easy. Thank you. I also enjoy crocheting amigurumi little animals.
Amber says
That sounds adorable!
Sophie says
Great bag, love it. Can anyone tell me the size of it once completed please?
Love the fabrics used, so bright and perky.
Thanks
Pint Size Sophie UK
Windy says
Love how you casually say to just turn your 120″ tube! LOL. I monogrammed the one I made and it turned out super cute, but I’ve been up all night making it. I think this one will definitely be a go to for me though cause what little girl doesn’t need a little duffel bag?
Amber says
And watch a good show WHILE you turn the tube. 🙂
Lynnette says
I made this duffel bag for my grandson. He loves it. Thanks so much for the tutorial!
susan says
I love your website! I just made the mini-messenger bag today 🙂 I really want to try this duffel bag out. Would you consider making video tutorials??? I do so much better when I can see it vs. read it 🙂 I’m afraid to mess this one up as I’m a little confused haha
great web site!
Amber says
It’s on my to do list-I just haven’t really tried it yet!
Nicola Robinson says
I agree!! Im brand new at sewing and super excited to try this bag…..but even though i’ve read the instructions 10 times, i’m still unsure 🙂 Would love a video tutorial, though I appreciate it isn’t so easy. Thanks for sharing the information you do. It’s super inspiring.
Lynnette France says
I thought this was so cute and I needed an idea for my 10 year old grandson as a gift for him graduating from elementary school to junior high. Also I am a granny and would love to have him visit more! So, I made this duffel bag for him. It turned out so cute! I made it out of a cute cotton fabric with trucks all over it. I lined the inside with a thin vinyl so it would be waterproof. I hope he likes it. Thanks for the idea!
Missy says
I Love, Petal Wander Woods, from Michael Miller. It’s so soft and sweet, just what I want, to make the quilt of my dreams. And I only got through the first 20 pages. Thanks for hooking us up with this great company!
Ivy gabbard says
I would use these to make lap quilt lovely
Linda Thompson says
A quick and easy duffel….looks fun to try!
Sharon says
great details in the tutorial. love “the stash” for fabric variety!
Glenna Fleeman says
Very cute proJect!
Emily N. says
Love this fabric! I’d make a really cute quilt for a special little boy.
Anita Carol Gambrell says
i think I would love to try and make a duffel bag, all those fabrics are so cool!
Elizabeth says
This is amazing!!! You couldn’t have posted this at a better time!!! I am leaving on a 12 hour drive in just about three weeks with three kids. I have been trying to think of something different for them to carry their clothes in. I will have to get busy this week and make this. Hopefully I have enough fabric that they will like to do this with. lol I would hate to have to drag my husband to the local fabric store again. Thanks so much for this tutorial!!!
Laura says
I got this tutorial in my email and I thought it was so cute!! 1 I saved it to make!
Suzi says
What a cute beg! Grandkids would be clambering for it. Would be a hard choice. Just may have to keep it for me!
Judy Davis says
Love the bag and thanks for the giveaway!
Tracer says
Love the bag! I just started sewing and keep going back to your site for ideas and easy tutorials. Thank you and keep them coming!
Mz Cosby says
Very cute bag!!! Good thing my 2 are very little and I’m sure MJ would take over this bag anyway! LOL
Candias Chalker says
Great early Christmas Presents to start on! So fun, I love the opportunity to learn new patterns and techniques. Thank you and thank you for the give-a-way too 🙂
Kara says
Thanks for the fun info and giveaways! Love the projects! (PS I went to high school with your hubby way back in the day… In Neenah)
Amber says
What? That’s cool!
Gwen H. says
I love the duffle bag. Thank you for the giveaway and information.
Que says
Love you blog. I would not know where to begin except to search your blog for ideas. I’m just learning to sew and embroider so this giveaway would be so perfect to get me started 🙂
Amber says
Ah thanks!
Sharri says
I have four grandchildren and I think I will practice on this pattern making each their own so they will have new duffle bags to use to come to Nammy’s house!!!
This is simply darling. Gonna have fun with the patterns of fabrics to use.
Thank you for sharing this.
Sharri from Missouri
Amber says
Very fun idea!
Ann from Germansville.PA says
Love the duffel bag!! Luv ur Crazy Littke Projects and ur blog!!!
Ann from Germansville
Amber says
Thanks!
Cynthia says
I love your emails.
Joanne says
Thanks for all the sharing and giveaway !
Dana Kelley says
Cute bag!
Marina says
I would make lap quilts for the people with that dreaded Alhzamers (sorry spelt wrong) I nursed my hubby for 7 1/2 years then drove 60 miles each way for 18 month every day , till he passed , it is a awful
thing to get,
Carla Hundley says
How cute this is and I don’t
blame them for wanting it!
Thanks for sharing all the
instructions and giveaway.
Carla from Utah
Terry says
Adorable duffel bag!!!
Susie says
Such a cute bag! And I love stitch stash diva!