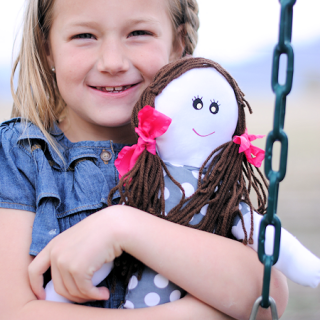
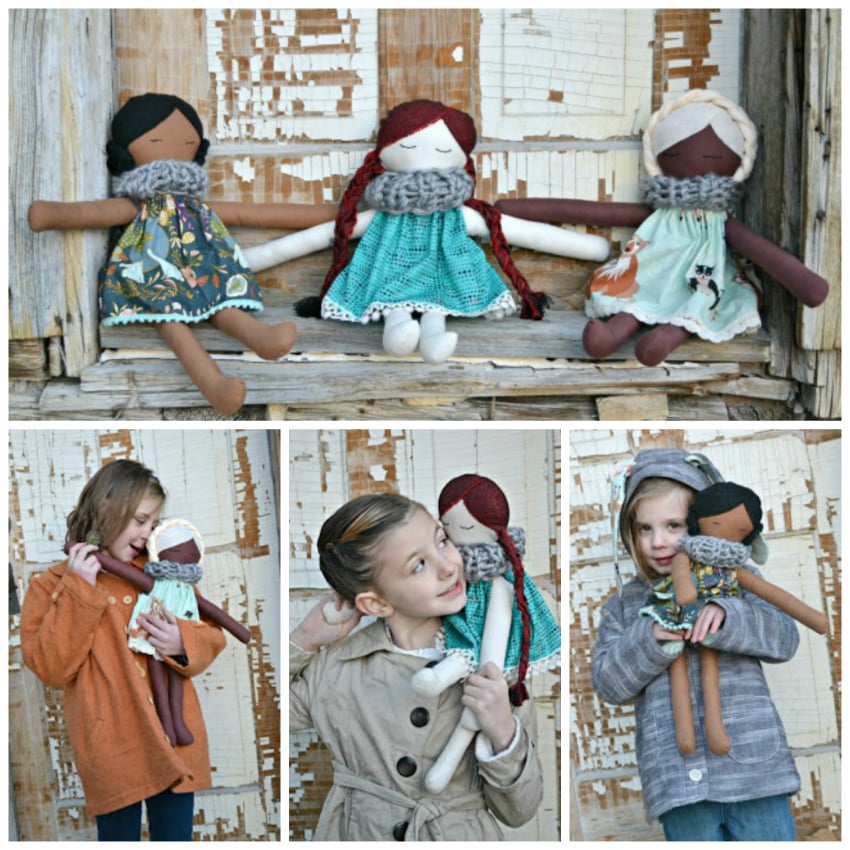
What’s the Project? In search of free doll patterns to make a cute doll for your little girl (or boy)? This rad doll pattern is easy to follow and makes a super cute little doll that you can customize to look however you want it to. A good beginner sewing project.
You know what I love to do? Make up cloth doll patterns and sew up cute little cloth dolls for all the darling little girls in my life.
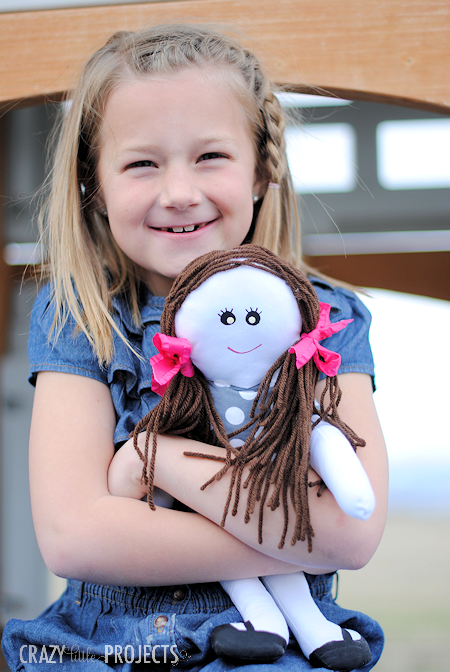
Wait, what?! Oh, right-I don’t have very many little girls in my life. In fact, I had to borrow my adorable little model from a friend for this post.
But if YOU’VE got little girls in your life who would love a doll and you’re looking for free doll patterns, here’s a cute and simple to sew rag doll pattern.
This is a good beginner sewing project too. It’s not too hard. It might even be something fun to have the kiddos sew themselves (with your help).
Let me tell you really why I sewed up some cute little fabric dolls and created a pattern this week.
A few months back I was contacted by a wonderful agency-Enchanted Makeovers-about working with them to make Women’s and Children’s Shelters a more welcoming place for the little ones there. They asked if I could design free doll patterns and have readers sew those dolls for the children who come to the shelters.
So I did.
The thing they didn’t know when they contacted me is that I was a social worker before having kids. And I went into social work because I love kids and I love doing anything I can to help kids in need. So their organization hit a soft spot in me. Yes! I want to make dolls for little kids who need a hug!
It was a challenge for me to create free doll patterns-but it was a fun challenge! And today I am happy to share this with you. 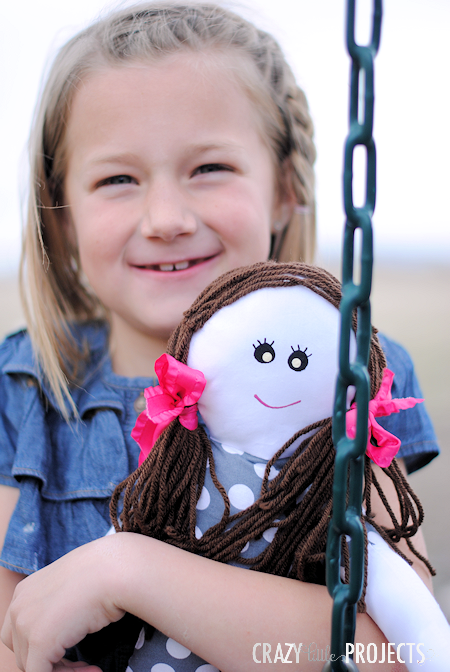
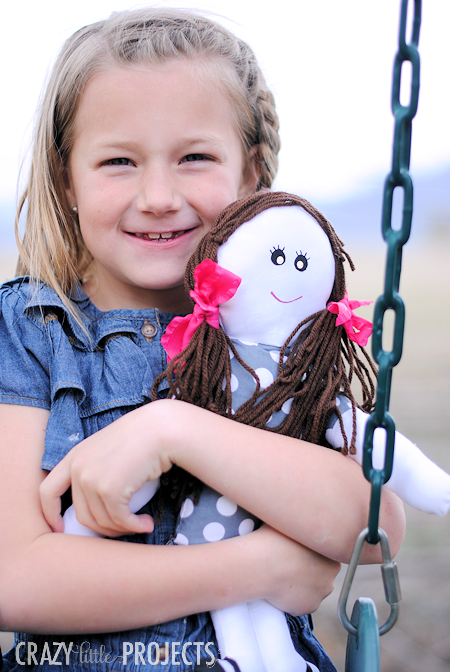
So, I am giving you this pattern and you can sew it up for all the little girls in your life. Make it look like your little girls. It would make a great gift!
Or…if you don’t have any little girls or if you just want to do something good for the world-sew one (or ten) of these dolls up and send it to Enchanted Makeovers and they will give it to a child that comes to a shelter. A child who needs a hug.
Here is the address to send it to:
Enchanted Makeovers
12663 Hipp St
Taylor, MI 48180
I encourage you to go to their website and see all the wonderful work they do!
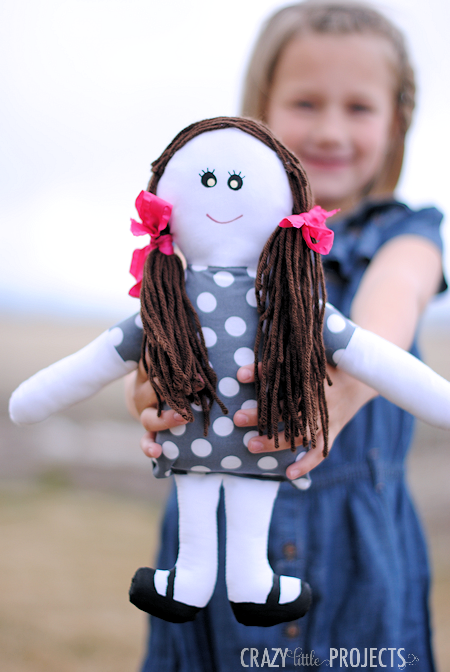
Easy Rag Doll Pattern
Supplies
- 1/4 yard "Flesh color" fabric If you are making these dolls to donate, please remember that kids come in all varieties, so let’s vary what flesh colors and hair colors and hair styles we use. Make them all different and unique.
- Small amount of fabric for the dress
- Stuffing to fill the doll
- Yarn (for the hair)
- Fabric paint (for the face and optional shoes)
- Optional ribbon for bows
- Doll Pattern Pieces
Instructions
- Print out the pattern and cut out the pattern pieces.
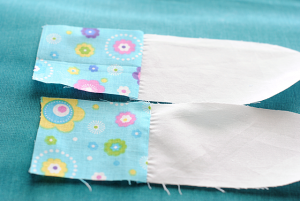
- With your pattern pieces, cut:-2 head pieces from your flesh fabric-4 arm pieces from your flesh fabric-4 leg pieces from your flesh fabric-4 sleeve pieces from your dress fabric-2 dress pieces from your dress fabric
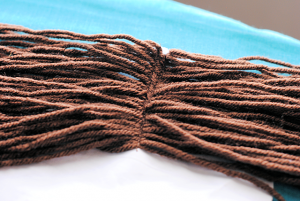
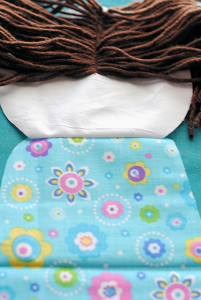
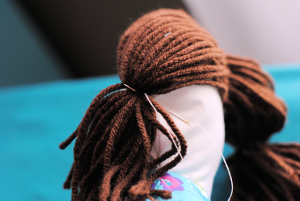
- From your yarn cut a bunch of strands to the length you want them for your doll. Each strand will cover from one end of the hair up to the head and down to the other end of the hair. So make them twice as long as you want the doll’s hair to actually be.
- Place your hair pieces in the center top of one of your head pieces. Sew a straight line right down the middle of the hair from top to bottom. Yes, this will be a little tricky. I go over it twice to hold it in place well.

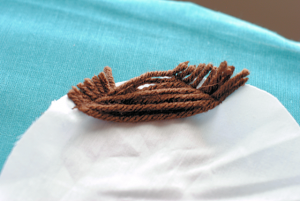
- On the other head piece, create some bangs by sewing some yarn across like this: (My hair pieces were longer when I sewed them and then I just snipped the ends off after.)
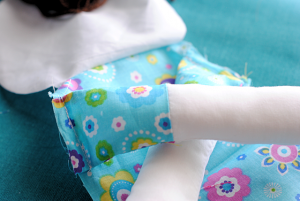
- Grab your sleeve pieces and your arm pieces and sew them together.
- Then place two of your completed arm pieces together with right sides facing in and sew around them leaving the short bottom side (where the sleeve is) open. Turn them right side out. Press them then stuff them with stuffing. Leave about an inch or so not stuffed at the top so that you can sew them in easily.
- Do the same with the leg pieces. (Be sure to clip the corners on the curve that is the ankles of the legs before turning right side out.)
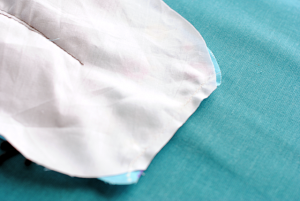
- Take your head pieces and sew them to the dress pieces across the bottom of the head and top of the dress with right sides together. You can then snip off the excess.
- It should look like this (from the back of the doll) when you are done.

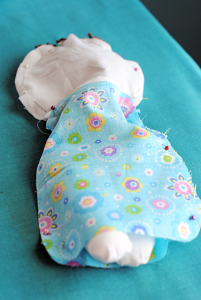
- Sew your arms in place on the doll body. Place them near the top. Pin them in place with them angling downward slightly (or they can stick straight out-either way is fine really) and sew them in place.
- Now, take your body back piece with the arms attached and your front piece and place them together with right sides facing in. Make sure the hair is out of your way (you can even put it in a pony tail for now if you need to) and that the arms are tucked in, and pin it all the way around.
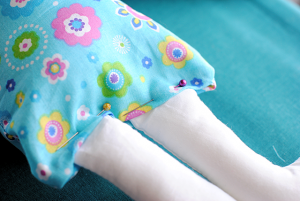
- Leaving an opening at the bottom of the dress as seen in the picture above. Sew all the way around where you pinned. Then turn your doll right side out.
- Now, insert the legs and pin the opening closed on them.
- Stitch that shut. Ideally, you would hand stitch this. I am not patient, so I machine stitch it.
- pull your hair into pig tails and get it just how you want it. (I like to pull it over the face a little.) Tie a piece of yarn in it on each side to create the pig tails. Then, hand stitch it from the back, through a tiny bit of the head and through the yarn you just tied it with. I stitch it about 5 times. This will keep the pig tails in place. Then I like to add bows in her hair.
- Now you just need to paint a face on your little doll. I also painted little Mary Jane shoes on her. I used fabric paint and it worked very well!
- And she’s done! And someone will love her.

Have fun with these free doll patterns! You can change them up as much as you would like!
You Might Also Like:


SH says
I love this idea and am going to make some of these for the local foster kid group! Thanks for sharing!
Amber says
Wonderful!
Laura says
I just found your adorable doll pattern on Pinterest. I’ve made some dolls for Enchanted Makeovers several times but it will be fun to have a new pattern to use the next time – thank you!
Betty Pettus says
I have made a lot of cloth dolls over the years but this is so nice. Mine have been doll and dress separately. Thanks.
Barbara-Jean Shafer says
I don’t have a printer so I use tracing paper and just held it up to my computer screen and with a crayon or marker I was able to trace.
One year ago I was diagnosed with an eye disease. I do have problems with reading and reading. I am a quilter so that came to an end. But so bored!!!!! So I decided to make some rag dolls that was at least 16″-18″. And I found this on internet.
All though I am limited but neverthyless, I am so excited to get started……BJ
Thanks Amber
Amber says
WOW! That’s great and good luck!
Linda Hamstra says
I would like to make some dolls but I got the dress pattern but not the doll could ou sent me the doll pattern please thank you
Debra McGrath says
I’m wondering what the seam allowance is for this doll. I’ve looked but can’t seem to find one.
Thanks
Amber says
3/8 inch
Debra McGrath says
I didn’t notice how much the seam allowance was on your doll pattern. Thanks.
Amber says
About 3/8 inch
arlete says
minha filha achou lindo , e quer que eu faça uma .
linda says
can u specify the type of fabric use, and how much fabric needed. also what is the length (size) of finish doll?
Amber says
I just used basic cotton. The doll is about 16 inches or so when finished.
Gerry Johnson says
Are the pattern pieces true to size or do they need to be enlarged? And to what proportion?
Amber says
They should be printed at 100% and then they are sized right.
Sanna says
I knowv this is a longshot, but by any chance, do you have a printable / pdf instruction for this? My mother would love to make some dolls, but she isn’t internet savy at all. Trying to print this directly from the site just doesn’t seem to work
Amber says
I have just the pattern as a pdf, not the instructions. Sorry!
Amy says
I can pull up the pattern but can’t print it for some reason??
Amber says
Is your adobe up to date?
Johanna from Finland says
Thank you for this pattern and tutorial! I have to do this for my goddaughter!
Morgyn says
This looks like a great idea 🙂
I only wish I had some little girls I knew so could make them for them. I’m surrounded by little boys with no girls in sight 😛
Katie Stone says
My daughter is on a service mission in Peru- I am going to make some of these to send. If you want to make some too, they will be given to the children who are so poor in Peru for Christmas this year.
Amber says
Oh very fun!!!
Leanne Heern says
I ran across this pin on pinterest… it just brought a smile to my face…
when I was little my mom had a doll crafting business…. this was in the day of the craft show! before the days of even personal computers…
I still have a few of her creations… this doll reminded me of one of my favorites!
thank you for posting…
I might need to make a few for this organization!
Megan says
I was just curious what kind of fabric paint you used? I’m working on a doll for my daughter’s sixth birthday. Thanks for the great tutorial!
Beckyjopdx says
Oh….my mom made me this doll. I still have it in all her blue calico glory.
cath says
this is fabulous, and could so easily be adapted to make a pirate, spaceman, knight or any toy suitable for boys or girls. I hope the shelter does well from the campaign.
Kathy says
Oh, I love this idea and I really love that you posted a site to send em too. I had been thinking to do this for about two good months and you posted this…ill take it as a sign and sew up a few! Thank you for the tutorial and pattern 🙂
Shannon says
Great idea and cause! My 4-year-old recently designed a doll that I made for him out of felt. Would they accept something like that for the little boys? I couldn’t find specific details on their website. Thank you!
Katie @ Made to be a Momma says
Adorable Amber!