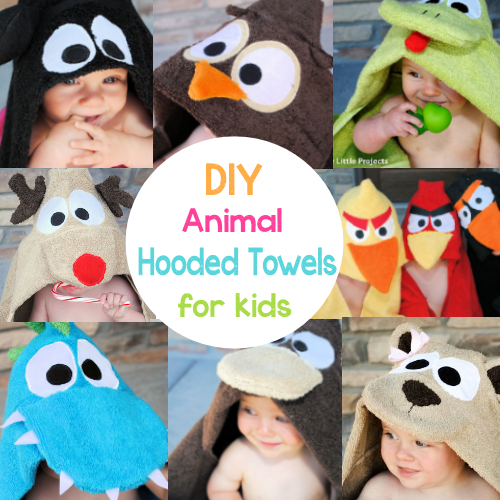
It’s that time again…and the last one of 2013 (gonna give you something different in December). It’s the monthly hooded towel tutorial. And this time, for the first time ever, it’s not an animal. I’ve had a lot of requests for this, it’s a Princess Hooded Towel Tutorial!
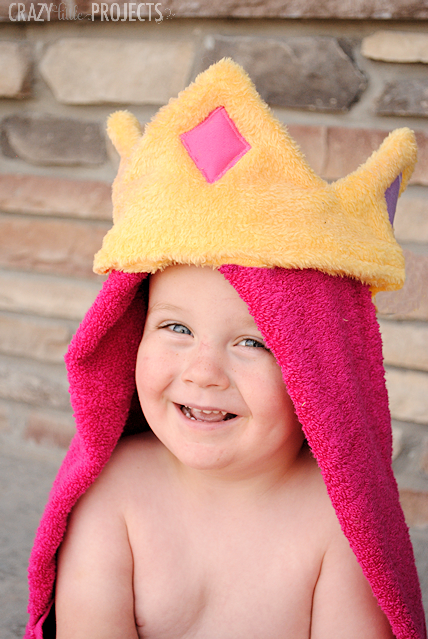
Now first you should know that I have no little girls, just 4 little boys around these parts. And yes, that’s my youngest modeling the hooded towel. He was ever so happy to do that. Give him a few years and he won’t want to have a thing to do with princesses!
I do a monthly hooded towel on my blog-everything from frogs and monkeys to pink bunnies and sharks, but I think this is the first one I’ve done that’s not an animal. I’ve had a lot of readers request a princess towel though, so I finally went for it.
Princess Hooded Towel Tutorial:
Supplies Needed:
- Bath towel in your choice of color (I just get full sized bath towels from any store)
- Half of a hand towel in same color
- 1 yellow hand towel or yellow terry cloth
- Small amounts of fabric for the “jewels” on the crown in your choice of color
- Small amounts of paper backed heat activated such as Heat n Bond
- Princess Hooded Towel Pattern Pieces
Instructions:
I have instructions to construct the actual hooded towel part on my blog, today I am going to show you how to make the crown and attach it to the hood. Please refer to my hooded towel post for help with the rest.
As I explain in my full hooded towel post, I start by cutting the hand towel in half horizontally, so that I have a short and fat piece to work with. I think fold the front under about 3 inches and sew it in place.
Now, cut out 2 yellow pieces for the crown using the pattern pieces provided (note that I am giving you patter pieces that are slightly smaller than what I used in the images here. I felt like the crown was a little too big.
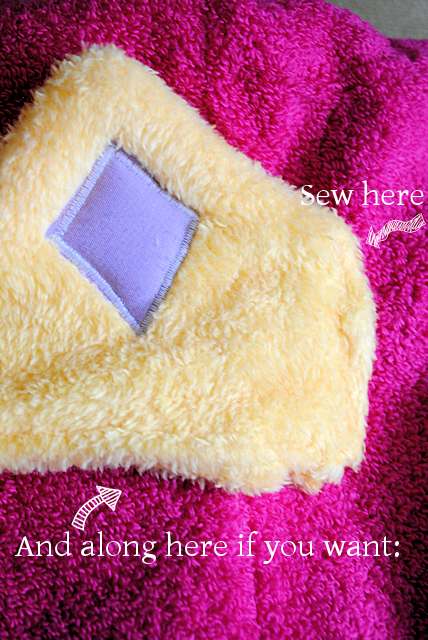
Sew the crown all the way around but leave one side open to turn it:
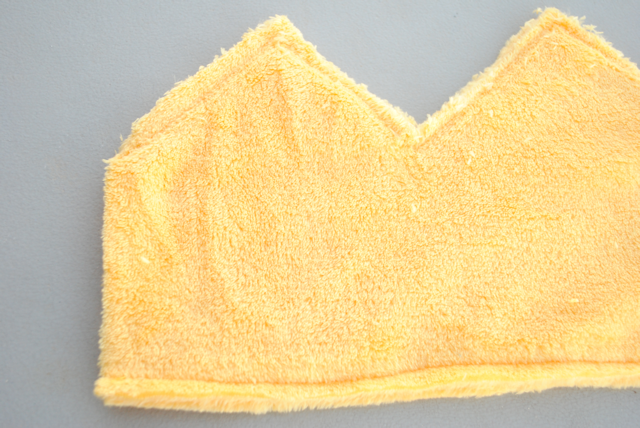
Turn it right side out.
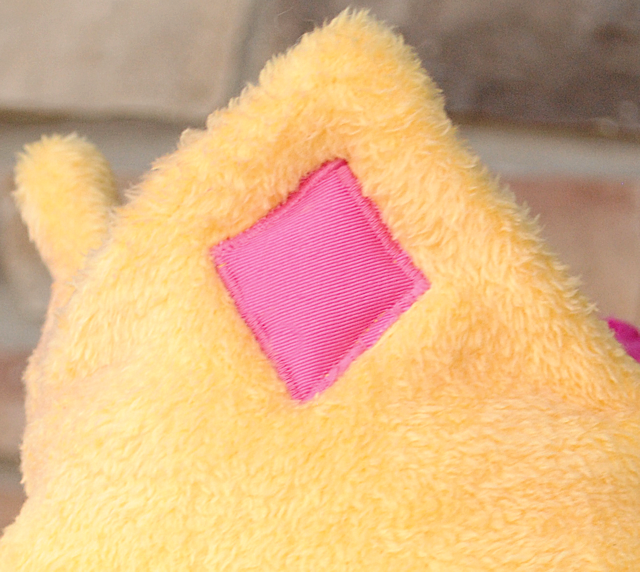
Cut out your little jewel pieces from the fabric AND from the paper backed adhesive. Iron them in place on your crown and then applique around them:
Now, take your half of the hand towel and zigzag it down the back edge to form the hood:
Now take your crown and pin it so that each edge is on the hood but the crown part goes around the forehead. To do this I actually put the hood on my head and went and looked in the mirror to get the placement right. It will just be attached at the two sides. Remember of course that your head will be a little bigger than your princess. Ideally you can use your princess’s head to figure out the sizing, but if not, use your own.
Pin it in place on either side and then sew a straight line on either end of the crown. On the end of the crown that is still open, fold the edge under BEFORE you sew and this will close the opening AND sew the crown in place.
Then just sew your hood to your towel and you’re all set!
See more hooded towels:


Nicole says
LOVE your hooded towels. Especially the tutorial–super easy to follow! I made my daughter the Princess one for Christmas and wrote about it on my blog. I tracked back to you. Here’s the link if yo want to check it out http://thenotsoboredhousewife.com/?p=1245! Thank you for sharing your awesome ideas!!!!!
Amber says
Love it!
Katrina says
Have you washed this princess towel? Does the crown come out still upright? Thanks!
Amber says
I haven’t-I actually gave the towel away. But if you do if from a sturdy fabric it should.
Melinda says
Hi, I’m about to make this for my daughter and niece as Christmas presents. I don’t have a printer tho to print the crown pattern. Are you able to give me some approximate measurements? Then I can draw my own pattern up 🙂 many thanks! I may make more of these… Minion perhaps 😀
Amber says
It’s the size of a sheet of paper, so about 8.5″ long.
sharon says
THANK YOU for posting these! It is greatly appreciated! I wish there was a full front and side view of how the crown is sewn on?
thank you again for doing this.
Sharon
Joan says
Did you sew a line across the top of the hood in this tutorial like you did some of the others. I love your tutorials and they are so easy to follow. I have made a few of them now and they are so much fun to make and give away as presents.
Thanks for all the great tutorials.
I live in Canada and unfortunately can’t join in your give aways. They look really great!
Joan
Amber says
Yes, I did sew the line across the top. Keep your eyes open. Not all the giveaways are just US. The Silhouette and Cricut ones are usually Canada too I think!
Gayle says
Thanks for the tutorial. I just completed a hooded towel based on Where the Wild Things Are theme. I used the crown and added fake fur underneath to make hair. It’s my daughters theme for her new baby girl.
Amber says
Oh fun!!!
Tiffany says
My daughters love these towels and the minions too, thank you.
Darlene says
The crown does not go all the way around head? Not a complete circle right?
Amber says
Right-it’s just in front. Although you COULD make it go all the way around if you prefer it that way.
Amanda says
I am new to this project and I LOVE your designs!!! The colors of your towels are so vibrant and beautiful! Would you tell me where you get them? Thanks for the inspiration!!!
Amber says
I always get them at Target. They have great colors!
Danielle says
Is this the last last hooded towel? Or are you just taking a break in December?
Amber says
No I am sure there will be more though I may not do them monthly anymore. I am getting pretty burned out on towel making. 🙂
joni says
Loving this!! Thank you so much! 🙂
Kathy says
Love this!