What’s the Project? When you’re sewing a project and you need to know how to insert elastic (for example into a waistband), here’s a simple tutorial that will walk you through it.
Hello, my sewing friends! It’s that time of the week again-a new sewing lesson for the Learn to Sew series! It’s week 4 and this week I am teaching you how to sew a casing for elastic and then how to insert elastic. Perfect for making things like pajamas and kids clothes. And it’s not too hard. In fact, if you have completed weeks 1-3, you have learned the most foundational skills for sewing. Everything from here on out is just the fancy stuff. So congrats on completing that!
Now let’s add elastic!
Lesson #4: How to Insert Elastic:
What I am teaching you today will help you so that you can sew things like pajama pants or little skirts or anything that you want to add elastic to. It’s a very easy way to add elastic and really only involves a hem and a straight stitch. Can you handle that? I know you can.
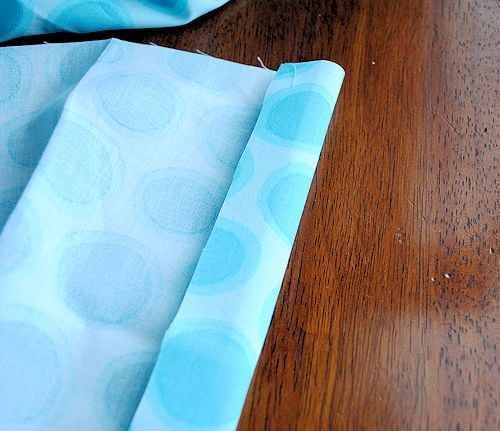
To create what we call a casing for your elastic, you will start out by folding down your fabric almost as if you were going to hem it. So, you’ll fold the fabric so that wrong sides are together. Fold it down about an inch or so:
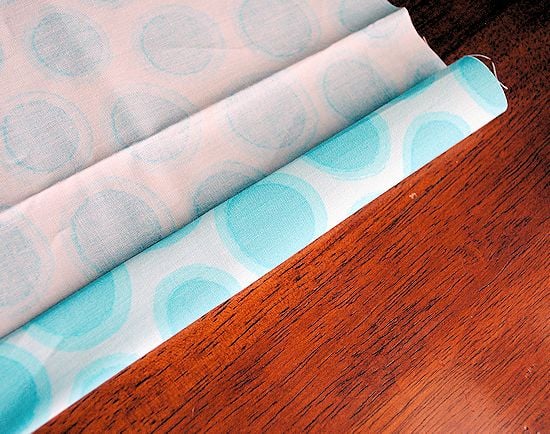
And then again one more time:
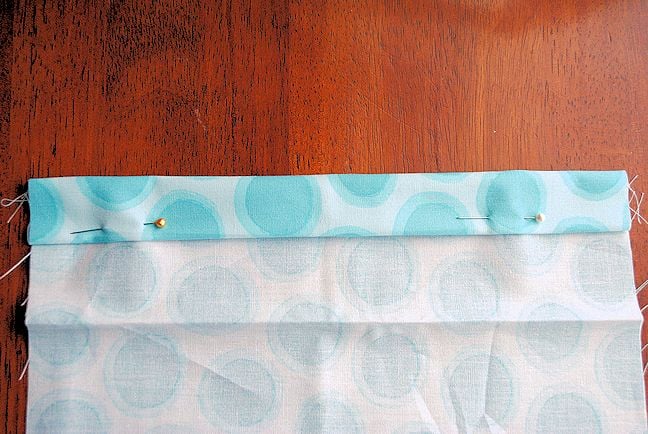
Press that seam or pin it in place (or both):
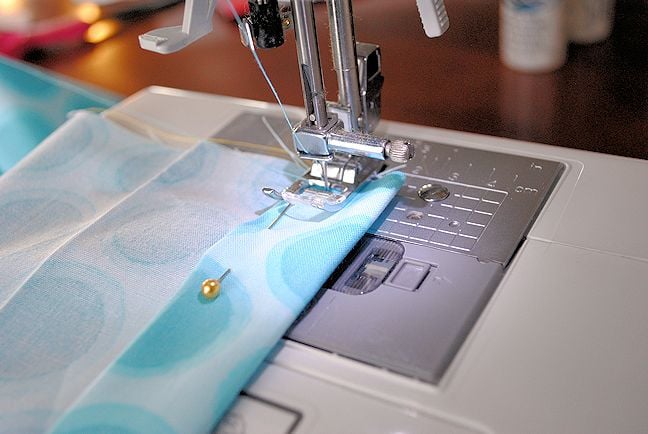
Now you will sew a straight line along the bottom of that fold. See how my presser foot is lined up to the bottom edge of the fold? Then sew straight along there:
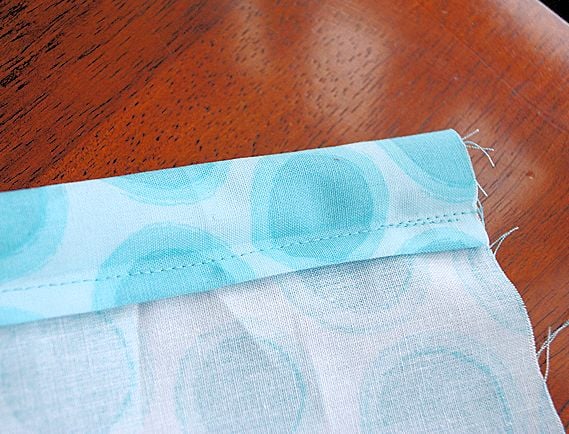
It will look like this when you are done:
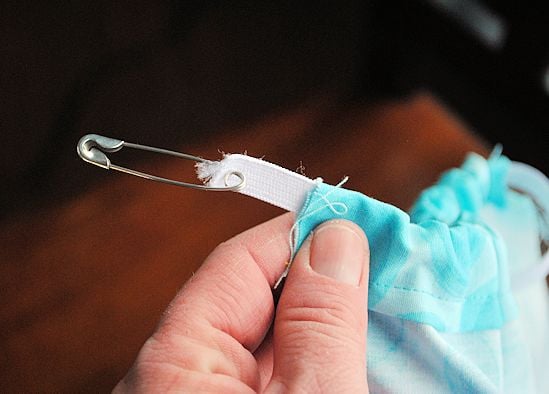
Now, grab your elastic (you can get any size as long as it is smaller in width than your casing. I typically use about 1/2 inch width on kids clothes) and a large safety pin and attach the safety pin to one end of your elastic:
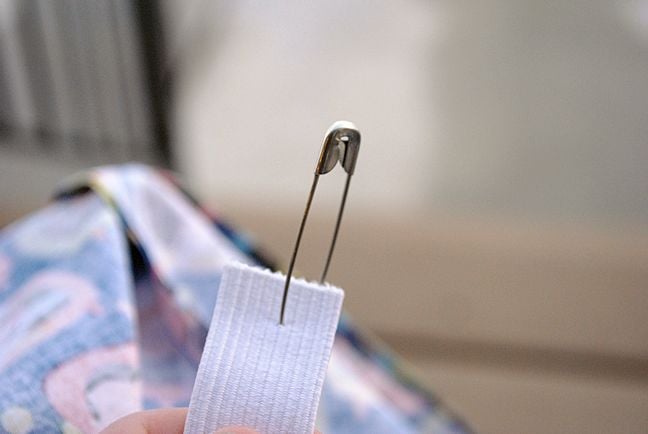
Now slide the head of your safety pin into the opening at the end of your casing you just made:
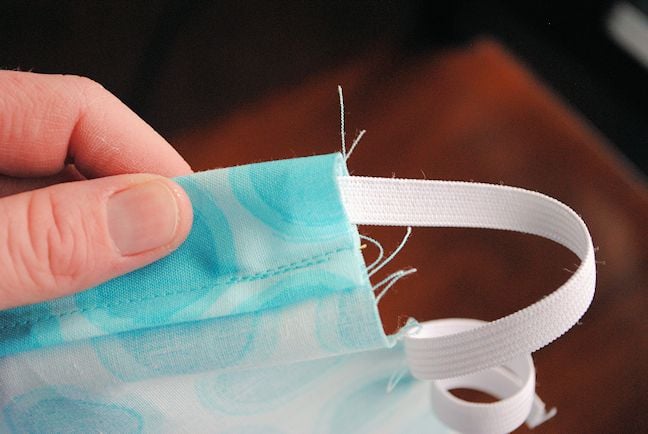
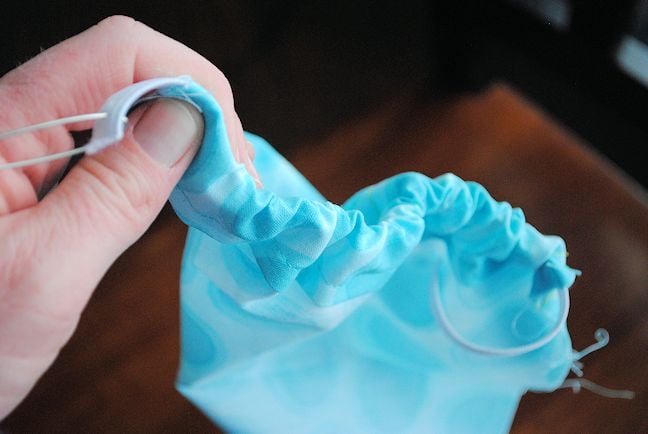
And pull it through using the safety pin to pull on and guide the elastic. BUT, make sure you don’t let the other end of the elastic pull through the end you started on. You can pin it in place or just hold onto it, just don’t let it follow through the hole.
Pull till your safety pin comes out the other side:
And your fabric will now be gathered:
OK, so those are the basics of how to do it. But, generally you aren’t going to be doing it on a flat piece of fabric like that. Usually you are going to be inserting it into a waist band, so your fabric is already going to be in a loop.
Let’s imagine you are doing pajamas (one of the project options for this week). You’ve already sewn the pajamas together, now you just need to create the elastic waistband.
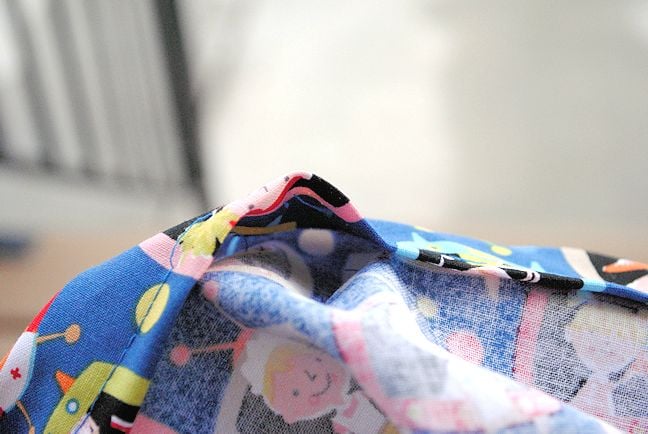
You will follow the same steps, just at the top of the pajamas. So, fold your fabric over once about an inch so that wrong sides are together and then again about an inch. Pin it and/or press it to hold it in place. Then sew all the way around BUT-this is important-leave a couple inches of opening:
That’s where you are going to insert your elastic. So, do that. First, measure how much elastic you need for this project (depends on your instructions or the size of the waist you are making it for). Then, grab your elastic and your safety pin and insert it in there:
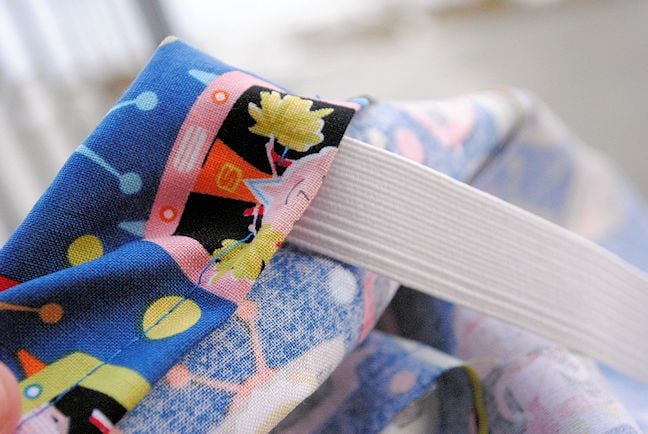
Pull it all the way around the waist:

And out the hole again making sure that your other end is still outside the hole too (pin it in place if you need to):

Make sure that your elastic did not get twisted up inside. Then sew those two ends of the elastic together. Either use a zigzag stitch to do it or just go over and over and over it about 10 times to make sure it is sewn tight.
Now you just need to close that opening that you had. Stretch out the elastic and sew it shut (making sure not to sew on the elastic, just on the fabric):
And you’ve got elastic! 
Your Assignment:
Sew something with elastic! Anything you want! Then move on to Lesson #5: How to Sew Ruffles
One of the best options for this is pajama pants! You can do them for yourself or a kid or anyone you want. I have a tutorial on how to create your own pajama pants without a pattern. If that’s too scary, try Pinterest for patterns or grab a real pattern from the store:

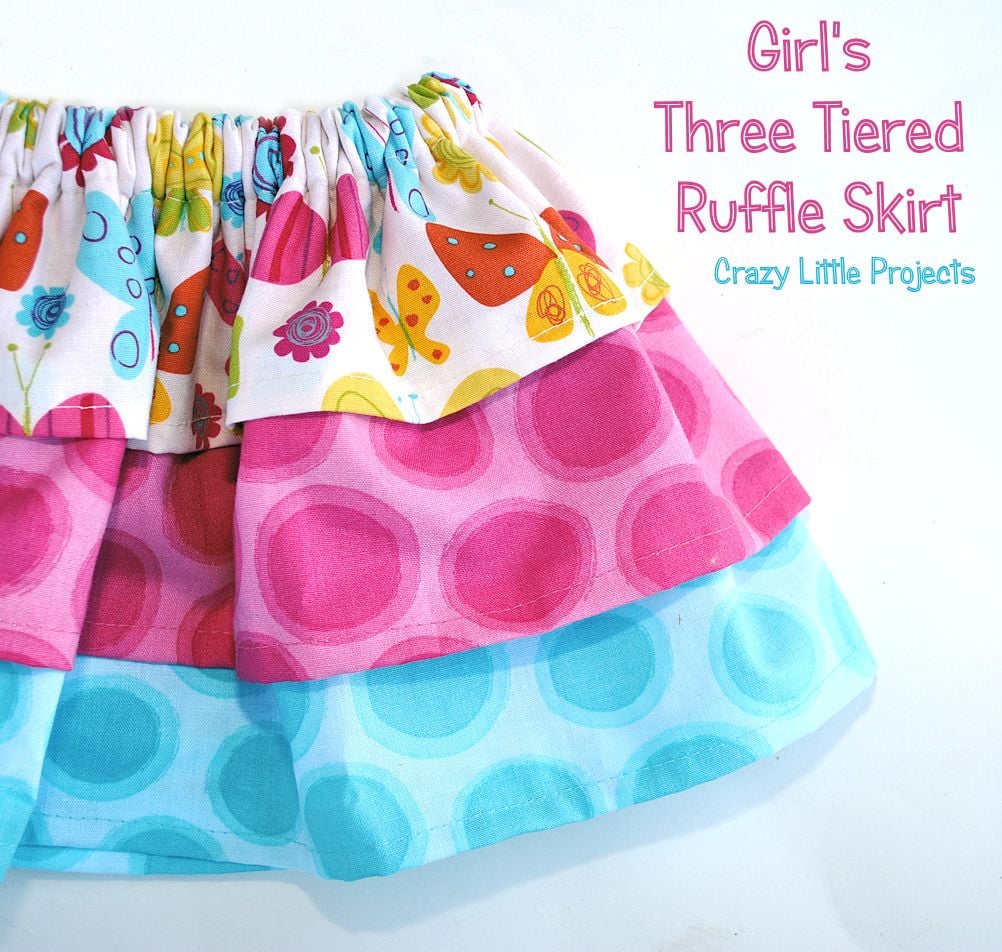
Or here is a simple little skirt that uses elastic:
Moderate Level:


Sandra says
I have a skirt with elastic waist,I want the skirt longer, can I add elastic to existing elastic, or can I do a casting on to existing elastic then run more elastic thru casino to make it longer.
Amber says
Yes, I think that would work?
Patricia S. says
I need to make myself some pj pants! Believe it or not…I have never made any for myself. Always the kids or hubby. :/
Rebecca B says
I love Stitch Stash Diva!! One of my faves is the Cars From Birch Organic Fabric. Out of all the sewing tutorials I’ve looked at, yours is my favorite. Thanks for breaking everything down and not assuming that some things are common knowledge!
Jacki says
I am trying to add a one or two inch piece of elastic to “expand” my son’s snow pants. He just needs a little more room for them to go over his ski boots. How can I do this without ruining the pants? Thank you.
Amber says
I honestly have no idea! Sorry!
Tuba says
Really amazing stuff! I just started sewing and literally searched all internet for sewing lessins. I love your lessons the best! Thanks for everything. Love from Turkey 🙂
Darlene says
I had enjoy your picture and the steps on how to use elastic.
Rwbecca says
A little confused with casing. So you start off with west but in your pictures after you’ve double folded it it looks like its right side out? Did you turn it or…are my eyes just wonky?
Amber says
You will just fold it to the inside of what you are making and sew it and then thread the elastic through.
Linda says
I want to make a table cloth will the same principle apply?
Amber says
Yep
Linda Russell says
thanks
stephanie says
I really admire you. I wish I was as talented as you. I can do very basic sewing but trying to learn everything as I do enjoy sewing. I find it very relaxing and very enjoyable. Your website is the best thing I’ve come across in months , thank you. I love everything on your pinterest. Your such an inspiration to me. 🙂 x
Amber says
Oh you are very sweet! Trust me, I am NOT an amazing sewer. I mess up often. 🙂
Monica says
I too am the mom of 4 crazy boys. I’m always looking for new things to make them. Love the pjs. Adorable.
Marie B says
I just wrnt over the tutorial for elastic again and I really think Now I can do it! Thank you from a beginner, beginner!! 🙂
Sherry says
Just finished a pair of M&M Pajama pants, they are adorable on my boy!! Now on to this weeks project!
Renee says
Yes! Done, and they even fit! I’m so excited!
Amber says
Bonus that they fit right? 🙂
Leah says
I’ve really enjoyed the weekly lessons. Thanks for helping me refine my sewing skills!
Linda says
Thank you for these tutorials. I have made each one each week and I can see my skills getting better. My ruffle skirt turned out awesome! I hope my niece likes it.
Amber says
Good job!
Joyce mosby says
does the five pairs of pj bottoms I made at Christmas count? I like your clear tutorials.
Amber says
Yup! 🙂
Jenny says
I LOVE finding new fabrics!
Amber says
Me too. 🙂
MissMOE says
This brought back great memories of my mom teaching me to sew. I loved threading the elastic through. I think I did that for every project my mom made with elastic!.
Karis says
I did one of each, because I have boy-girl twins & couldn’t choose just one project 🙂 The pants are awesome – super easy and SO cute. The skirt was a challenge… I used double the length of my daughter’s waist size, but it still looks like a bell skirt 🙁 Plus, the last step, where you have to sew through all of the layers of fabric and the elastic didn’t work so well for me. But the skirt turned out alright – it’ll still get worn, I’m sure 🙂
Amber says
I know…some people are having a hard time sewing through that many layers. But it sounds like you did great!
Ashley says
I’m making this into a Valentine’s skirt – can’t wait!
Lorie M says
Going to attempt the skirt today as a gift, am I am looking forward to it!
Thank you so much for this series, I live in a small town where the opportunity to learn a new skills close to home does not happen very often so this is perfect. I ave gotten lots of compliments about te projects we have done so far. Thanks again Amber 🙂
Michelle says
Thanks for the great tutorial on PJ’s. Tons of fun to make, and very easy to follow.
Megan says
I made the skirt and the pj’s!! I had so much fun making them!! They were really easy! Thanks for the tutorials and the giveaway! 🙂
Becca B says
I’ve started on the skirt for my little one (although I hve to admit I’m a little behind and just finished last week’s project)!
Nikki says
Just bought some toy story material and I am going to try and make my nephew some oj pants. So excited.
Meg Sluyter says
I sewed the ruffled skirt and it was so easy. I made it out of some old t-shirts I had that needed to be used. My daughter loves it too. Your sewing tutorials are done so well and they are super easy to follow too. Thank you for all the great tips too,
Meg Sluyter says
Oops, I wrote my blog address backwards in my first comment, sorry, it’s late for me right now. 🙂
Amber says
Oh fun idea!!!
MaryB says
Thank you so much for this series. I am a little behind but loving it all! Out of town guests will be gone in a couple weeks and I will be able to get back into things for longer periods of time.
Amber says
Catch up whenever you can. 🙂
Tanya H. says
I’d love to try the skirt, but I’m sadly lacking in the little girls dept! That said, my little boys get lots of handmade pajamas!
Amber says
I’m lacking in the little girls dept. too but sometimes I just sew girl stuff anyway.
AnnieG says
I can’t wait to try the skirt. Just have to find the time!
Allison P says
I am in process of making the skirt and it is turning out so cute! I had always wondered how to make the different layers…glad it is so easy! (With your help, anyway!)
Kristin Marsh says
I love the three tiered ruffle skirt!
Jonana says
Oooh, I would love to win!
Christine Sherman says
Thanks for all you do!
Amber S. says
Thank you for the awesome tutorials! I can’t wait to try the skirt for my daughters. 🙂
Erin Kimmons says
can never have too much fabric
Darcy says
I’m going to make the skirt — funny this tutorial is this week because I am at the part where I am adding elastic to sleeves on a Rapunzel running costume for the Disney Princess 5k in February!!
Heather says
I just finished the PJ pants for my son, and I love them! For anyone who didn’t do them yet, I almost didn’t think of this but start the hem on the back of the pants or the inside of the leg so the “knot” isn’t as prominent.
Morgen says
Such a beautiful and simple skirt pattern! Perfect timing for me as I am looking for outfits to make for my baby girl.
Dominique says
would you recommend using cotton for the pjs or can I use a knit fabric? which would be easier?
Amber says
Cotton will be easier to sew on but knit would make comfy pjs.
Kim H says
I made the skirt and it was going well until I did my last seam up the side. Somehow my fabric shifted and my layers don’t meet up. Next time I’ll sew each layer into tubes individually before attaching all 3 together and creating the elastic casing. I’m definitely doing this one again (and going to attempt the PJ bottoms for my son). Thanks so much for the great tutorials!
ANNA FINLAYSON says
I started a pair of pjs for my daughter 2 weeks ago but have been procrastinating the elastic waist band because I was too intimidated by it. Now I say: “Bring it on!”
aimee says
Great tutorial. Can’t wait to try this out on a skirt for my daughter!
Julie says
I made the skirt and it is sooo cute! Wish I could post a pic for you. My DD is wearing it now!
I’m loving your series. I taught myself to sew, so I really like looking at how other people do it and your projects are to die for! {I’ll make a blog post soon with a pic at http://hisandhershomemade.blogspot.com/
I will admit I fought the elastic FOREVER on this though. My big safety pin opened up while going thru the casing and it was a mess =/
Amber says
I can’t wait to see it!
S cottia says
If you use a large paper clip instead of a safety pin, it will never open up on you. Just poke the end of a large paper clip through the end of your elastic and push it around to the middle of the paper clip, then just push it all through your casing just like you would a safety pin. Works just the same, with out the risk of safety pin opening. 🙂
Amber says
Great tips!
Erica says
This skirt would make a cute shower gift! Thanks for the latest lesson!
Sherrie says
Looking forward to trying the skirt, hope to make it to go with the bag I made earlier TY
Karla F. says
i have some great avengers flannel that i have been wanting to make into pjs for my son and im soooo hoping to finally do it soon!! =)
thanks for the inspiration!!
Donna Payne says
I had my own pair of p.j.’s that I started making long ago. So with your easy guidance I was able to put the elastic in. It was so easy! Now I just have to get them hemmed and they’ll be all done.
Thanks!
Debby says
Enjoying your tutorials. Even though I am not a beginner but rather an intermediate in sewing children’s clothes, I am finding your very clear tutorials helpful. Good reminders. There is one thing I always get wrong when sewing elastic. When sewing the two ends together how do you ensure that you won’t get a tangle/twist. I make sure that the elastic is flat all the way around but somehow when sewing the ends together I always twist it and end up having to cut off the sewn ends and do it again. Any tips?
Amber says
If you just lay one on top of the other and sew you should be ok? Although I have to admit that I do it too.
Patsy Booher says
Greetings from snowy New Hampshire!
I have been following your “learning to sew” series and have really been impressed! Great job!
I do have one thing that you might want to mention regarding inserting the elastic. Be sure that the elastic does’t get TWISTED when inserting it into your casing. It feels horrible around your waist if it’s twisted.
Again, great job on your series. I look forward to more.
Amber says
Good point! I will add that. I have most definitely done that before!
S cottia says
To help keep elastic from twisting in casing after you have put it in and finished sewing it all up, stitch over the casing and elastic down each seamline – front – back – and side seams right in the ditch. You won’t see it, and it really helps to keep the elastic from “rolling” in a casing.
Rachael says
Was going to do the cute skirt bit bought the wrong amounts of material. Oh well, I have a set of jammy pants that are already cute that are calling my name! I am really enjoying your series! It has given me the push to try several projects of your’s I have been eyeing but haven’t had the courage to do!
Nikki says
Can’t. wait to get home and sew the skirt!!
Jona says
I am working on the three layered skirt. I have been looking for that pattern for a while now! I’m a little nervous about calculating the length and width, that’s where I always mess up!
Amber says
I hope it goes well. I’ve done my best to give you directions to size it up but I haven’t tried it out myself. Good luck!
Laurie says
Thanks for this great series. I made a skirt for a friends daughter. Loving all the tips.
Stefanie W says
I’m definitely doing the skirt! My daughter will love it for spring!
Stephanie P. says
I’m so excited to do this one! I’ve been wanting to do a skirt for my daughter, and have had the fabric (and elastic) for about 6 months. Just haven’t had the courage to actually do it! Now I can’t wait! Thanks!!!
Amber says
Good luck! 🙂
Emily Shelley says
I am really enjoying this series. I just finished the hooded towel (just a little behind on them). Have made several little girl skirts so I am going to do the PJ pants. Thank you!
Amanda Corbet says
Thank you so much for doing this series! It has been so much fun to follow along! I don’t have little girl to wear this adorable ruffle skirt I made, so I will probably add it to my Etsy shop, but it’s been so much fun playing along! Thank you again!
Kathy says
Im so excited! Im getting ready to do the skirt and I cant wait to do the pajamas. One question, when measuring out the elastic, do we use the exact measurement of the waist? Or do we cut back some? Okay, one more question, when sewing the elastic do we lay the elastic side by side and zigzag or do we lay it on top of each other? Sorry, I’m a newbie at these things 🙂 Thank you so much for these classes! The tutorials are awesome!
Amber says
I measure the elastic just shy of my kid’s waist. Hmmm, I don’t think I have that in there do I? I should fix that. Do you mean when you are done threading it through? Just put one piece on top of the other and sew through them but not through any fabric or anything.
Kathy says
Yes. After threading the elastic and thank you for answering 🙂 Baby skirt, here I come!!!
Uta says
Wow, thank you for this great tutorial.
Hugs, Uta
Jana says
I must admit I didn’t manage to complete last week’s project. I caught some kind of flu bug or something like that and spent a few days in bed with no energy to do anything other than dream up more options of how to improve my hypothetical/potential handbag!
The good news is that I have all the fabrics chosen and a general idea of how to put the bag together. Just missing a tiny piece of hardware (for a key fob, which I thought would be handy) and I’ll finally be able to get started!
I’m also looking forward to trying out the elastic thing! I’ll have to get some when I’m already over at the store.
Thank you for offering a pyjamas tutorial in addition to the girl’s skirt! The skirt looks cute—but as you say, not everyone has a girl in their lives to give it to.
Amber says
Hope you’re feeling better! 🙂