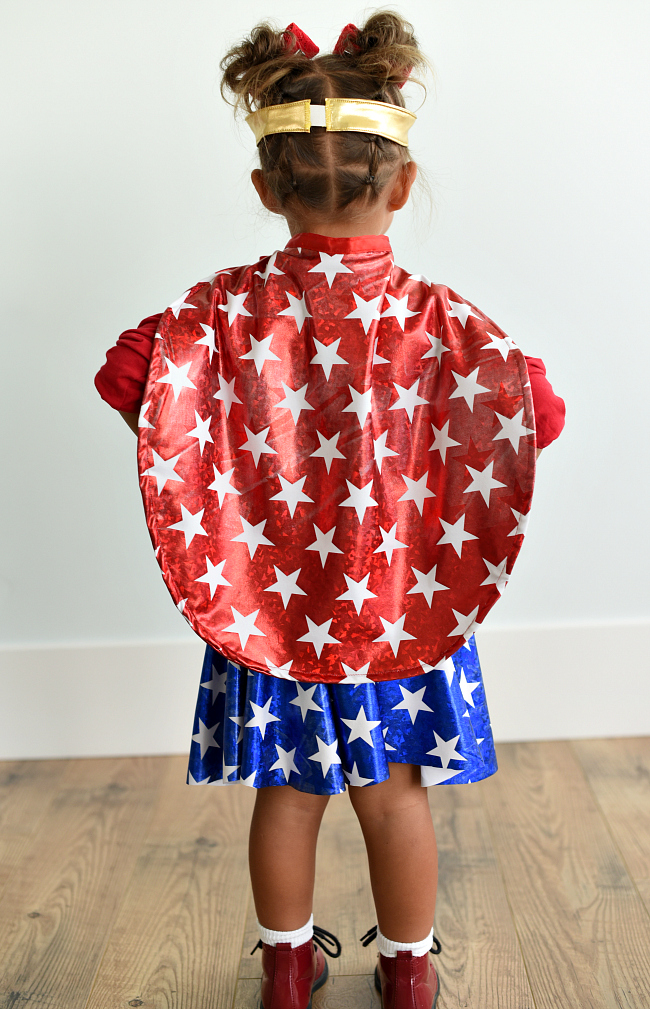
What’s the Project? This wonder woman costume pattern for kids is so cute and easy to sew, she will feel like a real superhero while wearing this! Skirt, cape, armbands and the headband, this costume is fantastic!
This post was created in partnership with Joann using Yaya Han fabrics. All opinions are my own.
When you start a new preschool, take a new dance class and successfully thwart your older brother’s teasing, you know you’re a Wonder Woman.
When you help mom make dinner, take care of your stuffed animals and teach your younger sister the ways of the world, you’ve just got to put on your boots and cape.
If you’ve got your own little super girl in your life, she might need this ensemble. And Mom might need to know how to make a wonder woman costume pattern for kids so that she can get her girl all decked out in superhero gear.

This DIY kid’s Wonder Woman costume is perfect for Halloween or just great for any toddler or little girl (or big girl) who wants to dress up like her favorite superhero.
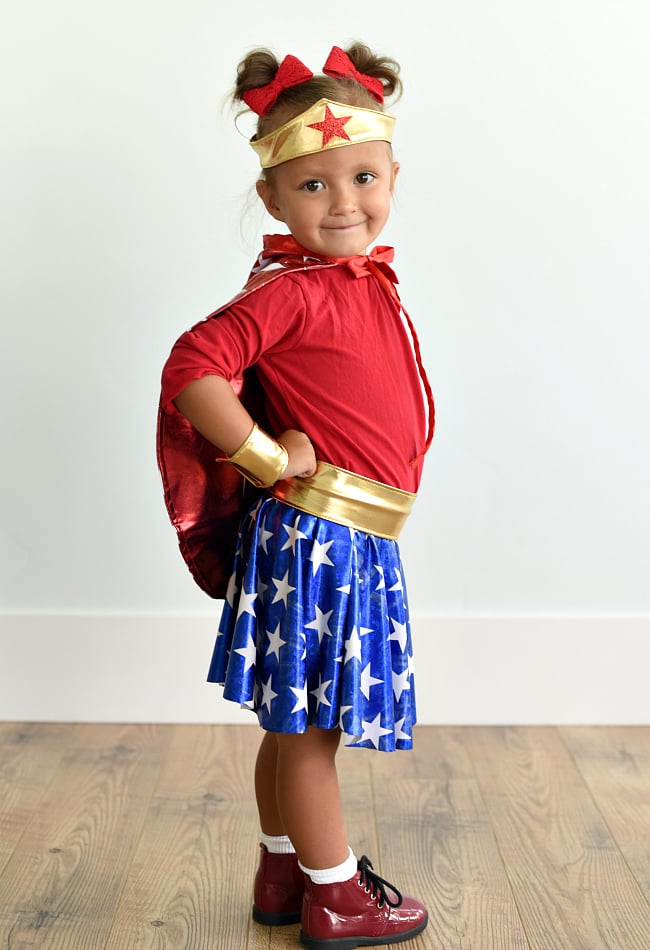
And if you look this cute wearing it, you better wear it every day!
How to Make a Wonder Woman Costume for Kids:
**First let’s make a note-you are going to have to do some of the math and figuring for this depending on the age of the child you are making this for.
I made it for a 3-year-old, so I will use those measurements as an example, but you need to measure your little superhero before starting and adjust accordingly.
Here’s what you need to measure:
- Around her waist where you want her skirt to sit
- The length from her waist to her knees for the skirt length
- Around her head where you want the tiara
- The back of her neck to just past her waist for the cape length
- Around her wrists
Supplies Needed:
Again, this is going to depend on the size of your girl and how big you need to make the costume. Do some calculations on the amount of fabric you will need before you go because it really will depend on the size you are making. (Take your Joann’s coupon-this fabric wasn’t on sale so I used a coupon when I bought it.)
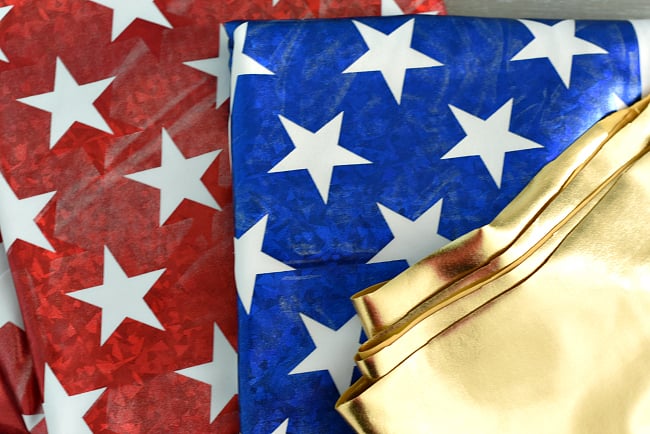
- Superhero Metallic Stars Blue Fabric by Yaya Han at Joann (This is for the skirt so you need to think about the length you want it and the waist size of your girl. For a 3-year-old I used a 1/2 yard)
- Superhero Metallic Stars Red Fabric by Yaya Han at Joann (This is for the cape, so you want to know the length you are making it and then figure your width. For a 3-year-old, again, I used about 1/2 yard)
- Metallic Red Fabric by Yaya Han at Joann (This is the underside of the cape, so the same amount as the red and white stars fabric above.)
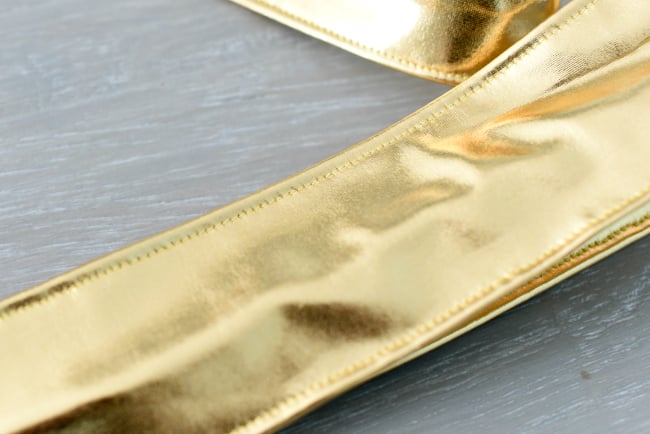
- Metallic Gold Fabric by Yaya Han at Joann (This is for the belt and the arm bands and the tiara. I used a little less than 1/2 yard)
- Elastic-I used some really thick-like an inch and a half for the waist of the skirt and then some half inch for the other spots.
- Velcro
- Red ribbon-at least 1 inch wide. This is for the next of your cape.
- Red glitter heat transfer vinyl or Heat n Bond and small bit of red metallic fabric above
- Wonder Woman Tiara Pattern Piece
Sewing Instructions:
Two notes before you sew:
- This fabric is fantastic and fun, but can be a little bit tricky to sew on. I found that I needed to sew slowly to make sure that my stitches stayed nice and even.
- Also, you won’t really be able to press this fabric like you typically do when you sew, so you will need to carefully top stitch everything to get it to lay like you want it to.
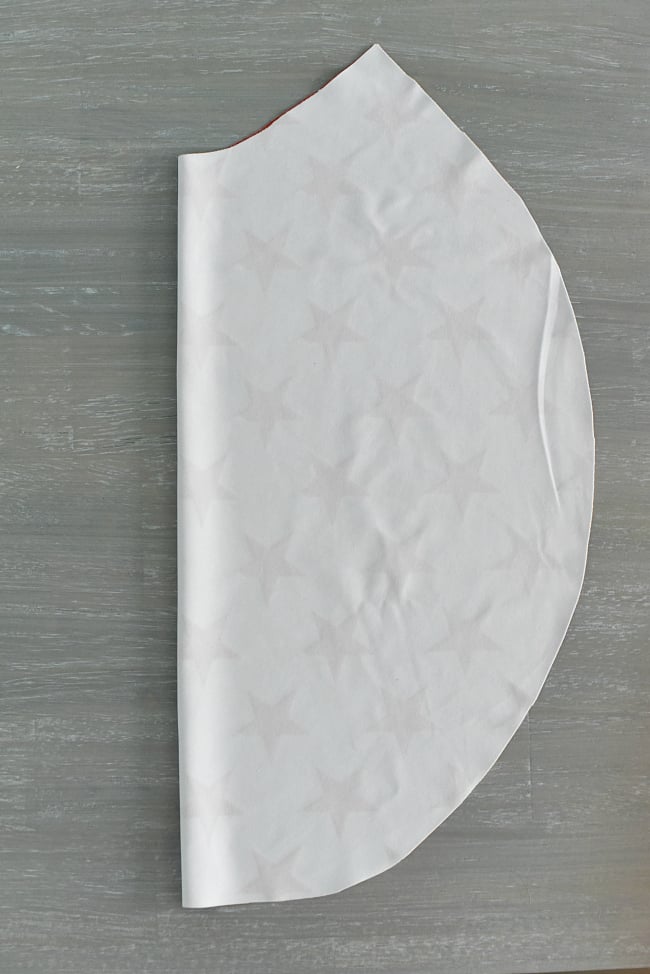
Let’s start with the skirt. You’ll make this by sewing a simple circle skirt. I’ve already got a circle skirt tutorial on the blog so I am going to refer you there to make this part of the costume. You’ll need to do some math and figuring to get your sizing right and instead of making a full donut shape, I cut 2 halves and sewed them together to save on fabric. Use the thick elastic you bought for the waistband.
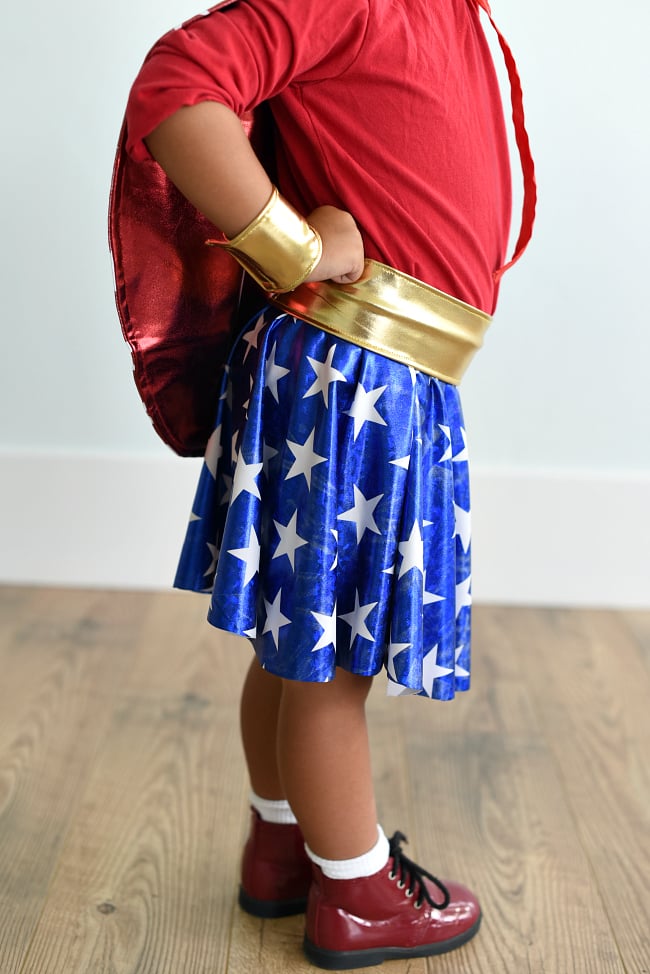
Next, let’s make the belt. To do this you need your waist measurement. You will need to cut a piece of gold fabric that is 5 inches wide (bigger if you are working on a costume for an older child) and the length of the waist. (You’ll fold in the ends a little but you’ll add elastic too. You want this to stretch a little to fit.)
Fold the gold fabric in half with the right sides together and then sew up the long side. Turn it right side out. Center the seam in the back of the belt and top stitch along the top and the bottom of the belt.
Now on the two short ends, tuck the raw edges into the inside of the belt about 1 inch. Cut a piece of elastic about 2 inches long. Stick one end of the elastic into each end of the belt and zig zag it shut:
On to the cape!
Grab your red and white star fabric and your red metallic fabric. With you measurement from back of the neck to just beyond the waist, fold the first fabric in half and mark that length on your fabric. You then need to cut the cape shape. Make sure that you make the length from the neck to the bottom match your measurement. The width should be slightly smaller than your length. Again, this will all depend on the size of your little superhero.
Capes are forgiving, so don’t stress a ton about this-just cut that general shape.
Cut one of this cape from the red and white star fabric and one from the red metallic fabric.
Now, using your red ribbon, cut two strips the length you want for the neck ties. This will go across the top of your cape and about 16 inches or so beyond on either side. For my 3-year-old cape, this was about 44 inches long.
Place the two ribbons together and sew them together all along the length of one side.
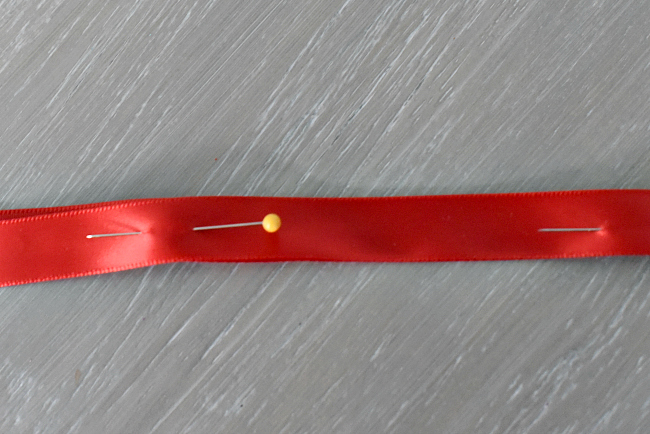
Then take the ribbon and find the center of the length. Place the open side of the ribbon down over the top of the cape so that the center of the ribbon is at the center of the neck of the cape. Pin it in place. Then pin it all along the neck of the cape so that you’ve got the ribbon over the edge of the cape.
Sew all the way along the bottom of the ribbon so that it is sewed closed and attached to the cape. Sew the ends of the ribbon closed.
Top stitch the edges of the cape.
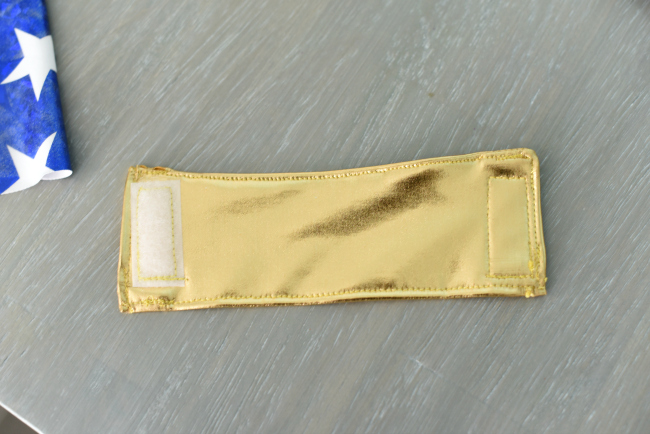
How about making the wristbands now? You’ll need your gold fabric again for these. And your wrist measurements. These will need to wrap around the wrist and overlap a little bit, so you will cut them longer than your wrist measurement by about 2-3 inches.
Cut the fabric 5 inches wide by your required length.
Fold the fabric in half the lengthwise with right sides together and sew up the long side (just like you did on the belt). Turn right side out. Top stitch along the top and the bottom of the fabric. Then tuck the ends under about 1 inch and sew shut.
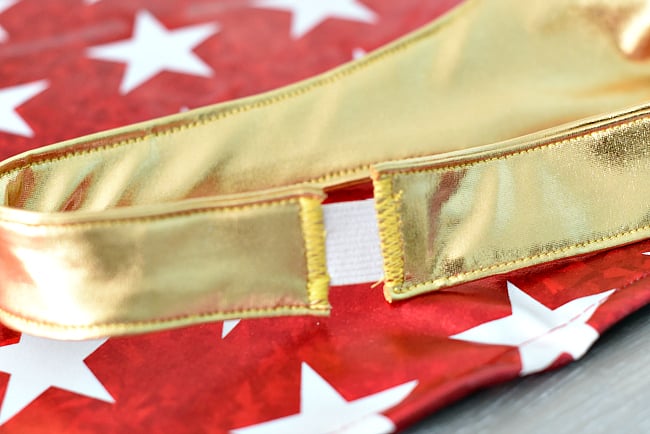
Cut a piece of velcro and sew one side to one end of the wristband and one to the opposite side:
Last, we need to make the tiara!
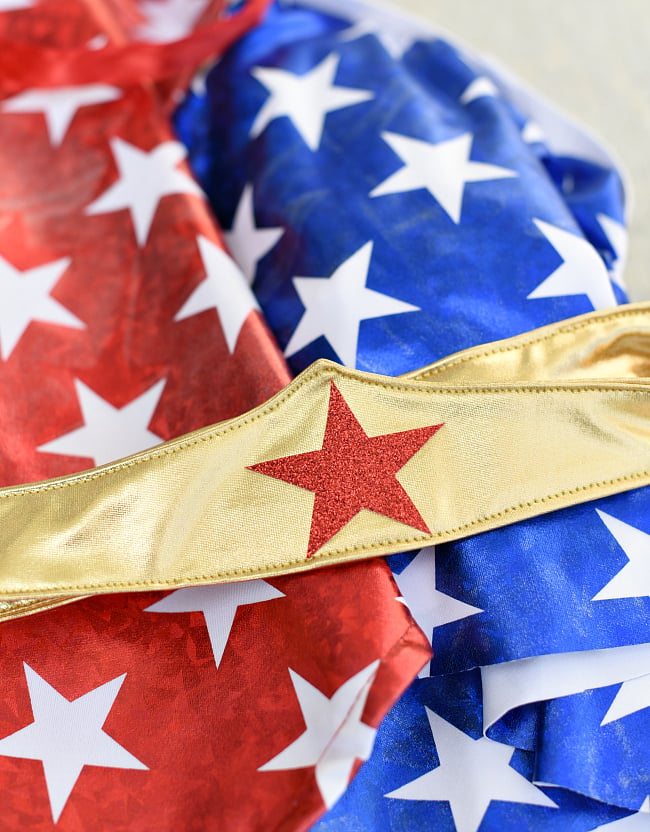
Using the pattern from the supplies list, you’ll cut two pieces of tiara from the gold fabric. (Note-you can make this taller if you are making this for an older child.)
Center the pattern on the folded gold fabric.
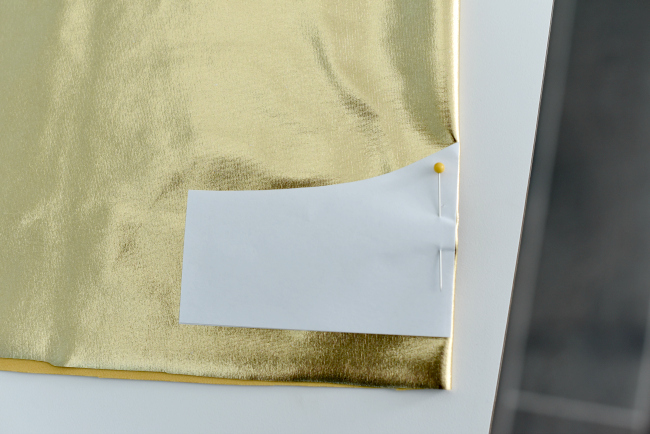
Now you will cut around the pattern but then you need to extend beyond it to get the length of your head measurement. You want it to fit snuggly, so use your head measurement minus about 1-2 inches.
Sew this exactly like you did with belt-right sides together, sew along the top and the bottom, then turn right side out.
This will be a little bit trickier because you need to make sure that you get the little tip at the top of the tiara pushed out to a point. Then carefully top sew to make sure everything stays in place.
Cut a red star and iron it to the center.
Add elastic to the back just like you did with the belt and you’re all set!

Who has a little girl ready and waiting to conquer the world in this Wonder Woman costume!?
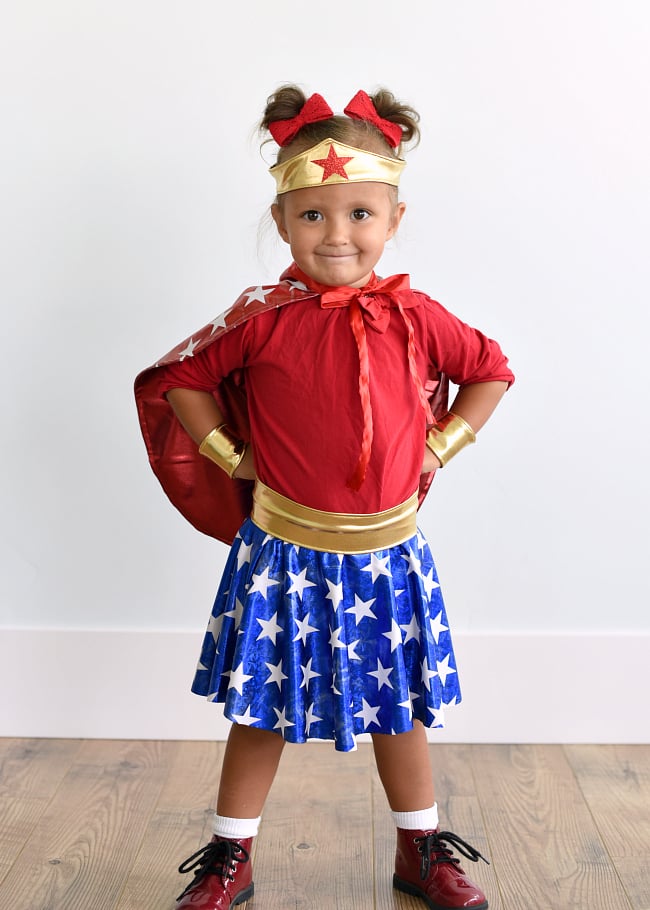
Hope you loved using this wonder woman costume pattern to make this cute outfit!
You Might Also Like:
Pin It:


Lily says
Hi, my name is Lily I’m 16 and I have a work project for high school in which I talk about little girls identifying themselves to Wonder Woman! I found this costume extremely cute and I was wondering if I could re-use the picture of the little girl for my assignment.
Waiting for your answer 🙂
Amber says
Sure. I’m kind of late responding so sorry if I missed the window for you.
Lorraine says
All of the fabrics are Out of Stock at Joann’s, and I can’t find them ANYWHERE else 🙁 Can you recommend any other fabrics that would work well for this project? It’s so adorable and my turning-5-yr-old niece would love it!
Amber says
Oh sad! I don’t know where else to get them?
Lorraine says
That’s okay – actually I did some searching and found some at Fabric.com! The reds and blues aren’t shiny, but they do have stars, and the gold is shiny. I was able to make it for my niece after all, and she was super excited! Thanks for the tutorial!
Karen Shields says
Thank you for the tutorial. I am having trouble finding the Wonder Woman Tiara Pattern piece
Amber says
Whoops! Thanks for the heads up. It’s fixed now.
Lisa says
I Love it!!! Is there any chance you could make one for my lil 3 yr. old granddaughter?
Samantha says
Your tiara pattern link is not working. I was hoping that you could fix this or send me the link directly please? Thanks!
Amber says
Just fixed that. Sorry about that. 🙂