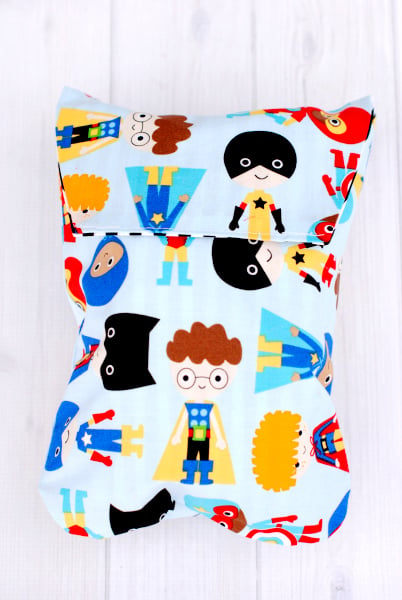
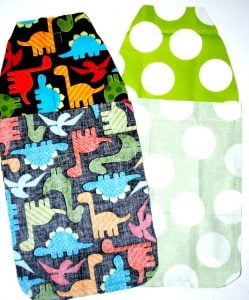
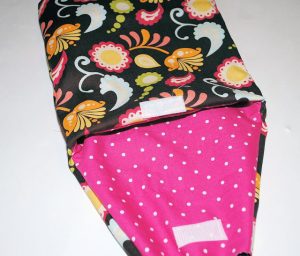
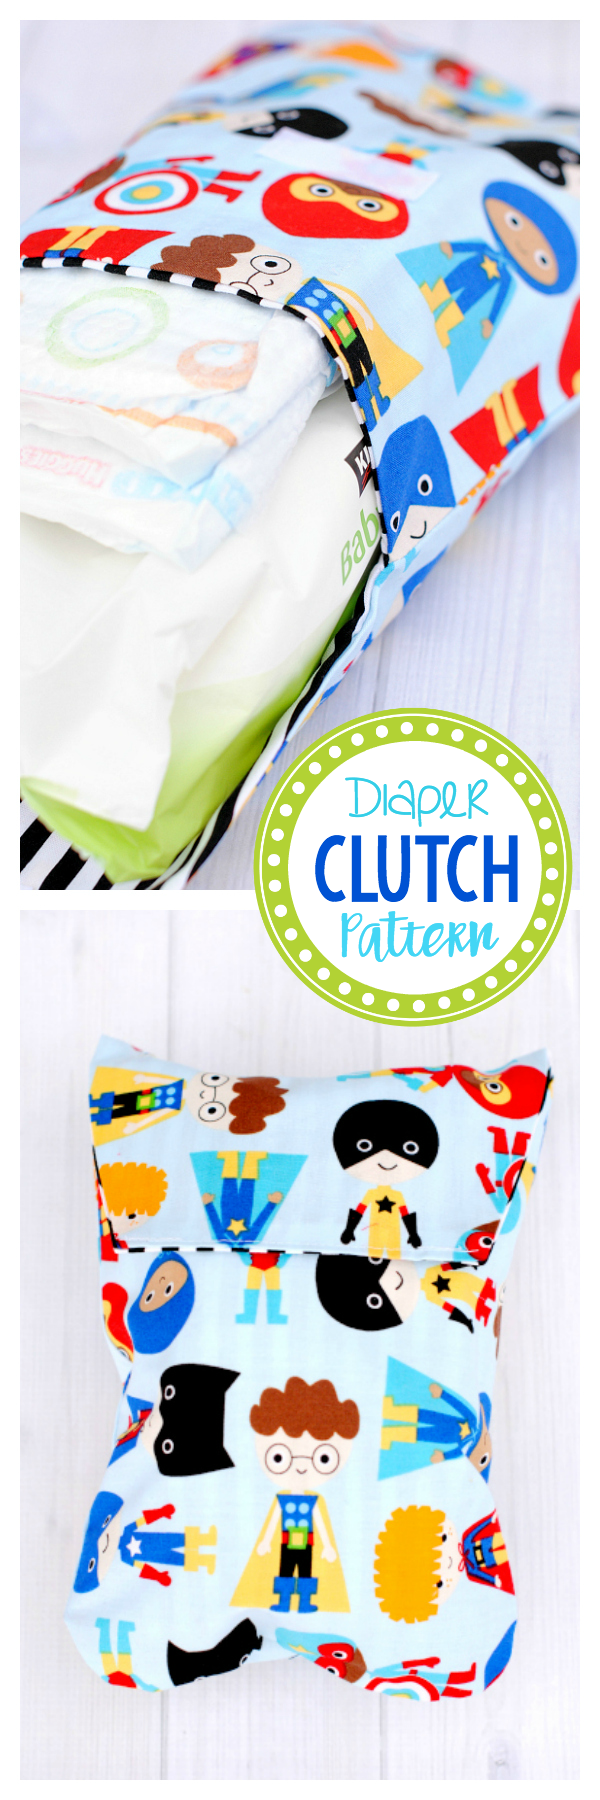
What’s the Project? This cute diaper clutch pattern is easy to sew, great for boys or girls and is super handy for mom (or dad) to carry in the diaper bag. The diaper clutch easily fits several diapers along with a pack of wipes for easy grab and go for diaper changes.
This diaper clutch pattern post was one of my very first on the blog when most of you weren’t here. So I wanted to bring it to life again because it is one of my VERY favorite posts!
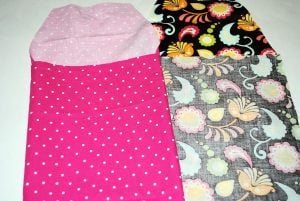
You know when you have a baby you ALWAYS need diapers and wipes on hand. And it can be a pain to lug everything around with you when you need to go change a diaper. That’s why I LOVE having a cute diaper clutch to grab when you need to do a diaper change or just to take in the car with you on quick errands and things. You can just grab it and do the diaper change-quick and easy. And also, they’re cute! These make a perfect baby shower gift idea. Here’s a simple to make Diaper Clutch Pattern:

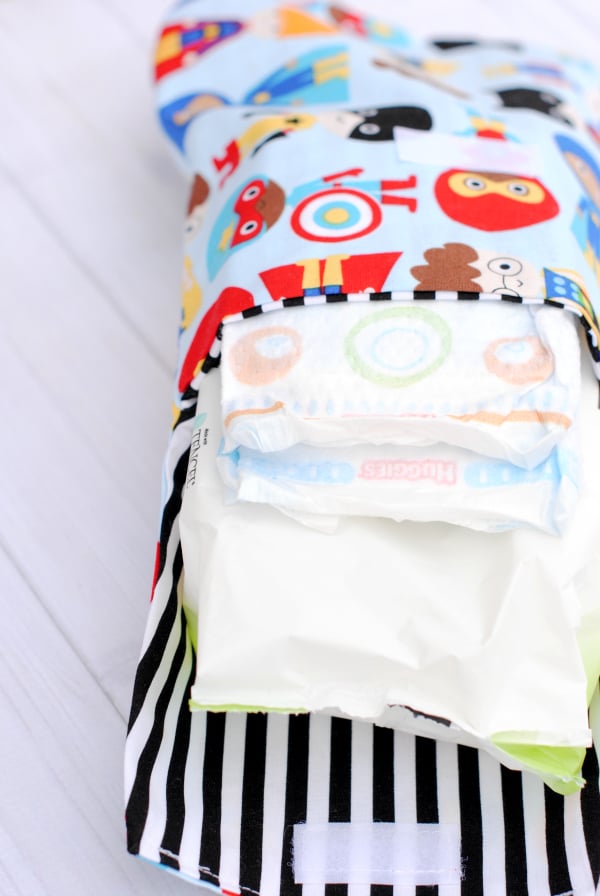
I’ve made this to fit several diapers and a pack of Costco wipes nice and easily. (Because that’s what I always needed.) It’s so handy and it’s easy to make!
SOOOO easy. Takes like 20 minutes, you can use 2 fat quarters or 1/4 yard of fabric of 2 fabrics (read, not very expensive to make) and it turned out so great! It would also make a really good baby shower gift. Oooh, maybe even with some matching burp cloths!
Make a million of them!
Ready to get started? Refer to this video or the printed instructions below!
Diapers and Wipes Case Pattern:
(There’s a few focus issues in the beginning but it should still be super helpful!)
This process video helps a lot for many of my tutorials. In this video I’m showing the technique on the mini messenger bag but it works the same for this pattern as well.
Diaper and Wipes Holder Pattern
Supplies
- 1/4 yard fabric #1
- 1/4 yard fabric #2
- Velcro
- Diaper and Wipes Holder Pattern Pieces
Instructions
- Print your pattern. You need two copies of the large piece. Cut and tape one of those large pieces to the flap piece to form the back piece. The leftover piece is your front piece.
- Fold your fabric and lay the pattern on the fold so that the straight edge is on the folded part. Cut out 1 front and 1 back piece in each fabric for a total of 4 pieces.
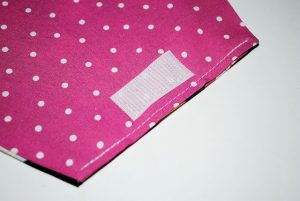
- Pin your Velcro (about a one-inch piece) in place. One piece goes on the front part of the main fabric. Just center it about 3 inches down from the top.
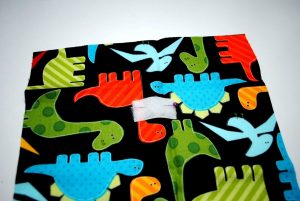
- The other piece of Velcro goes on the top flap part of the back piece on the inside fabric, centered on the fabric about 1 inch from the top.Sew your Velcro in place by sewing around all 4 sides.Now put right sides together on both pieces and sew them together around the sides and bottom.
- Now, turn your inside fabric right side out and stick it down into the outside fabric, so that right sides are touching. Turn inner fabric right side out (For further clarification I am adding in some more photos at this point. That’s why there a new and different fabric in these pictures.)
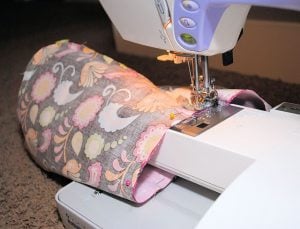
- Put the inner fabric into the outer fabric.Flip your fabric over and begin sewing the 2 pieces of the flap where shown in this photo.
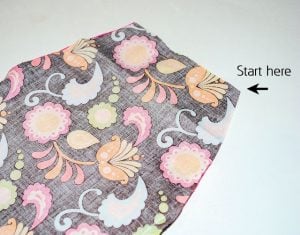
- Here it is in my sewing machine just as I am starting to sew.
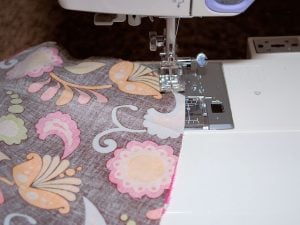
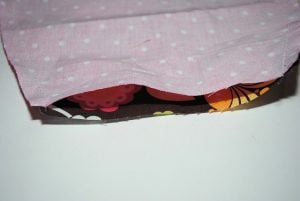
- Sew down that side until you get to the part where the front and back piece join across the middle. Sew across those two making sure that you are only sewing the front of the bag and not the back. (So you should be sewing 2 pieces of fabric, not 4.) Then sew across the middle and up the other side.
- You are leaving the top of the flap open so that you can turn it there.
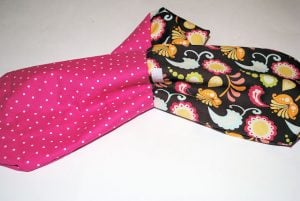
- Turn it right side out. First, reach in and pull out the inner fabric.

- Then turn your outer fabric.
- Now tuck your inner fabric down into the outer part.
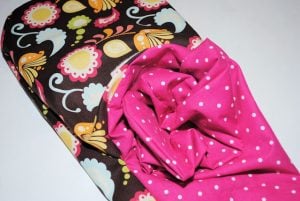
- Until it is all inside like this.
- Push out all the corners and make it nice and smooth and then press it flat.
- Fold the top opening under and top stitch it shut.
- Now press the whole bag nice and flat. And you’re done!
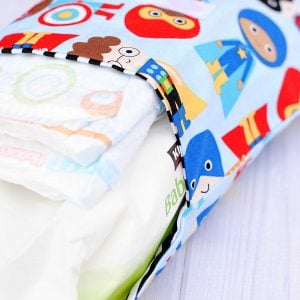
Works perfectly to fit my pack of Costco wipes and several diapers inside! And makes such a wonderful baby gift!
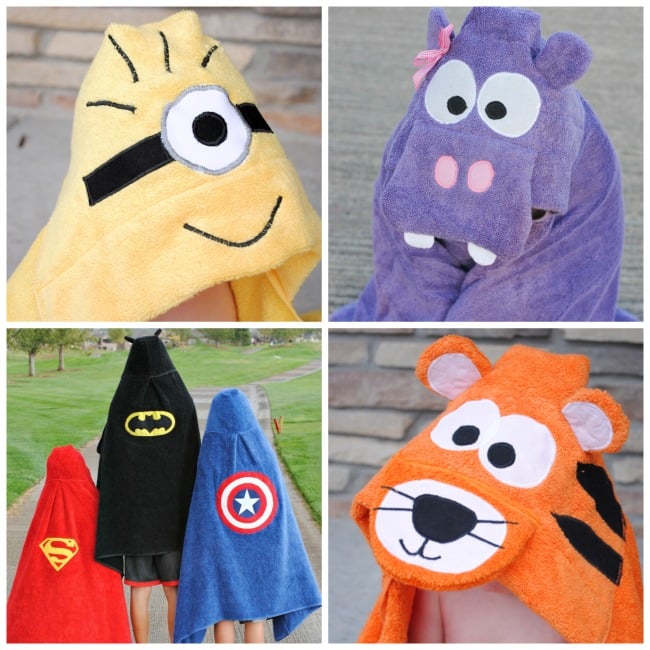
You Might Also Like:

Pin It:


Joan Gray says
Hi! Amber, I was wondering what happened to the awesome video you had here on how to put this together, I made it one other time but it was such a long time ago I am having trouble remembering and I am a visual person so videos are awesome.
Could you please add that video again.
I really enjoy all your tutorials.
Thanks, Joan
Heather Carr says
I made one from some Peppa Pig and Nightmare Before Christmas fabric, and I love it! Such a quick and easy sew, but great practice!
Amber says
Cute fabric choices!
Uz says
Do you just print the pattern on regular A4 paper? There are no measurements!
Amber says
Yes, just print the pattern out as is.
Melanie says
Hi there =]
Thank you so much for this pattern and tutorial. It was the perfect little project to get me comfortable with sewing again, after a very long time away from my machine.
I would just like to point out one little error. In the video tutorial you said to place both Velcro pieces one inch down from the top but the written instructions say to have the front piece of Velcro three inches from the top and the inner piece of Velcro one inch from the top. I followed the video tutorial and didn’t realise until after I’d finished that the front Velcro needed to be lower. Instead of unstitching the whole project I simply unpicked the front Velcro piece and sewed it lower down on the front. It means the two front pieces (inner and outer) are now stitched together in that spot but I’m ok with that. I’d rather that than all the unpicking! Plus the stitching is not very visible when looking on the inside anyway.
Thanks again! I made this one for a friend who’s expecting and am definitely going to make more of this and some of your other projects =]
sam says
ugh sorry meant to say — Will this work still if i add pellon batting in between these layers?
Amber says
Totally!
zuzacek says
Hi, thanks for great instructions. I have just bought sewing machine and trying to make myself friend with it as i never sew before. I have tweaked it a bit and added extra pockets, one at the back of pouch for wipes with hole in it so i dont need to take them out and two small pockets at the front for little handy things. Im so chuffed with it, but couldnt do it without your guide. Thanks a lot
Holly says
Love this! Added a scrap of support fabric and a clip on the back so this can be hung or clipped to something
Curious says
I am new to sewing and curious about the velcro pieces. I didn’t see anything mentioned about them after it said to pin them in place… Are they sewn to it or do you use the kind that stick? If they are sewn down, when is that done?
Amber says
Whoops! Did I forget to say to sew them in? Sew them when you pin them!
Adriane says
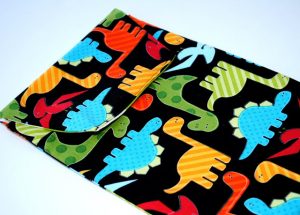
I would love to know where the dino print fabric was from and if you know the name…
We have a toddler pillow case that I ordered in that same fabric and I am itching to make sheets to match, and can’t locate the fabric.
Your diaper pouch pattern looks super easy and I will be attempting this in the next few weeks!
Amber says
It was years ago-probably at least 5 so I can’t remember and I bet it’s discontinued. Sorry!
Amanda Hunter says
My husband and I are starting a business selling projects we’ve made. I’m wondering if we make these are we able to sell them, or how can we get permission to sell them?
Amber says
Yes, that’s fine!
Amanda Hunter says
Thank you so much!
Silvana Cappella says
Hi Amber, great tutorial. Just one question: what is the actual size of the pattern as ro width and length? Thank you, can,t wait to start.
Sandy says
I’m with Lottie above. I am not new to sewing, but for some reason I cannot figure out how many pieces of fabric I am supposed to have. Are there 4 pieces of fabric total, 2 for the front and 2 for the back? More pictures of that step would be so very helpful. Thank you.
Sandy says
I figured it out. For those who also have questions, you will need 4 pieces of fabric total – 2 of the “front” piece (cut these without taping the flap piece to the piece that says front/back piece) and then 2 of the “back” pieces which will have the flap on them. So you should have 2 pieces of inside fabric (one with a flap, one without) and 2 pieces of the outside fabric (one with a flap, one without). Hope that helps anyone else who might be confused.
Amber says
Yes, a front and back for the inside and a front and back for the outside.
Lottie says
Has anyone got any pictures of the printed pattern pinned onto fabric. I’m a bit confused When it says about printed edges and the ‘left over piece forms the front’.
Elaina says
I’m a beginner and just wondering what what point you sewed on the Velcro? You mention pinning it on but never sewing it. And how do you make sure it’s lined up before you stitch it on? Thank you.
Amber says
Oops! Sew it right after pinning!
Sarah Brotherton says
Thank you for this tutorial. Made one for myself and one for my SIL. Such a good idea for when you are just popping out and don’t want to carry a large nappy bag with you.
Linda says
Just made this for a baby shower. So cute, thank you! Great way to use some of the cute remnants that I’ve been buying!
Courtney says
Just made this as a baby shower gift. I think I need one for myself now! So cute! Thanks for the free pattern and tutorial!
Del says
I like your ideas and instructions. Why do I have to be a seamstress? I think I like being a male sewer.
Amber says
That’ll work too!
Ranveig says
I see your latest comment on this is from 2012… Found this tutorial on pinterest and have made 4 of these now for babyshower gifts! Big success. Not having kids myself it is great when other mothers at the babyshower exclaim “I wish I had had some of those when my kids were small!”. I love giving practical and pretty gifts! 🙂
Thank you!
Amber says
Glad you like it. This is one of my all time favorite projects!
Julee says
How big are your seams? Such a cute idea. I want to make a lot of these.
Amber says
1/2 inch or so
Amber says
1/2 inch
C Chiu says
awesome tutorial! where did you get your fabric?
Amber says
This fabric from was Stitch Stash Diva on Etsy. LOVE her store!
Lauren F says
I made this a couple nights ago and love it! I had a little trouble when it came to stitching it together and had to figure out that the inside fabric had to be tucked inside in order to stitch it. I used a wipeable vinyl for the inner fabric, and also made a matching changing pad. I agree that it would be nice with a small strap, like maybe a side carry handle. If I figure out how to do this, I will post again. I’m thinking making a tube style strip about 6″ long and attaching it to the bag on the side once done might work. Or attaching it to the outer fabric before sewing together. It’s the perfect size for a “mini diaper bag” when I don’t want to carry the big one around! I bought more fabric today to make some for gifts for friends having babies.
Anita says
I am BRAND new to this sewing world. I followed this pattern & instructions & it came our PERFECTLY! I can actually proudly give it as a gift!
Thank you SO much for the pattern, great pics, & detailed instructions.
P.s. Someone gave me one of these with my last baby & it was one of the most useful little things ever.
Desirae says
I am making this tonight as my first REAL sewing project. I am super NERVOUS though as I don’t have any sewing skills at all! Wish me luck!! 🙂
Amber says
Hope it went well!!!
Di says
I made this two nights ago as my very first sewing project ☺ I loved it!!! Thanks so much
Sheila says
Love it ! So cute and easy to follow.. did it and even put name embroidery for the little one.. making this for a friend who’s just bundle of joy turning one month old.. so excited to show it to her.. and oh. the pattern is also a good size to make it as ipad casing too.. a double bonus for me.. all i need to do is to add the batting in between the layers and maybe use a slightly canvas fabric , that will be enough protection… am so loving it..Thank You! GReat tutorial
Theresa says
This is the second project of yours I’ve done and it’s fantastic, just like the little mess anger bag I made for my niece. Your projects are just great. Will your ebook be turned into a paper book?
Again thanks so much!
Amber says
No plans for that at this point. That would be fun though!
Laura says
I have been making lots of your mini tote bags to practice getting to know my sewing machine. I have made one of these cases and it is super cute but I was thinking I would like it more if it were a little more stable. Would the fusible fleece that I have from the totes work in this project?
Amber says
Yes! I always use fusible fleece if I want to make something more stable
Rachel Jones says
I’ve just made this and I’m thrilled with the result. Thankyou so much for publishing your patterns. Brilliant for a keen novice like me.
Jianna says
Just wondering if the widness of the bag is correct? I didn’t make any adjustments to the printing. ..just seems very wide. Thanks!
Amber says
Yes, it’s to fit a big pack of wipes. If you don’t need a big one just size it down a little.
Nicole says
Thank you so much for the awesome tutorial! This is the first actual project that I have done on my own, and I was able to do it without many problems at all.
Candias Chalker says
Just made this and the burp cloths or a baby gift but boy did I have a hard time getting the point right where the side and the front meet…but tweaked with it for a while and it looks great! Thanks for the pattern, guess I will make another one and try to perfect that corner point…
Samantha says
Thanks for this pattern! I was wondering what your seam allowance is? I want to make sure it can fit a big package of wipes. Thanks!
Amber says
1/2″
Kris says
Im very new to sewing and having a difficult time figuring out the pattern! can you give me exact dimensions or tell me how to place the pattern! I can sew I just have issues with patterns:(
Amber says
Fold the fabric in half and then place the pattern on the crease in your fabric. Does that make sense? I will update this tutorial soon with better pics and instructions!
Amber T. says
Okay, I am a newbie… and I am really wanting to make this, but I am having some issues. I have two fat quarters of two different fabrics. Once I place the back side pattern on the fold of my quarter, I am realizing I do not have enough fold left over nor can I maneuver the fabric enough to have enough fold for the front piece of the fabric on this same print. What am I doing wrong? Do I really need 4 quarters total? Thanks!
Amber says
Hmmmm, I feel like it was supposed to work with fat quarters but maybe I am nuts! Did you get it to work? I will have to test it out again.
Amber T. says
I figured it out! A fat quarter folds four times and I was folding it in half instead of only a quater, does that make sense? This was my first sewing project so it took me a bit too catch on but I finally figured it out and it came out perfect and boosted my confidence! Thanks for sharing!!
Heidi says
Happy New Year! Thank you so much for sharing this. I’m not the sharpest needle in the machine and your photos and descriptions made this project so easy to throw together. It will make a great “little something extra” to go with a baby gift.
Tavette says
I just commented on Tutorial #2 (with strap) so my same comments are for this version.
One thing I forgot to mention was to please write PLACE ON FOLD on the pattern pieces for the new seamstresses. Sure enough – Renita (post from July) was a bit confused. What comes naturally (knowing about the fold) to us long time sewers is not yet second nature to newbees.
Thanks again for your wonderful tutorials and the oh-so-helpful photos. The photos take a lot of time for you to do, but are so helpful and much appreciated so thanks for doing them.
Alana says
I was just about to ask about this! So glad I read this! I’m a total newbie, staring at the pattern thinking “this really only looks like HALF of the pouch! What is going on?!” The thought occurred to me to put it on a fold, but then I figured it would be written on there if that’s what I was supposed to do. Thank you for telling me it’s assumed and not necessarily written sometimes!
Kellie says
Yes, thank you!! I have looked at this for way too long thinking what is wrong with my brain and why does this only look like half. I figured it was just because I’m 41+ weeks pregnant and sleep deprived!
Stacey says
Hi Amber –
When you sew down the side, across the middle, and up the other side are you doing it as one continuous seam and are you sewing from the back….which it looks like in the pictures? If so, how do you know when you’ve gotten to the middle point and ensure you’re only sewing 2 layers? Mine turned out really cute, but I struggled with that step. I sewed from the front and did three separate seams. Like someone else that commented, it was hard not to have holes in the corners.
Also, I top stitched the whole bag, which really changes the look! Perhaps makes it look a little more trendy.
Thanks!
Stacey says
Can anybody that’s made this successfully answer my question above? Thanks!
Christina P says
Use the arm af your sewing machine to sew around the 2 layers so you are moving the fabric around that to sew your layers. You can see it in the picture in the instructions.
To find tour mid either measure the to part to find the mid point or I just fold through bag in half make a small crease then pin to the crease for the mid point. Hope that helps
Stacey says
That helps so much! Thanks very much.
Debbie Reik says
Can you give me the approximate measurements of the finished product? I sewed one up and mine sure looks a lot wider than the one on the tutorial. Thanks!
Amber says
It’s probably about 6 inches wide. Maybe a Little more. Did you print at 100%
nicole says
mine was really big too i was wondering the very same !
Amy says
Oops! I clicked on print pattern pieces and the link says it has been deleted or removed or there is a problem. Can you email me the pattern or give me the measurements? I’m dying to try this! Genius!
Amber says
Just got that fixed. The link should work now. 🙂
Kelly says
I love this tutorial, but I am having a bit of trouble with “holes” in my corners.. any tips? (If you’re not sure where/what I mean, I can try to upload a picture)… Thanks!
Amber says
Do you mean you are getting holes?
Tiffany Grace says
Love this! Im just beginning but this looks so easy and i think it would fit a couple cloth dipes. Do you happen to have a tutuorial for an easy changing pad?
Amber says
I don’t have one but I bet you could find a good one on Pinterest?
Lauren F says
I know it’s late for the original question, but I have a really simple changing pad pattern I used to make a matching pad for this. I make mine larger, but it’s still simple. Take two matching size pieces of fabric, one flannel or cotton type, and one vinyl (I used an old tablecloth). Sew together with right sides facing, leaving a hole to turn right side out. Turn right side out, tuck in the sides on the hole, and top stitch with a pretty stitch. Sew straight across with basic stitch from long side to long side at 1/3ds or 1/4s, to help with folding.
Renita says
This is so cute however, Im not sure about the cutting pieces. do I cut 2 of the bottoms pieces and 2 of the top and bottom pieces taped together. total of 4 pieces.
Amber says
Yes, a total of 4 pieces…two for the outside and two for the inside
Siara says
Thank you for this great tutorial!! I appreciate it. Although I’m a beginner, this was super simple!
lyn kingipotiki says
Brilliant thank you. awesome
Jenn says
I found your blog through Pinterest and have joined up to your Learn to Sew Series!! I love that I was able to make this in an hour (new sewer!!) and it turned out great!!! You have inspired me to try any project I come across!! Thanks!!!!
Amber says
Love hearing that! Way to go!
Nikki says
Quick question. I made one of these and loved it. Several of my friends liked it to, but everyone was asking if you could put a strap on it. I have just started sewing (I am taking your sewing class online) and I don’t know how to add a strap. Do you have any suggestions? Thanks for your time. I am learning bunches in your class.
Amber says
I think you could do it just like on the messenger bag-make a strap and put it down inside before you sew the inner and outer fabric together: http://crazylittleprojects.com/2012/09/messenger-bag-tutorial.html
kaye says
THANK YOU! I am excited to attempt this as a “first” real sewing project! Where did you find the ADORABLE fabric?! I love it! Thank yo again for your directions! Can’t wait to try it out!
Amber says
That fabric was from http://www.hypernoodle.com
Jen says
Great tutorial! I just made one with 2 FQs in a snorkeling frog pattern. So cute! Looking forward to giving it to my sister. Gotta go buy some wipes to put in it first!
Amber says
Love to hear that!
Jeanny says
Loved it! I just made one to match the fabrics of my DIY baby wraps! Thank you so much for the great tutorial! Easy to follow and wonderful idea to store my Costco wet wipes and diapers 😉
Amber says
Yay! Love to hear when people make things. I hope it turned out great!
Erin Biggers says
Thank you so much for including the pattern pieces so I don’t have to figure out the measurements myself. 🙂 I’ve been following you on FB for some time and now I’m a GFC follower as well.
http://www.craftybiggers.com
CJ - Food Stories says
OMG, how cute 🙂 Enjoying your site so I’m nominating you for my Illuminating Blogger Award for informative, illuminating blog content. I know not everyone participates in blog awards but I hope you’ll at least check it out because it’s a great way to discover new blogs and meet new web friends. If you’re interested in participating, you can check out the details at my site … http://foodstoriesblog.com/illuminating-blogger-award/ … Either way, hope you’re having a great Independence Day!
Nosnin says
I just made one. I want to post it to my blog with a link back to your tutorial, but I have to wait, I don’t want my friend to see it. 🙂
Nosnin says
I have a couple of friends that are expecting. I’m going to make a couple of these. Very cute! Thanks for the tutorial.
Als ik tijd heb... says
love this idea. Ik can see myself making this.
Thank you for this tutorial!
Artistic31Mama says
This is so simple and cute! I love the fabric you used. I really love your blog! I’m a new follower. 🙂 I would love if you stopped by and shared this at my linky party this week: http://www.artistic31mama.com/2012/04/fabulous-fridays-linky-party-7.html Thanks!
Alyssa says
These are so cute! Thanks for the great tutorial! Thanks for sharing at Showcase Your Talent Thursday. I hope to see you there next week!
Emily says
so cute and handy!
Polkadot-pretties says
Love your project!!!
I currently have a Craft, Create and Inspire linky party going on, i would love you to stop by and link up this project…
http://polkadot-pretties.blogspot.co.uk/2012/04/you-inspire-linky-party_21.html
Claire x
Terrie says
Good tutorial and nice keep in handbag for travels.
Terrie from Hong Kong
atnumber29 says
I will *definately* be making this! thank so so much for the neat idea and tutorial.
Alexis @ we like to learn as we go says
This is such a great idea! It would be nice to keep the diapers and wipes in an easy pouch in my diaper bag. Love the fabric! And I’m pinning this! I would love for you to link up to my What I Learned Wednesday link party! Hope to see you there! http://weliketolearnaswego.blogspot.com/2012/04/what-i-learned-wednesday-6.html
Christine says
THIS IS FABULOUS!!!!!!!!!!!!
Thanks for sharing this at The DIY Dreamer… From Dream To Reality!!
Thrifty Miss Smith says
(Insert Stunned gasp here) Genius! Absolutely genius!! I cannot wait to make one and it will be so easy thanks to your excellent tutorial!! Thanks for sharing it!
Crafty Cousins says
I love it, and the colors are fabulous! I’d love for you to link it up to Crafty Cousins!
http://crafting-cousins.blogspot.com/2012/04/what-i-wore-sunday-week-11.html
~Natalie @ Crafty Cousins
Taylor-Ann says
Sooo cute. I would love it if you linked it up to my new link party.
http://momslifevents.blogspot.com/2012/04/show-off-mondays.html
Can’t Wait to see what else you create.
~Taylor
Mandy @ Sugar Bee Crafts says
Thanks so much for linking to Take-A-Look Tuesday – you were featured today!
–Mandy, http://www.SugarBeeCrafts.com
Katie @ Pincushion Creations says
I LOVE this fabric! TOO CUTE! I would LOVE to have you share this at my link party! Im glad I found you…I am your newest GFC follower! Love to have you maybe follow me back!
http://www.pincushioncreations.com/2012/04/homemade-by-you-7.html
Alison @ Oopsey Daisy says
I love this fabric too! Great idea… I need to make one of these! 🙂 So excited to hear of our mutual friend, the Westovers! Your blog is full of inspiration! Thanks for sharing at oopsey daisy!
Thrifty Crafty Girl says
This is great and I love that fabric! I need to make one for the travel wipe container I have. I found you at the Funky Polkadot Giraffe party, I’m your newest follower!
Creating Sarah says
Great tutorial! Hopefully I’ll be making this soon! Thanks!
thnxpinterest.com says
Love this tutorial!!! Just pinned it and would love to use for a thnxpinterest.com future project if i can ever get my sewing maching unpacked and working! Thnx for the great tips!